Operator’s manual 455e Rancher 455 Rancher 460 Rancher Please read the operator’s manual carefully and make sure you understand the instructions before using the machine.
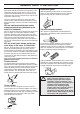
KEY TO SYMBOLS Symbols on the machine: WARNING! Chain saws can be dangerous! Careless or improper use can result in serious or fatal injury to the operator or others. Please read the operator’s manual carefully and make sure you understand the instructions before using the machine. Always wear: • Approved protective helmet • Approved hearing protection • Protective goggles or a visor Both of the operator′s hands must be used to operate the chain saw.
KEY TO SYMBOLS Symbols on the machine and/or in the manual: EPA III Switch off the engine by moving the stop switch to the STOP position before carrying out any checks or maintenance. Always wear approved protective gloves. Regular cleaning is required. Visual check. Protective goggles or a visor must be worn. The Emissions Compliance Period referred to on the Emission Compliance label indicates the number of operating hours for which the engine has been shown to meet Federal emissions requirements.
CONTENTS Contents KEY TO SYMBOLS Symbols on the machine: ...................................... Symbols on the machine and/or in the manual: .... CONTENTS Contents ............................................................... INTRODUCTION Dear customer! ..................................................... WHAT IS WHAT? What is what on the chain saw? ........................... GENERAL SAFETY PRECAUTIONS Before using a new chain saw .............................. Important ................................
INTRODUCTION Dear customer! Congratulations on your choice to buy a Husqvarna product! Husqvarna is based on a tradition that dates back to 1689, when the Swedish King Karl XI ordered the construction of a factory on the banks of the Huskvarna River, for production of muskets. The location was logical, since water power was harnessed from the Huskvarna River to create the waterpowered plant.
WHAT IS WHAT? 1 2 3 4 5 28 29 27 13 33 14 12 15 6 11 10 9 16 26 25 24 23 22 21 20 19 18 8 7 17 30 31 What is what on the chain saw? 1 Cylinder cover 17 Chain 2 Starter handle 18 Bar 3 Air purge 19 Bumper spike 4 Stop switch (Ignition on/off switch.
GENERAL SAFETY PRECAUTIONS Before using a new chain saw Important • Please read this manual carefully. • Check that the cutting equipment is correctly fitted and adjusted. See instructions under the heading Assembly. • Refuel and start the chain saw. See the instructions under the headings Fuel Handling and Starting and Stopping. You should only use the saw with the bar and chain combinations we recommend in the chapter Technical data.
GENERAL SAFETY PRECAUTIONS possible. Your dealer, forestry school or your library can provide information about which training materials and courses are available. Generally clothes should be close-fitting without restricting your freedom of movement. IMPORTANT! Sparks can come from the muffler, the bar and chain or other sources. Always have fire extinguishing tools available if you should need them. Help prevent forest fires.
GENERAL SAFETY PRECAUTIONS • chain brake. If this happens you should hold the chain saw firmly and not let go. This movement activates a spring-loaded mechanism that tightens the brake band (C) around the engine drive system (D) (clutch drum). • • • • The front hand guard is not designed solely to activate the chain brake. Another important feature is that it reduces the risk of your left hand hitting the chain if you lose grip of the front handle.
GENERAL SAFETY PRECAUTIONS experience a kickback, your hand may never leave the front handle and will not activate the chain brake, or the chain brake will only activate after the saw has swung around a considerable distance. In such instances, the chain brake might not have enough time to stop the saw chain before it touches you. Right hand guard Apart from protecting your hand if the chain jumps or snaps, the right hand guard stops branches and twigs from interfering with your grip on the rear handle.
GENERAL SAFETY PRECAUTIONS Stop switch General rules Use the stop switch to switch off the engine. • Only use cutting equipment recommended by us! See instructions under the heading Technical data. • Keep the chain’s cutting teeth properly sharpened! Follow our instructions and use the recommended file gauge. A damaged or badly sharpened chain increases the risk of accidents. • Maintain the correct depth gauge setting! Follow our instructions and use the recommended depth gauge clearance.
GENERAL SAFETY PRECAUTIONS Chain • A chain is made up of a number of links, which are available in standard and low-kickback versions. IMPORTANT! No saw chain design eliminates the danger of kickback. ! Chain oil hole and hole for chain tensioner. The bar must be matched to the chain saw design. Chain • Chain pitch (inches) • Drive link width (mm/inches) • Number of drive links. WARNING! Any contact with a rotating saw chain can cause extremely serious injuries.
GENERAL SAFETY PRECAUTIONS When you sharpen a cutting tooth there are four important factors to remember. 1 • Check that the chain is correctly tensioned. A slack chain will move sideways, making it more difficult to sharpen correctly. • Always file cutting teeth from the inside face. Reduce the pressure on the return stroke. File all the teeth on one side first, then turn the chain saw and file the teeth on the other side. • File all the teeth to the same length.
GENERAL SAFETY PRECAUTIONS acheive the correct depth gauge setting and bevel for the depth gauge. • Place the depth gauge tool over the chain. Detailed information regarding the use of the depth gauge tool, will be found on the package for the depth gauge tool. Use the flat file to file off the tip of the depth gauge that protrudes through the depth gauge tool. The depth gauge setting is correct when you no longer feel resistance as you draw the file along the depth gauge tool.
GENERAL SAFETY PRECAUTIONS • However, this safety feature requires that you use the right sort of chain oil (if the oil is too thin it will run out before the fuel), and that you adjust the carburetor as recommended (a lean mixture may mean that the fuel lasts longer than the oil) and that you also use the recommended cutting equipment (a bar that is too long will use more chain oil). Tighten the bar clutch by turning the knob clockwise.
GENERAL SAFETY PRECAUTIONS If the chain lubrication system is still not working after carrying out the above checks and associated measures you should contact your servicing dealer. • Whether there are burrs on the edges of the bar. Remove these with a file if necessary. • Whether the groove in the bar has become badly worn. Replace the bar if necessary. • Whether the tip of the bar is uneven or badly worn. If a hollow forms on the underside of the bar tip this is due to running with a slack chain.
ASSEMBLY Fitting the bar and chain ! should be tensioned until it does not sag from the underside of the bar. WARNING! Always wear gloves, when working with the chain. 455 Rancher, 460 Rancher Check that the chain brake is in disengaged position by moving the front hand guard towards the front handle. Remove the bar nuts and remove the clutch cover (chain brake). Take off the transportation ring (A).
ASSEMBLY Fit the bar over the bar bolts. Place the bar in its rearmost position. Place the chain over the drive sprocket locate it in the groove on the bar. Begin on the top edge of the bar. Make sure that the edges of the cutting links are facing forward on the top edge of the bar. Fit the clutch cover and locate the chain adjuster pin in the hole in the bar. Check that the drive links of the chain fit correctly over the drive sprocket and that the chain is correctly located in the groove in the bar.
FUEL HANDLING Fuel Gasoline, litre Note! The machine is equipped with a two-stroke engine and must always be run using a mixture of gasoline and two-stroke oil. It is important to accurately measure the amount of oil to be mixed to ensure that the correct mixture is obtained. When mixing small amounts of fuel, even small inaccuracies can drastically affect the ratio of the mixture. WARNING! Always ensure there is adequate ventilation when handling fuel.
FUEL HANDLING • In temperatures below 32°F (0°C) some oils become too viscous. This can overload the oil pump and result in damage to the oil pump components. • Contact your service agent when choosing chain oil. • Move the machine at least 10 ft (3 m) from the refuelling point before starting it. Fueling ! WARNING! Taking the following precautions, will lessen the risk of fire: • Never start the machine: Do not smoke and do not place any hot objects in the vicinity of fuel.
STARTING AND STOPPING Starting and stopping ! starting the machine. Once the machine has started the valve will automatically return to its original setting. WARNING! Note the following before starting: C The chain brake must be engaged when the chain saw is started to reduce the chance of contact with the moving chain during starting. Never start a chain saw unless the bar, chain and all covers are fitted correctly. Otherwise the clutch can come loose and cause personal injuries.
STARTING AND STOPPING not drop start. This method is very dangerous because you may lose control of the saw. achieved by disengaging the throttle lock. Disengagement is done by gently touching on the throttle trigger. This prevents unnecessary wear to the clutch, clutch drum and brake band. Allow the machine to idle a few seconds before giving full throttle. • Never start the machine indoors. Exhaust fumes can be dangerous if inhaled.
WORKING TECHNIQUES Before use: • To ensure that people, animals or other things cannot affect your control of the machine. • To make sure that none of the above might come within reach of your saw or be injured by falling trees. , 1 Check that the chain brake works correctly and is not damaged. 2 Check that the rear right hand guard is not damaged. 3 Check that the throttle lockout works correctly and is not damaged. 4 Check that the stop switch works correctly and is not damaged.
WORKING TECHNIQUES Lack of concentration can lead to kickback if the kickback zone of the bar accidentally touches a branch, nearby tree or some other object. cause you to lose control. Both situations can cause serious personal injury. 6 7 Before moving your chain saw switch off the engine and lock the chain using the chain brake. Carry the chain saw with the bar and chain pointing backwards. Fit a guard to the bar before transporting the chain saw or carrying it for any distance.
WORKING TECHNIQUES 5 In order to keep control of your saw, always maintain a firm foothold. Never work on a ladder, in a tree or on any other insecure support. by us. See instructions under the headings Cutting equipment and Technical data. Basic cutting technique ! WARNING! Never use a chain saw by holding it with one hand. A chain saw is not safely controlled with one hand. Always have a secure, firm grip around the handles with both hands. General 6 Always use a fast cutting speed, i.e.
WORKING TECHNIQUES 4 Is there a risk of kickback? 5 Do the conditions and surrounding terrain affect how safely you can stand and move about? Two factors decide whether the chain will jam or the object that you are cutting will split: the first is how the object is supported before and after cutting, and the second is whether it is in tension. In most cases you can avoid these problems by cutting in two stages; from the top and from the bottom.
WORKING TECHNIQUES Finish by cutting from below so that the two cuts meet. You may find you are forced to let the tree fall in its natural direction because it is impossible or dangerous to try to make it fall in the direction you first intended. Another very important factor, which does not affect the felling direction but does affect your safety, is to make sure the tree has no damaged or dead branches that might break off and hit you during felling.
WORKING TECHNIQUES starts to fall. Your path of retreat should be roughly 135 degrees away from the intended felling direction. Da ng er ir gd zo ne ect ion llin Fe Felling cut Da The felling cut is made from the opposite side of the tree and it must be perfectly horizontal. Stand on the left side of the tree and cut on the pull stroke. n Da ge rz o Retreat path Retreat path ne The line where the two cuts meet is called the directional cut line.
WORKING TECHNIQUES When the felling cut and directional cut are complete the tree should start to fall by itself or with the aid of a felling wedge or breaking bar. We recommend that you use a bar that is longer than the diameter of the tree, so that you can make the felling cut and directional cuts with single cutting strokes. See instructions under the heading Technical data section to find out which lengths of bar are recommended for your saw.
WORKING TECHNIQUES Cut tree/limb from outside the bend, after tension has been released. How to avoid kickback ! WARNING! Kickback can happen very suddenly and violently; kicking the chain saw, bar and chain back at the user. If this happens when the chain is moving it can cause very serious, even fatal injuries. It is vital you understand what causes kickback and that you can avoid it by taking care and using the right working technique.
MAINTENANCE General higher idle speed; turning it anti-clockwise gives a lower idle speed. The user must only carry out the maintenance and service work described in this manual. More extensive work must be carried out by an authorized service workshop. Carburetor adjustment Due to existing environmental and emissions legislation your chain saw is equipped with movement limiters on the carburetor adjuster screws. These limit the adjustment possibilities to a maximum of a 1/2 turn.
MAINTENANCE humidity, it may be necessary to make minor adjustments to the high speed jet. Checking the front hand guard CAUTION! If the high speed jet is screwed in too far, it may damage the piston/cylinder. When test run at the factory, the high speed jet is set so that the engine satisfies the applicable legal requirements at the same time as achieving maximum performance. The carburetor’s high speed jet is then locked using a limiter cap in the fully screwed out position.
MAINTENANCE Checking the brake trigger • Check that the throttle control and throttle lockout move freely and that the return springs work properly. • Start the chain saw and apply full throttle. Release the throttle control and check that the chain stops and remains stationary. If the chain rotates when the throttle control is in the idle position you should check the carburetor idle adjustment. Place the chain saw on firm ground and start it.
MAINTENANCE Vibration damping system Some mufflers are equipped with a special spark arrestor screen. If your machine has this type of muffler, you should clean the screen at least once a week. This is best done with a wire brush. A blocked screen will cause the engine to overheat and may lead to serious damage. Regularly check the vibration damping units for cracks or deformation. Note! The screen must be replaced if it is damaged.
MAINTENANCE recoil spring by letting the pulley rotate slowly backwards. Undo the screw in the centre of the pulley and remove the pulley. Insert and fasten a new starter cord to the pulley. Wind approx. 3 turns of the starter cord onto the pulley. Connect the pulley to the recoil spring so that the end of the spring engages in the pulley. Fit the screw in the center of the pulley. Insert the starter cord through the hole in the starter housing and the starter handle.
MAINTENANCE An air filter that has been in use for a long time cannot be cleaned completely. The filter must therefore be replaced with a new one at regular intervals. A damaged air filter must always be replaced. A HUSQVARNA chain saw can be equipped with different types of air filters according to working conditions, weather, season, etc. Contact your dealer for advice. Spark plug The spark plug condition is influenced by: • Incorrect carburetor adjustment.
MAINTENANCE Cooling system Special measures are therefore often required: • Partly mask the air inlet on the starter to increase the working temperature of the engine. Temperature 0°C (32°F) or colder: To keep the working temperature as low as possible the machine is equipped with a cooling system. The cooling system consists of: 1 Air intake on the starter. 2 Air guide plate. 3 Fins on the flywheel. 4 Cooling fins on the cylinder. 5 Cylinder cover (directs cold air over the cylinder).
MAINTENANCE Maintenance schedule The following is a list of the maintenance that must be performed on the machine. Most of the items are described in the Maintenance section. Daily maintenance Weekly maintenance Monthly maintenance Clean the outside of the machine. On chain saws without a catalytic converter, check the cooling system weekly. Check the brake band on the chain brake for wear. Replace when less than 0.024 inch (0.6 mm) remains at the most worn point.
TECHNICAL DATA Technical data 455e Rancher 455 Rancher 460 Rancher Motor Cylinder displacement, cu.
TECHNICAL DATA Recommended original and replacement bar and chain combinations Following is a list of recommended cutting equipment for the Husqvarna chain saw model 455 Rancher, 455e Rancher and 460 Rancher. The combinations of power head, bar and chain have been tested and found to be in accordance with the kickback requirements of ANSI B175.1–2012. The guide bar nose radius is determined by either the maximum number of teeth in the nose sprocket or the corresponding maximum nose radius of a solid bar.
TECHNICAL DATA Saw chain filing and file gauges English – 41
FEDERAL EMISSION CONTROL WARRANTY STATEMENT YOUR WARRANTY RIGHTS AND OBLIGATIONS or call Husqvarna Forest & Garden at 1-800-487-5951 or visit www.usa.husqvarna.com. The EPA (The US Environmental Protection Agency), Environment Canada and Husqvarna Forest & Garden are pleased to explain the emissions control system warranty on your 2009 and later small nonroad engine. In U.S. and Canada, new small nonroad engines must be designed, built and equipped to meet the federal stringent anti-smog standards.
AMERICAN STANDARD SAFETY PRECAUTIONS Safety precautions for chain saw users (ANSI B175.1-2012 Annex C) Kickback safety precautions ! WARNING! Kickback may occur when the nose or tip of the guide bar touches an object, or when the wood closes in and pinches the saw chain in the cut. Use safety footwear; snug-fitting clothing, protective gloves, and eye, hearing and head protection devices. Use caution when handling fuel.
Original instructions 1153137-95 ´®z+U-o¶5r¨ ´®z+U-o¶5r¨ 2017-05-15