H U SQVARNA AUTOMOWE R ® 105 BE DI E N U NG SAN LE ITU NG 1157868-51,105,DE.indd 1 2016-03-15 14.
1157868-51,105,DE.indd 2 2016-03-15 14.
INHALTSVERZEICHNIS 1. Einführung und Sicherheit..................................................... 5 1.1 Einleitung................................................................................ 5 1.2 Symbole auf dem Produkt....................................................... 7 1.3 Symbole in der Bedienungsanleitung ..................................... 8 1.4 Sicherheitshinweise ............................................................... 9 2. Vorstellung............................................
MEMO Seriennummer: PIN-Code: Händler: Telefonnummer des Händlers: Sollte der Mäher unglücklicherweise gestohlen werden, sollten Sie den Händler umgehend darüber informieren. Geben Sie die Seriennummer des Mähers an, damit er im zentralen System bei Husqvarna AB als gestohlen registriert werden kann. Dies ist eine wichtige Maßnahme zum Diebstahlschutz, die vom Kauf und Verkauf gestohlener Mäher abschrecken soll.
1. Einführung und Sicherheit 1. Einführung und Sicherheit 1.1 Einleitung Herzlichen Glückwunsch! Sie haben ein Produkt allerhöchster Qualität erworben. Um die bestmöglichen Ergebnisse mit dem Husqvarna Mähroboter zu erzielen, muss man die Funktionen des Geräts kennen. Deshalb enthält diese Bedienungsanleitung wichtige Informationen über den Mähroboter, seine Installation und Verwendung. www.automower.com Weitere Informationen zur Bedienungsanleitung finden Sie auf der Automower®-Website unter www.
1. Einführung und Sicherheit WICHTIGE INFORMATION Der Gebrauch des Geräts durch Personen (einschließlich Kindern), die über eingeschränkte körperliche, sensorische oder geistige Fähigkeiten verfügen oder denen es an der erforderlichen Erfahrung und Kenntnissen mangelt, ist untersagt, sofern sie nicht von einer für ihre Sicherheit verantwortlichen Person bei der Arbeit überwacht und im Gebrauch des Geräts zuvor geschult wurden. Kinder nicht mit dem Gerät spielen lassen.
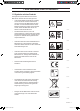
1. Einführung und Sicherheit 1.2 Symbole auf dem Produkt Die folgenden Symbole befinden sich auf dem Mähroboter. Schauen Sie sich diese genau an. • • Lesen Sie die Bedienungsanleitung sorgfältig durch und machen Sie sich mit dem Inhalt vertraut, bevor Sie den Mähroboter benutzen. Die Warn- und Sicherheitshinweise in dieser Bedienungsanleitung müssen genau beachtet werden, damit der Mähroboter sicher und effizient verwendet werden kann.
1. Einführung und Sicherheit • Das Niederspannungskabel darf weder gekürzt, verlängert noch gespleißt werden. • Verwenden Sie keinen Trimmer in der Nähe des Niederspannungskabels. Gehen Sie beim Trimmen von Kanten, an denen die Kabel verlegt sind, vorsichtig um. 3012-1351 1.3 Symbole in der Bedienungsanleitung Diese Symbole finden Sie in der Bedienungsanleitung. Schauen Sie sich diese genau an. • Drehen Sie den Hauptschalter auf 0, bevor Sie Kontroll- und/oder Wartungsarbeiten durchführen.
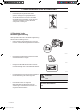
1. Einführung und Sicherheit 1.4 Sicherheitshinweise Gebrauch • Der Mähroboter ist zum Mähen von Gras auf offenen und ebenen Flächen bestimmt. Er darf nur mit dem durch den Hersteller empfohlenen Zubehör verwendet werden. Andere Verwendungsarten sind nicht zulässig. Die Anweisungen des Herstellers hinsichtlich Betrieb, Wartung und Reparatur sind genau einzuhalten.
1. Einführung und Sicherheit • Der Mähroboter darf nicht mit beschädigtem Messerteller oder Gehäuse betrieben werden. Darüber hinaus darf er auch nicht mit beschädigten Klingen, Schrauben oder Kabeln betrieben werden. • Verwenden Sie den Mähroboter nicht, wenn der Hauptschalter nicht funktioniert. • Den Mähroboter immer mit dem Hauptschalter ausschalten, wenn er nicht verwendet wird. Der Mähroboter startet nur, wenn der Hauptschalter auf 1 steht und Sie den korrekten PIN-Code eingegeben haben.
1. Einführung und Sicherheit Transport Benutzen Sie die Originalverpackung, wenn der Mähroboter über lange Strecken transportiert werden soll. Um ihn innerhalb des Arbeitsbereichs sicher zu bewegen oder ihn daraus zu entfernen, gilt Folgendes: 1. Drücken Sie die STOP-Taste, um den Mähroboter anzuhalten. Wenn eine mittlere oder hohe Sicherheitsstufe eingestellt wurde (siehe 6.5 Sicherheit auf Seite 52), muss der PIN-Code eingegeben werden.
2. Vorstellung 2. Vorstellung Dieses Kapitel enthält Informationen, die für die Planung der Installation notwendig sind. Die Installation eines Husqvarna Mähroboters umfasst vier Hauptbestandteile: • Ein Mähroboter ist ein Rasenmäher, der den Rasen nach einem zufälligen Muster mäht. Der Mähroboter wird dabei von wartungsfreien Batterien angetrieben. • Die Ladestation, zu der der Mähroboter zurückkehrt, wenn der Ladezustand der Batterie zu schwach ist.
2. Vorstellung 2.1 Aufbau des Geräts 2 3 5 4 1 6 29 7 16 15 12 8 9 10 13 28 14 18 27 26 17 11 25 24 23 22 21 19 20 3012-564 Die Nummern in der Abbildung stehen für Folgendes: 1. 2. 3. 4. 5. 6. 7. 8. 9. 10. 11. 12. 13. 14. 15. 16.
2. Vorstellung 2.2 Verpackungsinhalt Ihre Automower®-Verpackung enthält die folgenden Komponenten. Automower® 105 Mähroboter √ Ladestation √ Stromversorgung √ Niederspannungskabel √ Schrauben für Ladestation 3 Stück Inbusschlüssel √ Lineal √ Kabelmarkierungen √ Bedienungsanleitung und Kurzanleitung √ Zusätzliche Klingen 9 Stück Alarm Aufkleber √ 14 – German 1157868-51,105,DE.indd 14 2016-03-15 14.
2. Vorstellung 2.3 Funktion Kapazität Der Mähroboter ist für Rasenflächen bis 600 m2 geeignet. Die Größe der Fläche, die der Mähroboter bearbeiten kann, hängt hauptsächlich vom Zustand der Klingen sowie von Grasart, Wuchsgeschwindigkeit und Feuchtigkeit ab. Darüber hinaus ist auch die Form des Gartens von entscheidender Bedeutung.
2. Vorstellung Arbeitsmethode Der Mähroboter mäht den Rasen automatisch. Die Mähphasen wechseln sich ständig mit Ladephasen ab. Der Mähroboter beginnt nach der Ladestation zu suchen, wenn die Batterieladung zu schwach wird. Der Mähroboter mäht nicht, während er nach der Ladestation sucht. Wenn der Mähroboter nach der Ladestation sucht, wird zunächst nach dem Suchkabel gesucht. Anschließend folgt er dem Suchkabel zur Ladestation, wendet direkt vor der Ladestation und fährt rückwärts hinein.
2. Vorstellung Das Bedienfeld befindet sich oben auf dem Mähroboter. Hier können Sie sämtliche Einstellungen vornehmen. Durch Drücken der STOP-Taste öffnen Sie die Abdeckung des Bedienfelds. Wenn der Hauptschalter zum ersten Mal auf Position 1 gestellt wird, beginnt eine Startsequenz mit folgenden Elementen: Sprachwahl, Zeitformat, Datumsformat und ein vierstelliger PIN-Code sowie die Einstellung von Datum und Uhrzeit. Siehe 3.8 Erste Einrichtung und Kalibrierung auf Seite 35.
3. Installation 3. Installation Dieses Kapitel beschreibt die Installation des Mähroboters von Husqvarna. Bevor Sie mit der Installation beginnen, lesen Sie das vorherige Kapitel 2 Vorstellung. Lesen Sie das gesamte Kapitel, bevor Sie mit der Installation beginnen. Denn die Qualität der Installation ist dafür entscheidend, wie gut Ihr Mähroboter dann später auch arbeiten wird. Es ist deshalb sehr wichtig, die Installation sorgfältig zu planen.
3. Installation • Schleifenkabel zur Verwendung als Begrenzungs- und Suchkabel (17) • Netzgerät (25) • Niederspannungskabel (26) • Haken (19) • Verbinder zum Anschließen des Schleifenkabels an die Ladestation (18) • Schrauben für die Ladestation (21) • Lineal (26) • Kupplungselement für Schleifenkabel (20) Für die Installation brauchen Sie darüber hinaus noch folgendes: • Hammer/Gummihammer (zur leichteren Einschlagen der Haken in den Boden).
3. Installation Vor der Ladestation muss sich eine Freifläche von mindestens 3 Metern befinden. Die Ladestation sollte außerdem zentral im Arbeitsbereich positioniert sein, damit der Mähroboter alle Flächen im Arbeitsbereich leichter erreichen kann. 3012-931 Stellen Sie die Ladestation nicht in Ausbuchtungen des Arbeitsbereichs auf. Links und rechts neben der Ladestation muss ein gerades Begrenzungskabel verlegt werden können, das mindestens 1,5 m lang ist.
3. Installation Bei der Installation in einem Arbeitsbereich mit einem größeren Abhang (z. B. einem Haus an einem Hügel) sollte die Ladestation am unteren Ende der Steigung aufgestellt werden. Dadurch wird es dem Mähroboter erleichtert, dem Suchkabel zur Ladestation zu folgen. 3018-059 Die Ladestation sollte nicht auf einer Insel aufgestellt werden, da dies das optimale Auslegen des Suchkabels erschwert.
3. Installation Es ist möglich, das Niederspannungskabel quer durch den Arbeitsbereich zu verlegen. Das Niederspannungskabel muss im Rasen verankert oder eingegraben werden. Die Schnitthöhe muss so eingestellt sein, dass die Klingen am Messerteller das Niederspannungskabel niemals berühren. Stellen Sie sicher, dass das Niederspannungskabel am Boden verlegt und mit Haken fixiert wurde.
3. Installation Installation und Anschließen der Ladestation 1. Platzierung der Ladestation an einem geeigneten Standort. 2. Verbinden Sie das Niederspannungskabel mit der Ladestation. 3. Verbinden Sie das Stromkabel des Netzteils mit einer 100-240 V-Steckdose. Bei einer Außensteckdose ist darauf zu achten, dass das Netzteil vor direktem Sonnenlicht geschützt ist. 3012-984 4. Befestigen Sie die Ladestation mithilfe der mitgelieferten Schrauben am Untergrund.
3. Installation 3.4 Installation des Begrenzungskabels Das Begrenzungskabel kann auf eine der folgenden Arten installiert werden: 1. Fixieren Sie das Kabel mit Haken am Boden. Es empfiehlt sich, das Begrenzungskabel mit Haken zu befestigen, wenn Sie in den ersten Wochen des Betriebs Änderungen an der Begrenzungsschleife vornehmen möchten. Nach einigen Wochen wird das Gras das Kabel überwuchert haben, sodass es nicht mehr sichtbar ist.
3. Installation Arbeitsbereichsbegrenzungen Wenn ein hohes Hindernis (5 cm oder höher), wie zum Beispiel eine Wand oder ein Zaun, an den Arbeitsbereich grenzt, sollte das Begrenzungskabel in einem Abstand von 30 cm um das Hindernis verlegt werden. Dadurch wird verhindert, dass der Mähroboter mit dem Hindernis zusammenstößt, und der Verschleiß am Gehäuse wird reduziert. Ein Bereich von 20 cm um das festgelegte Hindernis wird nicht gemäht.
3. Installation Begrenzungen innerhalb des Arbeitsbereichs Nutzen Sie das Begrenzungskabel, um innerhalb des Arbeitsbereichs Inseln um Hindernisse zu bilden, die bei einem Zusammenstoß beschädigt würden, wie zum Beispiel Blumenbeete, Büsche und Brunnen. Verlegen Sie das Kabel bis und um den abzugrenzenden Bereich und führen Sie es dann über denselben Weg wieder zurück. Wenn Haken benutzt werden, sollte das Kabel bei der Rückführung mit demselben Haken verankert werden wie auf dem Hinweg.
3. Installation Abhänge Das Begrenzungskabel kann über einen Abhang mit weniger als 15 % Neigung verlegt werden. 3012-946 Das Begrenzungskabel sollte nicht über einen Abhang mit mehr als 15 % Neigung verlegt werden. Dann besteht das Risiko, dass der Mähroboter Probleme beim Wenden hat. Der Mähroboter hält dann an und zeigt die Fehlermeldung Außerhalb Arbeitsbereich an. Das entsprechende Risiko wird durch feuchte Witterungsbedingungen erhöht, da die Räder auf nassem Gras wegrutschen können.
3. Installation Verlegen des Begrenzungskabels Wenn das Begrenzungskabel mittels Haken befestigt werden soll: • Das Gras mit einem gängigen Rasenmäher oder Trimmer an der Verlegestelle des Kabels sehr kurz schneiden. Dadurch wird das Verlegen des Kabels näher am Boden erleichtert und das Risiko reduziert, dass der Mähroboter das Kabel zerschneidet oder die Isolierung beschädigt.
3. Installation Verlegen des Begrenzungskabels zur Ladestation Das Begrenzungskabel muss mindestens auf einer Länge von 1,5 Metern links und rechts neben der Ladestation in einer Linie der Rückseite der Ladestation verlegt werden. Siehe Abbildung. Wird das Begrenzungskabel auf andere Weise verlegt, kann der Mähroboter die Ladestation u. U. nur schwer finden. Min. 1,5 m Min.
3. Installation 3.5 Anschließen des Begrenzungskabels Schließen Sie das Begrenzungskabel wie folgt an die Ladestation an: WICHTIGE INFORMATION Das Begrenzungskabel darf beim Anschluss an die Ladestation nicht gekreuzt werden. Beim Anschließen an die Ladestation muss das rechte Ende des Begrenzungskabels mit dem rechten Anschluss und das linke Kabelende mit dem linken Anschluss verbunden werden. 1. Führen Sie die Kabelenden in den Verbinder ein: 3012-284 • Den Verbinder öffnen.
3. Installation 3.6 Installation des Suchkabels Das Suchkabel ist ein Kabel, das von der Ladestation aus zu einem entlegenen Teil des Arbeitsbereichs oder durch eine schmale Passage verlegt und dann mit der Begrenzungsschleife verbunden wird. Für Begrenzungsschleife und Suchkabel wird dieselbe Kabelrolle verwendet. Mithilfe des Suchkabels findet der Mähroboter zurück zur Ladestation. Das Suchkabel führt den Mähroboter jedoch auch von der Ladestation zu schwer zugänglichen Flächen des Arbeitsbereichs.
3. Installation Verlegen und Anschließen des Suchkabels 1. Lassen Sie das Kabel durch die Öffnung an der Unterseite der Ladeplatte laufen. 3012-997 2. Verbinden Sie die Kontaktklemme auf dieselbe Weise mit dem Suchkabel wie es für das Begrenzungskabel unter 3.5 Anschluss des Begrenzungskabels beschrieben wird. Schließen Sie sie an den Kontaktstift an der Ladestation an, der mit „Guide“ gekennzeichnet ist. 3012-995 3. Verlegen Sie das Kabel mindestens 2 m gerade an der Vorderkante der Platte.
3. Installation • In der Passage muss das Suchkabel so verlegt werden, dass der Mähroboter so viel Bewegungsfreiheit wie möglich besitzt. Die Entfernung zwischen Begrenzungsschleife und Suchkabel muss mindestens 30 cm betragen. Maximale Entfernung Mindestens 30 cm Mindestens 2 m 3012-951 Wenn das Suchkabel an einem steilen Abhang verlegt werden muss, sollte das Kabel nicht in einer geraden Linie, sondern möglichst in einem Winkel verlegt werden.
3. Installation 6. Fügen Sie das Suchkabel mit dem Begrenzungskabel mithilfe eines Verbinders zusammen: Die Enden des Begrenzungskabels in das rechte bzw. linke Loch des Verbinders schieben. Das Ende des Suchkabels in das mittlere Loch des Verbinders einführen. Stellen Sie sicher, dass die Kabel vollständig in den Verbinder eingeführt wurden. Dies ist der Fall, wenn die Kabelenden durch den durchsichtigen Teil auf der anderen Seite des Verbinders sichtbar sind.
3. Installation 3.8 Erste Einrichtung und Kalibrierung Vor der ersten Verwendung des Mähroboters startet eine Anlaufsequenz im Menü des Mähroboters und es wird eine automatische Kalibrierung des Suchsignals durchgeführt. Bei der Kalibrierung ist zudem sehr gut feststellbar, ob die Verlegung des Suchkabels so vorgenommen wurde, dass der Mähroboter dem Suchkabel leicht aus der Ladestation heraus folgen kann. 1. Durch Drücken der STOP-Taste öffnen Sie die Abdeckung der Bedientafel. 2.
3. Installation 3.9 Testandocken an der Ladestation Bevor Sie den Mähroboter in Betrieb nehmen, sollten Sie prüfen, ob der Mähroboter in der Lage ist, dem Suchkabel den ganzen Weg zur Ladestation zu folgen und dort ordnungsgemäß an der Ladestation anzudocken. Führen Sie folgenden Test durch. 1. Durch Drücken der STOP-Taste öffnen Sie die Abdeckung der Bedientafel. 2. Stellen Sie den Mähroboter in der Nähe der Stelle auf, an der das Suchkabel mit dem Begrenzungskabel verbunden ist.
4. Gebrauch 4. Gebrauch 4.1 Aufladen einer leeren Batterie Ist der Mähroboter neu oder wurde er längere Zeit nicht benutzt, ist die Batterie leer und muss vor dem Start aufgeladen werden. Das Aufladen dauert ca. 80 bis 100 Minuten. 1. Stellen Sie den Hauptschalter auf Position 1. 2. Platzieren Sie den Mähroboter in der Ladestation. Öffnen Sie die Abdeckung und schieben Sie den Mähroboter soweit es geht hinein, um so einen sicheren Kontakt zwischen dem Mähroboter und Ladestation herzustellen. 3.
4. Gebrauch 4.2 Nutzung des Timers Um ein optimales Mähergebnis zu erzielen, sollte der Rasen nicht zu oft gemäht werden. Nutzen Sie die Timer-Funktion (siehe 6.3 Timer auf Seite 46), um einen platten Rasen zu vermeiden. Beim Einstellen des Timers ist zu berücksichtigen, dass der Mähroboter ca. 43 m2 pro Stunde bearbeiten kann. Beispiel Wenn z. B. der Arbeitsbereich 360 m2 groß ist, muss der Mähroboter ca. 9 Stunden am Tag betrieben werden. Die tatsächliche Dauer hängt u. a.
4. Gebrauch Beispiel 2 24 Std. Start-/Stoppzeit 1: 08:00 – 16:00 Start-/Stoppzeit 2: 20:00 – 23:00 Betrieb La de Mähen Der Mäher ist zu den in der Start-/Stoppzeit festgelegten Zeiten in Betrieb. Die Gesamtbetriebszeit beträgt 11 Stunden und niemals mehr als 14 Stunden. n Stand-by Arbeitstage: Jeden Tag Automower® 105 Max. Betriebsdauer 14 Std. Min. Standby-Zeit 10 Std. Fläche/Dauer/Tag 43 m2 Betrieb Stand-by Die tatsächliche Dauer hängt u. a.
4. Gebrauch 4.5 Ausschalten 1. Drücken Sie die STOP-Taste. 2. Stellen Sie den Hauptschalter auf Position 0. Wenn der Mähroboter gewartet oder aus dem Arbeitsbereich entfernt werden muss, den Mäher immer am Hauptschalter ausschalten. 4.6 Einstellen der Schnitthöhe 3012-1023 Die Schnitthöhe kann zwischen 2 cm (MIN) und 5 cm (MAX) eingestellt werden. In der ersten Woche nach einer Neuinstallation muss die Schnitthöhe auf MAX eingestellt werden, damit das Schleifenkabel nicht beschädigt wird.
5. Bedienfeld 5. Bedienfeld Alle Befehlsformen und Einstellungen für den Mähroboter von Husqvarna erfolgen über die Bedientafel. Alle Funktionen sind über eine Reihe von Menüs zugänglich. 3012-929 Das Bedienfeld besteht aus einem Display und einer Tastatur. Alle Informationen werden auf dem Display angezeigt und alle Eingaben erfolgen über die Tasten. 3012-983 Wenn die Stop-Taste gedrückt und die Abdeckung geöffnet wurde, erscheint das Bedienfenster.
5. Bedienfeld 5.1 Auswahl des Betriebs Die Taste zur Auswahl des Betriebs ist durch ein Haus gekennzeichnet. Durch Drücken der Taste wird der ausgewählte Betriebsmodus im Display angezeigt. Durch mehrmaliges Drücken der Taste können drei unterschiedliche Betriebsmodi ausgewählt werden. 1. HOME: Schickt den Mähroboter zur Ladestation. Der Betriebsmodus bleibt aktiv, bis ein anderer ausgewählt wird. Der Text HOME wird im Bedienfenster angezeigt.
5. Bedienfeld 5.2 Auswahltasten Die drei Auswahltasten bieten verschiedene Funktionen, die auch davon abhängen, wo Sie sich in der Menüstruktur befinden. Die Tastenfunktion wird ganz unten im Display angezeigt. Beispiel: Wenn Sie sich im Hauptmenü befinden, können Sie mit der linken Taste zurück wechseln, mit der mittleren Taste die Auswahl bestätigen und mit der rechten Taste durch das Menü blättern. 3012-985 5.
6. Menüfunktionen 6. Menüfunktionen 6.1 Hauptmenü Das Hauptmenü umfasst vier Auswahlmöglichkeiten: • Timer • Installation • Sicherheit • Einstellungen Unter jeder Option gibt es darüber hinaus noch eine Reihe von Untermenüs. Darüber können Sie alle Funktionen für den Mähroboter erreichen und einstellen. 3012-987 Zwischen den Menüs blättern Blättern Sie mit den Auswahltasten durch das Hauptmenü und die Untermenüs.
1157868-51,105,DE.indd 45 Nie Selten Mittel Oft Häufigkeit Immer Nie Entfernung Häufigkeit Größte Breite Selten Mittel Entfernung Test IN Oft Fernstart 1 Sicherheit Fernstart 2 Niedrig Mittel Hoch Sprachvariante Land Datumsformat Kundeneinst. Info zurücksetzen Einstellungen Datum Zeitformat Zeit einstellen einstellen PIN-Code SicherheitsNeues ECO- Zeit und ändern ebene Schleifen- Modus Datum signal Immer Schleife überfahr.
6. Menüfunktionen 6.3 Timer Um ein optimales Mähergebnis zu erzielen, sollte der Rasen nicht zu oft gemäht werden. Daher ist es wichtig, die Betriebszeit mit der Timer-Funktion zu begrenzen, wenn die Fläche des Arbeitsbereichs geringer als die Arbeitskapazität des Mähroboters ist. Wenn der Mähroboter zu oft im Einsatz ist, kann es sein, dass der Rasen platt aussieht. Darüber hinaus bedeutet das für den Mähroboter einen unnötigen Verschleiß.
6. Menüfunktionen • • Start-/Stoppzeit 1 Zum Einstellen der Start- und Endzeiten für Betriebszeitraum 1. Geben Sie alle erforderlichen Zeiten in Stunden und Minuten ein und drücken Sie OK, um die eingegebene Zeit zu bestätigen. Start-/Stoppzeit 2: Zum Einstellen der Start- und Endzeiten für Betriebszeitraum 2. Geben Sie alle erforderlichen Zeiten in Stunden und Minuten ein und drücken Sie OK, um die eingegebene Zeit zu bestätigen.
6. Menüfunktionen 6.4 Installation Die folgenden Betriebseinstellungen sind über diese Auswahl im Hauptmenü verfügbar. • Korridorbreite Zur Auswahl der Entfernung zwischen dem Fahrweg des Mähers und dem Suchkabel, wenn sich der Mäher an diesem Kabel entlang von oder zur Ladestation bewegt. • Fernstart 1 Zum Steuern des Mähroboters, sodass er entlegene Flächen des Gartens leichter erreichen kann. • Fernstart 2 Zum Steuern des Mähroboters, sodass er entlegene Flächen des Gartens leichter erreichen kann.
6. Menüfunktionen Größte Breite In einem breiten Korridor mäht der Mähroboter in verschiedenen Abständen zum Suchkabel. Für einen Garten mit großen Freiflächen und ohne schmale Passagen sollte ein breiter Korridor eingestellt werden, um das Risiko von Spurenbildung zu minimieren. Mittel In einem mittelbreiten Korridor fährt der Mähroboter nahe am und weit entfernt vom Suchkabel, jedoch nicht so weit entfernt vom Suchkabel wie bei einem breiten Korridor.
6. Menüfunktionen • Die folgenden fünf Optionen stehen zur Auswahl: - Nie (0 %) - Selten (ca. 20 %) - Mittel (ca. 50 %) - Oft (ca. 80 %) - Immer (100 %) Geben Sie den Prozentwert ein, der der Größe des entlegenen Bereiches im Verhältnis zum gesamten Arbeitsbereich entspricht. Macht die Größe Nebenfläche z. B. weniger als die Hälfte des gesamten Arbeitsbereichs aus, sollte die Einstellung Selten gewählt werden.
6. Menüfunktionen Test Schleife AUS Die Funktion wird zum Testen von Ausfahrteinstellungen und Berechnen der Entfernung zwischen der Ladestation und einem abgelegenen Bereich verwendet. Test Schleife EIN Um die Einstellungen in Fernstart 1 zu testen, gehen Sie wie folgt vor: Test Schleife AUS Platzieren Sie den Mähroboter in die Ladestation und wählen Sie die Funktion Test AUS aus.
6. Menüfunktionen Schleife überfahr. Die Vorderseite des Mähers ragt vor dem Drehen des Mähers immer etwas über das Begrenzungskabel hinaus. Standardmäßig sind das 25 cm, dieser Wert kann jedoch bei Bedarf geändert werden. Der Mindestwert beträgt 25 cm und der maximale Wert 30 cm. Bitte beachten Sie, dass die angegebene Entfernung ein ungefährer Wert ist und nur als Richtwert dienen soll. Die tatsächliche Entfernung, über die der Mähroboter über das Begrenzungskabel hinausragt, kann variieren.
6. Menüfunktionen Sperrzeit Diese Funktion sorgt dafür, dass der Mähroboter nach 30 Tagen ohne vorherige Eingabe des korrekten PIN-Codes nicht gestartet werden kann. Nach Ablauf dieser 30 Tage funktioniert der Mähroboter wie gewohnt, beim Öffnen der Abdeckung wird jedoch die Meldung PIN-Code eingeben angezeigt. Geben Sie Ihren Code erneut ein, und drücken Sie OK.
6. Menüfunktionen 6.6 Einstellungen Mit dieser Funktion können Sie Änderungen an den allgemeinen Einstellungen des Mähroboters vornehmen. ECO-Modus Diese Funktion schaltet automatisch das Signal des Begrenzungskabels, der Suchkabel und der Ladestation aus, wenn der Mähroboter nicht mäht. Das heißt, wenn der Mähroboter lädt oder wegen Timer-Einstellungen nicht mähen darf.
6. Menüfunktionen Sprachvariante Stellen Sie die Sprache mit dieser Funktion ein. So wählen Sie die Sprache aus: Platzieren Sie den Cursor auf Sprache, und drücken Sie OK. Platzieren Sie den Cursor auf der erforderlichen Sprache, und drücken Sie auf OK. Info ECO-Modus Zeit und Datum Sprachvariante Land Kundeneinst. zurücksetzen Land Mit dieser Funktion können Sie das Land auswählen, in dem der Mähroboter eingesetzt wird. Info Platzieren Sie den Cursor auf dem gewünschten Land, und drücken Sie OK.
7. Beispiele für Gartenformen 7. Beispiele für Gartenformen – Installationsvorschläge und Einstellungen Das Verhalten des Mähers richtet sich bis zu einem gewissen Grad nach den vorgenommenen Einstellungen. Wenn Sie die Garteneinstellungen des Mähers an die Form des Gartens anpassen, kann er leichter alle Teile des Gartens häufig anfahren. Dadurch wird ein perfektes Mähergebnis erzielt. Verschiedene Gartenformen brauchen unterschiedliche Einstellungen.
7. Beispiele für Gartenformen Installations- und Einstellungsvorschläge Bereich 600 m2. Einige Inseln und ein Abhang mit 25% Steigung. Timer 07:00-23:00 (Werkseinstellung) Montag-Sonntag Häufigkeit Selten (Werkseinstellung) Korridorbreite Mittel Anmerkungen Stellen Sie die Ladestation im unteren Teil des Arbeitsbereichs auf. Verlegen Sie das Suchkabel in einem Winkel über den steilen Abhang. Bereich 200 m2. L-förmiger Garten mit Ladestation im schmalen Bereich. Umfasst einige Inseln.
7. Beispiele für Gartenformen Installations- und Einstellungsvorschläge Bereich 250 m2. U-förmiger Garten, verbunden durch eine schmale Passage. Timer 07:00 – 16:00 Montag – Freitag Häufigkeit Mittel Korridorbreite Mittel Anmerkungen Das Suchkabel muss entlang der schmalen Passage verlegt werden, damit der Mäher die Ladestation leicht finden kann, auch wenn er sich im linken Teil des Arbeitsbereichs befindet.
7. Beispiele für Gartenformen Installations- und Einstellungsvorschläge Bereich 400 m2. Drei Bereiche, die durch zwei enge Passagen miteinander verbunden sind.
8. Wartung 8. Wartung Überprüfen und reinigen Sie den Husqvarna Mähroboter regelmäßig und tauschen Sie ggf. Verschleißteile aus, um die Betriebszuverlässigkeit zu verbessern und eine längere Lebensdauer zu gewährleisten. Weitere Informationen über das Reinigen finde Sie unter 8.4 Reinigung auf Seite 62. Bei der ersten Verwendung des Mähroboters sollten der Messerteller und die Klingen einmal wöchentlich überprüft werden.
8. Wartung WICHTIGE INFORMATION Die Batterie muss am Ende der Saison vor der Winterlagerung vollständig aufgeladen werden. Wird die Batterie nicht vollständig geladen, kann sie beschädigt werden, was in bestimmten Fällen dazu führt, dass sie unbrauchbar wird. Ladestation Lagern Sie die Ladestation und das Netzkabel am besten im Haus. Das Begrenzungskabel und das Suchkabel können im Boden verbleiben. Die Enden der Kabel sollten gegen Feuchtigkeit geschützt werden, z. B.
8. Wartung 8.4 Reinigung Es ist wichtig, dass Sie den Mähroboter stets sauber halten. Ein Mäher mit umfangreichen Grasansammlungen arbeitet an Abhängen deutlich schlechter. Es wird empfohlen, zur Reinigung eine Bürste zu verwenden. WICHTIGE INFORMATION Reinigen Sie den Mähroboter weder mit einem Hochdruckreiniger noch unter fließendem Wasser. Keine Lösungsmittel zum Reinigen benutzen. 3018-062 WICHTIGE INFORMATION Das Arbeiten mit stumpfen Klingen führt zu einem schlechteren Mähergebnis.
8. Wartung Chassis Die Unterseite des Chassis reinigen. Dies sollte mit einer Bürste oder einem feuchten Tuch erfolgen. Räder Den Bereich um die Vorder- und Hinterräder sowie um die Vorderradaufhängung reinigen. Gehäuse Die Reinigung des Gehäuses sollte mit einem feuchten, feinen Schwamm oder einem Tuch erfolgen. Wenn das Gehäuse sehr verschmutzt ist, kann es notwendig sein, es mit einer Seifenlauge oder Spülmittel zu reinigen.
8. Wartung 8.7 Messer WARNUNG Verwenden Sie stets Originalklingen und Originalschrauben für den Austausch. Wenn nur die Klingen ausgetauscht werden und die Schrauben weiterhin genutzt werden, kann dies zu einem Verschleiß der Schrauben beim Mähen und Schneiden führen. Die Klingen können dann aus dem Gehäuse getrieben werden und schwere Verletzungen verursachen. Der Mähroboter verfügt über drei Klingen, die in den Messerteller eingeschraubt sind.
8. Wartung 8.8 Batterie Die Batterie ist wartungsfrei. Die Lebensdauer ist dennoch auf 2 bis 4 Jahre beschränkt. Die Lebensdauer der Batterie hängt von der Länge der Saison und von der Stundenzahl ab, die der Mähroboter in Betrieb ist. Eine lange Saison oder eine große Zahl Betriebsstunden pro Tag führen dazu, dass die Batterie häufiger ausgetauscht werden muss. Laden Sie die Batterie nur in der mitgelieferten Ladestation auf. Verwenden Sie ausschließlich das Originalnetzgerät.
8. Wartung Batteriewechsel Wenn die Betriebszeiten des Mähers zwischen den einzelnen Aufladungen kürzer als üblich werden, ist dies ein Anzeichen dafür, dass die Batterie das Ende ihrer Lebensdauer erreicht und ggf. ausgetauscht werden sollte. Die Batterie muss solange nicht ausgetauscht werden, wie der Mäher den Rasen noch gut schneiden kann. WICHTIGE INFORMATION Verwenden Sie ausschließlich Original-Akkus von Husqvarna Group AB. Die Kompatibilität mit anderen Batterien kann nicht garantiert werden.
9. Fehlersuche 9. Fehlersuche Dieses Kapitel enthält eine Liste der Fehlermeldungen, die auf dem Display angezeigt werden können. Es werden mögliche Ursachen sowie entsprechende Maßnahmen zur Behebung der Störung aufgezeigt. Für Fälle, in denen der Mäher nicht ordnungsgemäß arbeitet, ohne dass eine Fehlermeldung erscheint, bietet dieses Kapitel außerdem eine Beschreibung von Symptomen und geeigneter Lösungswege. Weitere Vorschläge zur Fehlerbehebung bzw. weitere Symptombeschreibungen finden Sie auf www.
9. Fehlersuche Mitteilung Ursache Maßnahme Festgefahren Der Mähroboter hat sich festgefahren. Befreien Sie den Mähroboter und beheben Sie die Problemursache. Der Mähroboter hat sich innerhalb mehrerer Hindernisse festgefahren. Prüfen Sie, ob ein Hindernis die Fortbewegung des Mähroboters blockiert. Die Begrenzungskabelanschlüsse an der Ladestation sind verkreuzt. Prüfen, ob das Begrenzungskabel korrekt angeschlossen ist. Das Begrenzungskabel grenzt zu nah an den Arbeitsbereich.
9. Fehlersuche Mitteilung Ursache Maßnahme Kein Antrieb Der Mähroboter hat sich festgefahren. Befreien Sie den Mäher und beheben Sie die Problemursache. Falls die Ursache nasses Gras ist, warten Sie mit dem Einsatz des Mähers bis der Rasen wieder trocken ist. Der Arbeitsbereich umfasst einen steilen Abhang. Der maximal überwindbare Steigungsgrad beträgt 25 %. Steilere Abhänge sollten abgegrenzt werden. Siehe 3.4 Installation des Begrenzungskabels auf Seite 24.
9. Fehlersuche Mitteilung Ursache Maßnahme Alarm! Mäher ausgeschaltet Der Alarm wurde aktiviert, da der Mäher ausgeschaltet wurde. Passen Sie die Sicherheitsebene im Menü Sicherheit an. Alarm! Mäher gestoppt Der Alarm wurde aktiviert, da der Mäher angehalten wurde. Passen Sie die Sicherheitsebene im Menü Sicherheit an. Alarm! Mäher angehoben Der Alarm wurde aktiviert, da der Mäher angehoben wurde. Passen Sie die Sicherheitsebene im Menü Sicherheit an.
9. Fehlersuche 9.2 Anzeigelampe an der Ladestation Leuchtet die Anzeigelampe an der Ladestation dauerhaft grün, weist dies auf eine vollständige und betriebsfähige Installation hin. Sollte die Lampe nicht dauerhaft grün leuchten, die Fehlersuche zu Rate ziehen. Weitere Hilfestellungen zur Fehlerbehebung finden Sie auf www.automower.com. Sollten Sie trotz allem Hilfe bei der Behebung eines Fehlers benötigen, setzen Sie sich mit dem Händler vor Ort in Verbindung.
9. Fehlersuche 9.3 Symptome Wenn Ihr Automower® nicht wie erwartet funktioniert, folgen Sie den Anweisungen zur Fehlerbehebung unten. Auf www.automower.com finden Sie eine Seite mit häufig gestellten Fragen (FAQs). Dort finden Sie auch detailliertere Antworten zu einer Vielzahl von Standardfragen. Wenn Sie die Fehlerursache dennoch nicht finden, nehmen Sie Kontakt mit dem Händler vor Ort auf. Symptome Ursache Maßnahme Der automatische Rasenmäher hat Probleme beim Andocken an die Ladestation.
9. Fehlersuche Symptome Ursache Maßnahme Der Mähroboter arbeitet zur falschen Zeit. Die Uhr des Mähroboters muss eingestellt werden. Uhr einstellen. Siehe 6.6 Einstellungen auf Seite 54. Die Start- und Endzeiten für das Mähen sind falsch. Die Start- und Stoppzeiteinstellungen für das Mähen zurücksetzen. Siehe 6.3 Timer auf Seite 46. Der Mähroboter vibriert. Beschädigte Klingen führen zu Unwuchten im Schneidsystem. Untersuchen Sie die Klingen und Schrauben und tauschen Sie sie bei Bedarf aus.
9. Fehlersuche 9.4 Unterbrechungen/Brüche im Schleifenkabel finden Brüche im Schleifenkabel rühren normalerweise von unbeabsichtigten Beschädigungen des Kabels, z. B. beim Graben mit einer Schaufel, her. In Breiten, in denen es zu Bodenfrost kommt, können scharfe Steine, die sich im Untergrund bewegen, das Kabel beschädigen. Auch das starke Spannen des Kabels bei der Installation kann zu Brüchen führen. Durch zu niedriges Rasenmähen nach der Installation kann die Kabelisolierung beschädigt werden.
9. Fehlersuche 3. Ladestation an die Stromversorgung anschließen. Anschlüsse von Suchkabel und Begrenzungskabel mit der Ladestation verbinden. a) Begrenzungskabel AL und das Suchkabel anschließen. Blinkt die Anzeigelampe gelb, befindet sich der Bruch irgendwo am Begrenzungskabel zwischen AL und der Stelle, an der das Suchkabel mit dem Begrenzungskabel verbunden ist (dicke schwarze Linie in der Zeichnung).
9. Fehlersuche 4. a) Folgendes gilt für den Fall, dass die Lampe bei Test a) gelb geblinkt hat. Alle Anschlüsse in den ursprünglichen Zustand zurücksetzen. Dann Begrenzungskabel AR trennen. Ein neues Schleifenkabel an AR anschließen. Das andere Ende des Schleifenkabels irgendwo in der Mitte der Installation anschließen.
9. Fehlersuche 5. Sobald der Bruch aufgespürt wurde, muss der beschädigte Abschnitt durch ein neues Kabel ersetzt werden. Der beschädigte Abschnitt kann, sofern möglich, aus dem Begrenzungskabel herausgeschnitten werden. Stets Originalverbinder verwenden. 3012-1323 German – 77 1157868-51,105,DE.indd 77 2016-03-15 14.
10. Technische Daten 10. Technische Daten Daten Automower® 105 Maße Länge 55 cm Breite 39 cm Höhe 25 cm Gewicht 6,7 kg Elektrisches System Batterie Lithium-Ionen-Batterie, 18 V/2,1 Ah, Teile-Nr.
11. Garantiebedingungen 11. Garantiebedingungen Husqvarna AB garantiert die Funktionsfähigkeit dieses Produkts für einen Zeitraum von zwei Jahren (ab dem Kaufdatum). Die Garantie umfasst gravierende Material- und Herstellungsfehler. In der Garantiezeit wird das Produkt kostenlos ersetzt bzw. repariert, wenn folgende Bedingungen erfüllt sind: • Der Mähroboter und die Ladestation dürfen nur in Übereinstimmung mit den Anweisungen dieser Bedienungsanleitung verwendet worden sein. • Es darf vom Benutzer bzw.
12. Umweltinformationen 12. Umweltinformationen Durch Symbole auf dem Husqvarna-Mähroboter oder seiner Verpackung wird angezeigt, dass dieses Produkt nicht über den Hausmüll entsorgt werden darf. Übergeben Sie es zur Entsorgung stattdessen an eine entsprechende Recyclinganlage für elektrische und elektronische Geräte. Weitere Informationen zum Entfernen der Batterie finden Sie unter 8.8 Batterie. Die Batterie muss entfernt werden, bevor der Mäher entsorgt wird.
13. EU-Konformitätserklärung 13. EU-Konformitätserklärung EU-Konformitätserklärung (nur für Europa) Husqvarna AB, SE-561 82 Huskvarna, Schweden, Tel.
1157868-51,105,DE.indd 82 2016-03-15 14.
1157868-51,105,DE.indd 83 2016-03-15 14.
ORIGINALANWEISUNGEN AUTOMOWER ist eine Marke von Husqvarna AB. Copyright © 2016 HUSQVARNA. Alle Rechte vorbehalten. www.automower.com 115 78 68-51 1157868-51,105,DE.indd 84 2016-03-15 14.