H U SQVARNA AUTOMOWE R ® 230 ACX /220 AC BE DI E N U NG SAN LE ITU NG
INHALT 1. Einführung und Sicherheit .................................................. 1.1 Einführung ................................................................................. 1.2 Symbole an Automower® .................................................... 1.3 Symbole in der Bedienungsanleitung .............................. 1.4 Sicherheitsvorschriften ......................................................... 5 5 6 7 8 2. Vorstellung ..................................................................
INHALT Husqvarna AB arbeitet ständig mit der Weiterentwicklung seiner Produkte und behält sich daher das Recht vor, Änderungen im Hinblick auf Form, Aussehen und Funktion ohne vorherige Ankündigung durchzuführen. Diese Bedienungsanleitung beschreibt Version 2.7x des Steuerprogramms des Mähers.
1. EINFÜHRUNG UND SICHERHEIT 1. Einführung und Sicherheit 1.1 Einführung Herzlichen Glückwunsch zu Ihrer Wahl dieses ausgezeichneten Qualitätsprodukts! Um Husqvarna Automower® optimal nutzen zu können, sind Kenntnisse seiner Funktionsweise erforderlich. Diese Bedienungsanleitung enthält wichtige Informationen zum Mäher, seiner Installation und Bedienung.
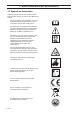
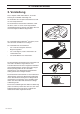
1. EINFÜHRUNG UND SICHERHEIT 1.2 Symbole an Automower® Folgende Symbole können sich am Rasenmäher befinden. Bitte machen Sie sich mit ihrer Bedeutung vertraut. • Vor dem Gebrauch von Automower® lesen Sie die Bedienungsanleitung aufmerksam durch und machen sich mit dem Inhalt vertraut. • Die Warnungen und Sicherheitsvorschriften in dieser Bedienungsanleitung sind unbedingt zu beachten, damit ein sicherer und effektiver Gebrauch des Mähers gewährleistet ist.
1. EINFÜHRUNG UND SICHERHEIT 1.3 Symbole in der Bedienungsanleitung Die Bedienungsanleitung enthält die nachstehenden Symbole. Bitte machen Sie sich mit ihrer Bedeutung vertraut. • Kontrollen und/oder Wartungsmaßnahmen sind mit dem Hauptschalter in der Position OFF durchzuführen. • Bei allen Arbeiten am Untergestell des Mähers sind stets Schutzhandschuhe zu tragen. • Zur Reinigung von Automower® niemals einen Hochdruckreiniger, nicht einmal fließendes Wasser verwenden.
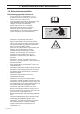
1. EINFÜHRUNG UND SICHERHEIT 1.4 Sicherheitsvorschriften Bestimmungsgemäßer Gebrauch • Vor dem Gebrauch von Automower® lesen Sie die Bedienungsanleitung aufmerksam durch und machen sich mit dem Inhalt vertraut. • Der ursprüngliche Zustand von Automower® darf nicht modifiziert werden. Alle Änderungen erfolgen auf eigene Verantwortung.
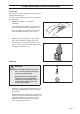
1. EINFÜHRUNG UND SICHERHEIT Transport Für längere Transporte Automower® am besten in die Originalverpackung legen. Für einen sicheren Transport vom oder innerhalb des Arbeitsbereichs: 1. STOP-Taste drücken, um den Mäher anzuhalten. Ist der Diebstahlsalarm aktiviert (siehe Seite 59), geben Sie die erste Ziffer des PIN-Codes ein. Beim erstmaligen Start des Mähers wählen Sie einen vierziffrigen PIN-Code, siehe Seite 31. 2.
2. VORSTELLUNG 2. Vorstellung Dieses Kapitel enthält Informationen, die für die Planung der Installation notwendig sind. Die Installation von Husqvarna Automower® besteht aus vier Hauptelementen: Der automatische Rasenmäher Automower® mäht das Gras, indem er sich in einem hauptsächlich unregelmäßigen Muster bewegt. Der Mäher wird von einer wartungsfreien Batterie angetrieben. Zur Ladestation fährt Automower® von alleine, wenn der Ladestand der Batterie zu niedrig ist.
2. VORSTELLUNG 2.1 Automower®, was ist was? 2 7 3 7 6 10 8 4 5 1 9 14 13 11 12 16 17 15 19 18 20 21 22 23 24 25 26 Die Zahlen in der Abbildung entsprechen 1. 2. 3. 4. 5. 6. 7. 8. 9. 10. 11. 12. 13. Ladeblech Abdeckung der Schnitthöheneinstellung Sperrknopf zum Öffnen der Abdeckung der Schnitthöheneinstellung Vorderräder Antriebsräder Gehäuse STOP-Taste Tastatur Display Hauptschalter Griff Fahrwerk mit Elektronik, Batterie und Motoren Gleitplatte 14. 15. 16. 17. 18. 19. 20. 21. 22.
2. VORSTELLUNG 2.2 Funktion von Automower® Leistung Automower® wird für Rasenflächen von bis zu 3000 m2 (1800 m2 für 220 AC) empfohlen. Die Größe der gemähten Fläche hängt vor allem vom Zustand der Messer sowie von Grasart, Wuchsgeschwindigkeit und Feuchtigkeit ab. Die Beschaffenheit des Gartens ist ebenfalls von Bedeutung.
2. VORSTELLUNG Arbeitsweise Automower® mäht den Rasen automatisch. Mähen und Aufladen wechseln sich kontinuierlich ab. Die Ladestation sendet ein Signal, das Automower® in einem Abstand von 6-7 Metern erkennen kann. Der Mäher sucht nach der Ladestation, sobald die Batteriekapazität zu gering ist. Automower® mäht nicht, wenn er nach der Ladestation sucht.
2. VORSTELLUNG Über die Bedientafel an der Oberseite von Automower® erfolgen alle Einstellungen des Mähers. An der Bedientafel befindet sich auch der Hauptschalter. Durch Drücken der STOP-Taste die Abdeckung der Bedientafel öffnen. Wird der Hauptschalter zum ersten Mal in die Position ON gestellt, beginnt eine Startsequenz mit folgenden Elementen: Sprachwahl, Uhrzeitformat, Datumsformat und ein vierziffriger PIN-Code sowie die Einstellung von Datum und Uhrzeit, siehe Seite 31.
2. VORSTELLUNG 2.3 Vorstellung der Suchart Automower® kann so eingestellt werden, dass er nach einer oder mehreren von drei Suchmethoden nach der Ladestation sucht. Mit den Einstellmöglichkeiten können die drei Sucharten kombiniert werden, um die Suche nach der Ladestation zu optimieren. Welche Suchart(en) geeignet sind, hängt von der Gartenform ab. Suchart 1: Zufällig Automower® bewegt sich unregelmäßig, bis er die Ladestation findet.
2. VORSTELLUNG Suchart 3: Suchkabel folgen Automower® bewegt sich unregelmäßig, bis er das Suchkabel erreicht. Daraufhin folgt der Mäher dem Suchkabel bis hin zur Ladestation. Das Suchkabel ist ein zusätzliches Kabel, das von der Ladestation aus zu einem entlegenen Teil des Arbeitsbereichs oder durch eine schmale Passage verlegt und dann mit dem Begrenzungskabel verbunden wird. Beim 230 ACX können maximal zwei Suchkabel installiert werden. Weitere Informationen entnehmen Sie dem Abschnitt 3.
3. INSTALLATION 3. Installation Dieses Kapitel beschreibt die Installation von Husqvarna Automower®. Vor Beginn der Installation ist das vorherige Kapitel 2. Vorstellung durchzulesen. Lesen Sie das gesamte Kapitel, bevor Sie mit der Installation beginnen. Die Ausführung der Installation entscheidet darüber, ob Automower® optimal eingesetzt werden kann. Daher sollten Sie die Installation sorgfältig und detailliert planen.
3. INSTALLATION • Ladestation (15) • Schleifenkabel für Begrenzungs- bzw. Suchkabel (18) • Transformator (19) • Niederspannungskabel (20) • Drahtösen (21) • Kontaktklemmen für Schleifenkabel (22) • Schrauben für die Ladestation (23) • Messlatte (24) • Verbinder für Schleifenkabel (25) Für die Installation sind zudem erforderlich: Hammer zum Einschlagen der Drahtösen in die Erde, Kombizange und ein gerader Spaten, falls das Begrenzungskabel eingegraben werden soll. 3.
3. INSTALLATION Bei der Bestimmung des Aufstellorts an die Nähe zu einer Steckdose denken. Die Ladestation wird über ein Niederspannungskabel und einen Transformator an eine 230-V-Wandsteckdose angeschlossen. Das im Lieferumfang enthaltene Niederspannungskabel ist 20 m lang. Tipp! Das Niederspannungskabel kann durch den Arbeitsbereich verlaufen. In diesem Fall muss es mit Ösen im Rasen verankert oder eingegraben werden.
3. INSTALLATION Stellen Sie die Ladestation nicht so auf, dass der Mäher näher als 3 m von hinten an die Ladestation gelangen kann (z.B. in einer schmalen Ausbuchtung). Andernfalls findet der Mäher nicht die Ladestation. Installation und Anschluss der Ladestation 1. Platzieren Sie die Ladestation an einer geeigneten Stelle. 2. Ladestation mithilfe der mitgelieferten Schrauben an der Unterlage anbringen. 3. Sicherstellen, dass die Schrauben richtig in der Ansenkung sitzen.
3. INSTALLATION WICHTIGE INFORMATION Niemals die Platte der Ladestation betreten. 3.3 Laden der Batterie Automower® wird mit leerer Batterie geliefert. Sobald die Ladestation angeschlossen ist, kann der Mäher aufgeladen werden. 1. Hauptschalter in Position OFF stellen. 2. Automower® in die Ladestation stellen, um die Batterie während der Verlegung des Begrenzungskabels aufzuladen. Bei leerer Batterie dauert das vollständige Aufladen ca. 1,5-2,5 Stunden.
3. INSTALLATION Optimale Verlegung des Begrenzungskabels Beim Verlegen des Begrenzungskabels Folgendes beachten: • Eine Schleife um den Automower®-Arbeitsbereich bilden. Ausschließlich das Original-Begrenzungskabel verwenden. Es ist verzinnt und besitzt eine hochwertige Isolierung zum Schutz vor der Bodenfeuchtigkeit. • Einen maximalen Abstand von 35 m von Automower® im gesamten Arbeitsbereich einhalten. • Die Länge von 500 m darf nicht überschritten werden.
3. INSTALLATION Angrenzungen an den Arbeitsbereich Befindet sich ein höheres Hindernis wie z. B. eine Mauer oder eine Wand am Rande des Arbeitsbereichs, ist das Begrenzungskabel im Abstand von 35 cm vom Hindernis zu verlegen. So wird verhindert, dass Automower® das Hindernis berührt, und der Verschleiß des Gehäuses wird reduziert. 35 cm Grenzt der Arbeitsbereich an einen kleinen Graben, z. B. an ein Beet, oder ein niedriges Hindernis, z. B.
3. INSTALLATION Wenn Automower® nach der Ladestation sucht oder sich gemäß der Funktion Schleife folgen (3-2) bewegt (siehe Seite 51), hält er einen bestimmten Abstand zum Begrenzungskabel ein. Die Funktion Korridorbreite (3-2-3) bestimmt, welchen Abstand der Mäher zum Begrenzungskabel einhalten soll. Es empfiehlt sich, einen höchstmöglichen Wert für die Korridorbreite anzugeben. Ein hoher Wert für die Korridorbreite verringert das Risiko für eine Spurenbildung.
3. INSTALLATION Nebenflächen Wenn der Arbeitsbereich aus zwei Flächen besteht, die durch eine Passage verbunden werden, in der der Abstand zwischen den Begrenzungskabeln unter 60 cm liegt, empfiehlt sich das Anlegen einer Nebenfläche. Legen Sie in diesem Fall das Begrenzungskabel um die Nebenfläche, sodass es eine Insel außerhalb des Hauptbereichs bildet. Nebenfläche Automower® muss manuell zwischen Hauptbereich und Nebenfläche bewegt werden.
3. INSTALLATION (3-2-3) ein niedriger Wert eingegeben wird (siehe Seite 54). Diese Einstellung birgt jedoch ein erhöhtes Risiko für eine Spurenbildung entlang des gesamten Begrenzungskabels. Der Übergang zwischen einem großen Bereich und einer Passage sollte möglichst trichterartig verlaufen, mit runden Ecken, damit Automower® leichter in die Passage fahren kann. Abhänge Das Begrenzungskabel kann quer über einen Abhang verlegt werden, dessen Neigung höchstens 10 % beträgt.
3. INSTALLATION Verlegung des Begrenzungskabels Verlegen Sie das Begrenzungskabel um den Arbeitsbereich, verbinden Sie es jedoch noch nicht mit der Ladestation. WICHTIGE INFORMATION Extrakabel darf nicht in einer Rolle außerhalb des Begrenzungskabels gelegt werden. Dies kann zu Funktionsstörungen von Automower® führen. Tipp! Nutzen Sie beim Verlegen des Begrenzungskabels die beiliegende Messlatte als Hilfsmittel.
3. INSTALLATION Verlegung des Begrenzungskabels zur Ladestation Hinein zur Ladestation kann das Begrenzungskabel auf mehrere Arten verlegt werden. Die beste Alternative ist es, das Kabel komplett außerhalb der Ladestation zu verlegen, siehe Alternative 1 auf der Abbildung. Es ist ebenfalls möglich, das Kabel unter der Platte der Ladestation zu verlegen, siehe Alternative 2 auf der Abbildung.
3. INSTALLATION 3.5 Anschluss des Begrenzungskabels Das Begrenzungskabel an die Ladestation anschließen: 1. Abdeckung der Ladestation abheben: • Mit beiden Händen unter die Gehäusekanten greifen und sie gerade zur Seite herausziehen. • Dann die Abdeckung gerade nach oben abheben. 2. Die Enden des Begrenzungskabels durch die unteren Öffnungen an der Ladestation nach oben schieben, bis sie durch die oberen Öffnungen wieder herauskommen.
3. INSTALLATION 3. Die Kabelenden in die Kontaktklemmen legen: • Kontaktklemme öffnen. • Das Kabel in die Einbuchtung der Kontaktklemme legen. 4. Die Kontaktklemmen mit einer Zange zusammendrücken. Drücken, bis ein Klicken zu hören ist. 5. Überstehendes Begrenzungskabel abschneiden. 1-2 cm oberhalb der jeweiligen Kontaktklemme abschneiden. 6. Drücken Sie die Kontaktklemmen an den mit A gekennzeichneten Kontaktstiften an der Ladestation fest.
3. INSTALLATION 7. Die Abdeckung der Ladestation wieder anbringen. Beachten Sie, dass die drei Nasen der Ladestation korrekt in den Löchern an der Abdeckung sitzen. 3.6 Überprüfung der Installation Das Schleifensignal durch Beobachtung der Anzeige der grünen Leuchtdiode an der Ladestation prüfen. • Konstantes Leuchten = Das Signal ist korrekt. • Einmaliges Blinken alle zwei Sekunden = Die Schleife ist unterbrochen, kein Signal. • Zweimaliges Blinken alle zwei Sekunden = schwaches Signal.
3. INSTALLATION 3.8 Installation des Suchkabels Das Suchkabel ist ein zusätzliches Kabel, das von der Ladestation aus zu einem entlegenen Teil des Arbeitsbereichs oder durch eine schmale Passage verlegt und dann mit dem Begrenzungskabel verbunden wird. Für Begrenzungskabel und Suchkabel wird ein und dasselbe Kabel verwendet. Beim 230 ACX können maximal zwei Suchkabel installiert werden. Das Suchkabel kann wie das Begrenzungskabel mit Drahtösen im Boden verankert oder eingegraben werden.
3. INSTALLATION • Die Wegstrecke zu einem abgelegenen Bereich ist lang oder komplex. Wenn Automower® entlang dem Begrenzungskabel einen abgelegenen Bereich aufsuchen oder verlassen soll und wenn ein langer oder komplizierter Streckenverlauf des Begrenzungskabels vorliegt. • Das Begrenzungskabel verläuft quer über einen langen Abhang (Steigung über 10 %). Wenn Automower® dem Begrenzungskabel quer über einen Abhang folgt (Steigung über 10 %), muss der Mäher das Gefälle ausgleichen.
3. INSTALLATION Je länger das Suchkabel, desto geringer der Abstand zwischen Mäher und Suchkabel. Bei einer Suchkabellänge über 300 m wird es für den Mäher unter Umständen schwer, dem Kabel zu folgen. Dies variiert je nach Aussehen von Garten und Installation. 2. Abdeckung der Ladestation abheben. 3. So installieren Sie S-Kabel 1: Guide 2 • Schieben Sie das Ende von S-Kabel 1 in die rechte untere Öffnung an der Ladestation, bis es durch die obere Öffnung wieder austritt.
3. INSTALLATION 5. Ziehen Sie das Suchkabel mindestens 2 m gerade von der Vorderkante der Ladeplatte heraus. Maximal Abstand Mindestens 30 cm Mindestens 2m Bei der Verlegung des Suchkabels durch eine Passage: • Automower® folgt dem Suchkabel auf dem Weg von und zur Ladestation auf derselben Kabelseite. Demnach liegt auf dem Weg zur Ladestation das Suchkabel auf der rechten Mäherseite und auf dem Weg von der Ladestation auf der linken Mäherseite.
3. INSTALLATION 9. Verbinden Sie Such- und Begrenzungskabel mit einem Verbinder. • Die Enden des Begrenzungskabels in das rechte bzw. linke Loch des Verbinders schieben. • Das Ende des Suchkabels in das mittlere Loch einführen. • Den Knopf am Verbinder ganz herunterdrücken. 10. Die Verbindungsstelle mit Ösen im Rasen verankern bzw. eingraben. WICHTIGE INFORMATION Die Funktion des Suchkabels variiert je nach Beschaffenheit des Arbeitsbereichs.
4. BESTIMMUNGSGEMÄSSER GEBRAUCH 4. Bestimmungsgemässer Gebrauch 4.1 Laden der leeren Batterie Ist Husqvarna Automower® neu oder wurde er längere Zeit nicht benutzt, ist die Batterie leer und muss vor dem Start aufgeladen werden. Das Aufladen dauert ca. 1,5-2,5 Stunden. 1. Automower® in die Ladestation setzen. Den Mäher so weit wie möglich einschieben. Ein guter Kontakt entsteht, wenn beide Ladebleche des Mähers mittig an den Kontaktblechen der Ladestation anliegen. 2. Abdeckung der Bedientafel öffnen.
4. BESTIMMUNGSGEMÄSSER GEBRAUCH 4.2 Verwendung des Timers Für ein optimales Mähergebnis das Gras nicht zu viel mähen. Die Timerfunktion verwenden (siehe 6.4 Timer (2) auf Seite 47), um einen platten Rasen zu vermeiden und die Lebensdauer Ihres Automower® zu maximieren. Die Qualität des Grases wird z. B. verbessert, wenn es anstatt 12 Stunden täglich jeden zweiten Tag gemäht wird. Außerdem tut es dem Rasen gut, wenn er einmal im Monat mindestens drei Tage lang eine Ruhepause hat. 4.3 Automower® starten 1.
4. BESTIMMUNGSGEMÄSSER GEBRAUCH 4.5 Neustart Neustart innerhalb von 20 Sekunden 1. Abdeckung der Bedientafel schließen. Automower® startet automatisch. Neustart nach mehr als 20 Sekunden Sind seit dem letzten Betätigen der STOP-Taste oder der Tastatur mehr als 20 Sekunden vergangen, lässt sich Automower® nicht einfach nur durch Schließen der Abdeckung starten: Zum Starten: 1. YES-Taste drücken. 2. Abdeckung der Bedientafel schließen. 4.6 Automower® abschalten 1. STOP-Taste drücken. 2.
4. BESTIMMUNGSGEMÄSSER GEBRAUCH 4.7 Einstellung der Schnitthöhe Die Schnitthöhe kann von MIN (2 cm) bis MAX (6 cm) eingestellt werden. Ist das Gras lang, wird empfohlen, Automower® in der Schnitthöhe MAX beginnen zu lassen. Nachdem das Gras kürzer geworden ist, kann die Schnitthöhe allmählich gesenkt werden. Zur Einstellung der Schnitthöhe: 1. STOP-Taste drücken, um den Mäher anzuhalten. 2. Abdeckung der Schnitthöheneinstellung öffnen: Sperrknopf drücken und die Abdeckung anheben. 3.
5. BEDIENTAFEL 5. Bedientafel Über die Bedientafel werden alle Befehle und Einstellungen für Husqvarna Automower® vorgenommen. Sämtliche Funktionen werden über eine Reihe Menüs gesteuert. Die Bedientafel besteht aus einem Display und einer Tastatur. Alle Informationen werden auf dem Display angezeigt, und alle Eingaben werden mit den Tasten vorgenommen.
5. BEDIENTAFEL Die Tastatur besteht aus fünf Tastengruppen: Schnellbefehle, Programme, Auswahl, Ziffern und Hauptschalter. Hauptmenü Befehle Timer Garten Einstellungen 5.1 Schnellbefehle 1. Parken: • Schickt den Mäher zur Ladestation. Dort bleibt er stehen, bis die Taste erneut gedrückt wird. Das Haussymbol leuchtet rechts auf dem Display auf, wenn die Taste gedrückt wird. Bei voll aufgeladener Batterie bleibt der Mäher in der Ladestation und gibt die Meldung Wartet aus.
5. BEDIENTAFEL 5.2 Programme 3. A 4. B 5. C 3 Unter den Programmtasten können verschiedene Einstellungen gespeichert werden, um sie wiederholt einzusetzen oder die Verwendung von Automower® in mehreren Gärten zu erleichtern. Unter der jeweiligen Taste sind einige vorgewählte Einstellungen zu finden. Sie können entweder verwendet oder auch geändert werden. • Zum Ändern der Einstellungen: Die gewünschten Einstellungen vornehmen.
5. BEDIENTAFEL 5.4 Ziffern 9. In der Menüstruktur verwenden, um Einstellungen wie z. B. PIN-Code, Uhrzeit oder Ausfahrtrichtung anzugeben. Außerdem verwenden, um eine Ziffernreihe als Schnellwahl für die verschiedenen Menüs anzugeben. Weitere Informationen zur Ziffernreihe enthält der Abschnitt Ziffernreihe auf Seite 45. 5.5 Hauptschalter 10. Den Hauptschalter auf ON stellen, um Automower® starten zu können.
6. MENÜFUNKTIONEN 6. Menüfunktionen 6.1 Hauptmenü Das Hauptmenü umfasst vier Auswahlmöglichkeiten: 6.3 Befehle (1) 6.4 Timer (2) 6.5 Garten (3) 6.6 Einstellungen (4) Die Zahlen in Klammern verweisen auf die Menüzeilen im Display an Husqvarna Automower®. Hauptmenü Befehle Timer Garten Einstellungen Unter jeder Auswahl sind einige Untermenüs zu finden. Über diese kann auf alle Funktionen zugegriffen werden, um an Automower® Einstellungen vorzunehmen.
Laden, dann AUTO 46 - Deutsch Letzten Fehler anzeigen Befehle Mo Alle Zeiten rückstellen Do Fr Sa So Alle fahren v. Tagestim. kopie. Stoppzeit 2 Startzeit 2 Mi Stoppzeit 1 Di Startzeit 1 Wochenend- WochenTimer timer Stoppzeit 2 Tagestimer Startzeit 2 Stoppzeit 1 NEIN Startzeit 1 JA Timer ausgeschaltet Alle Zeiten rückstellen Auf Werkseinst. rückst.
6. MENÜFUNKTIONEN 6.3 Befehle (1) Über diese Auswahl im Hauptmenü werden die nachstehenden Funktionen von Automower® zugänglich. • Laden, dann AUTO (1-1) Automower® fährt umgehend zur Ladestation, lädt die Batterie und kehrt dann in die automatische Betriebsart zurück. Funktion wählen und YES drücken, wenn der Cursor auf Ja steht. • Befehle Laden, dann AUTO Timer Letzten Fehler anzeigen Garten Auf Werkseinst 1rückst.
6. MENÜFUNKTIONEN Timer ausgeschaltet (2-1) Wurde an Ihrem Automower® der Timer eingestellt, lassen sich mithilfe dieser Funktion kurzzeitig die Einstellungen deaktivieren. • JA (2-1-1) Cursor auf JA stellen und YES drücken, um die Timerfunktion auszuschalten. • JA Timer ausgeschaltet NEIN 2-1- Tagestimer Wochenendtimer NEIN (2-1-2) Cursor auf NEIN stellen und YES drücken, um die Timerfunktion einzuschalten.
6. MENÜFUNKTIONEN Wochentimer (2-4) Aktivieren bzw. deaktivieren Sie per YES-Taste die Tage, an denen Automower® mähen bzw. nicht mähen soll. An den mit einem Häkchen markierten Tagen mäht Automower®. • Timer ausgeschaltet Tagestimer Mo (2-4-1) • Di (2-4-2) • Mi (2-4-3) • Do (2-4-4) • Fr (2-4-5) • Sa (2-4-6) • So (2-4-7) • Alle fahren (2-4-8) Mo Fr Di Sa Mi So Do Alle fahren 2-4- Wochenendtimer Wochentimer 2-4 Über die Funktion Alle fahren werden alle Tage ausgewählt.
6. MENÜFUNKTIONEN Ausfahrtwinkel (3-1) Normalerweise verlässt Automower® die Ladestation in einer Richtung im Ausfahrtsektor 90°-270°, wobei 90° als Start- und 270° als Schlusswinkel bezeichnet wird. Mit der Einstellung von Start- und Schlusswinkeln wird bestimmt, in welche Richtung Automower® die Ladestation verlässt. Der Mäher kann für einen oder zwei Ausfahrtsektoren eingestellt werden. Befindet sich die Ladestation in einer Passage, können zwei Ausfahrtsektoren von z. B.
6. MENÜFUNKTIONEN • Anteil erster (3-1-6) Wenn zwei Ausfahrtsektoren verwendet werden: Einen Prozentsatz angeben, um zu bestimmen, wie oft Automower® die Ladestation in Sektor 1 verlassen soll. So testen Sie die Einstellungen unter Ausfahrtwinkel: Geben Sie unter Anteil erster den Wert 100 % ein, wenn Sektor 1 getestet werden soll. Geben Sie unter Anteil erster den Wert 0 % ein, wenn Sektor 2 getestet werden soll.
6. MENÜFUNKTIONEN Bis zu fünf abgelegene Bereiche können aktiviert werden: Bereich 1, Bereich 2, Bereich 3, Bereich 4 und Bereich 5. (Für Modell 220 AC stehen nur drei Bereiche zur Auswahl.) Zur Aktivierung eines Bereichs müssen drei Werte angegeben werden: Bereich 1 Schleife aus folgen Schleife in folgen Korridorbreite Test Schleife IN • Richtung Geben Sie Rechts oder Links, S-Kabel 1 oder S-Kabel 2 je nachdem an, in welcher Richtung von der Ladestation der Bereich liegt.
6. MENÜFUNKTIONEN • Schleife in folgen (3-2-2) Diese Funktion steuert, wie Automower® nach der Ladestation sucht. Automower® beginnt die Suche nach der Ladestation stets mit der Suchart Zufällig. Bei einigen Gärten reicht dies nicht aus, damit der Mäher schnell die Ladestation findet. In diesem Fall kann die Suche mithilfe der Funktion Schleife in folgen (3-2-2) optimiert werden.
6. MENÜFUNKTIONEN • Korridorbreite (3-2-3) Die Einstellung Korridorbreite bestimmt den Abstand zwischen dem Fahrweg des Mähers und dem Begrenzungskabel oder Suchkabel, wenn sich der Mäher an diesen Kabeln entlang von oder zur Ladestation bewegt. Die Fläche neben dem Kabel, die der Mäher dann nutzt, wird Korridor genannt. Korridor Durch einen niedrigen Wert für die Korridorbreite entsteht ein schmaler Korridor, ein hoher Wert führt zu einem breiten Korridor.
6. MENÜFUNKTIONEN • Test Schleife IN (3-2-4) Mit der Funktion Test Schleife IN (3-2-4) überprüfen Sie, ob und wie Automower® zur Ladestation zurückfindet. Schleife aus folgen Schleife in folgen Korridorbreite Test Schleife IN Test Schleife AUS 3-2-4 Bei Auswahl dieser Funktion folgt der Mäher direkt dem Begrenzungskabel, S-Kabel 1 oder S-Kabel 2 zur Ladestation – je nachdem, welches Kabel er zuerst findet.
6. MENÜFUNKTIONEN So ermitteln Sie die Strecke von der Ladestation zu einem abgelegenen Bereich: • Geben Sie eine Streckenlänge an, die die tatsächliche Länge mit Sicherheit überschreitet. Die maximal mögliche Streckenlänge beträgt 500 m. Geben Sie unter Anteil für den Bereich, zu dem die Strecke getestet werden soll, den Wert 100 % ein, sowie den Wert 0 % für die übrigen Bereiche. Platzieren Sie Automower® in der Ladestation und wählen Sie die Funktion Test Schleife AUS (3-2-5).
6. MENÜFUNKTIONEN Fortgeschritten (3-4) • Schleife überfahren (3-4-1) Das Vorderteil von Automower® fährt stets ein Stück über das Begrenzungskabel, bevor der Mäher wendet. Die Grundeinstellung dieser Strecke ist 27 cm, sie kann jedoch nach Bedarf geändert werden. Der Mindestwert ist 15 cm, der Höchstwert 50 cm. Einstellung der Strecke: Cursor auf Schleife überfahr. stellen und YES drücken. Anschließend die Anzahl in cm angeben, die Automower® über das Begrenzungskabel fahren soll.
6. MENÜFUNKTIONEN Sicherheit (4-1) • PIN-Code (4-1-1) Mit dieser Funktion kann der PIN-Code jederzeit geändert werden. • Zum Ändern des PIN-Codes: Cursor auf PIN-Code stellen und YES drücken. Automower® in die Ladestation setzen. Neuen PIN-Code angeben und YES drücken. Zum Bestätigen denselben Code noch einmal eingeben und YES drücken. Nach einer Änderung des PIN-Codes erscheint die Meldung PIN-Code geändert für einige Sekunden auf dem Display. Danach wird das Menü Sicherheit erneut angezeigt.
6. MENÜFUNKTIONEN • Alarm (4-1-3) Bei dieser Funktion muss die erste Ziffer des PIN-Codes innerhalb von zehn Sekunden nach Drücken der Taste STOP eingegeben werden, oder der Mäher wurde aus einem bestimmten Grund angehoben. Wird diese Ziffer nach drei Versuchen nicht korrekt angegeben, ertönt der Alarm. Der Alarm kann durch Eingabe des vollständigen PIN-Codes abgeschaltet werden.
6. MENÜFUNKTIONEN Lautstärke Bedeutung 2 Pieptöne/10 Sek. Lädt In 2 Sekunden werden 5 Pieptöne ausgegeben. Startet Messerteller 3 Pieptöne/Sek.
6. MENÜFUNKTIONEN • Zeitformat (4-4-3) Cursor auf Zeitformat stellen und YES drücken. Cursor auf das gewünschte Zeitformat stellen: • 12 h • 24 h Durch Drücken von YES beenden. • Datumformat (4-4-4) Cursor auf Datumformat stellen und YES drücken. Cursor auf das gewünschte Datumformat stellen: • JJ-MM-TT (Jahr-Monat-Tag) • MM-TT-JJ (Monat-Tag-Jahr) • TT-MM-JJ (Tag-Monat-Jahr) Durch Drücken von YES beenden.
7. BEISPIELE FÜR GARTENFORMEN 7. Beispiele für Gartenformen - Vorschläge für Installationen und Einstellungen Das Verhalten des Mähers richtet sich nach den erfolgten Einstellungen. Durch die Anpassung der Garteneinstellungen des Mähers entsprechend der Gartenform wird es leichter für Husqvarna Automower® , alle Teile des Gartens mit der gleichen Häufigkeit zu erreichen und dadurch ein perfektes Mähergebnis zu erzielen. Unterschiedliche Gärten erfordern unterschiedliche Einstellungen.
7. BEISPIELE FÜR GARTENFORMEN Vorschläge für Installationen und Einstellungen Fläche: 1800 m2. Kein Suchkabel erforderlich. Timer: Betriebszeit von 24 Std. pro Tag Ausfahrtwinkel: ein Sektor 90°-270° Suchart: Zufällig und Schleife in folgen Verzögerung: S-Kabel 1: 4 min, S-Kabel 2: 4 min und Begrenzungskabel: 11 min. Korridorbreite: Begrenzungskabel 20 Fläche: 1800 m2. Einige Inseln und ein steiler Hang entlang des Begrenzungskabels. Suchkabel wird empfohlen. Timer: Betriebszeit von 24 Std.
7. BEISPIELE FÜR GARTENFORMEN Vorschläge für Installationen und Einstellungen Fläche: 600 m2. L-förmiger Garten mit Ladestation auf der schmalen Fläche. Einige Inseln sind vorhanden. Kein Suchkabel erforderlich. Timer: Betriebszeit von 8 Std. pro Tag Ausfahrtwinkel: Sektor 1: 70°-130° und Sektor 2: 250°-290°; Anteil erster 10 % Suchart: Zufällig und Schleife in folgen Verzögerung: S-Kabel 1: 4 min, S-Kabel 2: 4 min und Begrenzungskabel: 11 min. Korridorbreite: 10 Fläche: 700 m2.
7. BEISPIELE FÜR GARTENFORMEN Vorschläge für Installationen und Einstellungen Fläche: 500 m2. Mehrere Inseln sind vorhanden. Kein Suchkabel erforderlich. Die Grundeinstellungen des Mähers brauchen nicht geändert zu werden. Timer: Betriebszeit von 7 Std. pro Tag Ausfahrtwinkel: ein Sektor 90°-270° Suchart: Zufällig Verzögerung: S-Kabel 1: 4 min, S-Kabel 2: 4 min und Begrenzungskabel: 11 min. Korridorbreite: 10 Fläche: 1000 m2. Eine kleine Insel ist vorhanden. Suchkabel durch Passage empfohlen.
7. BEISPIELE FÜR GARTENFORMEN Vorschläge für Installationen und Einstellungen Dieses Beispiel gilt nur für Modell 230 ACX. Area: 3000 m2. Der Einsatz von zwei Suchkabeln wird empfohlen. Timer: Betriebszeit von 24 Std.
8. WARTUNG 8. Wartung Für eine bessere Betriebssicherheit und längere Lebensdauer ist Husqvarna Automower® regelmäßig zu überprüfen und zu reinigen; verschlissene Teile sind bei Bedarf auszutauschen. Weitere Informationen über die Reinigung enthält der Abschnitt 8.5 Reinigung auf Seite 69. In der ersten Zeit des Gebrauchs von Automower® sind Messerteller, Gleitplatte und Messer einmal wöchentlich zu kontrollieren.
8. WARTUNG 8.2 Aufbewahrung für den Winter Automower® Automower® ist vor der Aufbewahrung für den Winter sorgfältig zu reinigen, siehe der Abschnitt 8.5 Reinigung auf Seite 69. Laden Sie die Batterie vor der Wintereinlagerung voll auf. Hauptschalter in Position OFF stellen. Wir empfehlen außerdem, im Winter die Batterie vollständig zu laden, um ihre Lebensdauer zu verlängern.
8. WARTUNG 8.3 Service Lassen Sie vor der Einwinterung des Automower® eine Wartung durch Ihren Händler vornehmen. Dies ist eine wesentliche Voraussetzung, um den Mäher in gutem Zustand zu erhalten. Die Wartung umfasst normalerweise folgende Arbeiten: • Sorgfältige Reinigung von Gehäuse, Fahrgestell, Messerteller, Gleitplatte und allen anderen beweglichen Teilen. • Funktionsprüfung von Mäher und den einzelnen Komponenten. • Kontrolle der Verschleißteile wie Messer und Lager.
8. WARTUNG 4. Messerteller und Untergestell z. B. mit einer Spülbürste reinigen. Gleichzeitig prüfen, dass der Messerteller im Verhältnis zur direkt darüber liegenden Motorhalterung frei rotiert. Ebenfalls prüfen, dass die Gleitplatte im Verhältnis zum Messerteller frei rotiert. Dringen lange Grashalme oder andere Gegenstände ein, können Messerteller und/oder Gleitplatte gebremst werden.
8. WARTUNG 8.6 Austausch der Messer WARNUNG Beim Austausch stets Originalmesser und -schrauben verwenden. Wird nur das Messer ausgetauscht und die Schraube wieder verwendet, kann die Schraube während des Mähens verschlissen werden und sich lösen. Das Messer kann dann herausgeschleudert werden und Verletzungen verursachen. An Automower® befinden sich drei an den Messerteller geschraubte Messer. Die Messer haben vier Schneiden (220 AC: zwei Schneiden), um eine längere Lebensdauer zu ermöglichen.
8. WARTUNG Austausch der Messer: 1. Hauptschalter in Position OFF stellen. 2. Schutzhandschuhe anziehen. 3. Automower® auf den Kopf legen. 4. Die Gleitplatte so drehen, dass ihr Loch genau vor der Schraube des Messers steht. 5. Das Messer herausschrauben. Einen gewöhnlichen oder einen Kreuzschlitz-Schraubenzieher verwenden. 6. Gleitplatte und Messerteller leicht auseinander biegen und Messer und Schraube herausnehmen. 7. Das neue Messer festschrauben. 8.
9. FEHLERSUCHE 9. Fehlersuche 9.1 Fehlermeldungen Nachstehend folgt eine Liste der Fehlermeldungen, die auf dem Display von Husqvarna Automower® angezeigt werden können. Tritt derselbe Fehler wiederholt auf, nehmen Sie Kontakt zum Fachhändler auf. Fehlermeldung Ursache Maßnahme Linker Radmotor blockiert Gras oder andere Gegenstände haben sich um das Antriebsrad verklemmt. Antriebsrad überprüfen und Gras oder Gegenstand entfernen.
9. FEHLERSUCHE Fehlermeldung Ursache Maßnahme Ausserhalb Tritt der Fehler an einzelnen Stellen auf, kann dies auf Störungen durch Metallgegenstände (Zaun, Armierung) oder vergrabene Kabel in der Nähe zurückzuführen sein. Versuchen, das Begrenzungskabel zu verlegen. Der Arbeitsbereich hat ein zu starkes Gefälle. Prüfen, dass das Begrenzungskabel korrekt verlegt ist. Das Begrenzungskabel wurde in der falschen Richtung um eine „Insel” herum gelegt.
9. FEHLERSUCHE 9.2 Fehlersymptom Funktioniert Automower® nicht ordnungsgemäß, den nachfolgenden Fehlersuchplan befolgen. Bleibt der Fehler bestehen, Kontakt zum Fachhändler aufnehmen. Symptom Ursache Ungleichmäßiges Mähergebnis. Automower arbeitet zu wenige Die Arbeitszeit verlängern, siehe 6.4 Stunden pro Tag. Timer (2) auf Seite 47. Der Arbeitsbereich ist zu groß. Versuchen, den Arbeitsbereich zu verkleinern, oder die Arbeitszeit verlängern, siehe 6.4 Timer (2) auf Seite 47.
10. TECHNISCHE DATEN 10.
11. UMWELTINFORMATION 11. Umweltinformation Das Symbol auf Husqvarna Automower® oder der Verpackung gibt an, dass dieses Produkt nicht als Hausmüll entsorgt werden darf. Zur Entsorgung ist es stattdessen an eine entsprechende Recyclinganlage für elektrische und elektronische Geräte zu übergeben. Informationen zum Ausbau der Batterie erhalten Sie von Ihrem Händler.
12.
ORIGINALANWEISUNGEN AUTOMOWER ist ein von Husqvarna eingetragenes Warenzeichen. Copyright © 2014 HUSQVARNA. All rights reserved. www.automower.