
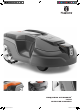
Operation Manual


English - 1
1 Introduction and safety 3
1.1 Introduction 3
1.2 Symbols on the product 4
1.3 Symbols in the Operator’s Manual 6
1.4 Safety instructions 6
2 Presentation 10
2.1 What is what? 11
2.2 Package content 12
2.3 Function 12
3 Installation 16
3.1 Preparations 16
3.2 Installation of the charging station 17
3.3 Charging the battery 21
3.4 Installation of the boundary wire 22
3.5 Connecting the boundary wire 28
3.6 Installation of the guide wire 29
3.7 Checking the installation 32
3.8 First start-up and calibration 33
3.9 Test docking with the charging station 33
4 Use 34
4.1 Charging a at battery 34
4.2 Using the timer 35
4.3 Standby 36
4.4 Starting 37
4.5 Stopping 37
4.6 Switching off 37
4.7 Adjusting the cutting height 38
5 Control panel 39
5.1 Operation selection Start 40
5.2 Operation selection Parking 41
5.3 Main switch 41
6 Menu functions 42
6.1 Main menu 42
6.2 Menu structure 43
6.3 Timer 44
6.4 Security 46
6.5 Messages 48
6.6 Weather timer 49
6.7 Installation 50
6.8 Settings 59
6.9 Accessories 63
7 Garden examples 64
8 Maintenance 69
8.1 Winter storage 69
8.2 Winter service 70
8.3 After winter storage 71
8.4 Cleaning 71
8.5 Transport and moving 72
8.6 In the event of a thunderstorm 72
8.7 Blades 73
8.8 Battery 73
9 Troubleshooting 74
9.1 Fault messages 74
9.2 Info messages 77
9.3 Indicator lamp in the charging station 78
9.4 Symptoms 79
9.5 Finding breaks in the loop wire 80
10 Technical Data 84
11 Guarantee terms 85
12 Environmental information 86
12.1 Removing the battery for recycling 86
13 EC Declaration of Conformity 88
OM_1157863-26_HQ 310,315,EN_160229.indd 1 2016-02-29 10:51:22