
Operation Manual


3012-1101
English - 16
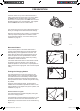
INSTALLATION
3 Installation
This chapter describes how to install the robotic
lawnmower. Read the previous chapter 2. Presentation
before starting the installation.
Read also through this entire chapter before beginning
the installation. How the installation is done also affects
how well the robotic lawnmower works. It is therefore
important to plan the installation carefully.
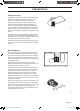
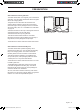
Planning is simplied if you make a sketch of the working
area, including all obstacles. This makes it easier to see
the ideal positions for the charging station, the boundary
wire and the guide wire. Draw on the sketch where the
boundary and guide wires should be routed.
For examples of installations, see 7 Yard Examples on
page 69.
Visit also www.automower.com for further descriptions
and tips regarding installation.
Carry out the installation in the following
steps:
3.1 Preparations
3.2 Installation of the charging station
3.3 Charging the battery
3.4 Installation of the boundary wire
3.5 Connecting the boundary wire
3.6 Installation of the guide wire
3.7 Checking the installation
3.8 First start-up and calibration
3.9 Test docking with the charging station
The charging station, boundary loop and guide wire must
be connected to be able to carry out a complete start-up.
3.1 Preparations
1. If the grass in the working area is higher than
10 cm, mow it using a standard lawnmower. Then
collect the clippings.
2. Fill in holes and hollows to stop rainwater
collecting in puddles. The product may be
damaged if it is operated in puddles, see 11
Warranty Terms on page 92.
3. Read carefully through all the steps before the
installation.
1157866-26,420,430X,450X,EN_160314.indd 16 2016-03-14 16:58:24