Operator’s manual K3000, K3000 Wet Please read the operator’s manual carefully and make sure you understand the instructions before using the machine.
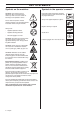
KEY TO SYMBOLS Symbols on the machine: Symbols in the operator’s manual: WARNING! The machine can be a dangerous tool if used incorrectly or carelessly, which can cause serious or fatal injury to the operator or others. Inspection and/or maintenance should be carried out with the motor switched off and the plug disconnected. Please read the operator’s manual carefully and make sure you understand the instructions before using the machine. Always wear approved protective gloves.
CONTENTS Contents KEY TO SYMBOLS Symbols on the machine: ............................................. Symbols in the operator’s manual: ............................... CONTENTS Contents ...................................................................... WHAT IS WHAT? What is what on the power cutter - K3000? ................. WHAT IS WHAT? What is what on the power cutter - K3000 Wet? .......... SAFETY INSTRUCTIONS Steps before using a new power cutter ........................
WHAT IS WHAT? 4 2 5 3 6 7 1 8 6 12 9 14 10 11 13 15 What is what on the power cutter - K3000? 1 Rear handle 9 2 Guard for the blade 14” 10 Brush retainer 3 Cutting blade 11 Carbon brushes 4 Locking the axle 12 Guard for the blade 12” (Model version) 5 Front handle 13 Connection for vacuum cleaner 6 Inspection covers 14 Combination spanner 7 Power switch lock 15 Operator’s manual 8 Switch 4 – English Type plate
WHAT IS WHAT? What is what on the power cutter - K3000 Wet? 1 Rear handle 10 Water tap 2 Guard for the blade 11 Water connection with flow limiter 3 Water kit 12 Type plate 4 Cutting blade 13 Brush retainer 5 Locking the axle 14 Carbon brushes 6 Front handle 15 Ground fault circuit interrupter 7 Inspection covers 16 Combination spanner 8 Power switch lock 17 Operator’s manual 9 Switch English –5
SAFETY INSTRUCTIONS Steps before using a new power cutter • Please read the operator’s manual carefully and make sure you understand the instructions before using the machine. • The machine is only designed for cutting hard materials, such as concrete, brick, masonry as well as cast iron and cement pipes. • Let your Husqvarna dealer regularly check the power cutter and make essential adjustments and repairs.
SAFETY INSTRUCTIONS General safety warnings ! WARNING! Read all safety warnings and all instructions. Failure to follow the warnings and instructions may result in electrtic shock, fire and/or serious injury. Electrical safety • Power tool plugs must match the outlet. Never modify the plug in any way. Do not use any adapter plugs with earthed (grounded) power tools. Unmodified plugs and matching outlets will reduce the risk of electric shock.
SAFETY INSTRUCTIONS Personal safety Power tool use and care • • Do not force the power tool. Use the correct power tool for your application. The correct power tool will do the job better and safer at the rate for which it was designed. • Do not use the power tool if the switch does not turn it on and off. Any power tool that cannot be controlled with the switch is dangerous and must be repaired.
SAFETY INSTRUCTIONS Machine′′s safety equipment Checking the power switch lock This section describes the machine′s safety equipment, its purpose, and how checks and maintenance should be carried out to ensure that it operates correctly. See the ”What is what?” section to locate where this equipment is positioned on your machine. • Make sure the power switch is locked when the power switch lock is in its original position.
SAFETY INSTRUCTIONS Ground fault circuit interrupter (K3000 Wet) Cutting blades Ground fault circuit interrupters are for protection in case an electrical fault should occur. ! The LED indicates that the ground fault circuit interrupter is on and that the machine can be switched on. If the LED is not on, push the RESET button (green). WARNING! A cutting blade may burst and cause injury to the operator. Never use a cutting blade at a lower speed rating than that of the power cutter.
SAFETY INSTRUCTIONS Diamond blades Blade vibration The blade can become out-of-round and vibrate if an excessive feed pressure is used. A lower feed pressure can stop the vibration. Otherwise replace the blade. The blade must be of the recommended type for the material to be cut. ! WARNING! Cutting plastics with a diamond blade can cause kickback when the material melts due to the heat produced when cutting and sticks to the blade.
SAFETY INSTRUCTIONS Dry cutting with diamond blade ! General working instructions WARNING! Diamond blades get very hot when used. A heated blade can be deformed and cause damage to the machine as well as the user. ! When dry cutting, lift the blade out from the cut every 30–60 seconds and let it rotate in the air for 10 seconds to let it cool.
SAFETY INSTRUCTIONS • • The guard for the cutting equipment should be adjusted so that the rear section is flush with the work piece. Spatter and sparks from the material being cut are then collected up by the guard and led away from the user. Feed down the machine in line with the blade. Pressure from the side can damage the blade and is very dangerous. ! • Never start to cut with the upper quadrant of the blade as shown in the figure, also known as the kickback zone.
ASSEMBLY Assembly ! WARNING! Always pull out the plug from the outlet socket before cleaning, maintenance or assembly. Checking the drive axle and flange washers Check that the threads on the drive shaft are undamaged. Check that the contact surfaces on the blade and the flange washers are undamaged, of the correct dimension, clean, and that they run properly on the drive axle. Fitting the cutting blade Husqvarna’s blades are approved for hand-held power cutters.
STARTING AND STOPPING Starting and stopping ! Starting • Grip the front handle with the left hand. • Grip the rear handle with your right hand. • Press in the power switch lock with your right-hand thumb and press in the power switch. • Run the machine unloaded and in a safe manner for at least 30 seconds. WARNING! Note the following before starting: The machine should be connected to an earthed outlet socket.
MAINTENANCE Maintenance Replacing the carbon brushes Check the carbon brushes at least once a month. The carbon brushes should be replaced with new brushes if they are worn, cracked or in any other way deformed. ! WARNING! Inspection and/or maintenance should be carried out with the motor switched off and the plug disconnected. All carbon brushes must be replaced when the brushes are replaced. • Remove both inspection covers by loosening both screws. • Unscrew the cable holding the carbon brush.
MAINTENANCE Changing the grease The following parts must be dismantled to change the grease in the gear housing: 1 Flange washers holding the cutting blade 2 The sealing ring 3 Support flange for the guard Checking water connection with flow limiter Check and clean the filter in the connection regularly and change it when needed. 1 Unscrew the connector. 2 Press out the filter (A) using a screwdriver or the like. 3 Clean or change the filter.
TECHNICAL DATA Technical data K3000 K3000 Wet Protection class I I Ground fault circuit interrupter No Yes Europe 230 230 Great Britain 110 110 USA / Canada / Japan 100-120 100-120 Australia 230 230 Europe 2700/12 A 2700/12 A Great Britain 2200/20 A 2200/20 A USA / Canada / Japan 15 A, 50-60 Hz 15 A, 50-60 Hz Australia 2300/10 A 2300/10 A 8,8 8,9 Water cooling of blade No Yes Connecting nipple Type ”Gardena” Type ”Gardena” Water pressure - max, bar - 8 Engine Rat
! WARNING! Cutting, especially when DRY cutting, generates dust that comes from the material being cut, which frequently contains silica. Silica is a basic component of sand, quartz, brick clay, granite and numerous other minerals and rocks. Exposure to excessive amount of such dust can cause: Respiratory disease (affecting your ability to breath), including chronic bronchitis, silicosis and pulmonary fibrosis from exposure to silica. These diseases may be fatal; Skin irritation and rash.