Operator′s manual T540 XP Please read the operator’s manual carefully and make sure you understand the instructions before using the machine.
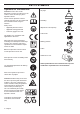
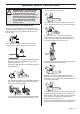
KEY TO SYMBOLS Symbols on the machine: WARNING! Chain saws can be dangerous! Careless or incorrect use can result in serious or fatal injury to the operator or others. Please read the operator’s manual carefully and make sure you understand the instructions before using the machine. Always wear: • Approved protective helmet • Approved hearing protection • Protective goggles or a visor Air purge. Refuelling. Adjustment of the oil pump Chain oil fill.
KEY TO SYMBOLS Symbols in the operator’s manual: Switch off the engine before carrying out any checks or maintenance. Always wear approved protective gloves. Regular cleaning is required. Visual check. Protective goggles or a visor must be worn. Refuelling. Filling with oil and adjusting oil flow. The chain brake must be engaged when the chain saw is started.
CONTENTS Contents KEY TO SYMBOLS Symbols on the machine: ...................................... Symbols in the operator’s manual: ........................ CONTENTS Contents ............................................................... INTRODUCTION Dear Customer, ..................................................... WHAT IS WHAT? What is what on the chain saw? ........................... GENERAL SAFETY PRECAUTIONS Before using a new chain saw .............................. Important .......................
INTRODUCTION Dear Customer, Congratulations on your choice to buy a Husqvarna product! Husqvarna is based on a tradition that dates back to 1689, when the Swedish King Karl XI ordered the construction of a factory on the banks of the Husqvarna River, for production of muskets. The location was logical, since water power was harnessed from the Huskvarna River to create the waterpowered plant.
WHAT IS WHAT? 1 19 2 18 17 16 3 4 5 15 20 14 21 22 23 24 6 25 27 13 12 11 10 28 29 26 What is what on the chain saw? 1 Front hand guard 16 Saw chain 2 Stop switch 17 Guide bar 3 Information and warning decal 18 Throttle trigger 4 Top handle 19 Throttle trigger lockout 5 Filter cover 20 Belt eyelet 6 Choke control 21 Clutch cover 7 Rope eyelet 22 Chain tensioning screw 8 Air purge 23 Product and serial number plate 9 Fuel tank 24 Chain catcher 10 Fuel level window
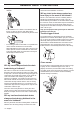
GENERAL SAFETY PRECAUTIONS Before using a new chain saw Important • Please read this manual carefully. • Check that the cutting equipment is correctly fitted and adjusted. See instructions under the heading Assembly. • Refuel and start the chain saw. See the instructions under the headings Fuel Handling and Starting and Stopping. You should only use the saw with the bar and chain combinations we recommend in the chapter Technical data.
GENERAL SAFETY PRECAUTIONS as well as help you to use your chain saw both efficiently and safely. • Fire Extinguisher and Shovel Generally clothes should be close-fitting without restricting your freedom of movement. Work is constantly in progress to improve the design and technology - improvements that increase your safety and efficiency. Visit your dealer regularly to see whether you can benefit from new features that have been introduced.
GENERAL SAFETY PRECAUTIONS WARNING! Never use a machine with defective safety components. Safety equipment must be inspected and maintained. See instructions under the heading Checking, maintaining and servicing chain saw safety equipment. If your machine does not pass all the checks, take the saw to a servicing dealer for repair. ! reduces the risk of your left hand hitting the chain if you lose grip of the front handle.
GENERAL SAFETY PRECAUTIONS designed to be activated by the inertia in the kickback direction. brake. If the chain brake is too sensitive it would activate all the time which would be a nuisance. Will my chain brake always protect me from injury in the event of a kickback? No. First, the chain brake must be in working order to provide the intended protection. Second, it must be activated during the kickback as described above to stop the saw chain.
GENERAL SAFETY PRECAUTIONS Vibration damping system ! Your machine is equipped with a vibration damping system that is designed to minimize vibration and make operation easier. CAUTION! The muffler gets very hot during and after use. This also applies during idling. Be aware of the fire hazard, especially when working near flammable substances and/or vapours. The machine′s vibration damping system reduces the transfer of vibration between the engine unit/cutting equipment and the machine′s handle unit.
GENERAL SAFETY PRECAUTIONS • Keep cutting equipment well lubricated and properly maintained! A poorly lubricated chain is more likely to break and lead to increased wear on the bar, chain and drive sprocket. • Chain pitch (inches). The spacing between the drive links of the chain must match the spacing of the teeth on the bar tip sprocket and drive sprocket. • Number of drive links.
GENERAL SAFETY PRECAUTIONS is very blunt it will produce wood powder and no chips or shavings. • See instructions under the heading Technical data for information about sharpening your chain. A sharp chain eats its way through the wood and produces long, thick chips or shavings. ! WARNING! Departure from the sharpening instructions considerably increases the risk of kickback.
GENERAL SAFETY PRECAUTIONS data to find the correct depth gauge setting for your particular chain. Tensioning the chain ! ! WARNING! The risk of kickback is increased if the depth gauge setting is too large! Adjustment of depth gauge setting • The cutting teeth should be newly sharpened before adjusting the depth gauge setting. We recommend that you adjust the depth gauge setting every third time you sharpen the cutting teeth.
GENERAL SAFETY PRECAUTIONS throttle you should see a distinct line of oil on the light surface. The position of the chain tensioning screw on our chain saws varies from model to model. See instructions under the heading What is what? to find out where it is on your model. Lubricating cutting equipment ! WARNING! Poor lubrication of cutting equipment may cause the chain to snap, which could lead to serious, even fatal injuries.
GENERAL SAFETY PRECAUTIONS Chain drive sprocket • Whether the tip of the bar is uneven or badly worn. If a hollow forms on the underside of the bar tip this is due to running with a slack chain. • To prolong the life of the bar you should turn it over daily. The clutch drum is fitted with a Spur sprocket (the chain sprocket is welded on the drum). Regularly check the degree of wear on the drive sprocket. Replace if wear is excessive. Replace the drive sprocket whenever you replace the chain.
ASSEMBLY Fitting the bar and chain ! • • • sprocket and that the chain is in the groove on the bar. Tighten the bar nut finger-tight. WARNING! Always wear gloves, when working with the chain. Check that the chain brake is in disengaged position by moving the front hand guard towards the front handle. • Tension the chain by turning the chain tensioning screw clockwise using the combination spanner. The chain should be tensioned until it does not sag from the underside of the bar.
ASSEMBLY chain saw when it is delivered. Contact your service workshop to change the size of the handle insert. Assembling the belt eyelet The chain saw is fitted with two eyelets on the rear edge of the chain saw cover, a rope eyelet and a belt eyelet. The rope eyelet is fitted on delivery. The belt eyelet is not fitted on delivery and is used by chain saw users as a simple way to fasten the saw to a belt or a harness. For more information, please see the Working techniques section.
FUEL HANDLING Fuel Petrol, litre Note! The machine is equipped with a two-stroke engine and must always be run using a mixture of petrol and twostroke oil. It is important to accurately measure the amount of oil to be mixed to ensure that the correct mixture is obtained. When mixing small amounts of fuel, even small inaccuracies can drastically affect the ratio of the mixture. ! WARNING! Always ensure there is adequate ventilation when handling fuel.
FUEL HANDLING Fueling ! • Loosen the cap by turning it counterclockwise. • Remove the cap. WARNING! Taking the following precautions, will lessen the risk of fire: Do not smoke and do not place any hot objects in the vicinity of fuel. Always stop the engine and let it cool for a few minutes before refuelling. When refuelling, open the fuel cap slowly so that any excess pressure is released gently. Tighten the fuel cap carefully after refuelling.
FUEL HANDLING Fuel safety • Never refuel the machine while the engine is running. • Make sure there is plenty of ventilation when refuelling or mixing fuel (petrol and 2-stroke oil). • Move the machine at least 3 m from the refuelling point before starting it. • Never start the machine: 1 If you have spilt fuel or chain oil on the machine. Wipe off the spillage and allow remaining fuel to evaporate. 2 If you have spilled fuel on yourself or your clothes, change your clothes.
STARTING AND STOPPING Starting and stopping ! WARNING! Note the following before starting: Warm engine Use the same starting procedure as for a cold engine but without setting the choke control in the choke position. Starting The chain brake must be engaged when the chain saw is started to reduce the chance of contact with the moving chain during starting. Never start a chain saw unless the bar, chain and all covers are fitted correctly. Otherwise the clutch can come loose and cause personal injuries.
STARTING AND STOPPING Note! Reactivate the chain brake by pushing the front hand guard back towards the front handle. The chain saw is now ready for use. ! WARNING! Long term inhalation of the engine’s exhaust fumes, chain oil mist and dust from sawdust can represent a health risk. • Never start a chain saw unless the bar, chain and all covers are fitted correctly. See instructions under the heading Assembly.
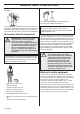
WORKING TECHNIQUES Before use: 2 3 Wear personal protective equipment. See instructions under the ”Personal protective equipment” heading. 1 Basic safety rules 4 9 1 Look around you: • To ensure that people, animals or other things cannot affect your control of the machine. • To make sure that none of the above might come within reach of your saw or be injured by falling trees. 5, 7 6 1 2 3 4 5 6 7 8 9 8 Check that the chain brake works correctly and is not damaged.
WORKING TECHNIQUES suddenly. Take great care when working on sloping ground. handle. Wrap your fingers and thumbs around the handles. You should use this grip whether you are right-handed or left-handed. This grip minimises the effect of kickback and lets you keep the chain saw under control. 3 7 Take great care when cutting a tree that is in tension. A tree that is in tension may spring back to its normal position before or after being cut.
WORKING TECHNIQUES 6 If you have to cut branches or the like that are above shoulder height, a working platform or scaffold tower is recommended. Working with tree service chain-saws from a rope and harness This chapter sets out working practices to reduce the risk of injury from tree service chainsaws when working at height from a rope and harness. While it may form the basis of guidance and training literature, it should not be regarded as a substitute for formal training.
WORKING TECHNIQUES point (front or rear) or at the sides. Where possible attaching the saw to centre rear mid-point will keep it clear of climbing lines and support its weight centrally down the operator’s spine. One-hand use of the chainsaw When moving the saw from any attachment point to another, operators should ensure it is secured in the new position before releasing it from the previous attachment point. • cut with the kickback zone at the tip of the chainsaw guide bar • ‘hold and cut’ sections.
WORKING TECHNIQUES There are five important factors you should consider before making a cut: 1 Make sure the cutting equipment will not jam in the cut. 2 Make sure the object you are cutting will not split. 3 Make sure the chain will not strike the ground or any other object during or after cutting. 4 Is there a risk of kickback? 5 Do the conditions and surrounding terrain affect how safely you can stand and move about? Cut all the way through the log from above.
WORKING TECHNIQUES - Finish by cutting from below so that the two cuts meet. Limbing Several factors affect this: • Lean of the tree • Bend • Wind direction • Arrangement of branches • Weight of snow When limbing thick branches you should use the same approach as for cutting. Cut difficult branches piece by piece. You may find you are forced to let the tree-top fall in its natural direction because it is impossible or dangerous to try to make it fall in the direction you first intended.
WORKING TECHNIQUES Next make the bottom cut so that it finishes exactly at the end of the top cut. The directional cuts should run 1/4 of the diameter through the trunk and the angle between the top cut and bottom cut should be 60° - 70°. trunk diameter. The uncut section of the trunk is called the felling hinge. The felling hinge controls the direction that the tree falls in.
WORKING TECHNIQUES Work out which side is in tension and where the point of maximum tension is (i.e. where it would break if it was bent even more). Decide which is the safest way to release the tension and whether you are able to do it safely. In complicated situations the only safe method is to put aside your chain saw and use a winch. General advice: Kickback only occurs if the kickback zone of the bar touches an object.
MAINTENANCE General The user must only carry out the maintenance and service work described in this Operator's Manual. More extensive work must be carried out by an authorized service workshop. Checking, maintaining and servicing chain saw safety equipment Note! All service and repair work on the machine demands special training. This is especially true of the machine’s safety equipment. If your machine fails any of the checks described below we recommend that you take it to your service workshop.
MAINTENANCE object. See the instructions under the heading Start and stop. • • Check that the throttle trigger and throttle lockout move freely and that the return springs work properly. • Start the chain saw and apply full throttle. Release the throttle control and check that the chain stops and remains stationary. If the chain rotates when the throttle trigger is in the idle position, contact your servicing dealer. Grasp the chain saw firmly, wrapping your fingers and thumbs around the handles.
MAINTENANCE Stop switch • use a muffler if the spark arrestor mesh is missing or defective. Start the engine and make sure the engine stops when you move the stop switch to the stop setting. Starter housing Muffler ! • WARNING! When the recoil spring is wound up in the starter housing it is under tension and can, if handled carelessly, pop out and cause personal injury. Never use a machine that has a faulty muffler. Care must be exercised when replacing the return spring or the starter cord.
MAINTENANCE • Undo the bolt in the centre of the pulley and remove the pulley. • Make a simple knot with approximately 10mm of the free end protruding (1). Turn the protruding part parallel to the starter cord and press down the knot into its position in the spring guide (2). 1 • • Hold the starter handle and pull the starter cord so that at least 10mm of the spring guide is visible. Press the starter handle cover at the same time and slide it out of the starter handle.
MAINTENANCE • Remove the cassette with the recoil spring from the starter. The filter can be cleaned more thoroughly by washing it in water and detergent. • Lubricate the recoil spring with light oil. Fit the cassette with recoil spring in the starter. Fit the starter pulley and tension the recoil spring. An air filter that has been in use for a long time cannot be cleaned completely. The filter must therefore be replaced with a new one at regular intervals.
MAINTENANCE Lubricating the bar tip sprocket clockwise will increase the oil flow, turning it anticlockwise will reduce the oil flow. Lubricate the bar tip sprocket each time you refuel. Use the special grease gun and a good quality bearing grease. The oil tank should become nearly empty by time fuel is used up. Be sure to refill the oil tank every time when refueling the saw. WARNING! The engine must not be running when making adjustments.
MAINTENANCE Temperature -5°°C or colder For running the machine in cold weather or powder snow, a special cover is available, which is mounted on the starter housing. This reduces the intake of cold air and prevents large amounts of snow from being sucked in. Part number: 579 38 48-01. CAUTION! If the special winterising kit has been fitted or any measures have been taken to increase the temperature these changes must be reversed before the machine is used in normal temperature conditions.
MAINTENANCE Maintenance schedule The following is a list of the maintenance steps that must be performed on the machine. Most of the items are described in the Maintenance section. Daily maintenance Weekly maintenance Monthly maintenance Clean the outside of the machine. Check the cooling system weekly. Check the brake band on the chain brake for wear. Replace when less than 0.6 mm (0,024 inch) remains at the most worn point. Check that the components of the throttle trigger work safely.
TECHNICAL DATA Technical data T540XP Engine Cylinder displacement, cm3 37,7 Cylinder bore, mm 40 Stroke, mm 30 Idle speed, rpm 3000 Power, kW/ rpm 1,8/10200 Ignition system Spark plug NGK CMR6H Electrode gap, mm 0,5 Fuel and lubrication system Fuel tank capacity, litre 0,34 Oil pump capacity at 9,500 rpm, ml/min 3-9 Oil tank capacity, litre 0,20 Type of oil pump Adjustable Weight Chain saw without bar or chain, empty tanks, kg 3,9 Noise emissions (see note 1) Sound power level, measu
TECHNICAL DATA Guide bar and saw chain combinations The following cutting attachments are approved for the model Husqvarna T540XP. Guide bar Saw chain Length, inch Pitch, inch Gauge, mm Max. nose radius 12 3/8 1,3 9T 14 3/8 1,3 9T 16 3/8 1,3 9T Type Length, drive links (no.
Original instructions 1153298-26 ´®z+U=r¶6u¨ ´®z+U=r¶6u¨ 2014-07-07