
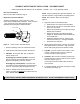
Owner's manual


- 12 -
CLEANING, SANITIZING, AND CARTRIDGE REPLACEMENT
9. CAUTION: Excessive concentrations of bleach will
damage plastic and rubber components. Rinse all
parts that contact bleach thoroughly with clean potable
water.
Mix sanitizing solution of 1.5 ml (1/3 teaspoon) of
household bleach and 3.8 L (1 gallon) of clean,
potable water in the bucket. Mix the solution well.
10. CAUTION: Tighten filter housings by hand only.
Do not use tools as they will over-tighten and damage
housings. Take care not to cut or pinch “O” rings.
Add 236 ml (one cup or 8 oz.) of sanitizing solution to
each of the filter housings and install them onto the
manifold (do not install filters at this time). Tighten
each filter housing by hand only.
11. Slowly open the feed water supply valve.
12. Open product water faucet. Keep it open for 5
seconds after water starts coming out.
13. Close the product water faucet.
14. Wait 30 minutes, open product water faucet and let
water flow 5 minutes.
15. After 5 minutes, close feed water supply valve and
allow water to flow until system pressure is relieved.
16. CAUTION: Do not attempt to remove filter housings
until water flow stops. This reduces pressure inside
the system so housings may be removed safely.
Remove the filter housings and dispose of the water.
Rinse housings and manifold ports thoroughly with
clean potable water.
17. CAUTION: Do not remove protective plastic bag from
filters until so instructed.
Open the top of the bag only enough to expose
the top cap and "O" rings. Place a small amount of
“O” ring lubricant on surface of each “O” ring.
Install the filter cartridges. Hold cartridge by its
protective plastic bag and insert the cartridge into the
manifold turning it 1/2 turn as it enters the port (See
Page II, Figure 1 for location of each cartridge).
Slide bag from cartridge and discard it.
CAUTION: Tighten filter housings by hand only.
Do not use tools as they will over-tighten and damage
housings. Take care not to cut or pinch “O” rings.
Replace each filter housing as each cartridge is
installed.
NO WATER FLOW MONITOR:
Complete Steps 26 - 29
OPTIONAL SMARTAP
®
WATER FLOW MONITOR:
Complete Steps 18 – 29
Smartap
®
Flow Monitor Operation Requirements:
Monitor must be reset to zero each time system is serviced
and cartridges replaced. If monitor is not reset, there is no
way to determine when filters were changed or if the
system is still operating within specifications.
Monitor is reset when the battery (Item 24) is disconnected
from the clip. Failure to replace battery may result in
yellow light when system is reconnected.
Installing a new battery when filter cartridges are replaced
ensures an accurate indication of system performance and
a continuing supply of high quality drinking water.
18. CAUTION: The wiring within the module cover
connects the monitor components. If wires, circuit
board, or connections are damaged and/or wetted,
monitor will not function.
Loosen three mounting bracket screws. Gently pull
module cover up and away from module body.
19. Disconnect the battery. The connection to the battery
is a snap type connector (See Figure 11).
20. Remove the battery by sliding it out of its holder.
21. Replace the battery with a new alkaline 9-volt
transistor battery (P/N 31300001).
22. Carefully slide the battery into its holder.
23. CAUTION: Verify battery connector alignment before
making connection (Figure 11).
Reconnect the battery by pressing the clip onto the
battery terminals.
24. Replace the module cover and tighten screws.
25. Turn feed water valve slowly to the open position.
26. Test battery connection by activating the monitor.
Pressing the test button or open the product water
faucet. If an indicator light illuminates, connection
is good.
NOTE: Close faucet after light illuminates. Test
confirms connection, not system status.