
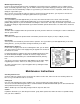
Owner's manual


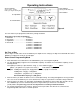

3
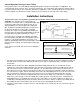
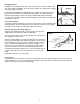
Installation Instructions
Figure 3
4. Attach the bypass valve to the control valve. Connect the inlet and outlet of the water softener to the plumbing in the
house. The control valve must not be submitted to temperatures above 71°C (110°F). When sweat fittings are used,
to avoid damaging the control valve, solder the threaded copper adapters to the copper pipe and then, using Teflon
tape, screw the assembly into the bypass valve.
CAUTION - do not use pipe thread compound as it may attack the material in the valve body.
5. Using teflon tape, screw the 1/2" hose barb into the drain port in the valve. Attach 1/2" drain hose to the hose barb
and tighten securely with a hose clamp. Run the drain line to a floor drain or a laundry drain. Complete any
necessary plumbing.
6. On twin tank units, pull the 3/8" brine line through the hole in the back of the brine tank. Connect the brine line to the
fitting on the side of the valve using the nut and ferrule. Tighten snugly.
7. Make sure the bypass valve is in the service position.
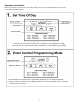
8. Plug the 24-volt transformer into a 120 VAC 60 Hz outlet. This valve has four positions: 1) Backwash
2) Brine/Rinse 3) Rapid Rinse and 4) Brine Refill. When the valve is in the Service position, the extra cycle button
(far left button as shown on Figure 4) must be pressed and held for 5 seconds before it activates. Press and hold
the extra cycle button for 5 seconds to advance the valve into the “1” Backwash position. Slowly turn on the water
supply and allow the unit to backwash until the air purges out of the tank and clears the system.
9. Press the extra cycle button to advance the valve to the “2” position. Press once more to advance to the “3” position.
Press once more to advance to the “4” Brine refill position. Wait until the water level reaches 6" in the brine tank.
Water can be added to the tank to speed up the filling but the valve should be in the Brine Refill position for a
minimum of two minutes to purge the air out of the injector set.
10. Press the extra cycle button to advance the valve from the Brine Fill position through service to the “2” position
Brine/Rinse position. Verify that water is being drawn from the tank. If not, repeat step 9.
11. Press the extra cycle button to advance the valve to the “3” Rapid Rinse position and allow water to run to drain for
2 minutes.
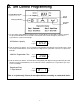
12. Press the extra cycle button to advance the valve to the “4” Brine Fill position until there is 6” of water in the brine
tank. Press the extra cycle button to advance the valve back into the service position indicated by the red dot in
upper left corner of the display.
13. Put 40 kgs of crystal water softener salt in the brine tank. The unit will automatically fill to the correct level when it
regenerates.
Optional Sanitization Procedure: We recommend that all new water conditioners be disinfected as part of the startup.
Sanitization is achieved by the application of chlorine in the regeneration cycle of the conditioner. A liquid solution of
5.25% sodium hypochlorite (commonly referred to as household bleach) is recommended as a suitable disinfectant. Use
only unscented products. For every cubic foot of resin in the softener, pour approximately two (2) tablespoons of sodium
hypochlorite into the brine well tube. The brine tank refill in Step 12 should add the correct amount of water to the brine
tank. If not, the water can be added manually now. Press and hold the EXTRA CYCLE button to begin a manual
regeneration. Press the EXTRA CYCLE button again to advance the valve to the Brine/Rinse position. Allow softener to
complete the Brine/Rinse cycle, then let the manual regeneration continue until the brine tank is refilled again with the
correct amount of water.
ALL STATE AND LOCAL GOVERNMENT CODES GOVERNING INSTALLATION OF THESE DEVICES MUST BE OBSERVED.