FCC ID:PZ8PANSAT600IR Report No: E02.0412.FCC.214N Test Date: April 11~12, 2002 Appendix F. ETL Inc. #584 Sangwhal-ri, Kanam-myon, Yoju-kun, Kyounggi-do, 469-880,Korea. User’s Manual Hyundai Digital Technology Co., Ltd.
PANSAT 600IR Digital Satellite Receiver User’s Manual E109000157A
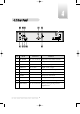
1. Introduction 1.1. Overview 1.2. Main Features 2 2. Safety/Precautions 2.1. Safety 2.2. Precautions 3 3. Check Point before Use 3.1. Accessories 3.2. The Satellite dish 5 4. Controls/Functions 4.1. Front Panel 4.2. Rear Panel 4.3. Remote Controller 6 5. Using Remote Controller 5.1. Batteries 5.2. Range Of Operation 12 6. How to Connect 14 7. Operation 7.1. Getting Started 7.2. Channel Editing 7.3. System Parameters 7.4. Transponder 7.5. Factory Set 7.6. Other Function on Remote Control 16 8.
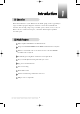
This Common Interface is your “Window to the World” giving you the opportunity to enjoy scrambled programs. Enjoy the rich choice of more than 4,000 different channels, broadcasting a large range of culture, sports, cinema, news, events, etc. This receiver is a technical masterpiece, assembled with the highest qualified electronic parts.
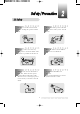
Be sure to read the user's manual before starting the operation of the unit. Do not touch the power cord with wet hands as it may cause electric shock. Never open the cover. It is very dangerous to touch the inside of the unit due to possible electric shock. Place the unit in a well ventilated and no-heat environment. When you do not use this unit for a long time, make sure that power cord is pulled out from the outlet. Also do not use a damaged power cord as it may cause fire or electric shock.
When installing the unit Install the unit horizontally. An uneven installation may cause the unit to be damaged. Do not put heavy items such as a TV on the unit. That may cause the unit to be damaged. Do not install the unit: Moving the unit to a hot area from a cold one will cause condensation. Do not operate the unit for one or two hours or until it has dried completely.
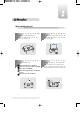
Accessories of the Unit User's manual : 1 Remote control : 1 QZ- 1 GHI ABC 3 MNO 5 6 TUV WXY 7 8 INFO al nu ma s er' Us DEF 2 JKL 4 PRS 9 AUDIO 0 GUIDE CH.LIST CH VOL MENU VOL CH RECALL TV/RADIO AUX IN EXIT SLEEP TV/SAT Batteries (AAA type) : 2 If any accessories listed above are missing, contact the sales representative where you purchased this unit. Your dish should be properly installed and azimuth and elevation must be precisely set up. This unit is working with DiSEqC 1.
Power To switch the receiver in “standby” mode or in power on mode. Standby/Power on Indication light Flashing red in “standby” and no light in power on mode. Remote Sensor Receives the infrared signal from remote control. Channel Display(4 Digit) - When you connect the power line of the receiver, the current time is displayed. - After programming, the program number is displayed. Menu To launch or terminate the menu application.
Vol. / To adjust the volume level or change the value of an item with preprogrammed values. The Key can be used as a backspace to cancel the numerical input. CH. / To change channel or cursor position on the application screen. Slot A, B PCMCIA-module : provided by a broadcaster for watching scrambled programs. Smart Card Slot Smart Card : provided by a broadcaster for watching IRDETO scrambled programs.
No. Name Connector Function 1. TV ANT IN IEC 169-2 female Input from terrestrial antenna. 2. RF OUT VHF 3-4 IEC 169-2 male Output to TV. 3. AUDIO L RCA cinch Left audio output. 4. AUDIO R RCA cinch Right audio output. 5. VIDEO RCA cinch Composite video output. 6. Digital Audio RCA cinch Digital Audio Output 7. S-VHS 8. RS-232C DB-9 Low speed serial port. 9. LNB INPUT IEC 169-24 female IF input from LNB to digital tuner. 10.
POWER : To switch into ‘standby’ or ‘power on’ mode. QZ- ABC 1 2 3 GHI JKL MNO 4 5 6 PRS TUV WXY 7 8 INFO MUTE : To turn the sound on/off. DEF Numeric Keys(0-9) : To select channels and input of channel numbers or characters. 9 AUDIO INFO. : To display the information of the current channel. 0 GUIDE CH.LIST CH VOL MENU AUDIO : To change the audio track, stereomono mode. VOL CH RECALL TV/RADIO AUX IN EXIT GUIDE : (EPG : Electronic Program Guide) To watch program information.
Left & Right : To move the cursor up and down in menu. can be used as a backspace to cancel the numerical input. QZ- ABC DEF 1 2 3 GHI JKL MNO 4 5 6 PRS TUV WXY 7 8 INFO ENTER : To select an item or to confirm a menu. Pause function. 9 MENU : To enter/exit the main menu. AUDIO 0 GUIDE CH.LIST EXIT : To return to previous status or menu. CH VOL MENU RECALL : To return to the previous chosen channel.
QZ- ABC 1 2 3 GHI JKL MNO 4 5 6 PRS TUV WXY 7 8 INFO BLUE : To delete a channel from the Channel List menu. To show extended program information in the EPG menu. To see Teletext Service Data. DEF IVORY : To add a new channel to the Channel List menu. 9 AUDIO ORANGE : To see variant channel lists for user's convenience in the Channel List menu. 0 GUIDE CH.LIST CH VOL MENU RED : To setup favorite channel lists in the Channel List menu.
How to insert a battery Open the cover at the top of the rear side of the remote control. Insert two AAA type batteries(1.5V) to be aligned with appropriate +/- polarity. Close the cover completely. When to replace a battery If the operational range of remote control is getting smaller, it indicates batteries are almost consumed. Replace both batteries together. How to replace a battery Check +/- polarities and insert batteries to be aligned with appropriate +/polarity.
The remote controller can be detected by the receiver within an angle of 30 degrees to the left or right. The transmission distance of the remote control is 7m in direct line of sight. Notes When the remote control is not operative Replace batteries with new ones and check AC power plug on the receiver. Abnormal operation Disturbance from peripheral devices might occur. Ensure that other products which might cause interference are placed further away from the receiver.
14
15
After your receiver is powered up, proceed with installation as follows: 1 Menu Language Setting When you plug in AC power, the following will be displayed on the front. Press POWER on remocon, the LED number will be displayed as follows; Press MENU key and position cursor on 'Language' column with Select language you want with or .
2 Help If you want to know how to use current part in the menu, use 'help' function. Select a content in the menu. For example, if you want to know about the installation menu, select installation. Screen Main Menu System Parameters Installation Language English Common Interface & CAS Information -Next, Press INFO. Then you can see the help window of the selected content.
Press MENU key and position the cursor on Installation column with and press . or Screen Main Menu System Parameters Installation Language English Common Interface & CAS Information -Next, By using or , select ‘LNB Configuration’ and press . Screen Installation LNB Configuration Antenna Setup Satellite Scan TP Edit/Scan Factory Set -Next, -Prev. Note : Enter 4-Digit password if need arise. The default password is ‘0000’ Select the Satellite you want to add with .
If you press , the selected Satellite will be added and the cursor will move to right window for detailed installation. Note : If you just want to edit the data of the satellite which is already contained in the receiver, press after you select the satellite. Select item you want to edit with or and change each parameter. - Position : When necessary, set the position(longitude) of the satellite with the numeric keys. - High L.O. / Low L.O. : Enter LNB oscillator frequency with the numeric keys.
4 Antenna Setup You need to position your antenna correctly for reception of the best signal. Press MENU key. Select ‘Installation’ with or , and press . Screen Installation LNB Configuration Antenna Setup Satellite Scan TP Edit/Scan Factory Set -Next, -Prev. Select ‘Antenna Setup’ with or and press . Screen Antenna Setup Tuner Level USER1 Horizontal-18V [1] 4,000 GHz 28,123 MSPS ---5/6 FEC Qual. Motor/Goto 0 ON Move/Save Stop Set Limit 5% 10% M Level Quality -Main, E 000.
Tuner Lock FEC 1/2, 2/3, 3/4, 5/6 or 7/8 Level over 30% Quality over 10% DiSEqC 1.2 Positioner Setting If you want to use an antenna positioner compatible with DiSEqC 1.2, please do the following : - Motor / Goto 0 Determine the kind of Motor & whether or not controlling it by using or . On Off Using DiSEqC Motor. Not using DiSEqC Motor. STAB Using the specific Motor supplied by Stab company. Determine the longitude of the satellite on LNB Configuration Menu.
5 Satellite Scan After finishing ‘Antenna Setup’, execute a ‘Satellite Scan’. Then you can get all channels in the pre-programmed TPs. This function can also be used to get the latest channel data while receiver is in use. Through this function, the receiver searches for all the available channels and saves them in the memory. Press MENU key. or Select ‘Installation’ with Select ‘Satellite Scan’ with , and press or .
If you press , the selected satellites will be scanned. Screen Satellite Scan TV: Good 2 Scanning:10% 33 34 35 36 SATLINK 972 2 APTN1 + 442074 NMTV Guangdong 2 17 18 19 20 37 38 39 Hunan 2 Hubei 1 Hubei 2 21 22 AsiaSat 2 84% [4] 3,720 GHz Radio: 0 DW 9 RDP ANTENA 1 RDP ESPECIAL NN ~ ¥xÆWaN¥<< TWN ~ ¥@uØ1/2Auø USA Hor. 4,420 -Select, M -Main, E -Prev. While scanning, you can see the following menu on the screen.
6 Select Channel You can change the current channel to any other channel you want. If you do not know the channel name, or you want to select a channel at random, you can navigate between channels with or (CH. Up/Down) till you find the channel you want. If you know the channel number, enter the number and wait 5 seconds for the channel to change. If you know the channel name, press CH LIST key then channel list will pop-up.
7 Volume Control While you are watching a program, press the current channel. or to control volume of Note : You can configure volume of each channel differently. Screen When necessary, press MUTE key to remove the sound of the program temporarily. Then, your receiver goes into mute condition and the volume bar will become red. Press MUTE key again to turn the sound on.
1 Favorite Channel You can set up favorite channel lists as you want. For example, if you want to set favorite channel lists as following. Favorite1 : 7 DWtv, 6 Hunan1 Favorite2 : 1 Fujian1 Favorite3 : 3 ANHUI TV, 5 Guangdong1 Firstly, set favorite1 channels. Press CH.LIST.
Select favorite1 with or and Press . Screen TV Channel List All List 1 2 3 4 5 6 7 8 Favorite State Fujian 1 Favorite 1 DIGITL VID Favorite 2 ANHUI TV Favorite 3 NMCHTV Guangdong 1 4 Favorite Hunan 1 DWtv Favorite 5 MCM -Select, / Rename. AsiaSat 2 [24] 4,847 GHz Horizontal-18V 28,123 MSPS Dban FAV.
Press RED. Screen TV Channel List All List 1 2 3 4 5 6 7 8 -Select, Press Favorite State Fujian 1 Favorite 1 DIGITL VID Favorite 2 ANHUI TV Favorite 3 NMCHTV Guangdong 1 4 Favorite Hunan 1 DWtv Favorite 5 MCM / Rename. AsiaSat 2 [24] 4,847 GHz Horizontal-18V 28,123 MSPS Dban FAV. DEL LOCK ADD MOVE MODE -Exit .
Select ‘Favorite 1’ with / . Screen TV Channel List All List 1 2 3 4 5 6 7 8 Favorite State Fujian 1 Favorite 1 DIGITL VID Favorite 2 ANHUI TV Favorite 3 NMCHTV Guangdong 1 4 Favorite Hunan 1 DWtv Favorite 5 MCM -Select, Rename. / AsiaSat 2 [24] 4,847 GHz Horizontal-18V 28,123 MSPS Dban FAV. DEL LOCK ADD MOVE MODE -Exit Press IVORY.
Press Press to delete a character. Screen TV Channel List All List 1 2 3 4 5 6 7 8 / Press MENU, EXIT or Favorite State Fujian 1 DRAMA DIGITL VID Favorite 2 ANHUI TV Favorite 3 NMCHTV Guangdong 1 4 Favorite Hunan 1 DWtv Favorite 5 MCM -Select, Rename. / AsiaSat 2 [24] 4,000 GHz Horizontal-18V 28,123 MSPS he Well FAV. DEL LOCK ADD MOVE MODE -Exit to finish the process. You have finished favorite1 channel setting. With similar way, you can set favorite2 ~ favorite5 channel list.
2 Channel List Mode Using this function, you can see variant channel lists which may enable you to edit and select channels more conveniently. Favorite Mode If you have set up favorite channel lists as the previous section, you can use them as following. Press CH.LIST. Screen TV Channel List AsiaSat 2 [20] 3,847 GHz Horizontal-18V 4,420 MSPS Hunan All List 1 2 3 4 5 6 7 8 Fujian 1 DIGITL VID ANHUI TV NMCHTV Guangdong 1 Hunan 1 DWtv MCM -Page Up/Down, -Watch, -Main, FAV.
You can see 'Channel List Mode' window. Select 'Favorite' with and select 'Favorite1' with or . / Screen TV Channel List AsiaSat 2 All List Channel List Mode [20] 3,847 GHz Fujian 1 Free+Scrambled Horizontal-18V DIGITL VID Favorite 1 4,420 MSPS ANHUI TV Favorite Hunan NMCHTV Satellite AsiaSat 2 Guangdong 1 AB Alphabet A FAV. DEL Hunan 1 1 2 3 4 5 6 7 8 DWtv MCM / Press LOCK ADD MOVE MODE -Exit .
Alphabet Mode Using this function, you can see the channel list which have same initial. This function is useful when you search specific channel among the list of thousands channels. For example, if you want to see the channel lists which start with 'D'.
Free only Mode Press ORANGE in the channel list and select first line with Select 'Free only' with / . / . Screen TV Channel List AsiaSat 2 All List Channel List Mode [20] 3,000 GHz Fujian 1 Free+Scrambled Horizontal-18V DIGITL VID Favorite 1 4,420 MSPS ANHUI TV Favorite Hunan NMCHTV Satellite AsiaSat 2 Guangdong 1 AB Alphabet A FAV. DEL Hunan 1 1 2 3 4 5 6 7 8 DWtv MCM / LOCK ADD MOVE MODE -Exit Select 'Favorite' or 'Satellite' or 'Alphabet' and press the selected 'free' channel list. .
Select 'Favorite' or 'Satellite' or 'Alphabet' and press selected free and scrambled channel list. . You can see the Screen TV Channel List AsiaSat 2 [24] 4,000 GHz Horizontal-18V 28,123 MSPS Deutsche Well All List 1 2 3 4 5 6 7 8 Fujian 1 DIGITL VID ANHUI TV NMCHTV Guangdong 1 Hunan 1 DWtv MCM -Page Up/Down, -Watch, -Main, FAV. DEL LOCK ADD MOVE MODE -Exit, 0 ~ 9 -Move Note : 'Scrambled' channel can be shown only with CI (Common Interface) model and CAS (Conditional Access System) model.
3 Lock Channel This menu enables you to prevent children from viewing programs unsuitable for their age. Press CH.LIST and Select the channel you want to lock with or and press GREEN. / or Then the selected channel is locked. Screen TV Channel List AsiaSat 2 [24] 4,000 GHz Horizontal-18V 28,123 MSPS Deutsche Well All List 1 2 3 4 5 6 7 8 Fujian 1 DIGITL VID ANHUI TV NMCHTV Guangdong 1 Hunan 1 DWtv MCM -Page Up/Down, -Watch, -Main, FAV.
Screen TV Channel List All List 1 2 3 4 5 6 7 8 Fujian 1 NMCHTV RAI Guangdong 1 Hunan 1 MCM DWtv TVE -Page Up/Down, Press MENU, EXIT or AsiaSat 2 [24] 4,000 GHz Horizontal-18V << Authorized! >> 28,123 MSPS Deutsche Well -Watch, -Main, FAV. DEL LOCK ADD MOVE MODE / -EXIT, 0 ~ 9 -Move to finish the process. Without entering your password, you cannot watch a locked channel's program.
4 Channel Order Setting You can organize the number or sequence of the channels. Press CH.LIST. Screen TV Channel List AsiaSat 2 [9] 3,773 GHz Horizontal-18V 5,632 MSPS Reuters Londo All List 17 18 19 20 21 22 23 24 Jiangxi 1 Jiangxi 2 LNTV WNS MEA LON SATLINK 972 2 APTN1 +442074 NMTV Guangdong 1 -Page Up/Down, -Watch, -Main, FAV. DEL LOCK ADD MOVE MODE / L -EXIT, 0 ~ 9 -Move Select the channel you want to move with press YELLOW.
Press YELLOW. Screen TV Channel List AsiaSat 2 [24] 4,000 GHz Horizontal-18V 28,123 MSPS Deutsche Well All List 9 10 11 12 13 14 15 16 RAI Internati RTPi TVE TV5-Asia uØoH-u1/4Ö¥x CS ªFËê>>Ú¥x ET «DoZ¥x USTV-I oé¥>>¥x JET -Page Up/Down, Press MENU, EXIT or 5 S FAV. DEL S LOCK ADD S MOVE MODE S -Watch, -Main, -EXIT, 0 ~ 9 -Move to finish the process. Delete Channel You can delete channels from the channel list. Press CH.LIST and select the channel you want to remove with or / .
Press BLUE. Note : If ‘password' window is risen as following picture, enter password with numeric keys (default password is' 0000'). Then you can delete the channel. If you don't want this window, change ‘Parental Control' set up in the ‘System Parameters' menu. Refer to the 'Parental control' in System parameters' in this manual for detail.
6 Add Channel Press CH.LIST. Screen TV Channel List AsiaSat 2 [24] 4,000 GHz Horizontal-18V 28,123 MSPS Deutsche Well All List 1 2 3 4 5 6 7 8 Fujian 1 DIGITL VID ANHUI TV NMCHTV Guangdong 1 Hunan 1 DWtv MCM -Page Up/Down, -Watch, -Main, FAV. DEL LOCK ADD MOVE MODE -EXIT, 0 ~ 9 -Move Press Ivory. Screen TV Channel List Satellite Name AsiaSat 2 TP Frequency [24] 4,000 GHz Polarization Horizontal-18V Symbol Rate 28,123 MSPS CH.
Move to 'Polarization' by pressing with or . and select Horizontal or Vertical Note : Please check whether LNB Power is ON in ‘Installation’ menu Move to 'Symbol Rate' by pressing with numeric keys. Move to 'CH. Name' by pressing with numeric keys. and enter the Symbol Rate value and enter the alphabetic characters For example : if you want to enter SAT-1, Note : Press to delete a character. Move to 'VIDEO PID' by pressing numeric keys.
1 Setting Age Restrictions This sub-menu allows you to set the age for parental locking and protect children from viewing programs unsuitable for their age. Press MENU key. Press or to select 'System Parameters' and press . Screen System Parameters Parental Control System Information Local time/Timer DL Saving No TV Type Press or 3 MULTI Aspect Ratio 4X3 Screen P/S / 18/07/2001 16:43 RF Channel -Prev.
Enter 4-digit password. Note : The default password is '0000' Screen System Parameters Parental Control PASSWORD System Information **** 18/07/2001 16:43 Local time/Timer << Authorized! >> DL Saving No TV Type 4X3 Screen P/S / Press or RF Channel 3 MULTI Aspect Ratio -Prev. to select ‘Age Limit’. Screen Parental Control Age Limit None Lock Channel Editing No Lock Installation No New Password ???? Verify Password Personal -Main, Press None 8 12 15 18 or ???? ***** -Prev.
2 Security Check You can set SECURITY CHECK to protect your current installation from being changed (location shift, deletion, adding etc.) or modifying of installed data. Press MENU key Press or to select 'System Parameters' and press Press or to select 'Parental Control' and press . . Enter 4-digit password. Note : The default password is '0000' Press Press Yes No or or to select ‘Lock channel Editing’, or ‘Lock Installation’. to select ‘Yes’, or ‘No’.
Press ~ numeric numbers to enter new password. Press ~ numeric numbers again to verify the new password. Note : When you forget your new password, please consult the shop where you bought the receiver or the nearest dealer. 4 Personal Information Setting You can enter your personal information, such as your name and address, etc. Press MENU key. Press or to select 'System Parameters' and press Press or to select 'Parental Control' and press . . Enter 4-digit password.
5 System Information You can check the current information about your receiver such as receiver’s software and hardware version or manufacturing date. Press MENU key. Press or to select 'System Parameters' and press . Screen System Parameters Parental Control System Information Local time/Timer DL Saving No TV Type Press or RF Channel 3 MULTI Aspect Ratio 4X3 Screen P/S / dd/mm/yyyy hh:mm -Prev. to select 'System Information' and press .
6 Setting Timer (Automatic power On/Off) You can pre-set the on/off time of your receiver. During your absence, you can record programs on your VCR. Press MENU key. Press or to select ‘System Parameters’, and press . Screen System Parameters Parental Control System Information Local time/Timer DL Saving No TV Type 4X3 Screen P/S 0 ~ 9 -Edit, or 3 MULTI Aspect Ratio Press 18/07/2001 16:43 RF Channel / -Prev. to select ‘Local Time/Timer’, and press .
Select 'CH. Number' with numeric keys or with or or . and enter channel number with Select ‘Start Time’ for your receiver power-on. For example : For 1st of February in the year of 2000, 7:30 P.M., Enter in sequence Select ‘Stop Time’ by pressing . Enter power off time in the same way as you entered ‘Start Time’ Select ‘Status’ and set ‘Yes/No’ with or . Note : 1. Without ‘STATUS’ being actuated (ON), Timer does not work. 2. If Prior time than current is entered, Timer does not work. 3.
8 Setting TV Type You can set your TV display mode with this sub-menu. Press MENU key. Press or to select ‘System Parameters’, and press Press or to select ‘TV Type’. Press Multi PAL NTSC or . to select ‘Multi’, ‘PAL’, or ‘NTSC’. When your TV is compatible with NTSC/PAL dual mode. When your TV is only for PAL reception. Regardless of satellite signal, the display will be done in PAL format. When your TV is only for NTSC reception.
9 Setting Aspect Ratio This sub-menu allows you to select your TV aspect ratio to 4:3 or 16:9 according to your wishes. Press MENU key. Press or to select ‘System Parameters’, and press Press or to select ‘Aspect Ratio’. Press or to select ‘4x3’ or ‘16x9’. 4x3 16x9 . When your TV is 4:3. When your TV is 16:9. Note : If you set 4 x 3 when the Satellite input signal is 16 x 9, the right and the left parts of the original picture may not be seen.
10 Setting Screen You can select the satellite input signal display mode. Press MENU key. Press or to select ‘System Parameters’, and press Press or to select ‘Screen’. Press or . to select ‘P/S’ or ‘L. Box’. When you set screen display boundary from Pan/Scan data of Satellite input signal. (For signal for 16x9 program) P/S You can watch 16 x 9 ratio screen by reducing original size vertically and horizontally. L.Box Note : 1. If you select ‘L.Box’, the screen might be distorted.
1 TP Edit / Scan After ‘LNB Configuration’ and ‘Antenna Setup’ procedure, when necessary, you can edit and/or add certain TPs (transponders) Press MENU key. or Select ‘Installation’ with , and press . Screen Installation LNB Configuration Antenna Setup Satellite Scan TP Edit/Scan Factory Set -Next, -Prev. Select ‘TP Edit/Scan’ with or , and press .
Select ‘Polarization’ by pressing value for selected TP with or and the set the proper . Select ‘Symbol rate’ by pressing and enter the symbol rate value for the selected TP with numeric keys . After entering all values of the TP parameters, move to ‘SCAN’ section (column) with and press for storing all the entered TP data. As a result, you can get the following menu showing the scanning process.
2 TP Delete Press MENU key. Select ‘Installation’ with or Select ‘TP Edit/Scan’ with or , and press , and press . . Screen TP Edit/Scan Good Satellite Name AsiaSat 2 TP Frequency [24] 4,000 GHz Polarization Horizontal - 18V Symbol Rate 28,123 MSPS Scan Free+Scrambled TP Delete 80% -Select, -Main, -Prev. Move to TP section (column) with to delete with or .
The status of the receiver will return to factory default parameters by using this function. Press MENU key. Select ‘Installation’ with or , and press . , and press . Screen Installation LNB Configuration Antenna Setup Satellite Scan TP Edit/Scan Factory Set -Next, Select ‘Factory Set’ with -Prev. or Screen Installation LNB Configuration Do you want to reset all data? Antenna Setup Q Yes / No Satellite Scan TP Edit/Scan Factory Set -Next, -Prev.
1 TV / SAT switching This function is used for receiving a signal through the RF modulator. If your receiver has no 'TV ANT IN' terminal in the rear panel, this key may not work. Press ‘TV/SAT’. The signal reception path will change to RF modulator and ‘TV/SAT’ LED on front panel will be lit. The signal output through the RF modulator will be as follows : TV/SAT LED ON OFF 2 Power ON TV ANT IN signal will be out. Decoded signal will be out through RF. Power OFF TV ANT IN signal will be out.
3 GUIDE(EPG:Electronic Program Guide) You can check the channel information on the channels of the transponder you are watching. Press GUIDE key, then the following menu will be displayed. Screen Program Guide 19:33 1 2 3 4 5 6 7 8 Fujian 1 DIGITL VID ANHUI TV NMCHTV Guangdong 1 Hunan 1 DWtv MCM -Current/Next, Current JOURNAL News - Sports Weather - Interview JOURNAL Ne.. 19:23 -Schedule, 19:53 -Extended Note : 1.
If you press YELLOW, you can see program schedule list of the selected channel. Screen Program Guide 19:39 19:27~19:57 JOURNAL News - Sports.. 19:57~20:27 In Focus [7] DWtv 11/03/1998 19:27~19:57 20:27~20:57 20:57~21:27 21:27~21:57 21:57~22:27 JOURNAL News-SportsWeather - Interview JOURNAL Nachrichten - .. Thema JOURNAL News - Busines.. Germany Live 22:27~22:57 JOURNAL Nachrichten - ..
You can set up automatic power on-off (Timer) on the program schedule list. After press YELLOW in the Guide( EPG) menu, select a program with / or / and press . Select between 'No', 'Once', 'Daily' or 'Weekly' of 'Status' with or . Screen Program Guide Program Guide 19:42 19:27~19:57 JOURNAL News - Sports.. Timer 19:57~20:27 In Focus 19:42 [7] DWtv 11/03/1998 20:27~20:57 JOURNA chrichten 20:27~20:57 JOURNAL Nachrichten - ..
4 Subtitle/Audio You can adjust the subtitle and audio condition/status of the current channel. Press ‘AUDIO’ and subtitle and audio related window will be displayed on the screen. Screen Subtitle/Audio Subtitle Track 2 of 10 [Swedish] Audio Track 1 of 8 [English] Audio Mode Stereo Dig.Output Non-compressed -Subtitle On/Off In this example, program spoken language is 'English' and user's selected subtitle language is 'Swedish'.
5 Teletext Teletext Service is text data service from Service Provider. It is available only when the satellite signal carries teletext service data. Press BLUE key and wait. If ‘*’ sign is pop up in the left upside of the screen as the following picture, wait until teletext service menu is displayed because ‘*’ means 'This program provides teletext service. So wait a moment'. Screen Teletext Service Data is displayed as following picture. Screen Select your interesting item with numeric keys.
6 Sleep Timer Your receiver will automatically power-off when the time you set is passed. Press ‘SLEEP’ key until the right time you want appears. Screen Note : 1. You can set SLEEP TIMER in 30 minute steps up to 150 minutes. 2. The SLEEP TIMER does not work while you are in ‘MENU’, ‘GUIDE’ or ‘CHANNEL LIST’.
7 Channel / Information Brief information is displayed, such as current channel type, name, local start/end time, guide information, current time, fav/normal mode, Audio mode and Audio ID. Press INFO, then the information bar will pop-up. Screen AsiaSat 2 5 DWtv ((( 1/8 (( ( 13:41 JOURNAL News-Busin... 13:26 ~ 13:56 Note : If you have no information : - Check your local time setting is correct. - Information is not sent by the channel provider.
To receive pay-TV channels you need a CA Module and a Smart card from the service provider (program distributor) of your preference. If you are subscribing to services from more than one service provider, you need to change different smart card or even different CA Modules. Since a smart card is connected to a single service provider, a limited range of channels will be available. Without the CA Module and the smart card, you can watch only ‘Free-to-Air’ programs.
You can check the status of CAM and smart card inserted in their slots. Press MENU key. Press . or , and select the Common Interface you want, then press Screen Main Menu System Parameters Installation Language English Common Interface & CAS Information -Next, Brief information on selected CAM will be displayed.
There may be various reasons for the abnormal operation of the unit. Therefore, if the unit does not work properly, check it according to the procedures shown in the table below : Problem Possible causes Remedy LED on front panel AC power cord disconnected. Connect power cord properly into the power socket. does not light. No Picture or sound. Wrong connection of the Connect two terminals correctly video/audio output to TV input with scart cable or RCA or RF cable. terminal.
System capabilities Fully DVB compliant LNB/Tuner input Connector IEC 169-24, female Frequency range 950MHz 2150MHz Signal level -65dBm 25dBm LNB supply 14/18V, max 400mA LNB switch control 22KHz DiSEqC Ver 1.
Remote control Power supply Rear Panel connectors RF modulator (PAL or NTSC) PAL G/I/K TV Type Physical Specification Code NEC-IR Operating condition up to 7 Meter Power consumption max 30W Supply voltage AC 120V Supply frequency 60 Hz Video out 1 X RCA cinch Audio L/R 2 X RCA cinch DIGITAL OUT 1 X RCA cinch Serial data 9pin D-sub Digital tuner input IEC 169 24 Loop-through Digital tuner IEC 169 24 Terrestrial ant input IEC 169 2 RF modulator output IEC 169 2 Connector IEC
LIMITED WARRANTY PANAREX Inc. warrants to the original purchaser that this product shall be free from defects in workmanship and material for one year from the date of original purchase. During this warranty period PANAREX will provide free of charge both parts and labor necessary to correct defects in workmanship or material.
RISK OF ELECTRIC SHOCK, DO NOT OPEN ATTENTION : RISQUE CHOC LELECTRIQUE-NE PAS OUVRIR CAUTION : TO REDUCE THE RISK OF ELECTRIC SHOCK This symbol is intended to alert the user to the presence of uninsulated "dangerous voltage" within the product's enclosure that may be of sufficient magnitude to constitute a risk of electric shock to persons. This symbol is intended to alert the user to the presence of important operating and maintenance(servicing) instructions in the literature accompanying the appliance.
Slots and openings in the cabinet are provided for ventilation and to ensure reliable operation of the product and to protect it from overheating, and these openings must not be blocked or covered. The openings should never be blocked by placing the product on a bed, sofa, rug, or other similar surface. The openings should not be placed in a built-in installation such as a bookcase or rack unless proper ventilation is provided or the manufacturer's instructions have been adhered to.
shock, or other hazards. Upon completion of any service or repair to this product, ask the service technician to perform safety checks to determine that the product is in proper operating condition. The product should be situated away from heat sources such as radiators, heat registers, stoves, or other products(including amplifiers) that produce heat. NOTE : This equipment has been tested and found to comply with the limits for a Class B digital device pursuant to Part 15 of the FCC Rules.