General Information ENGLISH Table of Contents General Information DTV Setup Safety Precaution .................................................................2 Contents of the Package .......................................................6 Products Sold Separately ......................................................6 Parts Names and Functions ..................................................7 Remote Control .....................................................................
General Information Safety Precaution The contents of this section are provided for the safety of users and their property. Please read the instructions carefully before using. ENGLISH Outdoor Antenna Grounding If an outside antenna or cable system is connected to the TV, be sure the antenna or cable system is grounded so as to provide some protection against voltage surges and built-up static charges. Section 810 of the National Electrical Code, ANSI/NFPA No.
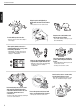
ENGLISH General Information Do not block ventilating slits with a table cloth. - Blocking the ventilation slits may produce internal heat increase, resulting in a fire. Please avoid touching the panel at the rear of TV as it is producing high temperature. - Direct contact with the hot surface may cause physical burns. Do not place any heat sources such as radiators and heat registers, etc. near the TV. - It may cause a fire. Do not place toys and cookies, etc.
General Information ENGLISH If there is a persistent accumulation of dusts or water on the plug, please make sure to wipe it off using a dry cloth. Do not use a damaged power cord or plug, or loose outlet. - It may cause electric shock or fire. - It may cause a fire or an electric shock. Firmly plug in the power cord so that it does not pull out. - An unstable connection may cause fire. Do not install in a place where there is oil, smoke, excessive humidity, or where water may be sprinkled on it.
ENGLISH General Information Unplug the product during lightning or thunderstorms and never touch the antenna cable. - It may cause a fire or an electric shock. Do not install the product on the floor. Keep the remote control batteries out of sight and out reach of children. - This may cause the TV to fall resulting in serious injury. - If your child swallows a battery, see your doctor immediately.
General Information Contents of the Package When opening the package, please ensure to check the following accessories. ENGLISH Antenna Cable (coaxial cable) Power Cord Remote Control & 2 batteries (1.5V AAA) User's Guide Products Sold Separately If you want to purchase the following accessories, consult a service center, electronics shops, or parts seller.
General Information Parts Names and Functions ENGLISH Front View - E200D/E230D MODEL * This product image may be a bit different from the actual product. Volume buttons Use these buttons to adjust sound levels. These buttons also serve as the cursors of Select/Adjust in Menu mode. Channel buttons Use these buttons to change channels. These buttons also serve as the cursors of Down and Up buttons in Menu mode. Select button Use this button to select each item from the menu mode.
General Information ENGLISH Rear View - E200D/E230D MODEL * This product image may be a bit different from the actual product. Power switch Composite Audio input terminal Power (AC) input terminal Antenna input terminal HDMI input terminal ✓ * - it's for technical service do not use at home.
General Information ENGLISH Front View - E201D/E231D MODEL * This product image may be a bit different from the actual product. Volume buttons Use these buttons to adjust sound levels. These buttons also serve as the cursors of Select/Adjust in Menu mode. Channel buttons Use these buttons to change channels. These buttons also serve as the cursors of Down and Up buttons in Menu mode. Select button Use this button to select each item from the menu mode.
General Information Rear View - E201D/E231D MODEL ENGLISH * This product image may be a bit different from the actual product. Power switch Composite Audio input terminal Power (AC) input terminal Antenna input terminal HDMI input terminal ✓ * - it's for technical service do not use at home.
General Information ENGLISH Remote Control 1. POWER/STANDBY 2. SOURCE Use this button to select External Input. 3 MUTE 4 PROGRAM EDIT 5. PREVIOUS PROGRAM 6. VOLUME 7. PROGRAM SELECTION 8. MENU SELECTION Use this button to select menu items. 9. LEFT/RIGHT MOVE/ADJUST Use these buttons to move between menu items or adjust each item. 10. MENU Use this button to call the OSD on the screen. 11. PICTURE MODE 12.INFO 13. EXIT Use this button to select end the osd. 14. SLEEP 15.
General Information Teletext & Fastext Function (See pages 29 for more details.) How to Insert Batteries in the Remote Controller 1 Press and hold open cover part and push to 2 Insert batteries with proper polarities of + and -. ENGLISH 1. TV-RADIO To switch between the TV channel and radio channel for Digital TV. 2. S.MODE To adjust the subtitle and audio condition/status of the current channel for Digital TV 3. WHITE rubber(PR EDIT) DTV : To add a new channel to the Channel List menu.
Connections Connecting Indoor/Outdoor TV Antenna(UHF/VHF) ENGLISH - Antenna or Cable service without cable box connections - For on optimum picture quality, adjust the direction of antenna if needed. VHF Antenna UHF Antenna Antenna cable ✓ When inserting a 75 ohm coaxial cable into the input connection, ensure the wire tip not to bend. ✓ If you experience poor signal reception, we recommend you purchase a signal amplifier for better picture quality.
Connections Before Connecting the Video/Audio Connections to External Devices... Please make sure to read the following instruction to enjoy the best picture quality. Best picture quality is displayed in the following order. ENGLISH HDMI HDMI,D-Sub FULL SCART COMPOSITE The superior picture quality starts from the far left side. How to Connect a VCR, Cable Receiver, Camcoder, Game Player 1. Connect the Video cable between Video output terminals of VCR or Cable receiver and Video input terminal of TV.
Connections How to Connect to a PC ENGLISH 1. Connect the PC signal cable (15-pin D-sub) between the output terminal of PC and the D-sub input terminal of TV. 2. Connect the Audio cable between Audio output terminal of PC and Audio input terminal for PC on the rear of TV. (Connect the jacks to terminals in the same color.) Audio Cable D-SUB cable ✓ If you use HDMI connection, you can enjoy better picture quality. ✓ This product supports Plug-and-Play function.
Connections Scart Connection to the External Input/Output * “F Scart” sends the TV broadcast signal received through an antenna to a set-top box and receives the descrambled signal back, which allows you to view TV broadcasts in AV Mode.
Connections HDMI Connection ENGLISH HDMI*1 (High Definition Multi media Interface) is the first all digital consumer electronics A/V interface that supports uncompressed standard. The HDMI terminal supports both video and audio information. To the HDMI™ input terminal, you can connect an EIA/CEA-861/861*2 compliant consumer electronic device, such as a Set Top Box or DVD player with HDMI or DVI output terminal.
Connections How to Select input source ENGLISH ANALOG TV - Terrestrial broadcasting for supporting analog PAL/SECAM system. F-SCART - For supporting composite video and RGB video signals. SCART connectors is used with many European video equipments. CVBS : For supporting the color shade(chrominance) and brightness(luminance) information into one video signal. HDMI : High Definition Multi media Interface that supports both video and audio information. PC : For supporting Personal Computer connection.
Picture Setup How to Select the Picture Mode ENGLISH Users can automatically adjust the picture mode according to the input mode. 1 2 3 4 5 6 Press MENU button. Menu items appear on the screen. Press button to select “Picture” Icon. “PICTURE MODE” is highlighted. buttons to select “mode”. Press / to move. Press / or buttons to select, then “V” mark to selected item. Press EXIT button to TV viewing or press MENU button to return to the previous menu.
Picture Setup How to Set Image Adjust in PC Mode Press MENU button. Menu items appear on the screen. 2 3 4 5 6 Press select button to select “Picture” and press Press button to select “PC” / ENGLISH 1 buttons move to “PC” “PC” menus appear. Press / or button to select “Auto Adjust”,”Phase”. “Position”,”Clock”,”Auto color” Press EXIT button to TV viewing or press NEW button to return to the previous menu ♦ Auto ADJUST : Horizontal/vertical positions are automatically adjusted.
Picture Setup/Sound Setup How to Set the Display Size ENGLISH Users can adjust the display scale as they want 1 2 3 4 5 Press MENU button. Menu items appear on the screen. Press / button to select size. Press Press Press buttons to move to “SIZE” / buttons to move to the desired item. button to select, then “V” mark appears Press EXIT button to TV viewing or press MENU button to return to the previous menu. ♦ WIDE - General broadcast picture is adjusted to 16:9.
Channel Setup Choosing the Your Languages Using the TV for the first time, users must select their preferred language preference in order to display main menus and sub menus, etc. ENGLISH 1 2 3 4 Press MENU button. Menu items appear on the screen. Press / buttons to move to “SET UP”. Press buttons to select “SET UP”. Press Press / buttons to move to “LANGUAGE”. buttons to select “LANGUAGE”.
Channel Setup How to Select Manual Scan ENGLISH Manual store enables to searching channels which the user want manually. 1 Press MENU button. Menu items appear on the screen. 2 3 4 5 Press Buttons to move to “SETUP” icon. Press button to select “CHANNEL” Icon. “COUNTRY” is highlighted. Press / Buttons to move to “MANUAL SCAN”. button to select “MANUAL SCAN”. Manual program menu appears. ☞ Search Press 6 press Press 7 8 / / buttons to move to “SYSTEM” button.
Channel Setup How to Set the Program Edit(Skip, Swap) Program edit enables users to edit the searched programs. Press MENU button. Menu items appear on the screen. 2 3 4 5 Press Press / or buttons to select ”Prog Edit” The program table appears on the screen. 6 Press / or to ch or swap / ENGLISH 1 Buttons to move to “SETUP” icon. Press buttons to select “CHANNEL” Icon. “COUNTRY” is highlighted. Press / Buttons to move to “Prog Edit”.
Function Setup ENGLISH How to Set Clock, Sleep Time, ON/OFF Time 1 2 3 4 5 Press Menu button. Menu items appear on the screen. Press / buttons to move to “TIMER”. Press buttons to select “SET TIME”. Press / buttons to move between Hour, Minute and Press buttons to set Hour, Minute. Press / buttons to set “ON or OFF Time” ✓ When the power supply(AC main power) is cut off, the clock is reset to the value before the Time set.
Function Setup How to Set Teletext in ATV You can use Teletext service in analog TV mode. If it is included in you receiving channels. Press “TTX/MIX” button and wait. If the “*” sign pops up left upside of the screen as the following picture, wait until the teletext service menu is displayed “*” means it provides teletext service. So wait a moment. 2 Select your interesting item with numeric keys.
DTV Channel Setup How to Search Automatically(IDTV) ENGLISH This function can be used to get the latest program data while the receiver is still in use. Through this function, the receiver searches for all the available program and saves them in the memory. 1 2 3 4 Press MENU button. Menu items appear on the screen. Press / Buttons to move to “SET UP” icon. Press button to select “CHANNEL” Icon. Press buttons to select AUTO SCAN” Automatic Scan menu appears, then auto scan activates.
DTV Channel Setup Press / buttons to select “Bandwidth”, and set the proper value for the selected Channel. 12 13 Press Up and Down buttons to move to “Scan”. 14 Press EXIT button to TV viewing or press MENU button to return to the previous menu. Press buttons to store all the entered channel data. Then you can get the following menu showing the scanning process. After scanning process, the first channel of scanned channel will be displayed.
DTV Channel Setup How to Use the Guide (EPG : Electronic Program Guide) ENGLISH Users can check the channel information on the channels of the transponder they are watching. Press MENU button. Menu items appear on the screen. 1 2 3 4 5 Press / Press button to select “CHANNEL” Icon. Press / 6 Press / buttons to select Channel, you can see the current or next program information of the selected channel. Buttons to move to “SET UP” icon. Buttons to move to “GUIDE”.
DTV Channel Setup How to Select Channel List Users can change the current channel to any other channel they want. ENGLISH Press MENU button. Menu items appear on the screen. 1 2 3 4 5 Press / Press button to select “CHANNEL” Icon. Press / 6 Press / (page up/down) or select the channel you want 7 8 Press buttons to move to “SET UP” icon. buttons to move to “CHANNEL LIST”.
DTV Channel Setup How to Use Channel List Mode ENGLISH Users can see variant channel lists which may enable them to edit and select channels more conveniently. Press CH. LIST button. Channel list appears on the screen. 1 2 3 Select required option by pressing the buttons to select you want. 4 Press buttons. You will see the following mode. Press “ORANGE” button, then you can see “Channel List Mode” window. / buttons, then Press / ♦ Favorite Mode : You can see favorite 1 ~ 5 channel list.
DTV Channel Setup How to Set the Channel Order Users can organize the number or sequence of the channels. ENGLISH 1 2 3 4 5 6 Press CH. LIST button. Channel list menu appears on the screen. Press / or / buttons to select the channel you want to move. Press “YELLOW” buttons. Press / or / buttons to move to the position you want to move. Press buttons, the channels will move automatically to the programmed position. Press MENU, EXIT or button to finish the process.
DTV Channel Setup How to Add Channel ENGLISH Users add channels they want. 1 Press CH. LIST button. Channel list menu appears on the screen. 2 3 4 5 Press WHITE buttons. The Add Digital Channel window will appear. Select the channels with / buttons or numeric keys. Select required option by pressing the keys to enter the proper value. Press MENU, EXIT or / buttons, then Press numeric button to finish the process.
DTV Channel Setup Setting Time offset Saving Time(Summer time) Users can use this menu when they want to change a TV channel to a Radio channel or vice versa. Press / buttons to select “Time offset” Press / buttons to select. ENGLISH 1 2 Then it will change “YES” or “NO” YES : Set for daylight saving function activated. The current time automatically moves on hour ahead. NO : Set for daylights saving function deactivated. The current time automatically moves on hour behind.
DTV Channel Setup How to Subtitle / Audio ENGLISH Users can adjust the subtitle and audio condition/status of the current channel. 1 Press “S.MODE” button. Subtle and audio related window will be displayed on the screen. 2 Select required option by pressing the buttons to select you want. / buttons, then Press / If Dig. Output is supported, you can select MPEG Stereo or Dolby Digital/AC3.
DTV Channel Setup How to Set Teletext in DTV You can use Teletext service in iDTV mode. The icon on the screen means your TV is receiving Teletext service. Press “TTX/MIX” button and wait. If the “*” sign pops up left upside of the screen as the following picture, wait until the teletext service menu is displayed “*” means it provides teletext service. So wait a moment. 2 Select your interesting item with numeric keys.
Appendix ENGLISH Troubleshooting Symptom Possible solution How can I install an antenna? Refer to page 13. TV screen is not clear after installing an indoors antenna. How can I view cable broadcasting? Symptom Neither picture nor sound comes up. Picture turns on slowly after power is on. Picture is distorted or frozen while watching digital broadcasting. Input Source information only appears on black screen. Poor reception on some channels. Black and white on some channels. TV won’t turn on.
Appendix Symptom Ensure to use the remote control or power button on the product to turn off your TV. If you unplug the power cord, the stand-by consumption power becomes 0 (zero), which causes the programmed time to be erased. Possible solution Too much noise occurs. Check whether the audio setting is in the Stereo mode. In the Stereo mode, the sound may be distorted in areas with poor reception or located far away from a TV broadcasting station.
Appendix Product Specifications E200D E230D Full-Scart 1 (A/V) 1 (A/V) Video (RCA) 1 (Audio included) 1 (Audio included) Antenna 1 (Analog TV/IDTV) 1 (Analog TV/IDTV) PC Connection jack D-SUB D-SUB Max.
Appendix E231D Full-Scart 1 (A/V) 1 (A/V) Video (RCA) 1 (Audio included) 1 (Audio included) Antenna 1 (Analog TV/IDTV) 1 (Analog TV/IDTV) PC Connection jack D-SUB D-SUB Max.
HYUNDAI IT SERVICE CENTER Germany/Austria/Benelux Sw/Fi/De POLAND Hyundai IT Germany SVC Hessenring 13B D-65546 Mörfelden-Walldorf Germany Tel Total : 0049 (0) 6105 4088 211 IT : 0049 (0) 180 50 70113 TV : 0049 (0) 180 59 13 134 e-mail : oezer.oeguen@ hyundai-service.eu Attn : Oezer Oeguen Zolter Sp. z o. o. Piaseczno 05-500 ul.żoytnia 1 Tel : 0048 (0) 22735 54 30 e-mail : A.Gorayski@zolter.com.