OWNER'S MANUAL A030A01JM-AAT Operation Maintenance Specifications OJM009001 All information in this Owner's Manual is current at the time of publication. However, Hyundai reserves the right to make changes at any time so that our policy of continual product improvement may be carried out. This manual applies to all Hyundai models and includes descriptions and explanations of optional as well as standard equipment.
EN hma cover.qxd 11/27/2006 5:07 PM Page 2 WARRANTIES FOR YOUR HYUNDAI VEHICLE Please consult your Owner's Handbook & Warranty Information booklet for your vehicle's specific warranty coverage. RESPONSIBILITY FOR MAINTENANCE The maintenance requirements for your new Hyundai are found in Section 7. As the owner, it is your responsibility to see that all maintenance operations specified by the manufacturer are carried out at the appropriate intervals.
A070A01A-AAT ! CAUTION: MODIFICATIONS TO YOUR HYUNDAI Your Hyundai should not be modified in any way. Such modifications may adversely affect the performance, safety or durability of your Hyundai and may, in addition, violate conditions of the limited warranties covering the vehicle. Certain modifications may also be in violation of regulations established by the U.S. Department of Transportation and other federal or state agencies.
A090A01A-AAT SAFETY AND VEHICLE DAMAGE WARNING This manual includes information titled as WARNING, CAUTION and NOTE. These titles indicate the following: ! WARNING: This indicates that a condition may result in harm, serious injury or death to you or other persons if the warning is not heeded. Follow the advice provided with the warning. ! CAUTION: This indicates that a condition may result in damage to your vehicle or its equipment if the caution is not heeded.
A110A01A-AAT VEHICLE DATA COLLECTION AND EVENT DATA RECORDERS Your Hyundai vehicle is equipped with many high technology, electronically controlled systems that help to ensure your vehicle operates properly and provides the performance that you expect. These systems utilize computers to monitor the operation of various systems and components and help to control their operation.
A040A01A-AAT FOREWORD Thank you for choosing Hyundai. We are pleased to welcome you to the growing number of discriminating people who drive Hyundais. The advanced engineering and high-quality construction of each Hyundai we build is something of which we're very proud. Your Owner's Manual will introduce you to the features and operation of your new Hyundai.
A100A03A-AAT Guide to Hyundai Genuine Parts 1. What are Hyundai Genuine Parts? Hyundai Genuine Parts are the same parts used by Hyundai Motor Company to manufacture vehicles. They are designed and tested for the optimum safety, performance, and reliability to our customers. 2. Why should you use genuine parts? F6 warranty.
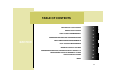
TABLE OF CONTENTS SECTION FEATURES OF YOUR HYUNDAI 1 DRIVING YOUR HYUNDAI 2 WHAT TO DO IN AN EMERGENCY 3 CORROSION PREVENTION & APPEARANCE CARE 4 VEHICLE MAINTENANCE REQUIREMENTS 5 DO-IT-YOURSELF MAINTENANCE 6 EMISSION CONTROL SYSTEMS 7 CONSUMER INFORMATION, REPORTING SAFETY DEFECTS & BINDING ARBITRATION OF WARRANTY CLAIMS 8 VEHICLE SPECIFICATIONS INDEX 9 10 F7
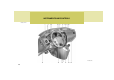
INSTRUMENTS AND CONTROLS B250A01JM-AAT B250A01JM-U F8
1. 2. 3. 4. 5. 6. 7. 8. 9. Panel Brightness Control Knob (Rheostat Switch) 4WD Lock Switch (If installed) Traction Control System (TCS) Switch (If installed) / Electronic Stability Control (ESC) Switch (If installed) Instrument Cluster Multi-Function Light Switch (If installed) Front Window Defroster (If installed) / Aux Outlet (If installed) Hazard Warning Light Switch Digital Clock Windshield Wiper/Washer Switch ! 10. Rear Defroster and Outside Rearview Mirror Heater Switch (If installed) 11.
YOUR VEHICLE AT A GLANCE B255A03JM-AAT INDICATOR SYMBOLS ON THE INSTRUMENT PANEL SRS (Airbag) Service Reminder Indicator (SRI) Turn Signal Indicator Lights Seat Belt Reminder Light and Chime Traction Control Indicator Light (If installed) Electronic Stability Control (ESC) Indicator Lights (If Installed) High Beam Indicator Light Cruise Indicator (If installed) Low Oil Pressure Warning Light SET Indicator Light (If installed) Parking Brake/Brake Fluid Level Warning Light 4WD System Warning Light (If
FEATURES OF YOUR HYUNDAI Fuel Recommendations ................................................ 1-2 Breaking in Your New Hyundai ..................................... 1-3 Keys .............................................................................. 1-3 Door .............................................................................. 1-4 Power Windows .......................................................... 1-12 Seats ...........................................................................
1FEATURES OF YOUR HYUNDAI 2 FUEL RECOMMENDATIONS B010A05A-AAT B010B01A-AAT B010D01A-AAT Use Unleaded Gasoline What About Gasohol? Do Not Use Methanol Gasohol (a mixture of 90% unleaded gasoline and 10% ethanol or grain alcohol) may be used in your Hyundai. However, if your engine develops driveability problems, the use of 100% unleaded gasoline is recommended. Fuels with unspecified quantities of alcohol, or alcohols other than ethanol, should not be used.
FEATURES OF YOUR HYUNDAI BREAKING IN YOUR NEW HYUNDAI B010E01A-AAT B020A01S-AAT Gasolines for Cleaner Air During the First 1,200 Miles (2,000 Km) To help contribute to cleaner air, Hyundai recommends that you use gasolines treated with detergent additives, which help prevent deposit formation in the engine. These gasolines will help the engine run cleaner and enhance performance of the Emission Control System.
1FEATURES OF YOUR HYUNDAI DOOR LOCKS 4 B030B01A-AAT B030C01JM-AAT Record Your Key Number ILLUMINATED IGNITION SWITCH (If installed) B040A01A-AAT B030B01HR A code number is stamped on the number plate that came with the keys to your Hyundai. This key number plate should not be left with the keys but kept in a safe place, not in the vehicle. The key number should also be recorded in a place where it can be found in an emergency.
FEATURES OF YOUR HYUNDAI 1 5 B040B02JM-AAT B040C02O-AAT Locking, unlocking front doors with a key Locking From the Outside (Driver's side - without key) NOTE: UNLOCK LOCK HJM2007 o The door can be locked or unlocked with a key. o Lock the door by turning the key toward the front of the vehicle and unlock it by turning the key toward the rear. ❈ If your vehicle is installed with the remote keyless entry system, there is no key lock on the front passenger's door.
1FEATURES OF YOUR HYUNDAI 6 B040D01O-AAT B045C01JM-AAT Locking From the Inside (Driver's side) Locking From the Outside (Passenger's side - Without key) UNLOCK LOCK HJM2008 To lock the door from the inside, simply close the door and push the lock switch to the "LOCK" position. NOTE: o When pushing the lock switch of the driver's door to the "LOCK" position, only the driver's door can be locked. o When the door is locked, the red mark on the switch is not visible.
FEATURES OF YOUR HYUNDAI 1 7 B045D01JM-AAT B040E04A-AAT B040G03HP-AAT Locking From the Inside (Passenger's side) Child-Protector Rear Door Lock Central Door Locks Driver's door LOCK HJM2010 UNLOCK Passenger's door HJM2011 HJM2008-U To lock the door from the inside, simply close the door and push the lock switch to the "LOCK" position. When this is done, neither the outside nor the passenger's inside door handles can be used.
1FEATURES OF YOUR HYUNDAI 8 o If the door is locked/unlocked multiple times in rapid succession with either the vehicle key or door lock switch, the system may stop operating temporarily in order to protect the circuit and prevent damage to system components. B070F03O-AAT KEYLESS ENTRY SYSTEM (If installed) NOTE: This device complies with Part 15 of the FCC rules.
FEATURES OF YOUR HYUNDAI THEFT-ALARM SYSTEM NOTE: The transmitter will not work if any of following occur: - The ignition key is in ignition switch. - You exceed the operating distance limit (393.7 inches [10 m]). - The battery in the transmitter is weak. - Other vehicles or objects may be blocking the signal. - The weather is extremely cold. - The transmitter is close to a radio transmitter such as a radio station or an airport which can interfere with normal operation of the transmitter.
1FEATURES OF YOUR HYUNDAI 10 NOTE: o If any door, the tail gate or engine hood remains open, the system will not be armed. If this happens, rearm the system as described above. o If the "LOCK" button is pressed once more within 4 seconds after pushing the "LOCK" button on the transmitter, the siren will sound once to indicate that the system is armed. ! CAUTION: Do not arm the system until all passengers have left the car.
FEATURES OF YOUR HYUNDAI 1 11 B075E01JM-AAT B070E02HP-AAT Panic Warning Replacing the battery When the transmitter's battery begins to get weak, it may take several pushes on the button to lock or unlock the doors. Replace the battery as soon as possible. Battery Battery type : CR2032 PANIC Replacement instructions: Case B070E01JM 2. Remove the old battery from the case and note the polarity.
1FEATURES OF YOUR HYUNDAI 12 POWER WINDOWS B060A03Y-AAT Close HJM2017 B060A03JM The power windows operate when the ignition key is in the "ON" position. The main switches are located on the driver's armrest and control the front and rear windows on both sides of the vehicle. The windows may be opened by depressing the appropriate window switch and closed by pulling up the switch. To open the window on the driver's side, press the switch halfway down. The window moves as long as the switch is operated.
FEATURES OF YOUR HYUNDAI SEATS 13 B080A02A-AAT B080B03A-AAT ADJUSTABLE FRONT SEATS Adjusting Seat Forward and Rearward ! ! WARNING: After adjusting the seat, always check that it is securely locked into place by attempting to move the seat forward or reverse without using the lock release lever. Sudden or unexpected movement of the driver's seat could cause you to lose control of the vehicle resulting in an accident. WARNING: o Never adjust the driver’s seat while the vehicle is moving.
1FEATURES OF YOUR HYUNDAI 14 Now lean back until the desired seatback angle is achieved. To lock the seatback into position, release the recliner control lever. ! B080D02JM-AAT B080E01JM-GAT Adjustable Headrests Forward and backward adjustment (if installed) WARNING: Riding with a reclined seatback increases your chance of serious or fatal injuries in the event of a collision or sudden stop. The protection of your restraint system (seat belts and airbags) is greatly reduced by reclining your seat.
FEATURES OF YOUR HYUNDAI 1 15 ! B083D01NF-AAT B080F02A-AAT Active Headrests (If Installed) Seat Cushion Height Adjustment (Driver's Seat Only) (If Installed) WARNING: HNF2041-1 B080D01JM o For maximum effectiveness in case of an accident the headrest should be adjusted so the middle of the headrest is at the same height as the top of the occupant's eyes. For this reason, the use of a cushion that holds the body away from the seatback is not recommended.
1FEATURES OF YOUR HYUNDAI 16 B080E01F-AAT B100A02JM-AAT Lumbar Support Control (Driver's seat only) (If Installed) SEAT WARMER (If installed) ! WARNING: It is recommended that the seat heater not be used when elderly people or people who are ill occupy the seat. Also, do not use the seat warmer if the occupant is sleeping. SOFT FIRM HJM2042 OJM019004 The driver's seat is equipped with adjustable lumbar support. To increase the amount of lumbar support, pull the lever forward.
FEATURES OF YOUR HYUNDAI 1 17 B085A01JM-GAT B085B02JM-AAT REAR SEAT Adjusting Seatback Angle Folding Rear Seatback For convenience, the seatbacks and seat cushions may be folded down and up. HJM2048 Seatback folding lever NOTE: OJM019005 To recline the seatback, pull the seatback folding lever and release it after the desired seatback angle is achieved. When you recline the seatback to desired position, always be sure it has locked into position. ! OJM019006 1.
1FEATURES OF YOUR HYUNDAI 18 o When you return the seatback to its upright position, always be sure it is locked into position by pulling and pushing on the top of the seatback. ! WARNING: o The purpose of the fold-down rear seat back is to allow you to carry larger items than could otherwise be accommodated. Never allow passengers to sit on the cargo area while the car is moving. This is not a proper seating position and no seat belts are available for use when the seat back is folded down.
FEATURES OF YOUR HYUNDAI SEAT BELTS 19 B150A02S-AAT SEAT BELT PRECAUTIONS ! WARNING: All occupants of the vehicle must wear their seat belts at all times. Seat belts and child restraints reduce the risk of serious or fatal injuries for all occupants in the event of a collision or sudden stop. Without a seat belt, occupants could be shifted too close to a deploying airbag, strike the interior structure or be thrown from the vehicle. Properly worn seat belts greatly reduce these hazards.
1FEATURES OF YOUR HYUNDAI 20 B150E01A-AAT Injured Person A seat belt should be used when an injured person is being transported. When this is necessary, you should consult a physician for recommendations. B150F01A-AAT One Person Per Belt Two people (including children) should never attempt to use a single seat belt. This could increase the severity of injuries in case of an accident.
FEATURES OF YOUR HYUNDAI 1 21 B160C01A-AAT B170A05Y-AAT Keep Belts Clean and Dry HEIGHT ADJUSTABLE FRONT SEAT SHOULDER BELT Seat belts should be kept clean and dry. If belts become dirty, they can be cleaned by using a mild soap solution and warm water. Bleach, dye, strong detergents or abrasives should not be used because they may damage and weaken the fabric.
1FEATURES OF YOUR HYUNDAI 22 B180A02A-AAT SEAT BELT-Driver's 3-Point System with Emergency Locking Retractor To Fasten Your Belt B180A01L To fasten your seat belt, pull it out of the retractor and insert the metal tab into the buckle. There will be an audible "click" when the tab locks into the buckle. The seat belt automatically adjusts to the proper length only after the lap belt portion is adjusted manually so that it fits snugly around your hips.
FEATURES OF YOUR HYUNDAI 1 23 NOTE: B200A01A-AAT Although the combination retractor provides the same level of protection for seated passengers in either emergency or automatic locking modes, it is recommended that seated passengers use the emergency locking feature for improved convenience. The automatic locking function is intended to facilitate child restraint installation.
1FEATURES OF YOUR HYUNDAI 24 B210A01A-AAT B220A02JM-AAT To Release the Seat Belt SEAT BELTS - Center Rear Seat 3Point System With Combination Locking Retractor If there is a sudden stop or impact, the belt will lock into position. It will also lock if you try to lean forward too quickly. (c) (a) B210A01L The seat belt is released by pressing the release button in the locking buckle. When it is released, the belt should automatically draw back into the retractor.
FEATURES OF YOUR HYUNDAI 1 25 B220C01Y-AAT ! ! WARNING: o Never unlock the metal tab (a) and the buckle (b) with the following exceptions. (1)In case of folding rear seatbacks down. (2)If transporting an object on the rear seat may cause damage to the rear seat center belt. o Always lock metal tab (a) into buckle (b) immediately after returning the rear seatbacks to an upright position. This portion of the rear center seat belt should only be unbuckled when the rear seatback is folded down.
1FEATURES OF YOUR HYUNDAI 26 CHILD RESTRAINT SYSTEM B230A05O-AAT Children riding in the car should sit in the rear seat and must always be properly restrained to minimize the risk of injury in an accident, sudden stop or sudden maneuver. According to accident statistics provided by the National Highway Traffic Safety Administration (NHTSA), children are safer when properly restrained in the rear seats than in the front seat.
FEATURES OF YOUR HYUNDAI 1 27 B230C07O-AAT ! WARNING: o Never leave children unattended in a vehicle – not even for a short time. The car can heat up very quickly, resulting in serious injuries to children inside. Even very young children may inadvertently cause the vehicle to move, entangle themselves in the windows, or lock themselves or others inside the vehicle. o Never allow two children, or any two persons, to use the same seat belt. o Children often squirm and reposition themselves improperly.
1FEATURES OF YOUR HYUNDAI 28 To install the child restraint seat tether Tether anchor cover Rear luggage compartment floor Child Restraint Hook Holders Child Restraint Hook Holder B230C05JM 1. Open the tether anchor cover on the rear luggage compartment floor. Tether Strap Hook Front of Vehicle B230B01JM 2. Route the child restraint seat tether strap over the seatback.
FEATURES OF YOUR HYUNDAI 1 29 ! WARNING: o Never mount more than one child restraint to a single tether or to a single lower anchorage point. The increased load caused by multiple seats may cause the tethers or anchorage points to break, causing serious injury or death. B230D06E-AAT Securing the Child Restraint Seat with the Child Seat Lower Anchor system LATCH stands for "Lower anchors and Tethers for Children".
1FEATURES OF YOUR HYUNDAI 30 Lower Anchor Position Indicator Lower Anchor B230D02JM Child restraint symbols are located on the left and right rear seat backs to indicate the position of the lower anchors for child restraints. Follow the child seat manufacturer's instructions to properly install safety seats with LATCH or LATCH-compatible attachments.
FEATURES OF YOUR HYUNDAI 1 31 B230G02O-AAT Child Restraint System Installation on Outboard Rear Seats Also, double check to be sure that the retractor has engaged the Automatic Locking feature by trying to extend webbing out of the retractor. If the retractor is in the Automatic Locking mode, the belt will be locked. After installation of the child restraint system, try to move it in all directions to be sure the child restraint system is securely installed.
1FEATURES OF YOUR HYUNDAI 32 B180B05JM-AAT Driver's airbag Pre-tensioner Seat Belt Your Hyundai vehicle is equipped with driver's and front passenger's pre-tensioner seat belts. The purpose of the pre-tensioner is to make sure that the seat belts fit tightly against the occupant's body in certain frontal collisions. The pre-tensioner seat belts may be activated with or without airbag activation, depending on the circumstances of a collision. 1 Passenger's airbag 2 3 1LDE3100 1.
FEATURES OF YOUR HYUNDAI 1 33 NOTE: o Both the driver's and front passenger's pre-tensioner seat belts will be activated in certain frontal collisions. The pre-tensioner seat belt may be activated with or without airbag activation, depending on the circumstances of a collision. The pretensioners will not be activated if the seat belts are not being worn at the time of the collision.
1FEATURES OF YOUR HYUNDAI 34 ADVANCED SUPPLEMENTAL RESTRAINT (AIRBAG) SYSTEM (SRS) B240A03E-AAT Driver's Airbag B240A01JM Your Hyundai is equipped with an advanced Supplemental Restraint (Airbag) System and lap/shoulder belts at both the driver and passenger seating position. The indications of the system's presence are the letters "SRS AIRBAG" embossed on the airbag pad cover in the steering wheel and the passenger's side front panel pad above the glove box.
FEATURES OF YOUR HYUNDAI 1 35 ! WARNING: o Modification to the seat structure can adversely affect the seat position sensor and cause the airbag to deploy at a different level than should be provided. o Do not place any objects underneath the front seats which could damage the seat position sensor or interfere with the occupant classification system. o Do not place any objects that may cause magnetic fields near the front seats. These may cause a malfunction of the seat position sensor.
1FEATURES OF YOUR HYUNDAI 36 ! ! WARNING: o Airbags can only be used once – have an authorized Hyundai dealer replace the airbag immediately after deployment. o The SRS is designed to deploy the front airbags only when an impact is sufficiently severe and when the impact angle is less than 30° from the forward longitudinal axis of the vehicle. The front airbags will not deploy in side, rear or rollover impacts. Additionally, the airbags will only deploy once. Seat belts must be worn at all times.
FEATURES OF YOUR HYUNDAI 1 37 B240B02JM-AAT ! SRS Components and Functions WARNING: o For maximum safety protection in all types of crashes, all occupants including the driver should always wear their seat belts whether or not an airbag is also provided at their seating position to minimize the risk of severe injury or death in the event of a crash. Do not sit or lean unnecessarily close to the airbag while the vehicle is in motion.
1FEATURES OF YOUR HYUNDAI 38 B240B01L The airbag modules are located both in the center of the steering wheel and in the front passenger's panel above the glove box. When the SRSCM detects a sufficiently severe impact to the front of the vehicle, it will automatically deploy the front airbags. B240B02L Upon deployment, tear seams molded directly into the pad covers will separate under pressure from the expansion of the airbags. Further opening of the covers then allows full inflation of the airbags.
FEATURES OF YOUR HYUNDAI 1 39 Passenger's Airbag Passenger's Airbag B240B01JM ! CAUTION: When installing a container of liquid air freshener inside the vehicle, do not place it near the instrument cluster nor on the instrument panel surface. If there is any leakage from the air freshener onto these areas (instrument cluster, instrument panel or air ventilator), it may damage these parts. If the liquid from the air freshener does leak onto these areas, wash them with water immediately.
1FEATURES OF YOUR HYUNDAI 40 B990A03JM-AAT OCCUPANT CLASSIFICATION SYSTEM Your vehicle is equipped with an occupant classification system in the front passenger's seat. The Occupant Classification system is designed to detect the presence of a properly-seated front passenger and determine if the passenger's front airbag should be enabled (may inflate) or not. The driver's front airbag is not affected or controlled by the Occupant Classification system.
FEATURES OF YOUR HYUNDAI 1 41 Always be sure that you and all vehicle occupants are seated and restrained properly (sitting upright with the seat in an upright position, centered on the seat cushion, with the person's legs comfortably extended, feet on the floor, and wearing the safety belt properly) for the most effective protection by the air bag and the safety belt. o The OCS may not function properly if the passenger takes actions which can defect the detection system.
1FEATURES OF YOUR HYUNDAI 42 B990A08O o NEVER put a heavy load in the front passenger seat. B990A07O B990A02O o NEVER sit with hips shifted towards the front of the seat. - NEVER lean on the center console. - NEVER sit on one side of the front passenger seat. Proper position B990A03O o NEVER excessively recline the front passenger seatback. B990A05O - NEVER place feet on the dashboard.
FEATURES OF YOUR HYUNDAI 1 43 When an adult is seated in the front passenger seat, if the PASSENGER AIR BAG "OFF" indicator is on, turn the ignition key to "LOCK" and ask the passenger to sit properly (sitting upright with the seat back in an upright position, centered on the seat cushion with their seat belt on, legs comfortably extended and their feet on the floor). Restart the engine and have the person remain in that position.
1FEATURES OF YOUR HYUNDAI 44 B990B02JM-AAT ! WARNING: o Do not sit on sharp objects such as tools when occupying the front passenger seat. This can adversely affect the occupant classification system. o Do not use accessory seat covers on the front seats. o Accident statistics show that children are safer if they are restrained in the rear, as opposed to the front seat.
FEATURES OF YOUR HYUNDAI 1 45 B990C01LZ-GAT ! Side airbag sensor HTB072 ! WARNING: o The side impact airbag is supplemental to the driver's and the passenger's seat belt systems and is not a substitute for them. Your seat belts must be worn at all times while the vehicle is in motion. The airbags deploy only in certain side impact conditions severe enough to cause significant injury to the vehicle occupants.
1FEATURES OF YOUR HYUNDAI 46 B240C02JM-AAT SRS Care o The SRS is virtually maintenance free and there are no parts you can safely service by yourself. If the SRS SRI (Service Reminder Indicator) does not illuminate, or continuously remains on, have your vehicle immediately inspected by your Hyundai dealer. o Any work on the SRS system, such as removing, installing, repairing, or any work on the steering wheel must be performed by a qualified Hyundai technician.
FEATURES OF YOUR HYUNDAI 1 47 B240D02JM-AAT Additional Safety Precautions o Never let passengers ride in the cargo area (trunk) or on top of a folded-down back seat. All occupants should sit upright, fully back in their seats with their seat belts on and their feet on the floor. o Passengers should not move out of or change seats while the vehicle is moving.
1FEATURES OF YOUR HYUNDAI 48 INSTRUMENT CLUSTER AND INDICATOR LIGHTS B260A02JM-AAT 1 11 2 3 4 12 13 14 15 5 16 17 18 6 7 2 8 9 10 19 20 22 24 25 26 21 23 OJM019016-U
FEATURES OF YOUR HYUNDAI 1 49 1. 2. 3. 4. Tachometer Turn Signal Indicator Light Seat Belt Warning Light Supplemental Restraint (AirBag) System Service Reminder Indicator (SRI) 5. Speedometer 6. Parking Brake/Low Brake Fluid Level Warning Light 7. Low Oil Pressure Warning Light 8. High Beam Indicator Light 9. Engine Temperature Warning Light 10. Fuel Gauge 11. Tail Gate Open Warning Light 12.
1FEATURES OF YOUR HYUNDAI 50 WARNING AND INDICATOR LIGHTS B260B01JM-AAT SRS (Airbag) Service Reminder Indicator (SRI) The SRS service reminder indicator (SRI) comes on for about 6 seconds after the ignition key is turned to the "ON" position or after the engine is started, after which it will go out. This light also comes on when the SRS is not working properly.
FEATURES OF YOUR HYUNDAI 1 51 B260H02A-AAT Parking Brake/Low Brake Fluid Level Warning Light ! WARNING: If you suspect brake trouble, have your brakes checked by a Hyundai dealer as soon as possible. Driving your car with a problem in either the brake electrical system or brake hydraulic system is dangerous, and could result in a serious injury or death.
1FEATURES OF YOUR HYUNDAI 52 B260L02HP-GAT Door ajar warning light and chime (If Installed) The door ajar warning light warns you that a door is not completely closed and the chime warns you that the key is in the ignition switch. NOTE : The warning chime only sounds whenever the key is in the ignition switch and the driver's side front door is open simultaneously. The chime sounds until the key is removed from the ignition switch or the driver's side front door is closed.
FEATURES OF YOUR HYUNDAI 1 53 B265C01O-AAT Traction Control Indicator Lights (If installed) B260Q01E-GAT The traction control indicators change operation according to the ignition switch position and whether the system is in operation or not. They will illuminate when the ignition key is turned to the "ON" position, but should go out after three seconds. If the TCS or TCSOFF indicator stays on, take your car to your authorized Hyundai dealer and have the system checked.
1FEATURES OF YOUR HYUNDAI 54 B260W02JM-GAT B265W02JM-GAT Low tire pressure telltale (If installed) The low tire pressure telltale comes on for 3 seconds after the ignition key is turned to the "ON" position. If the warning light does not come on, or continuously remains on after comming on for about 3 seconds when you turned the ignition key to the "ON" position, the Tire Pressure Monitoring System is not working properly.
FEATURES OF YOUR HYUNDAI INSTRUMENT CLUSTER 1 55 B280A01A-AAT B330A03A-AAT B300A01A-AAT FUEL GAUGE TACHOMETER SPEEDOMETER B330A01JM OJM019017 The needle on the gauge indicates the approximate fuel level in the fuel tank. The fuel capacity is given in Section 9. The tachometer registers the speed of your engine in revolutions per minute (rpm). ! CAUTION: The engine should not be raced to such a speed that the needle enters the red zone on the tachometer face.
1FEATURES OF YOUR HYUNDAI TRIP COMPUTER 56 B310B02JM-GAT B400B02JM-GAT ODOMETER/TRIP ODOMETER (If installed) (AT) (2) (AT) (1) (1) (MT) (2) (MT) (1) (1) B310B01JM-2 Odometer (1) The odometer records the total driving distance in kilometers or miles, and is useful for keeping a record for maintenance intervals.
FEATURES OF YOUR HYUNDAI 1 57 TRIPMETER A 1. Tripmeter 2. Distance to Empty Tripmeter Distance to Empty TRIPMETER B DISTANCE TO EMPTY AVERAGE FUEL CONSUMPTION HJM2186-C AVERAGE SPEED DRIVE TIME o This mode indicates the total distance travelled since the last tripmeter reset. Total distance is also reset to zero if the battery is disconnected. o Pressing the trip computer switch for more than 1 second, when the tripmeter is being displayed, clears the tripmeter to zero.
1FEATURES OF YOUR HYUNDAI 58 3. Average Fuel Consumption 4. Average Speed 5. Drive Time Average Fuel Consumption Drive Time Average Speed MPH B400B02JM-C o This mode calculates the average fuel consumption from the total fuel used and the distance since the last average consumption reset. o The total fuel used is calculated from the fuel consumption input. o For an accurate calculation, drive more than 30 miles. o The meter's working range is from 0.1 to 199.9 MPG.
FEATURES OF YOUR HYUNDAI MULTI-FUNCTION SWITCH LIGHT 59 B340A01A-AAT B340B01A-AAT B340C04A-AAT COMBINATION TURN SIGNAL, HEADLIGHT AND HIGH-BEAM SWITCH Turn Signal Operation Lane Change Signal Headlight Switch Pulling down on the lever causes the turn signals on the left side of the car to blink. Pushing upwards on the lever causes the turn signals on the right side of the car to blink.
1FEATURES OF YOUR HYUNDAI 60 Parking Light Auto Cut o The purpose of this feature is to prevent the battery from being discharged. The system automatically turns off the headlights and parking lights when the driver removes the ignition key and opens the driver- side door. o With this feature, the parking light will be turned off automatically if the driver parks on the side of road at night.
FEATURES OF YOUR HYUNDAI WINDSHIELD WIPER AND WASHER SWITCH A : Wiper speed control · MIST – Single wipe · OFF – Off · INT – Intermittent wipe · LO – Low wiper speed · HI – High wiper speed B350A02JM-AAT Windshield wiper/washer 61 B350A02A-AAT Windshield wipers Fast B : Intermittent wipe time adjustment C : Wash with brief wipes Slow B350A07JM-U Rear window wiper/washer (If installed) B350A09JM-U D : Rear wiper/washer control – Spraying washer fluid · · OFF – Off · ON – Intermittent wipe after som
1FEATURES OF YOUR HYUNDAI 62 NOTE: To prevent damage to the wiper system, do not attempt to wipe away heavy accumulations of snow or ice. Accumulated snow and ice should be removed manually. If there is only a light layer of snow or ice, operate the heater in the defrost mode to melt the snow or ice before using the wiper or activate the windshield wiper blade deicer.
FEATURES OF YOUR HYUNDAI 1 63 B350C01O-GAT B390A02JM-AAT Adjustable Intermittent Wiper Operation Rear Window Wiper And Washer (If installed) B350C03JM-U B390A03JM-U To use the intermittent wiper feature, place the wiper switch in the "INT" position. With the switch in this position, the interval between wipes can be varied from approximately 1 to 18 seconds by turning the interval adjuster barrel.
1FEATURES OF YOUR HYUNDAI 64 FRONT FOG LIGHT SWITCH B360A04A-AAT HAZARD WARNING SYSTEM B370A01A-AAT WINDOW DEFROSTER SWITCH B385A01JM-AAT (If installed) Windshield wiper Blade De-icer (If installed) OJM019009 OJM019020 To turn on the front fog lights, push the switch. They will light when the headlight switch is in the second position and the ignition key is in the "ON" position. NOTE: If you turn on the headlight high beams, the front fog lights will be turned off.
FEATURES OF YOUR HYUNDAI AUX OUTLET B380A02Y-AAT Rear Window Defroster Switch NOTE: The engine must be running for the rear window defroster to operate. 65 B380A02Y-AAT (if installed) HJM2104 OJM019012 The rear window defroster and heated outside rearview mirrors are turned on by pushing in the switch. To turn the defroster off, push the switch a second time. The rear window defroster automatically turns itself off after about 15 minutes.
1FEATURES OF YOUR HYUNDAI 66 DIGITAL CLOCK INSTRUMENT PANEL LIGHT CONTROL (RHEOSTAT) B400A02A-AAT B410A01A-AAT HJM2137 There are three control buttons for the digital clock. Their functions are: HOUR - Push "H" to advance the hour indicated. MIN - Push "M" to advance the minute indicated. RESET -Push "R" to reset minutes to ":00" to facilitate resetting the clock to the correct time. When this is done: Pressing "R" between 10 : 30 and 11 : 29 changes the readout to 11 : 00.
FEATURES OF YOUR HYUNDAI ASHTRAY / COIN TRAY POWER OUTLETS B500D04JM-GAT 67 B430A02JM-AAT (If installed) ! Center OJM019021 Rear OJM019015 These supply 12V electric power to operate electric accessories or equipment only when the key is in the "ON" or "ACC" position. CAUTION: o Use when the engine is running and remove a plug from the power outlet after using the electric appliance.
1FEATURES OF YOUR HYUNDAI 68 DRINK HOLDER SUNROOF B450A01JM-AAT B450B01JM-AAT B460A01Y-AAT Front Drink Holder REAR DRINK HOLDER (If installed) (If installed) Sun Shade OJM019014 The front drink holder is located on the main console . ! WARNING: o Use caution when using the drink holders. A spilled beverage that is very hot can injure you or your passengers. Spilled liquids can damage interior trim and electrical components. o Do not place objects other than cups or cans in the drink holder.
FEATURES OF YOUR HYUNDAI 1 69 B460B02JM-GAT Opening the Sunroof Manual slide open Manual slide close Press the SLIDE OPEN button on the overhead console for less than 0.5 second. To close the sunroof, press the CLOSE button on the overhead console and hold it until the sunroof is closed. Auto slide close To close the sunroof, press the CLOSE button on the overhead console for more than 1 second. The sunroof will slide all the way close. To stop at the desired point, press any sunroof control button.
1FEATURES OF YOUR HYUNDAI 70 Close B460C01JM-AAT Tilting the Sunroof To close the sunroof, press the CLOSE button on the overhead console and hold it until the sunroof is closed. NOTE: After washing the car or after there is rain, be sure to wipe off any water that is on the sunroof before operating it. HJM2024 Auto tilt open To use the autotilt feature, momentarily (more than 1 second) press the TILT UP button on the overhead console. The sunroof will tilt all the way open.
FEATURES OF YOUR HYUNDAI INTERIOR LIGHT SPECTACLE CASE B480B01JM-AAT B490A02JM-AAT B491A03O-GAT Map Light INTERIOR LIGHT (If Installed) 71 Without Sunroof With sunroof HJM2099 Push in the map light switch to turn the light on or off. This light is convenient as a map light at night or as a personal light for the driver and the passenger. HJM2158 HJM2100 The interior courtesy light has two buttons.
1FEATURES OF YOUR HYUNDAI 72 GLOVE BOX CENTER CONSOLE COMPARTMENT B500A01S-AAT B500B01O-AAT B505A02NF-GAT Illuminated Glove Box (If installed) Center Console Box Opening the glove box will automatically turn on the light when the multi-function switch is turned to the first/second position. (1) HJM2145 o To open the glove box, pull on the glove box release lever. o The glove box door can be locked (and unlocked) with the key.
FEATURES OF YOUR HYUNDAI 1 73 B505B01NF-GAT ! WARNING: Center Console Armrest (If Installed) ! To avoid the possibility of injury in case of an accident or a sudden stop, the center console box lid should be kept closed when the car is in motion. WARNING: Do not place cups or cans in the drink holder when the console box lid is used as an armrest. It may result in spilling the beverage. A spilled beverage that is very hot can injure you or your passengers.
1FEATURES OF YOUR HYUNDAI 74 OUTSIDE REARVIEW MIRROR B510A01A-AAT B510B01Y-AAT Manual Type ! Electric Type (If installed) CAUTION: If the mirror control is jammed with ice, do not attempt to break it free using the control handle or by manipulating the face of the mirror. Use an approved spray de-icer (not radiator antifreeze) to release the frozen mechanism or move the vehicle to a warm place and allow the ice to melt.
FEATURES OF YOUR HYUNDAI 1 75 ! CAUTION: B510D01Y-AAT B510C01A-AAT OUTSIDE REARVIEW MIRROR HEATER (If installed) FOLDING THE OUTSIDE REARVIEW MIRRORS o Do not operate the switch continuously for an unnecessary length of time. o Scraping ice from the mirror face could cause permanent damage. To remove any ice, use a sponge, soft cloth or approved de-icer. ! WARNING: Be careful when judging the size or distance of any object seen in the passenger side rear view mirror.
1FEATURES OF YOUR HYUNDAI 76 DAY/NIGHT INSIDE REARVIEW MIRROR B520A01A-AAT B520C04JM-AAT Manual Type AUTOMATIC DIMMING REAR VIEW MIRROR WITH COMPASS (If installed) 1. To operate Compass feature Press and release the button, then the vehicle's directional heading will be displayed. Pressing and releasing the button again will turn off the display. Heading display - E : East - W : West - S : South - N : North ex) NE : North East HJM2070 Your Hyundai is equipped with a day/night inside rearview mirror.
FEATURES OF YOUR HYUNDAI 1 77 3. Setting the compass zone 1. Find your current location and variance zone number on the zone map. 4. Changing Mirror Angle setting (If Installed): Due to mirror positions being angled towards the driver, the compass mirror can also compensate for drivers seated on the Left Hand side of the vehicle (steering wheel on the LH side of the vehicle) or Right Hand side of the vehicle (steering wheel on the RH side of the vehicle).
1FEATURES OF YOUR HYUNDAI 78 PARKING BRAKE TAIL GATE B540A01JM-AAT B530A02A-AAT ! CAUTION: Driving with the parking brake applied will cause excessive brake pad (or lining) and brake rotor wear. Releasing the parking brake HJM3026 Applying the parking brake To engage the parking brake, first apply the foot brake and then without pressing the release button in, pull the parking brake lever up as far as possible.
FEATURES OF YOUR HYUNDAI 1 79 B540B01JM-AAT B540A01JM-AAT Tail gate Window SHOPPING BAG HOLDERS (If installed) ! CAUTION: o Do not hang a bag beyond 6 Ibs (3 kg). It may cause damage to the shopping bag holder. o Return it to the original position after using the shopping bag holder. (1) (2) OJM019024 o Pull the "GLASS" release lever (1) to open the tailgate window glass, and raise the window open lever (2). o To close the tail gate window, lower the tail gate window, and it will close by itself.
1FEATURES OF YOUR HYUNDAI 80 HOW TO USE LUGGAGE ROOM B640A01S-AAT B545B02JM-GAT CARGO SECURITY SCREEN (If installed) ! Luggage Under Tray (If installed) B650A01S-AAT Stowage Precautions B650A01JM To use the security screen, pull it out of the retractor and hook it to the anchors as illustrated. 1. Do not place objects on the cargo security screen. Such objects may be thrown about inside the vehicle and possibly injure vehicle occupants during an accident or when braking. 2.
FEATURES OF YOUR HYUNDAI 1 81 Luggage Side Trim B655A02JM-GAT Covering screen (If Installed) HJM2168-1 Raise the luggage under tray cover with the grip. B545B01JM There are small article trays in the luggage side trim. B655A02JM Covering shelf screen veils the luggage room to hang the screen hook to a headrest pole. While not in use, place the screen hook to the hook holder. ! CAUTION: When folding the rear seatback forward, remove the hook from the headrest pole.
1FEATURES OF YOUR HYUNDAI ROOF RACK 82 B540D03HP-GAT B630A01JM-AAT Luggage Net (If Installed) ! (If installed) CAUTION: To prevent damage to the goods or the vehicle, care should be taken when carrying fragile or bulky objects in the luggage compartment. ! B540D01JM Some objects can be kept in the net in the luggage compartment. Use the luggage net on the floor or at the back of the luggage compartment to prevent objects from sliding. WARNING: Avoid eye injury. DO NOT overstretch.
FEATURES OF YOUR HYUNDAI HIGH-MOUNTED REAR STOP LIGHT B550A01A-AAT ! REMOTE FUEL-FILLER LID RELEASE B560A03JM-AAT CAUTION: 165 lbs (75 kg) Evenly Distributed Loading cargo or luggage above 165 lbs (75 kg) on the roof rack may damage your vehicle. When you carry large objects, never let them hang over the rear or the sides of your vehicle. To prevent damage or loss of cargo as you are driving, check frequently to make sure the luggage carrier and cargo are still securely fastened.
1FEATURES OF YOUR HYUNDAI 84 ! B560A01JM ! WARNING: o Gasoline vapors are dangerous. Before refueling, always stop the engine and never smoke or allow sparks and open flames near the filler area. o Never operate your vehicle without a filler cap properly installed, flammable vapors and gasoline could leak out in dangerous situations such as a collision or rollover. If the filler cap must be replaced, only use genuine Hyundai replacement parts.
FEATURES OF YOUR HYUNDAI HOOD RELEASE 1 85 2. Push the secondary latch lever to the left and lift the hood. B570A03A-GAT Before closing the hood, return the support rod to its clip to prevent it from rattling. Lower the hood until it is about 1 ft. (30 cm) above the closed position and let it drop. Make sure that it locks into place. ! CAUTION: Make sure that the support rod has been released prior to closing the hood. HJM2020 1. Pull the release knob to unlatch the hood. HJM2022 3.
1FEATURES OF YOUR HYUNDAI 86 FLOOR MAT ANCHOR SUN VISOR B571A03Y-AAT B580A01L-AAT B580B01B-GAT Illuminated Vanity Mirror (If installed) Opening the lid of the vanity mirror will automatically turn on the mirror light. B585BA01JM-AAT SUN VISOR EXTENDER B570A01JM-A When using a floor mat on the front floor carpet, make sure it attaches to the floor mat anchor in your vehicle. This keeps the floor mat from sliding forward.
FEATURES OF YOUR HYUNDAI STEERING WHEEL TILT LEVER B580C01LZ-AAT B600A01A-AAT FRONT DOOR EDGE WARNING LIGHT B620A01S-AAT TICKET HOLDER HJM2067 B580C01JM The ticket holder is provided on the front of the sun visor for holding a tollgate ticket. To Adjust the Steering Wheel: 1. Push the lever downward to unlock. 2. Raise or lower the steering wheel to the desired position. 3. After adjustment, securely tighten the lever by pulling it upward.
1FEATURES OF YOUR HYUNDAI 88 HORN REAR SEAT ARM REST B610A01L-GAT CRUISE CONTROL B611A01Y-AAT B660A02S-AAT (If installed) Type A B610A01JM Press the pad on the steering wheel to sound the horn. Main Switch HJM2043 This arm rest is located in the center of the rear seat back.
FEATURES OF YOUR HYUNDAI 1 89 The cruise control system provides automatic speed control for your comfort when driving on straight, open freeways, toll roads, or other noncongested highways. This system is designed to function above approximately 25 mph (40 km/h). B660B04E-AAT To Set the Cruise Speed Type A NOTE: Cruise control is not recommended for city driving, winding roads, slippery roads, heavy rain, or other bad weather conditions. B660B01JM Type B 1.
1FEATURES OF YOUR HYUNDAI 90 To disengage the cruise control system, pull the control switch toward the steering wheel to the "CANCEL" position. Additionally, the following actions will disengage the system: B660C04E-AAT To Cancel the Cruise Speed Type A B660C01JM B660D03E-AAT To Resume the Preset Speed Type A o Depress the brake pedal. o Depress the clutch pedal (Manual transaxle). o Shift the selector lever to "P" or "N" position (Automatic transaxle).
FEATURES OF YOUR HYUNDAI 1 91 The vehicle will automatically resume the speed set prior to cancellation when you push the control switch upward to the "RES/ ACC" or "+/RES" position and release it, providing the vehicle speed is above 25 mph (40 km/h). If the control switch "RES/ACC" or "+/RES" is selected, the cruise "SET" indicator in the instrument cluster will illuminate. 1. Push the control switch downward to "SET /COAST" or "−/SET"and hold it. The vehicle will decelerate.
1FEATURES OF YOUR HYUNDAI 92 ! WARNING: o During cruise-control driving with a manual transaxle vehicle, do not shift into neutral without depressing the clutch pedal, or the engine will be overrevved. If this happens, depress the clutch pedal or release the main switch. o With the cruise control engaged, when the brake pedal is applied, it is normal to hear the cruise control system deactivate. This is an indication of normal system operation.
FEATURES OF YOUR HYUNDAI HEATING AND COOLING CONTROL 93 B710A01JM-GAT B710B02O-AAT CENTER VENTILATOR The center ventilators are located in the middle of the dashboard. To change the direction of the air flow, move the knob in the center of the vent up-and-down and side-to-side. The vents are opened when the vent knob is moved to " " position. The vents are closed when the vent knob is moved to " ". Keep these vents clear of any obstructions.
1 FEATURES OF YOUR HYUNDAI HEATING AND VENTILATION 94 B670A01JM-AAT B670B01A-AAT B670C03E-AAT Fan Speed Control (Blower Control) Air Intake Control HJM2109A There are three controls and two switches for the heating and cooling system. They are: 1. 2. 3. 4. 5. Air flow control Fan speed control Temperature control Air intake control switch Air conditioning switch HJM2118A HJM2116A This is used to turn the blower fan on and off and to select the fan speed.
FEATURES OF YOUR HYUNDAI 1 95 With the "Fresh" mode selected, air enters the vehicle from the outside and is heated or cooled according to the function selected. B670D01JM-GAT Air Flow Control With the "Recirculation" mode selected, air from within the passenger compartment will be drawn through the heating system and heated or cooled according to the function selected.
1 FEATURES OF YOUR HYUNDAI 96 HJM2114 Bi-Level Air is discharged through the face vents and the floor vents. HJM2112 HJM2113 Floor-Level Air is discharged through the floor vents, windshield defroster nozzle, side defroster nozzle and side ventilator. Floor-Defrost Level Air is discharged through the windshield defroster nozzle, the floor vents, side defroster nozzle and side ventilator.
FEATURES OF YOUR HYUNDAI 1 97 NOTE: o The air intake control switch will change to " " mode when the ignition switch is turned "ON" with the MAX A/C mode selected. o When you change to another mode from MAX A/C, the A/C and the air intake control switch are set to the following chart. A/C B670C02JM HJM2115 Defrost-Level Air is discharged through the windshield defroster nozzle, side defroster nozzle and side ventilator.
1 FEATURES OF YOUR HYUNDAI HEATING CONTROLS 98 B690A01E-AAT B670E02A-AAT Temperature Control B670C03JM Cool OFF Off-Level Air is discharged through the windshield defroster nozzle, side defroster nozzle and side ventilator. NOTE: If the air flow control is off, the air intake control is set to the fresh mode automatically. Warm B690A01JM-A HJM2117 This control is used to adjust the degree of heating or cooling desired.
FEATURES OF YOUR HYUNDAI BI-LEVEL HEATING VENTILATION B700A02E-AAT 99 B730A01L-AAT B710A01S-AAT Operation Tips B700A01JM-A Your Hyundai is equipped with bi-level heating controls. To use this feature: o Set the air intake control to the fresh air ) position. ( o Set the air flow control at the bi-level ( ) position. o Adjust the fan speed control to the desired speed. o Set the temperature control between "Cool" and "Warm".
1 FEATURES OF YOUR HYUNDAI 100 AIR CONDITIONING SYSTEM B740A01S-AAT B740B01S-AAT Air Conditioning Switch (If installed) Air Conditioning Operation for Cooling HJM2119 The air conditioning is turned on or off by pushing the A/C button on the heating/air conditioning control panel. B740B01JM-A To use the air conditioning to cool the interior: o Set the side vent control to "OFF", to shut off outside air entry. o Turn on the fan control switch.
FEATURES OF YOUR HYUNDAI 1 101 B720A01JM-AAT DEFROSTING/DEFOGGING A Type B Type A Type B Type B720B02JM B720B01JM Use the heating/ventilation system to defrost or defog the windshield: To remove interior fog on the windshield: o Set the air flow control to the defrost ( ) position. (The A/C will be turned on automatically and "Fresh" mode will be activated.) o Set the temperature control to the desired position. o Set the fan speed control between "1" and "4" position.
1 FEATURES OF YOUR HYUNDAI 102 B740C01S-AAT B740D01A-AAT Dehumidified Heating Operation Tips For dehumidified heating: o If the interior of the car is hot when you first get in, open the windows for a few minutes to expel the hot air. o When you are using the air conditioning system, keep all windows closed to keep hot air out. o When moving slowly, as in heavy traffic, shift to a lower gear. This increases engine speed, which in turn increases the speed of the air conditioning compressor.
FEATURES OF YOUR HYUNDAI AUTOMATIC HEATING AND COOLING CONTROL SYSTEM B970A01Y-AAT B970B02JM-GAT (If installed) Heating and Cooling Controls 103 Your Hyundai is equipped with an automatic heating and cooling control system controlled by simply setting the desired temperature. B970B01JM 1. 2. 3. 4. 5. Temperature Control Switch Air Flow Control Switch Display Window Defroster Switch Blower Fan Control Switch 1 6. 7. 8. 9.
1 FEATURES OF YOUR HYUNDAI 104 NOTE: B970C01JM-AAT Automatic Operation HJM2126-1 HJM2124-1 The FATC (Full Automatic Temperature Control) system automatically controls heating and cooling by doing as follows: 1. Push the "AUTO" button. The indicator light will illuminate confirming that the Face, Floor and/or Bi-Level modes as well as the blower speed and air conditioner will be controlled automatically. 2. Push the "TEMP" button to set the desired temperature.
FEATURES OF YOUR HYUNDAI 1 105 B980A01Y-AAT B980B01Y-AAT B670C03Y-AAT MANUAL OPERATION Fan Speed Control Switch Air Intake Control Switch The heating and cooling system can be controlled manually as well by pushing buttons other than the "AUTO" button. In this state, the system sequentially works according to the order of buttons selected. The function of the buttons which are not selected will be controlled automatically.
1 FEATURES OF YOUR HYUNDAI 106 With the "Fresh" mode selected, air enters the vehicle from the outside and is heated or cooled according to the function selected. B980E01E-GAT Air Flow Control With the "Recirculation" mode selected, and air from within the passenger compartment will be drawn through the heating system and heated or cooled according to the function selected.
FEATURES OF YOUR HYUNDAI 1 107 HJM2114 Bi-Level When selecting the "Bi-Level" mode, the indicator light will come on and the air will be discharged through the face vents and the floor vents. HJM2112 HJM2113 Floor-Level When selecting the "Floor-Level" mode, the indicator light will come on and the air will be discharged through the floor vents, windshield defroster nozzle, side defroster nozzle and side ventilator.
1 FEATURES OF YOUR HYUNDAI CLIMATE CONTROL AIR FILTER (IN FRONT OF BLOWER UNIT) 108 B980F01JM-GAT B760A05E-AAT Defrost Switch (If installed) ! Inside air Outside air Inside air HJM2138-1 When the "Defrost" button is pressed, the ) mode will be automatically selected ( and the air will be discharged through the windshield defrost nozzle, side defroster nozzle and side ventilator.
FEATURES OF YOUR HYUNDAI STEREO SOUND SYSTEM 1 109 B750A02A-AAT AM reception How Car Audio Works Ionosphere FM reception FM radio station Mountains Ionosphere Unobstructed area Buildings B750A02L B750A01L AM and FM radio signals are broadcast from transmitter towers located around your city. They are intercepted by the radio antenna on your car. This signal is then received by the radio and sent to your car speakers.
1 FEATURES OF YOUR HYUNDAI 110 B750B05Y-AAT Using a cellular phone or a two-way radio When a cellular phone is used inside the vehicle, noise may be produced from the audio equipment. This does not mean that something is wrong with the audio equipment. In such a case, use the cellular phone at a place as far as possible from the audio equipment. B750A04L o Fading - As your car moves away from the radio station, the signal will weaken and sound will begin to fade.
FEATURES OF YOUR HYUNDAI CARE OF DISCS ANTENNA Storage B850A02F-AAT Proper Handling 111 B870D02JM-AAT Roof Antenna When not in use, place your discs in their individual case and store them in a cool place away from the sun, heat, and dust. Do not grip or pull out the disc with your hand while the disc is being pulled into the unit by the self loading mechanism. Type A Keep Your Discs Clean B850A01L Your car uses a roof antenna to receive both AM and FM broadcast signals.
1 FEATURES OF YOUR HYUNDAI 112 ! CAUTION: o Be sure to remove the antenna before washing the car in an automatic car wash or it may be damaged. o Before entering a place with a low height clearance, be sure to adjust the roof antenna low. o In some vehicles, the antenna can be folded into only front position. o When reinstalling your antenna, it is important that it is fully tightened to ensure proper reception.
FEATURES OF YOUR HYUNDAI AUDIO SYSTEM 113 PA710E01JM-GAT RADIO, SET UP, VOLUME CONTROL (PA 710S) (If installed) 2 1 7 1 3 4 8 9 10 5 12 6 11 1. FM Selection Button 2. AM Selection Button 3. XM Selection Button 4. CD/AUX Selection Button 5. Automatic Channel Selection Button 6. Power ON/OFF 7. MUTE Button 8. SCAN Button 9. Information Display Button 10. SET UP Button 11. TUNE/ENTER Button 12. CAT(FLDR) Button 13.
1 FEATURES OF YOUR HYUNDAI 114 1. FM Selection Button Turns to FM mode and toggles FM1 and FM2 when the button is pressed each time. 2. AM Selection Button Turns to AM mode, and toggles in the order of AM1➟AM2➟···➟AM1···when the button is pressed each time. 3. XM Selection Button Turns to XM mode, and toggles in the order of XM1➟XM2➟XM3➟···➟XM1··· when the button is pressed each time. 4.
FEATURES OF YOUR HYUNDAI 1 115 11. TUNE/ENTER Button Turn this button clockwise by one notch to increase frequency by 0.05Mhz from current frequency. Turn this button counterclockwise by one notch to decrease frequency by 0.05Mhz from current frequency. Press this button while holding SET UP button to activate / inactivate the item to. Select SET UP item using left and right function of the Tune button.
1 FEATURES OF YOUR HYUNDAI 116 PA710F01JM-GAT CD (PA 710S) (If installed) 1 4 3 2 6 10 5 11 1. CD Loading Slot 2. CD Indicator 3. CD Eject Button 4. CD/AUX Selection Button 5. Automatic Track Selection Button 6. INFO Button 7. TUNE/ENTER Button 8. RANDOM Play Button 9. REPEAT Button 10. SCAN Play Button 11.
FEATURES OF YOUR HYUNDAI 1 117 1. CD Loading Slot 5. Automatic Track Selection Button When car ignition switch is ACC or ON and if the CD is loaded, this indicator is lighted. If the CD is ejected the light is turned off. o Push [SEEK ] button for less than 0.8 seconds to play from the beginning of current song. o Push [SEEK ] button for less than 0.8 seconds and press again within 1 seconds to play the previous song. o Push [SEEK ] button for 0.
1 FEATURES OF YOUR HYUNDAI 118 o BALANCE Control Rotate the knob clockwise to emphasize right speaker sound (left speaker sound will be attenuated). When the control knob is turned counter clockwise, left speaker sound will be emphasized (right speaker sound will be attenuated). 8. RANDOM Play Button Turns on/off the randomization of the play list of files in the currently played DISC. To cancel the mode, press the key once again. 9.
FEATURES OF YOUR HYUNDAI 1 119 PA760E01JM-GAT RADIO, SET UP, VOLUME CONTROL (PA 760S) (If installed) 2 1 7 3 4 8 9 10 5 12 6 11 1. FM Selection Button 2. AM Selection Button 3. XM Selection Button 4. CD/AUX Selection Button 5. Automatic Channel Selection Button 6. Power ON/OFF 7. MUTE Button 8. SCAN Button 9. Information Display Button 10. SET UP Button 11. TUNE/ENTER Button 12. CAT(FLDR) Button 13.
1 FEATURES OF YOUR HYUNDAI 120 1. FM Selection Button Turns to FM mode and toggles FM1 and FM2 when the button is pressed each time. 2. AM Selection Button Turns to AM mode, and toggles in the order of AM1➟AM2➟···➟AM1···when the button is pressed each time. 3. XM Selection Button Turns to XM mode, and toggles in the order of XM1➟XM2➟XM3➟···➟XM1··· when the button is pressed each time. 4.
FEATURES OF YOUR HYUNDAI 1 121 11. TUNE/ENTER Button Turn this button clockwise by one notch to increase frequency by 0.05Mhz from current frequency. Turn this button counterclockwise by one notch to decrease frequency by 0.05Mhz from current frequency. Press this button while holding SET UP button to activate / inactivate the item to. Select SET UP item using left and right function of the Tune button.
1 FEATURES OF YOUR HYUNDAI 122 PA760F01JM-GAT CDC (PA 760S) (If installed) 1 4 2 3 6 11 5 12 1. CD Loading Slot 2. CD Eject Button 3. LOAD Button 4. CD/AUX Selection Button 5. Automatic Track Selection Button 6. INFO Button 7. TUNE/ENTER Button 8. RANDOM Play Button 9. REPEAT Button 10. DISC Selection Button 11. SCAN Play Button 12.
FEATURES OF YOUR HYUNDAI 1 123 1. CD Loading Slot 5. Automatic Track Selection Button Please face printed side upward and gently push in. When the ignition switch is on ACC or ON and power is off, power is automatically turned on if the CD is loaded. This CDP supports both 8cm and 12 cm CDs. But if VCD, Data CD, MP3 CD are loaded, "Er-6" message will appear and CD will be ejected. Push button to eject the CD during CD playback. This button is enabled when ignition switch is off.
1 FEATURES OF YOUR HYUNDAI 124 o BALANCE Control Rotate the knob clockwise to emphasize right speaker sound (left speaker sound will be attenuated). When the control knob is turned counter clockwise, left speaker sound will be emphasized (right speaker sound will be attenuated). 11. SCAN Play Button 8. RANDOM Play Button Folder up/down operation. o Folder is moved up or down from currently playing and folder name becomes displayed. o Press enter key to play the selected folder.
DRIVING YOUR HYUNDAI Engine Exhaust Can Be Dangerous! ............................ 2-2 Before Starting the Engine ............................................ 2-4 Key Positions ................................................................ 2-5 Starting .......................................................................... 2-6 Manual Transaxle ......................................................... 2-7 Automatic Transaxle .....................................................
2 DRIVING YOUR HYUNDAI 2 ! WARNING: ENGINE EXHAUST CAN BE DANGEROUS! C010A02JM-AAT Engine exhaust fumes can be extremely dangerous. If, at any time, you smell exhaust fumes inside the vehicle, open the windows immediately. o Do not inhale exhaust fumes. Exhaust fumes contain carbon monoxide, a colorless, odorless gas that can cause unconsciousness and death by asphyxiation. o Be sure the exhaust system does not leak.
DRIVING YOUR HYUNDAI RISK OF ROLLOVER ! WARNING: o The 2WD Tucson is not designed for off-road use. The 4WD Tucson is designed primarily for use on paved roads. However, occasional use in off-highway conditions such as established unpaved roads and nonchallenging off-road trails is allowed. The 4WD Tucson is not designed for blazing new trails, challenging off-road conditions, or unpaved hill climbing.
2 DRIVING YOUR HYUNDAI 4 TO START THE ENGINE BEFORE STARTING THE ENGINE C020A04A-AAT Before you start the engine, you should always: 1. Look around the vehicle to be sure there are no flat tires, puddles of oil, water or other indications of possible trouble. 2. After entering the car, check to be sure the parking brake is engaged. 3. Check that all windows, and lights are clean. 4. Check that the interior and exterior mirrors are clean and in position. 5.
DRIVING YOUR HYUNDAI KEY POSITIONS 5 o "ON" C040A02A-AAT ACC LOCK ON When the key is in the "ON" position, the ignition is on and all accessories may be turned on. If the engine is not running, the key should not be left in the "ON" position. This will discharge the battery and may also damage the ignition system. C070C01A-AAT To remove the ignition key ACC LOCK ON o "ACC" START C040A01E-1 ! 2 With the key in the "ACC" position, some electrical accessories (radio, etc.) may be operated.
2 DRIVING YOUR HYUNDAI 6 STARTING C050A01A-AAT C050B02JM-AAT Normal Conditions: The Starting Procedure: C050A01E-1 ! WARNING: Never run the engine in a closed or poorly ventilated area any longer than is needed to move your car in or out of the area. The carbon monoxide gas emitted is odorless and can cause serious injury or death. 1. Insert key, and fasten the seat belt. 2.
DRIVING YOUR HYUNDAI OPERATING THE MANUAL TRANSAXLE 2 7 NOTE: C070A02A-AAT HJM3017 Your Hyundai's manual transaxle has a conventional shift pattern. This shift pattern is imprinted on the shift knob. The transaxle is fully synchronized in all forward gears so shifting to either a higher or a lower gear is easily accomplished. C070B02A-AAT o To shift into reverse, rest the lever in neutral for at least 3 seconds after your car is completely stopped. Then move the lever into the reverse position.
2 DRIVING YOUR HYUNDAI 8 C070D02O-AAT C070D04O-AAT Recommended Shift Points Good Driving Practices Shift Recommended from-to mph (km/h) 1-2 15 (20) 2-3 25 (40) 3-4 35 (55) 4-5 45 (75) The shift points as shown on the chart are recommended for optimum fuel economy and performance. o Never take the car out of gear and coast down a hill. This is extremely hazardous. Always leave the car in gear. o Don't "ride" the brakes. This can cause them to overheat and malfunction.
DRIVING YOUR HYUNDAI OPERATING THE AUTOMATIC TRANSAXLE 9 NOTE: C090A01O-GAT Depress the brake pedal and push the button when shifting. Push the button when shifting. The selector lever can be shifted freely. HJM3018 The highly efficient Hyundai automatic transaxle has four forward speeds and one reverse speed. The individual speeds are selected automatically, depending on the position of the speed selector lever. The selector lever has 2 gates; the main gate and the manual gate.
2 DRIVING YOUR HYUNDAI 10 C090B02A-AAT C090C01A-AAT C090F01JM-GAT The function of each position is as follows: o R (Reverse): Sports Mode o P (Park): Use to hold the vehicle in place when parked or while starting the engine. Whenever parking the car, apply the parking brake and shift the selector lever to the "P" (Park) position. ! CAUTION: Never place the selector lever in the "P" (Park) position unless the vehicle is fully stopped.
DRIVING YOUR HYUNDAI 2 11 ! CAUTION: o In sports mode, The driver must execute shifts in accordance with prevailing road conditions, taking care to keep the engine speed below the red zone. For engine protection, upward shifts are made automatically when the engine rpm reaches the red zone. o By rapidly moving the selector lever backwards (-) twice, it is possible to skip one gear, i.e., 3rd to 1st, 4th to 2nd.
2 DRIVING YOUR HYUNDAI 12 C090N05O-AAT Good Driving Practices o Never move the gear selector lever from "P" or "N" to any other position with the accelerator pedal depressed. o Never move the gear selector lever into "P" when the vehicle is in motion. o Be sure the car is completely stopped before you attempt to shift into "R" or "D". o Never take the car out of gear and coast down a hill. This may be extremely hazardous. Always leave the car in gear when moving. o Do not "ride" the brakes.
DRIVING YOUR HYUNDAI ANTI-LOCK BRAKE SYSTEM (ABS) TRACTION CONTROL SYSTEM (TCS) C120A01JM-AAT (If installed) The Anti-Lock Brake System (ABS) is designed to prevent wheel lock-up during sudden braking or on hazardous road surfaces. The ABS control module monitors the wheel speed and controls the pressure applied to each brake. Thus, in emergency situations or on slick roads, ABS will increase vehicle control during braking.
2 DRIVING YOUR HYUNDAI 14 Driving Hints TCS does not actively apply brakes. Be sure to decelerate the car sufficiently before entering curves. ! CAUTION: When the TCS indicator blinks, SLIP control function has been activated. It also means that the road is slippery or your car is accelerating excessively. In this situation, gently release foot pressure from the accelerator pedal and maintain moderate speed.
DRIVING YOUR HYUNDAI ELECTRONIC STABILITY CONTROL (ESC) SYSTEM 15 C310A03JM-AAT (If installed) ! ! CAUTION: Driving with varying tire or wheel size may cause the ESC system to malfunction. When replacing tires, make sure they are the same size as your original tires. WARNING: Never drive too fast for the road conditions or too quickly when cornering. Electronic stability control (ESC) will not prevent accidents.
2 DRIVING YOUR HYUNDAI FULL-TIME 4WD OPERATION 16 C310D01JM-AAT C350A02JM-AAT Indicators and Warning (If installed) The indicators should illuminate when the ignition key is turned to ON or START but should go out after three seconds. If the indicators do not illuminate, or the ESC or ESC-OFF indicator does not go out after 3 seconds, have the vehicle checked by an authorized dealer. Engine power can be delivered to all wheels.
DRIVING YOUR HYUNDAI 2 17 (6)The stopping distance of the full-time 4WD vehicle differs very little from that of the 2WD vehicle. When driving on a snow-covered road or a slippery, muddy surface, make sure that you keep a sufficient distance between your vehicle and the one ahead of you. (7)Since the driving torque is always applied to all 4 wheels, the performance of the full-time 4WD vehicle is greatly affected by the condition of the tires. Be sure to equip it with four tires of the same size and type.
2 DRIVING YOUR HYUNDAI 18 (9)For a speedometer test or inspection/ maintenance (I/M) program of a Tucson 4WD vehicle, use a four wheel chassis dynamometer. ! CAUTION: Never engage the parking brake while performing these tests. o In rare cases when it's unavoidable that a 4WD vehicle is to be inspected on a 2WD roll tester, strictly follow the procedures. 1. Check the tire pressures recommended for your vehicle. 2. Place the front wheels on the roll tester as shown in the illustration. 3.
DRIVING YOUR HYUNDAI 4WD LOCK SYSTEM 2 19 C360A01O-GAT (With Electronic Control 4WD) (If installed) This setup begins to get cancelled when the vehicle speed exceeds 30 km/h, and the function is completely released at a speed of 40 km/h or higher. Conversely, the function is rerun when the speed again drops to 40 km/h or lower, and is fully established at speeds below 30 km/h. To release the 4WD lock function, press the 4WD lock button again.
2 DRIVING YOUR HYUNDAI 20 Four Wheel Drive (4WD) transfer mode selection Transfer mode 4WD LOCK Selection button Indicator light 4WD LOCK (Indicator light is illuminated) 4WD AUTO (4WD LOCK is deactivated) (Indicator light is not illuminated) Description o This mode is used for climbing or descending sharp grades, off-road driving, driving on sandy and muddy roads etc. to maximize traction.
DRIVING YOUR HYUNDAI GOOD BRAKING PRACTICES C130A02A-AAT ! WARNING: o Whenever leaving vehicle or parking, always set the parking brake as far as possible and fully engage the vehicle's transaxle into the park position. Vehicles not fully engaged in park with the parking brake set are at risk for moving inadvertently and injuring yourself or others.
2 DRIVING YOUR HYUNDAI 22 DRIVING FOR ECONOMY C140A02A-AAT You can save fuel and get more miles from your car if you follow these suggestions: o Drive smoothly. Accelerate at a moderate rate. Don't make "jack-rabbit" starts or full-throttle shifts and maintain a steady cruising speed. Don't race between stoplights. Try to adjust your speed to that of the other traffic so you don't have to change speeds unnecessarily. Avoid heavy traffic whenever possible.
DRIVING YOUR HYUNDAI SMOOTH CORNERING C150A01A-AAT Avoid braking or gear changing in corners, especially when roads are wet. Ideally, corners should always be taken under gentle acceleration. If you follow these suggestions, tire wear will be held to a minimum. WINTER DRIVING 23 C160A01A-AAT NOTE: The more severe weather conditions of winter result in greater wear and other problems.
2 DRIVING YOUR HYUNDAI 24 C160E01A-AAT C160H02A-AAT C160J01A-AAT Change to "Winter Weight" Oil if Necessary Use Approved Window Washer AntiFreeze in System Don't Let Ice and Snow Accumulate Underneath In some climates it is recommended that a lower viscosity "winter weight" oil be used during cold weather. See Section 9 for recommendations. If you aren't sure what weight oil you should use, consult your Hyundai dealer.
DRIVING YOUR HYUNDAI HIGHER SPEED MOTORING USE OF LIGHTS C170A02A-AAT Pre-Trip Inspections 1. Tires: Adjust the tire inflation pressures to specification. Low tire inflation pressures will result in overheating and possible failure of the tires. Avoid using worn or damaged tires which may result in reduced traction or tire failure. NOTE: Never exceed the maximum tire inflation pressure shown on the tires.
2 DRIVING YOUR HYUNDAI 26 TRAILER OR VEHICLE TOWING C190A01S-AAT If you are considering towing with your car, you should first check with your State's Department of Motor Vehicles to determine their legal requirements. Since laws vary from State to State the requirements for towing trailers, cars, or other types of vehicles or apparatus may differ. Ask your Hyundai dealer for further details before towing.
DRIVING YOUR HYUNDAI 2 27 NOTE: C190E01JM-AAT Trailer Weight Limit Tongue load Total trailer weight C190E01JM o Keep the tongue load 10% of the total trailer load. o Tongue load x 100 = 10% (MAX) Total trailer weight o Tongue loads can be increased or decreased by re-distributing the load in the trailer. This can be verified by checking the total weight of the loaded trailer and then checking the load on the tongue. 1. Never load the trailer with more weight in the back than in the front.
2 DRIVING YOUR HYUNDAI 28 C190F01O-AAT ! Trailer or Vehicle Towing Tips WARNING: o Improperly loading your vehicle and trailer can seriously affect its steering and braking performance causing a crash which could cause serious injury or death. o Towing a trailer affected vehicle handling and braking. o Drive more slowly when towing a trailer and allow more distance when braking. o Be careful when driving in slippery and windy conditions. o Be careful when turning and while driving up and down hills.
DRIVING YOUR HYUNDAI VEHICLE LOAD LIMIT NOTE: ! 29 C190F03JM-AAT When towing check transaxle fluid more frequently. Tire and Loading Information Label Type A Type C CAUTION: If overheating should occur when towing, (the temperature gauge reads near the red zone), taking the following actions may reduce or eliminate the problem. 1. 2. 3. 4. Turn off the air conditioner. Reduce highway speed. Select a lower gear when going uphill.
2 DRIVING YOUR HYUNDAI 30 Seating capacity: Total: 5 persons (Front seat: 2 persons, Rear seat: 3 persons) Seating capacity is the maximum number of occupants including a driver, your vehicle may carry. However the seating capacity may be reduced based upon the weight of all of the occupants, and the weight of the cargo being carried or towed. Do not overload the vehicle as there is a limit to the total weight, or load limit including occupants and cargo, the vehicle can carry.
DRIVING YOUR HYUNDAI 2 31 Example 1 Example 2 A B Example 3 C A B Description Total Item Description 1400 lbs A Vehicle Capacity Weight A Total Vehicle Capacity Weight Total Vehicle Capacity Weight (635 kg) Subtract Occupant Weight 860 lbs B (136 kg) 150 lbs (68 kg) x 5 (340 kg) Available Cargo and 1100 lbs Available Cargo and 650 lbs C (498 kg) Description 1400 lbs Subtract Occupant Weight 750 lbs 150 lbs (68 kg) × 2 Luggage weight Item A B C C190F03JM (635 kg) Subtrac
2 DRIVING YOUR HYUNDAI 32 Refer to your vehicle's tire and loading information label for specific information about your vehicle's capacity weight and seating positions. The combined weight of the driver, passengers and cargo should never exceed your vehicle's capacity weight. C190G03JM-AAT This label also tells you the maximum weights that can be supported by the front and rear axles, called Gross Axle Weight Rating (GAWR).
DRIVING YOUR HYUNDAI 2 33 ! WARNING: o Do not load your vehicle any heavier than the GVWR, either the maximum front or rear GAWR and vehicle capacity weight. If you do, parts, including tires on your vehicle can break, and it can change the way your vehicle handles and braking ability. This could cause you to lose control and crash. Also, overloading can shorten the life of your vehicle.
2 DRIVING YOUR HYUNDAI 34 ! WARNING: Items you carry inside your vehicle can strike and injure people in a sudden stop or turn, or in a crash. o Put things in the cargo area of your vehicle. Try to spread the weight evenly. o Never stack items, like suitcases, inside the vehicle above the tops of the seats. o Do not leave an unsecured child restraint in your vehicle. o When you carry something inside the vehicle, secure it. o Do not drive with a seat folded down unless necessary.
WHAT TO DO IN AN EMERGENCY If the Engine will not Start .............................................. 3-2 Jump Starting ................................................................ 3-3 If the Engine Overheats ................................................ 3-4 Tire Pressure Monitoring System (TPMS) .................... 3-5 Spare Tire ..................................................................... 3-9 If You Have a Flat Tire ................................................
3 WHAT TO DO IN AN EMERGENCY 2 IF THE ENGINE WILL NOT START D010A01A-AAT ! D010B02A-AAT D010C02Y-AAT If Engine Doesn't Turn Over or Turns Over Slowly If Engine Turns Over Normally but Does Not Start WARNING: 1. Check fuel level. 2. With the key in the "OFF" position, check all connectors at ignition, coil and spark plugs. Reconnect any that may be disconnected or loose. 3. Check the fuel line in the engine compartment. 4.
WHAT TO DO IN AN EMERGENCY JUMP STARTING 3 D020A03A-AAT Discharged battery Booster battery ! 3 HJM4001 WARNING: The gas produced by the battery during the jump-start operation is highly explosive. If these instructions are not followed exactly, serious personal injury and damage to the vehicle may occur! If you are not sure how to follow this procedure, seek qualified assistance. Automobile batteries contain sulfuric acid. This is poisonous and highly corrosive.
3 WHAT TO DO IN AN EMERGENCY 4 IF THE ENGINE OVERHEATS D030A02A-AAT If your temperature gauge indicates overheating, you experience a loss of power, or hear loud pinging or knocking, the engine is probably too hot. If this happens, you should: 1. Pull off the road and stop as soon as it is safe to do so. 2. Place the gear selector lever in "P" (auto-matic), or neutral (manual transaxle) and set the parking brake. If the air conditioning is on, turn it off. 3.
WHAT TO DO IN AN EMERGENCY TIRE PRESSURE MONITORING SYSTEM (TPMS) C320A02JM-AAT (If installed) C320A01JM ➀ Low Tire Pressure Telltale ➁ TPMS Malfunction Indicator Each tire, including the spare (if provided), should be checked monthly when cold and inflated to the inflation pressure recommended by the vehicle manufacturer on the vehicle placard or tire inflation pressure label.
3 WHAT TO DO IN AN EMERGENCY 6 Low tire pressure telltale When the tire pressure monitoring system warning telltale is illuminated, one or more of your tires is significantly under-inflated. Immediately reduce your speed, avoid hard cornering and anticipate increased stopping distances. You should stop and check your tires as soon as possible.
WHAT TO DO IN AN EMERGENCY 3 7 Right, Rear Left, or Rear Right tire is under-inflated, the low tire pressure telltale may turn on at the same time as the TPMS malfunction indicator. Have the system checked by an authorized Hyundai dealer as soon as possible to determine the cause of the problem.
3 WHAT TO DO IN AN EMERGENCY 8 Please note that a tire that is hot (from being driven) will have a higher pressure measurement than a tire that is cold (from sitting stationary for at least 3 hours and driven less than 1 mile (1.6 km) during that 3 hour period). Allow the tire to cool before measuring the inflation pressure. Always be sure the tire is cold before inflating to the recommended pressure. A cold tire means the vehicle has been sitting for 3 hours and driven for less than 1 mile (1.
WHAT TO DO IN AN EMERGENCY SPARE TIRE 9 D040A02JM-AAT TEMPORARY SPARE TIRE The following instructions for the temporary spare tire should be observed: 1. Check inflation pressure as soon as practical after installing the spare tire, and adjust to the specified pressure. The tire pressure should be periodically checked and maintained at the specified pressure while the tire is stored. Spare Tire Pressure Tire Size Type A Type B, C Inflation Pressure 3 T155/90R16 4.
3 WHAT TO DO IN AN EMERGENCY IF YOU HAVE A FLAT TIRE 10 D040B02JM-GAT D050A02A-AAT Handling the Spare Tire If a tire goes flat while you are driving: To remove the spare tire 1. Take your foot off the accelerator pedal and let the car slow down while driving straight ahead. Do not apply the brakes immediately or attempt to pull off the road as this may cause a loss of control. When the vehicle has slowed to such a speed that it is safe to do so, brake carefully and pull off the road.
WHAT TO DO IN AN EMERGENCY CHANGING A FLAT TIRE 3 11 D060A02HP-AAT D060B01JM-AAT ! D060A01JM The procedure described on the following pages can be used to rotate tires as well as to change a flat tire. When preparing to change a flat tire, check to be sure the gear selector lever is in "P" (automatic) or reverse gear (manual transaxle) and that the parking brake is set, then: WARNING: Your vehicle is equipped with tires designed to provide for safe ride and handling capability.
3 WHAT TO DO IN AN EMERGENCY 12 D060C02A-AAT D060D01A-AAT D060E01A-AAT 2. Block the Wheel 3. Loosen Wheel Nuts 4. Put the Jack in Place Flat tire HJM4009 Block the wheel that is diagonally opposite from the flat to keep the vehicle from rolling when the vehicle is raised on the jack. HJM4015 The wheel nuts should be loosened slightly before raising the car. To loosen the nuts, turn the wrench handle counterclockwise.
WHAT TO DO IN AN EMERGENCY 3 13 D060F03E-AAT Raise the car high enough so that the fully inflated spare tire can be installed. To do this, you will need more ground clearance than is required to remove the flat tire. 5. Raising the vehicle Wrench bar D060G01JM-AAT 6. Changing Wheels ! Wheel nut wrench HFC4022 After inserting the wrench bar into the wheel nut wrench, install the wrench bar into the jack as shown in the drawing. To raise the vehicle, turn the wheel nut wrench clockwise.
3 WHAT TO DO IN AN EMERGENCY 14 D060H03O-AAT ! D060G02JM ! WARNING: If the vehicle has been driven recently, some pieces may be very hot. Use caution. WARNING: Wheels and wheel covers may have sharp edges. Handle them carefully to avoid possible severe injury. Before putting the wheel into place, be sure that there is nothing on the hub or wheel (such as mud, tar, gravel, etc.) that interferes with the wheel from fitting solidly against the hub. If there is, remove it.
WHAT TO DO IN AN EMERGENCY 3 15 D060I01E-AAT 8. Lower Vehicle and Tighten Nuts After changing wheels, have a technician tighten the wheel nuts to their proper torque as soon as possible. D060J02O-AAT After Changing Wheels Wheel nut tightening torque: Steel wheel & aluminium alloy wheel: 65-80 lb.ft (900-1,100 kg.cm) HJM4016 Lower the car to the ground by turning the wheel nut wrench counterclockwise. Then position the wrench as shown in the drawing and tighten the wheel nuts.
3 WHAT TO DO IN AN EMERGENCY IF YOUR VEHICLE MUST BE TOWED 16 After you have changed wheels, always secure the flat tire in its place and return the jack and tools to their proper storage locations. D080A01O-GAT If your vehicle has to be towed, it should be done by your Hyundai dealer or a commercial tow truck service. This will help assure that your vehicle is not damaged in towing. Also, professionals are generally aware of local laws governing towing.
WHAT TO DO IN AN EMERGENCY 3 17 ! 1) If the vehicle is being towed with the rear wheels on the ground, be sure the parking brake is released. CAUTION: o When towing the vehicle, take care not to cause damage to the bumper or underbody of the vehicle. D080A01JM o Do not tow with sling type truck as this may cause damage to the bumper or underbody of the vehicle. ! CAUTION: NOTE: Before towing, check the level of the automatic transaxle fluid.
3 WHAT TO DO IN AN EMERGENCY 18 D080B02O-AAT D080D02O-AAT Towing the 4 Wheel Drive Vehicle dolly ! EMERGENCY TOWING CAUTION: o The 4WD vehicle should never be towed with the wheels on the ground. This can cause serious damage to the transaxle or the 4WD system. o When towing the vehicle, take care not to cause damage to the bumper or underbody of the vehicle.
WHAT TO DO IN AN EMERGENCY IF YOU LOSE YOUR KEYS For emergency towing when no commercial tow vehicle is available, attach a tow cable, chain or strap to one of the towing hooks under the front/rear of your vehicle. Be very careful when attempting this procedure when the vehicle is on any unpaved surface to avoid damage to your vehicle. Nor should towing be attempted if the wheels, drive train, axles, steering or brakes are damaged.
CORROSION PREVENTION & APPEARANCE CARE Corrosion Protection ..................................................... 4-2 To Help Prevent Corrosion ........................................... 4-2 Washing and Waxing .................................................... 4-3 Cleaning the Interior ......................................................
4 CORROSION PREVENTION AND APPEARANCE CARE 2 TO HELP PREVENT CORROSION CORROSION PROTECTION E010A01A-AAT E010C01A-AAT Protecting Your Hyundai from Corrosion High-Corrosion Areas By using the most advanced design and construction practices to combat corrosion, Hyundai produces cars of the highest quality. However, this is only part of the job. To achieve the long-term corrosion resistance your Hyundai can deliver, the owner's cooperation and assistance is also required.
CORROSION PREVENTION AND APPEARANCE CARE WASHING AND WAXING o When cleaning lower door panels, rocker panels and frame members, be sure that drain holes are kept open so that moisture can escape and not be trapped inside to ac-celerate corrosion. E020C02A-AAT Keep Your Garage Dry Don't park your car in a damp, poorly ventilated garage. This creates a favorable environment for corrosion.
4 CORROSION PREVENTION AND APPEARANCE CARE 4 Use a clean sponge or cloth, rinse it frequently and don't damage the finish by rubbing too hard. For stubborn spots, dampen them frequently and remove them a little at a time. To clean whitewall tires, use a stiff brush or soapy steel-wool scouring pad. To clean plastic wheel covers, use a clean sponge or soft cloth and water. To clean cast aluminum alloy wheels, use a mild soap or neutral detergent. Do not use abrasive cleaners.
CORROSION PREVENTION AND APPEARANCE CARE CLEANING THE INTERIOR E030B01A-AAT E030D01A-AAT E040A01A-AAT Spot Cleaning When to Wax Again To Clean the Vinyl Upholstery Don't use gasoline, strong solvents or corrosive cleaning agents. These can damage the finish of the car. To remove road tar, use turpentine on a clean, soft cloth. Be gentle. To remove dead insects or tree sap, use warm water and mild soap or car-washing solution. Soak the spot and rub gently.
4 CORROSION PREVENTION AND APPEARANCE CARE ANY QUESTIONS? 6 E040B01A-AAT E040C01A-AAT To Clean the Leather Upholstery (If installed) Cleaning the Carpets In the normal course of use, leather upholstered surfaces will, like any material, pickup dust and dirt. This dust and dirt must be cleaned off or it may work into the surface of the leather, causing damage. Fine leather needs care, and should be cleaned when necessary.
VEHICLE MAINTENANCE REQUIREMENTS Maintenance Intervals ................................................... 5-2 Scheduled Maintenance ................................................ 5-4 Maintenance under Severe Usage Conditions ............. 5-6 Explanation of Scheduled Maintenance Items .............. 5-7 California Perchlorate Notice ......................................
5 VEHICLE MAINTENANCE REQUIREMENTS 2 MAINTENANCE INTERVALS F010A01A-AAT F010B01A-AAT F010C01A-AAT Service Requirements Maintenance Requirements Specified Scheduled Procedures To ensure that you receive the greatest number of miles of satisfying operation from your Hyundai, certain maintenance procedures must be performed. Although careful design and engineering have reduced these to a minimum, those that are required are of the utmost importance.
VEHICLE MAINTENANCE REQUIREMENTS 5 3 F010D02A-AAT F010F01A-AAT F020A02Y-AAT General Checks A Few Tips These are the regular checks you should perform when you drive your Hyundai or you fill the fuel tank. A list of these items will be found on page 6-4. o Whenever you have your Hyundai serviced, keep copies of the service records in your glovebox. This will help ensure that you can document that the required procedures have been performed to keep your warranties in effect.
5 VEHICLE MAINTENANCE REQUIREMENTS 4 SCHEDULED MAINTENANCE F030A01A-AAT The following maintenance services must be performed to ensure good emission control and performance. Keep receipts for all vehicle emission services to protect your warranty. Where both mileage and time are shown, the frequency of service is determined by whichever occurs first. F030B03JM-AAT R :Replace I : Inspect and, after Inspection, clean, adjust, repair or replace if necessary. No. DESCRIPTION MILES X 1000 7.5 15 22.
VEHICLE MAINTENANCE REQUIREMENTS 5 5 F030C03JM-AAT R : Replace No. I : Inspect and, after inspection, clean, adjust, repair or replace if necessary DESCRIPTION MILES X 1000 7.5 15 22.5 30 37.5 45 52.5 60 67.5 75 82.5 90 97.5 105 112.5 120 127.5 135 142.
5 VEHICLE MAINTENANCE REQUIREMENTS 6 MAINTENANCE UNDER SEVERE USAGE CONDITIONS F040A02JM-AAT The following items must be serviced more frequently on cars normally used under severe driving conditions. Refer to the chart below for the appropriate maintenance intervals. R : Replace I : Inspect and, after inspection, clean, adjust, repair or replace if necessary MAINTENANCE ITEM ENGINE OIL AND FILTER TIMING BELT (WHEN REPLA CE TIMING BELT and INSPECT WATER PUMP : 2.
VEHICLE MAINTENANCE REQUIREMENTS EXPLANATION OF SCHEDULED MAINTENANCE ITEMS 7 F060M01A-AAT F060B01A-AAT F060F01O-AAT o Engine Oil and Filter o Drive Belts o Vacuum Hoses The engine oil and filter should be changed at the intervals specified in the maintenance schedule. If the car is being driven in severe conditions, more frequent oil and filter changes are required. Inspect all drive belts for evidence of cuts, cracks, excessive wear or oil saturation and replace if necessary.
5 VEHICLE MAINTENANCE REQUIREMENTS 8 F065F01O-AAT F060H01A-AAT F070D01A-AAT o Crankcase Ventilation Hose o Air Cleaner Filter o Manual Transaxle Oil Inspect the surface of hose for evidence of heat and/or mechanical damage. Hard and brittle rubber, cracking, tears, cuts, abrasions, and excessive swelling indicate deterioration. Particular attention should be paid to examine that hose surface nearest to high heat sources, such as the exhaust manifold.
VEHICLE MAINTENANCE REQUIREMENTS 5 9 F070F01A-AAT F070K01A-AAT F070N01A-AAT o Brake Hoses and Lines o Exhaust Pipe and Muffler Visually check for proper installation, chafing, cracks, deterioration and any leakage. Replace any deteriorated or damaged parts immediately. Visually inspect the exhaust pipes, muffler and hangers for cracks, deterioration, or damage. Start the engine and listen carefully for any exhaust gas leakage. Tighten connections or replace parts as necessary.
5 VEHICLE MAINTENANCE REQUIREMENTS 10 CALIFORNIA PERCHLORATE NOTICE F080A02NF-AAT Perchlorate Material-special handling may apply, See www.dtsc.ca.gov/ hazardouswaste/perchlorate. Notice to California Vehicle Dismantlers: Perchlorate containing materials, such as airbag inflators, seatbelt pretensioners and keyless remote entry batteries, must be disposed of according to Title 22 California Code of Regulations Section 67384.10 (a).
DO-IT-YOURSELF MAINTENANCE Engine Compartment .................................................... 6-2 General Checks ............................................................ 6-4 Checking the Engine Oil ............................................... 6-5 Changing the Oil and Filter ............................................ 6-6 Checking and Changing the Engine Coolant ................ 6-8 Changing the Air Cleaner Filter ................................... 6-10 Checking the Transaxle Oil (Manual) ....
6 DO-IT-YOURSELFMAINTENANCE ENGINE COMPARTMENT 2 G010A01JM-GAT (2.7 Gasoline) ! CAUTION: When inspecting or servicing the engine, you should handle tools and other heavy objects carefully so that the plastic cover of the engine is not damaged. G010A01JM 1. 2. 3. 4. Power steering fluid reservoir Brake & Clutch fluid reservoir Air cleaner Fuse and Relay box 5. 6. 7. 8. Windshield washer fluid reservoir Engine oil level dipstick Coolant reservoir cap Engine oil filler cap 9.
DO-IT-YOURSELF MAINTENANCE 6 3 G010B01JM-AAT (2.0 Gasoline) ! CAUTION: When inspecting or servicing the engine, you should handle tools and other heavy objects carefully so that the plastic cover of the engine is not damaged. G010B01JM 1. 2. 3. 4. Power steering fluid reservoir Engine oil filler cap Brake & Clutch fluid reservoir Air cleaner 5. 6. 7. 8. Fuse and Relay box Windshield washer fluid reservoir Engine oil level dipstick Coolant reservoir cap 9.
6 DO-IT-YOURSELFMAINTENANCE GENERAL CHECKS 4 G020A01A-AAT G020B01A-AAT G020C01A-AAT Engine Compartment Vehicle Exterior Vehicle Interior The following should be checked regularly: The following should be checked monthly: The following should be checked each time when the vehicle is driven: o o o o o o o o o o o o Engine oil level and condition Transaxle fluid level and condition Brake fluid level Clutch fluid level Engine coolant level Windshield washer fluid level Accessory drive belt condition
DO-IT-YOURSELF MAINTENANCE CHECKING THE ENGINE OIL 5 G030A01A-AAT NOTE: Engine oil is essential to the performance and service of the engine. It is suggested that you check the oil level at least once a week in normal use and more often if you are on a trip or driving in severe conditions. o For good fuel economy, SAE 5W-20 (5W-30), ILSAC GF-3 engine oil is preferred regardless of regional option and engine variation.
6 DO-IT-YOURSELFMAINTENANCE CHANGING THE OIL AND FILTER 6 G030D01JM-AAT G040A02JM-AAT Adding Oil DOHC ! V6 DOHC V6 WARNING: Be very careful not to touch the radiator hose when adding the engine oil as it may be hot enough to burn you. G040A01GK G030D01JM If the oil level is close to or below the "L" mark, add oil until it reaches the "F" mark. To add oil: 1. Remove the oil filler cap by turning it counter-clockwise. 2. Add oil, then check the level again. Do not overfill. 3.
DO-IT-YOURSELF MAINTENANCE 6 7 2. Open the hood and remove the engine oil filler cap. 3. Slide underneath the car and loosen the drain plug by turning it counterclockwise with a wrench of the proper size. Be sure that a drain pan is in position to catch the oil as it drains out, then remove the drain plug. ! WARNING: Be very careful when draining the engine oil as it may be hot enough to burn you! 4.
6 DO-IT-YOURSELFMAINTENANCE 8 CHECKING AND CHANGING THE ENGINE COOLANT G050A01A-AAT ! WARNING: Do not remove the radiator cap when the engine is hot. When the engine is hot, the engine coolant is under pressure and may erupt through the opening if the cap is removed. You could be seriously burned if you do not observe this precaution. Do not remove the radiator cap until the radiator is cool to the touch.
DO-IT-YOURSELF MAINTENANCE 6 9 G050D02A-AAT To Change the Engine Coolant The engine coolant should be changed at those intervals specified in the vehicle maintenance schedule in Section 5. ! CAUTION: Engine coolant can damage the finish of your car. If you spill engine coolant on the car, wash it off thoroughly with clean water. 1. Park the car on level ground, set the park-ing brake and remove the radiator cap when cool. HJM5034 2.
6 DO-IT-YOURSELFMAINTENANCE 10 CHANGING THE AIR CLEANER FILTER G070A01E-AAT WINDSHIELD WIPER BLADES G080A02A-AAT ! CAUTION: o Do not operate the wipers on dry glass. This can result in more rapid wear of the wiper blades and may scratch the glass. o Keep the blade rubber out of contact with petroleum products such as engine oil, gasoline, etc. HJM5038 To change the filter, unsnap the clips around the cover.
DO-IT-YOURSELF MAINTENANCE FILLING THE WASHER RESERVOIR CHECKING THE TRANSAXLE OIL (MANUAL) G090A02JM-AAT G100A02JM-AAT ! CAUTION: o Radiator anti-freeze (engine coolant) should not be used in the washer system because it will damage the car's finish. o The washer should not be operated if the washer reservoir is empty. This can damage the washer fluid pump. G090A01JM The washer fluid reservoir supplies fluid to the front and rear washer systems.
6 DO-IT-YOURSELFMAINTENANCE CHECKING THE TRANSAXLE FLUID (AUTOMATIC) 12 G110A01E-AAT ! WARNING: It is always better to check the transaxle oil level when the engine is cool or cold. If the engine is hot, you should exercise great caution to avoid burning yourself on hot engine or exhaust parts. NOTE: It is recommended that the manual transaxle fluid should be checked by an authorized Hyundai dealer.
DO-IT-YOURSELF MAINTENANCE 6 13 G110C01JM-AAT G110D03O-AAT Transaxle Fluid Capacity Checking the Automatic Transaxle Fluid Level The fluid capacity of the automatic transaxle is 8.2 U.S. quarts (7.8 liters). HOT ! WARNING: The transaxle fluid level should be checked when the engine is at normal operating temperature. This means that the engine, radiator, exhaust system etc., are very hot so you should exercise great care not to burn yourself during this procedure.
6 DO-IT-YOURSELFMAINTENANCE CHECKING THE BRAKES 14 G120A01A-AAT ! G120B01A-AAT Checking the Brake Fluid Level WARNING: The cooling fan is controlled by engine coolant temperature and may sometimes operate even when the engine is not running. Use extreme caution when working near the blades of the cooling fan, so that you are not injured by a rotating fan blade. As the engine coolant temperature decreases, the fan will automatically shut off. This is a normal condition.
DO-IT-YOURSELF MAINTENANCE CHECKING THE CLUTCH FLUID G120D01A-AAT G120E02A-AAT G130A01A-AAT To Check the Fluid Level Adding Brake Fluid To Check the Clutch Fluid ! HJM5007 The fluid level in the brake fluid reservoir should be checked periodically. The level should be between the "MIN" and "MAX" marks on the side of the reservoir. If the level is at or below the "MIN" mark, carefully add fluid to bring it up to "MAX". Do not overfill. WARNING: Handle brake fluid carefully.
6 DO-IT-YOURSELFMAINTENANCE AIR CONDITIONING CARE 16 G130B02A-AAT G140A01A-AAT G140B01A-AAT To Replace the Fluid Keeping the Condenser Clean Recommended brake fluid conforming to DOT 3 or DOT 4 specification should be used. The reservoir cap must be fully tightened to avoid contamination from foreign matter or moisture. The air conditioning condenser (and engine radiator) should be checked periodically for accumulation of dirt, dead insects, leaves, etc.
DO-IT-YOURSELF MAINTENANCE CHANGING THE CLIMATE CONTROL AIR FILTER G140C01A-AAT G140D02A-AAT B145A03JM-GAT Lubrication Checking the Compressor Drive Belt (For Evaporator and Blower Unit) (If Installed) To lubricate the compressor and the seals in the system, the air conditioning should be run for at least 10 minutes each week. This is particularly important during cool weather when the air conditioning system is not otherwise in use. DOHC CVVT Water Pump Pulley V6 Power steering Auto tensioner 0.
6 DO-IT-YOURSELFMAINTENANCE 18 HJM2136 2. Lower the glove box down completely by pushing the both sides of the glove box inward. HJM2134 3. Remove the climate control air filter cover by pressing both side's clips. HJM2135 4. Remove the climate control air filter by lifting it. 5. Installation is the reverse order of disassembly.
DO-IT-YOURSELF MAINTENANCE CHECKING THE FREE-PLAY 19 G150A01A-AAT G160A01A-AAT STEERING WHEEL CLUTCH PEDAL FREE PLAY 0.24 ~ 0.51 in. (6 ~ 13 mm) B145A01JM 1.18 in. (30 mm) G150A01JM ! CAUTION: Be sure to install the air conditioner filter in the direction of the arrow sign. Otherwise, noise or filter damage may result. To check the steering wheel free-play, stop the car with the wheels pointed straight ahead and gently move the steering wheel back and forth.
6 DO-IT-YOURSELFMAINTENANCE CHECKING BRAKE PEDAL CLEARANCE 20 G170A01A-AAT CHECKING DRIVE BELTS G180A01A-AAT G190A01A-AAT BRAKE PEDAL FREE PLAY DOHC CVVT Water Pump Pulley V6 Power steering Auto tensioner 0.2~0.24 in. (5~6 mm) 0.12 ~ 0.31 in. (3 ~ 8 mm) 2.95 in. (75 mm) Alternator G180A01L G160A01HR With the engine off, press down on the brake pedal several times to reduce the vacuum in the brake booster.
DO-IT-YOURSELF MAINTENANCE CHECKING AND REPLACING FUSES 21 G200A03A-AAT G200B02JM-AAT Replacing a Fusible Link OpenReplace ! Replacing Accessory Fuses CAUTION: When replacing a fusible link, never use anything but a new fusible link with the same or lower amperage rating. Never use a piece of wire or a higher-rated fusible link. This could result in serious damage and create a fire hazard.
6 DO-IT-YOURSELFMAINTENANCE 22 1. Turn off the ignition and all other switches. 2. Open the fuse box and examine each fuse. Remove each fuse by pulling it toward you (a small "fuse puller" tool is contained in the relay and fuse box of the engine room to simplify this operation). 3. Be sure to check all other fuses even if you find one that appears to have opened. 4. Replace the blown fuse by pressing a new fuse of the same rating into place. The fuse should be a snug fit.
DO-IT-YOURSELF MAINTENANCE CHECKING THE BATTERY 23 G210A01A-AAT HJM5008 ! 6 o If battery fluid is on your skin, flush the affected areas with water for at least 15 minutes and then seek medical assistance. o If battery fluid is in your eyes, rinse out your eyes with water and get medical assistance as soon as possible. While you are being driven to get medical assistance, continue to rinse your eyes by using a sponge or soft cloth saturated with water.
6 DO-IT-YOURSELFMAINTENANCE CHECKING ELECTRIC COOLING FANS 24 G220A01A-AAT ! WARNING: Always read the following instructions carefully when handling a battery. Keep lighted cigarettes and all other flames or sparks away from the battery. Hydrogen, which is a highly combustible gas, is always present in battery cells and may explode if ignited. Keep batteries out of the reach of children because batteries contain highly corrosive SULFURIC ACID.
DO-IT-YOURSELF MAINTENANCE POWER STEERING FLUID LEVEL G230A03A-AAT HEADLIGHT AIMING ADJUSTMENT Recommended Fluid G290A03O-AAT Use PSF-3 type fluid Before performing aiming adjustment, make sure of the following. 1. Keep all tires inflated to the correct pressure. 2. Place the vehicle on level ground and press the front bumper & rear bumper down several times. Place vehicle at a distance of 118 in. (3m) from the test wall. 3.
6 DO-IT-YOURSELFMAINTENANCE 26 G290B01JM-AAT Vertical aiming Horizontal aiming ! WARNING: Never attempt to adjust the horizontal alignment of your headlights. Horizontal aiming must be adjusted by an authorized Hyundai dealer to avoid incorrect alignment that will reduce the effectiveness of your headlights. Adjustment After Headlight Assembly Replacement Vertical line 30 mm Horizontal line W "P" Cut-off line G290A01JM 6.
DO-IT-YOURSELF MAINTENANCE REPLACEMENT OF LIGHT BULBS SPECIFICATION: "H"; Horizontal center line of headlights from ground: 35.6 in.(904 mm) "W"; Distance between each headlight center: 53.4 in.(1,356 mm) G260A02A-AAT Before attempting to replace a light bulb, be sure the switch is turned to the "OFF" position. The next paragraph shows how to reach the light bulbs so they may be changed. Be sure to replace the burned-out bulb with one of the same number and wattage rating.
6 DO-IT-YOURSELFMAINTENANCE 28 HJM5013 5. Disconnect the power cord from the bulb base in the back of the headlight. HJM5016 6. Turn the plastic cover counterclockwise and remove it. HJM5017 7. Disconnect the connector from the bulb base in the back of the headlight.
DO-IT-YOURSELF MAINTENANCE 6 29 G270B01JM-AAT Rear Combination Light G270A03O HJM5018 8. Push the bulb spring to remove the headlight bulb. 9. Remove the protective cap from the replacement bulb and install the new bulb by matching the plastic base with the headlight hole. Reattach the bulb spring and reconnect the connector. 10. Use the protective cap and carton to promptly dispose of the old bulb. 11. Check for proper headlight aim. 12.
6 DO-IT-YOURSELFMAINTENANCE 30 G270I02JM-GAT Front fog Light (If installed) (1) (2) (3) (4) HJM5022 3. To replace the rear combination light (stop/tail light, turn signal light, back-up light, side mark light), take it out from the bulb holder by turning it counterclockwise. (1) (2) (3) (4) HJM5049 HJM5047 3. Disconnect the power cord. 1. Remove the cover with a phillips screw driver. 2. Remove the bolts with a wrench. Stop/Tail light Turn signal light Back-up light Tail light 4.
DO-IT-YOURSELF MAINTENANCE 6 31 G270C02TB-GAT Luggage Compartment Light (If Installed) HTB284 G270C02JM 2. Disconnect the power cord. G270C01JM 1. Remove the cover with a flat blade screw driver. 3. Replace to the new bulb.
6 DO-IT-YOURSELFMAINTENANCE 32 G270E01O-AAT G270G01O-AAT Front Side Marker Light Interior Light G270E02HR G270E01JM 2. Disconnect the connector. HJM5025 1. Remove the cover with a phillips screwdriver. 1. Remove the cover with a flat blade screwdriver. G270E03HR 3. Replace with a new bulb.
DO-IT-YOURSELF MAINTENANCE 6 33 G270H01O-AAT Glove Box Illuminated Light (If installed) HJM5039 HJM5026 2. Replace with a new bulb. 3. Disconnect the connector. 4. Replace with a new bulb. HJM5045 1. Open the glove box. 2. Remove the cover with a flat blade screwdriver.
6 DO-IT-YOURSELFMAINTENANCE 34 BULB WATTAGE G280A03JM-AAT OJM069001-U No. 1 2 3 4 5 6 7 8 Part Name Front Postion Light Glove Box Illuminated Light (If installed) Head Light (Low/High) Map Light Interior Light Wattage 5 10 55/60 10 Room Light 10 Front Fog Light (If installed) 27 Turn Signal Light 21 Side Marker 5 Front Door Edge Warning Light (If installed) 5 Part Name Socket type No. W2.1x9.5d 9 High Mounted Rear Stop Light 10 Luggage Compartment Light P43t W2.1x9.
DO-IT-YOURSELF MAINTENANCE FUSE PANEL DESCRIPTION 6 35 G200C01JM-GAT Engine Compartment FUSE RATING 30A IGN 30A ECU 50A BATT #1 50A FUSIBLE C/FAN 30A LINK ABS #1 40A ABS #2 30A BLOWER 30A BATT #2 15A INJ 10A SNSR 15A DRL 15A F/FOG FUSE 15A HORN 15A A/CON 15A H/LP (HI) 15A H/LP (LOW) DESCRIPTION PROTECTED COMPONENTS Start relay, Ignition switch Engine control, Fuel pump , A/C, Generator, ATM Ignition switch, Power connector Cooling fan ABS, ESC ABS, ESC Blower Ignition switch, Power connector Injector C
6 DO-IT-YOURSELFMAINTENANCE 36 G200E01JM-AAT Inner Panel G200E02JM
DO-IT-YOURSELF MAINTENANCE 6 37 FUSE RATING P/WDW-LH 30A P/WDW-RH 30A TAIL RH 10A RR HTR 30A A/BAG 15A CLUSTER 10A TAIL LH 10A AUDIO 10A C/LIGHTER 20A & P/OUTLET SPARE 15A RR FOG 10A HTD MIRR 10A AUDIO 10A IG COIL 20A IMMO 10A P/OUTLET 15A 10A S/HTR 20A A/CON SW 10A START 10A FUSE PROTECTED COMPONENTS Left power window Right power window Right rear combination lamp, Glove box lllumination Rear defogger SRS control Instrument cluster, ETACM/TACM Left head lamp, Left rear combination lamp, License lamp Dig
6 DO-IT-YOURSELFMAINTENANCE 38 FUSE IG-SW ROOM LP FUSE PROTECTED COMPONENTS RATING 30A Ignition switch 10A Room lamp, A/C control module, Digital clock, ETACM/TACM Key remind switch AMP 20A Audio T/SIG 10A Hazard switch, Auto light & Photo sensor, Transaxle range switch A/BAG IND RR WIPER 10A Instrument cluster Safety relay A/CON 15A 10A IGN 10A Sunroof controller, A/C control module, Blower relay, ETACM/TACM PTC heater relay, Fuel filter heater relay, DRL CONTROL MODULE, head LAMP RELAY HA
EMISSION CONTROL SYSTEMS Emission Control System ............................................. 7-2 Catalytic Converter .......................................................
7 EMISSION CONTROL SYSTEMS 2 EMISSION CONTROL SYSTEM H010A02O-AAT Your Hyundai is equipped with an emission control system to meet all requirements of the U.S. Environmental Protection Agency or California Air Resources Board. There are three emission control systems which are as follows.
EMISSION CONTROL SYSTEMS CATALYTIC CONVERTER 3 H020A02A-AAT (If installed) Catalytic Converter 7 ! H020A01JM Hyundai vehicles are equipped with a monolith type three-way catalytic converter to reduce the carbon monoxide, hydrocarbons and nitrogen oxides contained in the exhaust gas. Exhaust gases passing through the catalytic converter cause it to operate at a very high temperature.
CONSUMER INFORMATION, REPORTING SAFETY DEFECTS & BINDING ARBITRATION OF WARRANTY CLAIMS Vehicle Identification Number (VIN) .............................. 8-2 Engine Number ............................................................. 8-2 Tire Information ............................................................. 8-3 Recommended Inflation Pressures ............................... 8-3 Tire Sidewall Labeling ................................................... 8-6 Tire Terminology and Definitions ..........
8 CONSUMER INFORMATION, REPORTING SAFETY DEFECTS & BINDING ARBITRATION OF WARRANTY CLAIMS 2 ENGINE NUMBER VEHICLE IDENTIFICATION NUMBER (VIN) The vehicle identification number (VIN) is the number used in registering your car and in all legal matters pertaining to its ownership, etc. It can be found in three different places on your car: I010A02JM-AAT I010B01A-AAT DOHC (I4) V6 1. Lower side of the front passenger seat under the carpet. 2.
CONSUMER INFORMATION, REPORTING SAFETY DEFECTS & BINDING ARBITRATION OF WARRANTY CLAIMS TIRES 3 I020A02A-AAT I030A03JM-AAT TIRE INFORMATION RECOMMENDED COLD TIRE INFLATION PRESSURES The tires supplied on your new Hyundai are chosen to provide the best performance for normal driving. If you ever have questions about your tire warranty and where to obtain service, see the tire manufacture's booklet included with your vehicle's Owner's Manual Literature Kit.
8 CONSUMER INFORMATION, REPORTING SAFETY DEFECTS & BINDING ARBITRATION OF WARRANTY CLAIMS 4 Type C ! I030A02-A These pressures were chosen to provide the most satisfactory combination of ride comfort, tire wear and stability under normal conditions. Tire pressures should be checked at least monthly. Proper tire inflation pressures should be maintained for these reasons: WARNING: o Inspect your tires frequently for proper inflation as well as wear and damage. Always use a tire pressure gauge.
CONSUMER INFORMATION, REPORTING SAFETY DEFECTS & BINDING ARBITRATION OF WARRANTY CLAIMS 8 5 I035A01JM-AAT ! CAUTION: Always observe the following: o Check pressures when the tires are cold. (After the vehicle has been parked for at least three hours or hasn't been driven more than one mile (1.6 km) since starting up.) o Check the pressure of your spare tire each time you check the pressure of other tires. o Never overload your vehicle.
8 CONSUMER INFORMATION, REPORTING SAFETY DEFECTS & BINDING ARBITRATION OF WARRANTY CLAIMS 6 I030B01JM-AAT TIRE SIDEWALL LABELING 1 5, 6 7 4 3 2 1 I030B04JM Federal law requires tire manufacturers to place standardized information on the sidewall of all tires. This information identifies and describes the fundamental characteristics of the tire and also provides the tire identification number (TIN) for safety standard certification. The TIN can be used to identify the tire in case of a recall. 1.
CONSUMER INFORMATION, REPORTING SAFETY DEFECTS & BINDING ARBITRATION OF WARRANTY CLAIMS 8 7 o Four numbers represent the week and year the tire was built. For example, the numbers 3105 means the 31st week of 2005. 4. Tire ply composition and material The number of layers or plies of rubbercoated fabric in the tire. Tire manufacturers also must indicate the materials in the tire, which include steel, nylon, polyester, and others.
8 CONSUMER INFORMATION, REPORTING SAFETY DEFECTS & BINDING ARBITRATION OF WARRANTY CLAIMS 8 Cold Tire Pressure: The amount of air pressure in a tire, measured in pounds per square inch (psi) or kilopascals (kPa) before a tire has built up heat from driving. Curb Weight: This means the weight of a motor vehicle with standard and optional equipment including the maximum capacity of fuel, oil and coolant, but without passengers and cargo.
CONSUMER INFORMATION, REPORTING SAFETY DEFECTS & BINDING ARBITRATION OF WARRANTY CLAIMS 8 9 Sidewall: The portion of a tire between the tread and the bead. Speed Rating: An alphanumeric code assigned to a tire indicating the maximum speed at which a tire can operate. Traction: The friction between the tire and the road surface. The amount of grip provided. Tread: The portion of a tire that comes into contact with the road.
8 CONSUMER INFORMATION, REPORTING SAFETY DEFECTS & BINDING ARBITRATION OF WARRANTY CLAIMS 10 I040A01O-AAT I050A06A-AAT SNOW TIRES TIRE CHAINS If you equip your car with snow tires, they should be the same size and have the same load capacity as the original tires. Snow tires should be installed on all four wheels; otherwise, poor handling may result.
CONSUMER INFORMATION, REPORTING SAFETY DEFECTS & BINDING ARBITRATION OF WARRANTY CLAIMS 8 11 I080A01A-AAT I060A01O-AAT ! TIRE ROTATION CAUTION: Do not mix bias-ply and radial-ply under any circumstances. This may cause dangerous handling characteristics. I070A01A-AAT TIRE BALANCING HEF-241 Tires should be rotated every 7,500 miles (12,000 km). If you notice that tires are wearing unevenly between rotations, have the car checked by a Hyundai dealer so the cause may be corrected.
8 CONSUMER INFORMATION, REPORTING SAFETY DEFECTS & BINDING ARBITRATION OF WARRANTY CLAIMS 12 I090A04JM-AAT WHEN TO REPLACE TIRES ! 0.06 in. (1.6 mm) TWI indicator HJM5031 The original tires on your car have tread wear indicators . The location of tread wear indicators is shown by the "TWI" or " " marks, etc., The tread wear indicators appear when the tread depth is 0.06 in. (1.6 mm). The tire should be replaced when these appear as a solid bar across two or more grooves of the tread.
CONSUMER INFORMATION, REPORTING SAFETY DEFECTS & BINDING ARBITRATION OF WARRANTY CLAIMS 8 13 I090B02JM-AAT ! WARNING: o Tires degrade over time, even when they are not being used. Regardless of the remaining tread, it is recommended that tires tread, It is recommended that tires generally be replaced after 6 years of normal service. Heat caused by not climates or frequent high loading Conditions can accelerate the aging process.
8 CONSUMER INFORMATION, REPORTING SAFETY DEFECTS & BINDING ARBITRATION OF WARRANTY CLAIMS WARRANTIES FOR YOUR HYUNDAI VEHICLE SPARE TIRE AND TOOLS 14 I100A02E-AAT I120A03A-AAT ! WARNING: o Underinflated or overinflated tires can cause poor handling, loss of vehicle control, and sudden tire failure leading to accidents, injuries, and even death. Always check tires are properly inflated before driving. Refer to pages 2-28 and 83 for proper tire pressures and further information.
CONSUMER INFORMATION, REPORTING SAFETY DEFECTS & BINDING ARBITRATION OF WARRANTY CLAIMS CONSUMER INFORMATION I130A01A-AAT This consumer information has been prepared in accordance with regulations issued by the National Highway Traffic Safety Administration of the U.S. Department of Transportation. It provides the purchasers and/or prospective purchasers of Hyundai automobiles with information on uniform tire quality grading.
8 CONSUMER INFORMATION, REPORTING SAFETY DEFECTS & BINDING ARBITRATION OF WARRANTY CLAIMS 16 Temperature A, B, C - The temperature grades are A (the highest), B, and C, representing the tire's resistance to the generation of heat and its ability to dissipate heat when tested under controlled conditions on a specified indoor laboratory test wheel. Sustained high temperature can cause the material of the tire to degenerate and reduce tire life, and excessive temperature can lead to sudden tire failure.
CONSUMER INFORMATION, REPORTING SAFETY DEFECTS & BINDING ARBITRATION OF WARRANTY CLAIMS REPORTING SAFETY DEFECTS (U.S.A only) Southern Region: Florida, Georgia, North Carolina, South Carolina. Southern Region 270 Riverside Parkway, Suite A Austell, GA 30168 (800) 633-5151 South Central Region: Alabama, Arkansas, Colorado, Kansas, Louisiana, Mississippi, Missouri, New Mexico, Oklahoma, Tennessee, Texas, Wyoming.
8 CONSUMER INFORMATION, REPORTING SAFETY DEFECTS & BINDING ARBITRATION OF WARRANTY CLAIMS 18 BINDING ARBITRATION (U.S.A Only) I140A01A-AAT Any claim or dispute you may have related to your vehicle's warranty or the duties contemplated under the warranty, including claims related to the refund or partial refund of your vehicle's purchase price (excluding personal injury or product liability claims), shall be resolved by binding arbitration.
VEHICLE SPECIFICATIONS Measurement ................................................................ 9-2 Engine ........................................................................... 9-3 Lubrication Chart ...........................................................
9 VEHICLE SPECIFICATIONS 2 J010A02JM-AAT J030A01JM-AAT MEASUREMENT in.
VEHICLE SPECIFICATIONS ENGINE 3 J070A02JM-AAT GASOLINE ITEMS 2.0 DOHC 2.7 V6 Engine Type 4-Cyl., In-line DOHC 6-Cyl., V-type DOHC Bore x Stroke 82 × 93.5 86.7 × 75.0 1,975 2,656 1-3-4-2 1-2-3-4-5-6 0.0067 ~ 0.0091 in.(0.17 ~ 0.23 mm) Auto lash 0.0098 ~ 0.0122 in.(0.25 ~ 0.31 mm ) Auto lash 0.0047 ~ 0.011 in.(0.12 ~ 0.28 mm) Auto lash 0.0079 ~ 0.015 in.(0.2 ~ 0.
9 VEHICLE SPECIFICATIONS 4 LUBRICATION CHART J080A03JM-AAT Oil & Grease Standard Item Engine Oil Recommends SAE 5W-20, 5W-30 API SJ, SL or ABOVE, ILSAC GF-3 or ABOVE Q'ty u.s.qts. (liter) Drain and refill with oil filter 2.0 L : 4.23 (4.0) 2.7 L : 4.76 (4.5) SAE 10W-30 [ABOVE 0°F (-18°C)] Transaxle Manual HYUNDAI GENUINE PARTS SAE MTF SAE 75W/85 (API GL-4) 2.2 (2.
INDEX 10 10
10 INDEX 2 A Air bag ............................................................................................... 1-34 Air Cleaner Filter ............................................................................... 6-10 Air Conditioning Care .............................................................................................. 6-16 Operation .......................................................................... 1-100, 6-16 Switch ............................................................
INDEX 10 3 Drive Belts ......................................................................................... 6-20 Driving Driving for economy ..................................................................... 2-22 Smooth cornering ......................................................................... 2-23 Winter driving ............................................................................... 2-23 Fuel Filler Lid Remote release .............................................................
10 INDEX 4 K Keys ................................................................................................... 1-3 If you lose your keys ................................................................... 3-19 Positions ......................................................................................... 2-5 L Light Bulbs Replacement .................................................................. 6-27 Luggage Net .................................................................................
INDEX 10 5 T Tachometer ....................................................................................... 1-55 Tail Gate ............................................................................................ 1-78 Tail gate window ........................................................................... 1-79 Theft-Alarm System ............................................................................ 1-9 Ticket Holder .........................................................................
EN hma cover.qxd 11/27/2006 5:07 PM Page 3 This Owner's Manual should be considered a part of the car and remain with it when it is sold for the use of the next owner. OWNER'S INFORMATION ORIGINAL OWNER _____________________________________________________ ADDRESS CITY _________________ STATE ___________ ZIP CODE _____________________ DELIVERY DATE (Date Sold to Original Retail Purchaser) DEALER NAME _______________ DEALER NO.