
Instruction Manual

155
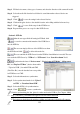
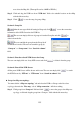
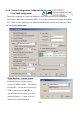
user selects the Map file. (The map file can be a BMP or JPG file.)
Step 2. Click and drag the NVR icon from “NVR sites” field to the suitable location on the eMap
with the left mouse key.
Step 3. Click “ ” to save the setup for group e-Map.
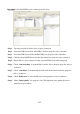
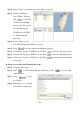
Section 2: Group list
: After the user types finish all setting in Group tab, click “ ” to save the connection
information of the NVR Server into the NVR list.
: The user can simply click one of group no from the Group list and click “ ” to
delete it from the list.
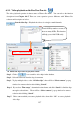
: The user can find the group from the Group list if
modification is needed. The user can search the group by
“Group no” or “Group name” from “Search in column”
field.
Section 3: Show the selected NVR Servers for Group
The user can simply click one of any NVR servers and click “ ” to delete it from the group.
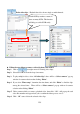
Section 4: Show all the NVR Servers
All the preset NVR Servers will be shown on this area. The user can simply click “ ” to search
the NVR Servers by “NVR no” or “NVR name” from “Search in column” field.
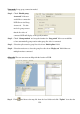
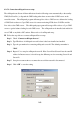
Set up for eMap tree topology:
You must edit the “eMap tree topology” tab and select the NVRs or Groups on the list of tree
topology, otherwise the “Tree map “ tab of “eMap connection “ will show nothing.
Step 1. Click group from “Group no” field and click “ ” to move the group to the eMap tree
topology or click and drag the group from “Group no” field with the left mouse key.