/ ASEP Controller PSEP Controller DSEP Controller Instruction Manual Ninth Edition
/ Please Read Before Use Thank you for purchasing our product. This Instruction Manual describes all necessary information items to operate this product safely such as the operation procedure, structure and maintenance procedure. Before the operation, read this manual carefully and fully understand it to operate this product safely. The enclosed CD/DVD in this product package includes the Instruction Manual for this product.
/
/ Table of Contents Safety Guide..............................................................................................................................1 International Standards Compliances......................................................................................8 CE Marking................................................................................................................................9 Precautions in Operation.................................................................
/ 3. Operation.........................................................................................................................48 3.1 Setting...............................................................................................................................................48 3.1.1 Initial Setting …………………………………………………………………………………… 48 3.1.2 Position Data Setting ………………………………………………………………………… 50 3.1.
/ Safety Guide “Safety Guide” has been written to use the machine safely and so prevent personal injury or property damage beforehand. Make sure to read it before the operation of this product. Safety Precautions for Our Products The common safety precautions for the use of any of our robots in each operation. No.
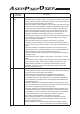
/ No. Operation Description Description 2 Transportation Ɣ :KHQ FDUU\LQJ D KHDY\ REMHFW GR WKH ZRUN ZLWK WZR RU PRUH SHUVRQV RU utilize equipment such as crane. Ɣ :KHQ WKH ZRUN LV FDUULHG RXW ZLWK RU PRUH SHUVRQV PDNH LW FOHDU ZKR LV to be the leader and who to be the follower(s) and communicate well with each other to ensure the safety of the workers.
/ No. 4 Operation Description Installation and Start Description (2) Cable Wiring Ɣ 8VH RXU FRPSDQ\¶V JHQXLQH FDEOHV IRU FRQQHFWLQJ EHWZHHQ WKH DFWXDWRU and controller, and for the teaching tool. Ɣ 'R QRW VFUDWFK RQ WKH FDEOH 'R QRW EHQG LW IRUFLEO\ 'R QRW SXOO LW 'R QRW coil it around. Do not insert it. Do not put any heavy thing on it. Failure to GR VR PD\ FDXVH D ¿UH HOHFWULF VKRFN RU PDOIXQFWLRQ GXH WR OHDNDJH RU continuity error.
/ No. Operation Description Description 4 Installation and Start (4) Safety Measures Ɣ :KHQ WKH ZRUN LV FDUULHG RXW ZLWK RU PRUH SHUVRQV PDNH LW FOHDU ZKR LV to be the leader and who to be the follower(s) and communicate well with each other to ensure the safety of the workers. Ɣ :KHQ WKH SURGXFW LV XQGHU RSHUDWLRQ RU LQ WKH UHDG\ PRGH WDNH WKH VDIHW\ measures (such as the installation of safety and protection fence) so that nobody can enter the area within the robot’s movable range.
/ No. Operation Description 6 Trial Operation Ɣ :KHQ WKH ZRUN LV FDUULHG RXW ZLWK RU PRUH SHUVRQV PDNH LW FOHDU ZKR LV to be the leader and who to be the follower(s) and communicate well with each other to ensure the safety of the workers. Ɣ $IWHU WKH WHDFKLQJ RU SURJUDPPLQJ RSHUDWLRQ SHUIRUP WKH FKHFN RSHUDWLRQ one step by one step and then shift to the automatic operation.
/ No. Operation Description Description Ɣ :KHQ WKH ZRUN LV FDUULHG RXW ZLWK RU PRUH SHUVRQV PDNH LW FOHDU ZKR LV to be the leader and who to be the follower(s) and communicate well with each other to ensure the safety of the workers.
/ Alert Indication The safety precautions are divided into “Danger”, “Warning”, “Caution” and “Notice” according to the warning level, as follows, and described in the Instruction Manual for each model. Level Degree of Danger and Damage Symbol Danger This indicates an imminently hazardous situation which, if the product is not handled correctly, will result in death or serious injury.
/ International Standards Compliances ASEP/PSEP and DSEP comply with the following international standards: RoHS Directive CE Marking ż ż (Note) The DSEP is not applicable to UL.
/ CE Marking If a compliance with the CE Marking is required, please follow Overseas Standards Compliance Manual (ME0287) that is provided separately.
/ Precautions in Operation 1. Use the following teaching tools. Use the teaching tool such as the PC software stated in the next clause as the applicable for this controller. Ɣ 7HDFKLQJ 7RROV WKDW LV DSSOLFDEOH IRU WKLV FRQWUROOHU [Refer to 1.2.2] 2. Backup the data to secure for breakdown. A non-volatile memory is used as the backup memory for this controller. All the registered position data and parameters are written into this memory and backed-up at the same time.
/ 4. Operation cannot be performed unless there is an input of Servo-on Signal and Pause Signal. (1) Servo-on Signal (SON) Servo-on signal (SON) is selectable from either “Enable” or “Disable” by the setting. It is settable in the initial setting. [Refer to 2.1 Setting] If it is set to “Enable”, the actuator would not operate unless turning this signal on.
/ 6. Transference of PIO Signal between Controllers Please note the following when conducting transference of PIO signal between controllers. To certainly transfer the signal between controllers with different scan time, it is necessary to have longer scan time than the one longer than the other controller. To ensure to end the process safely, it is recommended to have the timer setting more than twice as long as the longer scan time at least. Ɣ 2SHUDWLRQ ,PDJH PLC (e.g.
/ 7. PLC Timer Setting Do not have the PLC timer setting to be done with the minimum setting. Setting to “1” for 100msec timer turns on at the timing from 0 to 100msec while 10msec timer from 0 to 10msec for some PLC. Therefore, the same process as when the timer is not set is held and may cause a failure such as the actuator cannot get positioned to the indicated position number in Positioner Mode.
/ Name for Each Parts and Their Functions Pictures show ASEP, It should be the same for PSEP and DSEP.
/ 3) StatusLED (For SV, ALM and EMG) Following show the controller operation status: Indication Status Green Light is turned ON. Light is turned OFF Flashing in green (1Hz) Red Light is turned ON. SYS Description Servo ON Status Servo OFF Status Servo ON Status In the alarm issue or emergency stop 4) SIO Connector It is the connector for the connection of the communication cables for the teaching pendant and PC software. 5) PIO Connector It is the connector for 24V DC I/O signal connection.
/ Actuator Axes Refer to the pictures below for the actuator axes that can be controlled by ASEP/PSEP and DSEP. (There are some types that cannot be controlled depending on the controller. Check the catalog for the details.) GH¿QHV WKH KRPH SRVLWLRQ DQG LWHPV LQ ) are for the home-reversed type (option).
/ (5) Gripper Type Finger Attachment (Note) 0 + + Finger Attachment (Note) 0 0 0 + + + 0 Note: Finger attachment is not included in the actuator package. Please prepare separately.
/ Starting Procedures :KHQ XVLQJ WKLV SURGXFW IRU WKH ¿UVW WLPH PDNH VXUH WR DYRLG PLVWDNHV DQG LQFRUUHFW ZLULQJ E\ UHIHUULQJ WR the procedure below. Check of Packed Items Are there all the delivered items? No→ Contact our distributor or us. ↓ Yes Installation and Wiring Perform the installation of and wiring for the controller and actuator according to the instructions in the Instruction Manual for the actuator and this Instruction Manual.
/ 6SHFL¿FDWLRQV &KHFN Product Check 6SHFL¿FDWLRQV &KHFN 1.1 7KLV SURGXFW LV FRPSULVHG RI WKH IROORZLQJ SDUWV LI LW LV RI VWDQGDUG FRQ¿JXUDWLRQ ,I \RX ¿QG DQ\ IDXOW LQ WKH FRQWDLQHG PRGHO RU DQ\ PLVVLQJ SDUWV FRQWDFWV XV RU RXU GLVWULEXWHU 1.1.1 Parts No. 1 Controller Accessories 2 3 4 Part Name Model [Refer to “1.1.
/ 6SHFL¿FDWLRQV &KHFN 1.1.3 No 1 2 3 4 1.1.4 Instruction manuals related to this product, which are contained in the instruction manual (CD/DVD). Name ASEP/PSEP/DSEP Instruction Manual PC Software RCM-101-MW/RCM-101-USB Instruction Manual Touch Panel Teaching CON-PTA/PDA/PGA Instruction Manual Teaching Pendant dedicated for SEP Controller (Touch Panel Teaching) Instruction Manual Manual No. ME0267 ME0155 ME0294 ME0217 How to read the model plate Model Serial number 1.1.
/ [ PSEP] PSEP – C – 20PI – NP – 0 – 0 – ABU – H – ** C : Standard Type CW : Dust-proof type (Equivalent to IP53) [Motor Type] 20P : Ƒ6L]H 35P : Ƒ6L]H 28P : Ƒ6L]H 42P : Ƒ6L]H 28SP : Ƒ6L]H 56P : Ƒ6L]H (For RA3C) [Encoder Type] I : Incremental NP : NPN Specification (Sync.
/ %DVLF 6SHFL¿FDWLRQV 6SHFL¿FDWLRQV &KHFN 6SHFL¿FDWLRQV Item Number of controlled axes Power-supply voltage Control power capacity Load Motor type current 2W 5W 10W (RCL series) 10W (RCA/RCA2 series) 20W 20W (Model code display 20S) 30W 20P 28P 35P 42P 56P 3W Heat generation Rush current Motor control system Applicable RCA series encoder RCA2 RCA2-***N resolution series Except for RCA2-***N RCL RA1L, SA1L, series SA4L, SM4L RA2L, SA2L, SA5L, SM5L RA3L, SA3L, SA6L, SM6L RCP2, RCP3, RCP4 RCD Actuat
/ Item Forcibly releasing of electromagnetic brake switch PSEP DSEP None None Brake cannot Supply 24V DC 150mA to BK on power connector when be compulsorily a compulsory release of the brake is required. released.
/ 1.3 External Dimensions 6SHFL¿FDWLRQV &KHFN [ASEP/PSEP/DSEP-C] Front View [Dust-Proof Cover : ASEP/PSEP/DSEP-CW] Front View Side View Side View 107mm 110mm 34mm 30mm 105.7mm 72.2mm Bottom View Bottom View [Absolute Battery Unit SEP-ABUM (only applies to ASEP/PSEP)] Side View Front View 105mm 30mm Bottom View 24 72.
/ PIO Input and Output Interface 6SHFL¿ Input Current cation ON/OFF Voltage External Power Supply 24V DC Output Section Load Voltage 24V DC Peak Load Electric 50mA/1circuit Current 4mA 1circuit ON Voltage MIN.18V DC Leakage Current OFF Voltage MAX.6V DC MAX.0.1mA/1point Controller Controller P24 680 5.6K NPN 6SHFL¿FDWLRQV &KHFN Input Section 24V DCr10% Input Voltage Input Terminal Internal Power Supply 1.4.
/ 1.5 Installation Environment 6SHFL¿FDWLRQV &KHFN This product is capable for use in the environment of pollution degree 2*1 or equivalent. *1 Pollution Degree 2: Environment that may cause non-conductive pollution or transient conductive pollution by frost (IEC60664-1) Do not use this product in the following environment.
/ 1.6 (1) Installation and Noise Elimination Noise Elimination Grounding (Frame Ground) Connect it using an earth cable made of soft copper with the diameter of AWG16 (1.25mm2). Controller Class D grounding (Formerly Class-III grounding: Grounding resistance at 100 or less) (2) (3) Other equipment Other equipment Other equipment Do not share the ground wire with or connect to other equipment. Ground each controller.
/ 6SHFL¿FDWLRQV &KHFN (4) Heat Radiation and Installation Conduct design and manufacture in consideration of the control box size, controller layout and cooling in such a way that the temperature around the controller will be 40qC or less. Min. 20mm DIN Rail Min. 50mm Ensure enough space for wiring. Spacer : PFP-S (OMRON) 1 Unit Min. 20mm DIN Rail Min. 5mm Note 28 Install the Absolute Battery Unit securely under the controller.
/ 2. 2.1 Wiring Wiring Diagram (Connection of construction devices) Absolute Battery Unit (Note 2) SEP-ABUM SIO Connector PIO Connector Connection Cable between Controller and Absolute Battery (Note 1) Flat Cable Host System (PLC) Accessories FG Cable : AWG16 (1.
/ 2.2 PIO Pattern Selection and PIO Signal (1) Operation Pattern 2. Wiring The 6 operation patterns (For PIO Pattern). Each of these 6 patterns is described as in the table. Also, the corresponding air cylinder circuit is described for reference. Operation Pattern Contents PIO Pattern 0 Single Solenoid System (Standard Point-to-Point Movement) The actuator pointto-point movement is available using the same control function as for the air cylinder.
/ Contents Single Solenoid System (Point-to-Point Movement) (Target Position Setting (Position Data) Change) The actuator pointto-point movement is available using the same control function as for the air cylinder. The change-over between the positioning and pressing operations during the operation is available. The target position setting (forward position and backward position) is available. Speed and acceleration settings in the actuator movement are available. The pressing operation is available.
/ 2. Wiring Operation Pattern PIO Pattern 5 (Continuous Reciprocating Operation) Contents Example for Electric Cylinder Connection Example for Air Cylinder Connection (Reference) The actuator’s pointto-point reciprocating operation is performed between the forward position and backward position. The target position setting (forward position and backward position) is available. Speed and acceleration settings in the actuator movement are available. The pressing operation is available.
/ (2) PIO Pattern and Signal Assignment Pattern 1 2 3 4 5 Point-to-Point Movement (Movement Speed Setting) Point-to-Point Movement (Target Position Setting Change) 3-Point Movement (2-Input) 3-Point Movement (3-Input) Point-to-Point Reciprocating Movement (Continuous Reciprocating Operation) - Double - Cable Color Input/ Output 1 BR COM 24V 24V 24V 24V 24V 24V 2 RD COM 0V 0V 0V 0V 0V 0V ASTR Single Double Single Double Single Double 3 OR 0 ST0 ST0 ST0 ST0 ST0
/ (3) List of PIO Signal Functions 2.
/ 2.3 [1] Circuit Diagram (Example) Power/Emergency Stop Circuit 24V Emergency 0V 2.
/ [3] Pattern 1 : Point-to-Point Movement (Movement Speed Change) 1) Single Solenoid System 0V (NPN Type) 24V DC (PNP Type) 24V DC (NPN Type) 0V (PNP Type) 2.
/ [4] Pattern 2 : Point-to-Point Movement (Target Position Change) 1) Single Solenoid System 0V (NPN Type) 24V DC (PNP Type) 24V DC (NPN Type) 0V (PNP Type) 24V DC Supply Movement Signal BR 1 OR 3 Pause Signal YW 4 Target Position Change Signal (Reset Signal) GN 5 Servo ON Signal BL 6 P24 ST0 LS0/PE0 *STP LS1/PE1 CN1 (RES) –/SON 2 RD 7 PL 8 GY 9 WT 10 BK 0V HEND/SV *ALM/SV 0V Supply Load Backward Position Detection/ Backward Positioning Completion Forward Position Detectio
/ [5] Pattern 3 : 3-Point Movement (2-Input) 0V (NPN Type) 24V DC (PNP Type) 24V DC (NPN Type) 0V (PNP Type) 2.
/ [8] Input Emergency Stop to Multiple Controllers 0V Touch Panel Teaching +24V SIO Converter EMGA External External EMG EMG Reset Switch Switch EMG1 2.
/ [9] Motor • Encoder Connector ASEP/PSEP/DSEP Motor · Encoder Connector Integrated Cable(Note) 2. Wiring MOT PG (Motor · Encoder Cable Connector) (Note) Motor · Encoder Connector Integrated Cable is an accessory of the actuator.
/ 2.4 Wiring Method 2.4.1 Wiring Layout of Power Supply Connector 24V DC Power Supply 1 Pin (BR) +24V 2 Pin (RD) 0V Accessory I/O Flat Cable Brake Release Switch (Turn ON to Release Brake) Emergency Stop Circuit [Refer to 2.3] Accessory Power Supply Connector (MC1.5/5-ST-3.5) Class D Grounding Ɣ 3RZHU 6XSSO\ &RQQHFWRU Connector Name Cable Side MC1.5/5-ST-3.5 Controller Side MC1.5/5-G3.5 Pin No.
/ 2. Wiring 2.4.2 Wiring Layout of FG Terminal Block FG is to be connected to a screwless terminal block. Strip the sheath of the applicable wires for 11mm and insert them to the connector. Push a protrusion beside the cable inlet with a small slotted screwdriver to open the inlet. After inserting a cable, remove WKH VFUHZGULYHU IURP WKH SURWUXVLRQ WR ¿[ WKH FDEOH Ɣ )* 7HUPLQDO %ORFN Terminal Block Name Controller Side Pin No.
/ 2.4.3 Connection to Actuator Connect the cables to the motor • encoder connectors. 2. Wiring Note: For Simple Absolute applicable type, remove the absolute battery connector from the controller before connecting the cable. Ɣ 0RWRU (QFRGHU &RQQHFWRU 6SHFL¿FDWLRQV Connector Name MOT PG Cable Side PADP-24V-1-S Controller Side S24B-PADSS-1 Signal Name Pin No.
/ 2. Wiring 2.4.4 Connection of PIO Conduct the connection of I/O to the controller is to be carried out using the dedicated I/O cable. The cable length is shown in the model code of the controller. Please check the controller model code. There are 2m for standard, 3m and 5m as an option. 10m is also applicable at maximum if purchased separately. [Refer to “1.1.5. How to read the model] Also, the end of the cable harness to be connected to the host controller (PLC, etc.
/ 2.4.5 SIO Connector Connection 2. Wiring SIO connectors can be used not only for the connection of teaching tool, but also for the connection of the host controller (PLC, touch panel and PC). For the operation, refer to the instruction manual of each module. [Refer to Instruction manuals related to this product, which are contained in CD/DVD.
/ 2.4.6 Battery Connector Connection (For Simple Absolute Type) 2. Wiring The absolute battery unit is to be connected to the battery connector. Connect the dedicated cable enclosed with the absolute battery unit. Connection Cable between Controller and Absolute Battery : CB-APSEP-AB005 $SSOLFDEOH &RQWUROOHU $6(3 Ƒ Ƒ Ƒ $%80 36(3 Ƒ Ƒ Ƒ $%80 (Absolute Battery Unit) Connection Cable [Refer to 1.10.
/ NiMH battery (SANYO Electric Co., Ltd.) AB-7 3.6V 3300mAh Approximately 3 years (It may vary depending on the usage condition.) Approximately 72 hours Note: About Battery Charge and Discharge :KHQ XVLQJ IRU WKH ¿UVW WLPH RU WKH ¿UVW WLPH DIWHU WKH EDWWHU\ LV UHSODFHG GR QRW FKDUJH WKH EDWWHU\ for more than 72 hours in a row. The battery can be charged when 24V is supplied to the controller. The encoder data will be able to be retained for the duration (Note) stated below as per hour of battery charge.
/ 3. Operation 3.1 Setting 3. Operation 3.1.1 Initial Setting Conduct the following initial settings on the PC software or Touch Panel Teaching. Refer to the Instruction Manual for the PC software or Touch Panel Teaching for the details of the settings. • Initial Setting Items * There may be some items that are not displayed depending on the selected operation patterns. No.
/ No. Setting Items 8 Output Signal Type Output Signal Selection Limit Switch /Positioning (Limit Switch) 0 to 2 (0) Contents PIO Pattern 0 1 2 3 4 5 The actuator is moved and the signal output system after the positioning completion is selected. • Limit Switch : When the actuator reaches the target position, it is turned ON. (Even when the servo-motor is turned ON and if the current position is within the positioning width, the ON mode is continued.
/ 3.1.2 Position Data Setting Set the following items in the position data editing window of the PC software menu or by selecting “Position Setting” in the Touch Panel Teaching menu. [Refer to the PC Software or Touch Panel Teaching Instruction Manual for the details] 3.
/ Note: 5) Pressing Force 6) Pressing Width … Set the pressing torque (current limit value) in % for the pressing operation. Having a bigger power limit value gives bigger pressing force. It is set to the positioning operation when setting to “0”. [Refer to Appendix in this manual or the Instruction Manual for the actuator.] Setting Range : 0 (pressing operation is disabled), 20 to 70%(Note 1) (Unit: 1%) It differs depending on the actuator.
/ (Positioning complete signal output) Pressing Complete Pulling Action] 3. Operation [Pressing towards Backward Position or Intermediate Position Velocity Time Pressing Width Backward Position (Intermediate Position) Pressing Start Position Forward Position 7) Energy-Saving Function … When it is set to “Enable”, the servo-motor is turned OFF DXWRPDWLFDOO\ DIWHU WKH SRVLWLRQLQJ LV FRPSOHWHG DQG WKH VSHFL¿HG WLPH period passes.
/ Position Data 0 1 2 3 Backward Position Forward Position 0.00 50.00 0.1 0.1 0 0 EnergySaving Function Effective 200.00 50.00 0.1 0.1 70 1.00 Effective Position Velocity Acceleration Deceleration Pressing Force Pressing Width Backward Position 10.00 50.00 0.1 0.1 0 0 Effective Forward Position 100.00 50.00 0.1 0.1 60 1.00 Effective 53 3. Operation x When the position data is to be changed for the Operation Pattern (PIO Pattern) No.
/ 3. Operation 3.1.3 Absolute Reset (This function is effective only when the controller and actuator are the absolute type). :KHQ WKH SRZHU WR WKH PDFKLQH LV WXUQHG 21 IRU WKH ¿UVW WLPH SHUIRUP WKH $EVROXWH 5HVHW Procedure : After the power is turned ON, an absolute encoder error detection error occurs. Turn ON the RES signal (IN2), reset the alarm on the alarm window displayed on the PC software, or touch “RES” on the Alarm window in the Touch Panel Teaching mode to remove the error.
/ 3.2 3.2.1 Power-up and PIO Control Control of Input Signal 7msec Identify Input Signal Not Identify Input Signal 55 3. Operation The input signal of this controller has the input time constant of 7msec considering the prevention of wrong operation by chattering and noise. Therefore, ensure the continuous signal for more than 7msec for each input signal.
/ 3.2.2 Power Input 1) Release the emergency stop status or enable the motor driving power supply. 2) Supply 24V DC for the I/O. 3) Supply 24V DC for the controller. 4) Input the Servo-motor ON signal from the PLC side(*3). 3. Operation ,QSXW WKH %DFNZDUG 3RVLWLRQ PRYHPHQW FRPPDQG DQG VLJQDOV DW ¿UVW IURP WKH 3/& VLGH [Refer to 3.2.
/ 3.2.3 Home-return Home-return operation is performed when turning the Movement Signal 1 (ST0) on if the home return has not yet done since the power is turned on. 3. Operation 1) If the operation pattern is “Point-to-Point Movement (Single Solenoid)” ,I WKH KRPH UHWXUQ LV QRW FRQGXFWHG RQ WKH RSHUDWLRQ SDQHO \HW WKH ¿UVW 0RYHPHQW 6LJQDO 67 will bring the actuator to the home position. After home return operation, it moves to the forward position and stops (for positioning).
/ 3.3 Timing Chart [1] Point-to-Point Movement (For Single Solenoid System) ••• PIO Pattern 0 to 2 When the ST0 is turned “ON”, the positioning to the backward position is performed and when the ST0 is turned “OFF”, the positioning to the forward position is performed. 3.
/ [3] Pause during Movement (For Single Solenoid System) ••• PIO Pattern 0 to 2 * Inputting the STP signal pauses the actuator motion. A forward position movement example is shows as follows. Movement Signal (ST0) Pause Signal (*STP) Forward Position Detection Output (LS1) 3. Operation Forward Positioning Completion Output (PE1) Positioning Band (Parameter No.
/ [6] Speed Change during the Movement (For Double Solenoid System) ••• PIO Pattern 1 The movement speed is changed during the actuator’s movement to the target position. When the movement command is issued with SPDC turned ON, the actuator is moved at the changed VSHHG VSHFL¿HG XVLQJ WKH 6SHHG &KDQJH IXQFWLRQ IURP WKH SRVLWLRQ VHW IRU WKH VSHHG FKDQJH LQ WKH SRVLWLRQ VHWWLQJ RSHUDWLRQ 7KH IROORZLQJ ¿JXUH VKRZV DQ H[DPSOH RI IRUZDUG SRVLWLRQ PRYHPHQW 3.
/ [9] 3-Point Movement (For Single Solenoid System) ••• PIO Pattern 3 With the combination of ST0 and ST1, the actuator is moved to the target position. Backward Position Movement Signal (ST0) Refer to the table below for the combination of movement signals. Forward Position Movement Signal (ST1) 3.
/ [10] Reciprocating Operation between 2 Points ••• PIO Pattern 5 Reciprocating operation is performed continuously between the forward and backward positions while ASTR signal is ON. Once ASTR signal is turned OFF, the actuator positions at the current target position and stops. 3.
/ 3.4 No User Parameters Name Initial Value Setting Range Remarks Set the output range of LS signal and PE signal toward the target position. Set the movement speed in using the jog. Positioning Width [mm] Dependent on Actuator 2 -RJ 6SHHG >PP VHF@ Dependent on Actuator 0.01 to Dependent on Actuator 3 Servo-Motor Gain No.
/ No Name Initial Value Setting Range Remarks Set the standard for the absolute data storage time. 3. Operation 19 20 Absolute Battery Retention Time Position Data Change Password 2 0000 0 to 3 0000 to 9999 Parameter Encoder Max. Rotation No.19 Setting Speed [rpm] When the When the connected connected actuator is a actuator is model other RCA2-***N; than RCA2-***N; 0 100 75 1 200 150 2 400 300 3 800 600 20 15 10 5 When “0000” is set, the password input is not required.
/ 3.5 Servo Adjustment 3.5.1 Adjustment for ASEP and PSEP (Note) Make an adjustment following Section 3.5.2 if using DSEP. No. Situation that Requires Adjustment How to Adjust 1 7DNHV WLPH WR ¿QLVK positioning/Positioning accuracy is not appropriate / Shorter takt time is desired Increase the “Servo-Motor Gain Number”. By setting a bigger number, the follow-up ability to the position command becomes better. Try to increase one by one.
/ 3.5.2 3. Operation No. Adjustment for DSEP Situation that Requires Adjustment 1 Hunching occurs during the positioning stop 2 Speed is uneven during the movement / Speed accuracy is not appropriate How to Adjust Set the parameters following the procedure below and check the operation. Finish the adjustment once the operation is improved. There is no need to proceed to the next step.
/ No. 3 Situation that Requires Adjustment Change “Velocity Loop Proportional Gain” and “Velocity Loop Integrated Gain” to the following values and check the operation. Speed Loop Proportional Gain : 32 Velocity Loop Integrated Gain : 231 3. Operation Abnormal noise is generated/Especially, when stop and operation in low speed (less than 20mm/sec), comparatively high noise is generated.
/ 3.5.3 • Servo Parameter User Parameter No. 3 Servo-Motor Gain Number 3. Operation This parameter decides the responsibility to the position control loop. When the set value is increased, the follow-up ability to the position command becomes better. However, if the value is too large, an overshoot is caused easily. When the set value is too low, the follow-up ability to the position command is degraded and it takes longer time to complete the positioning.
/ 3.6 3.6.1 Alarm Alarm Level 7KH DODUPV DUH FODVVL¿HG WR W\SHV RI OHYHOV E\ WKH FRQWHQW RI WKH HUURU Status Lamp Condition in Error Occurrence Operation Cancellation Red Light is turned ON. Actuator compulsory stop (Motor power (servo) turns off after deceleration and stop.) Perform a reset with the reset signal (RES) or by using a teaching tool such as PC software Cut and supply the power again Red Light is turned ON.
/ 3.6.2 3. Operation Error Level Operation Cancellation Cold Start Alarm Codes and Trouble Shooting Code Alarm Name Cause/Treatment 080 Movement Command in Servo-Motor OFF Cause :The movement command is input while the servo-motor is turned OFF. Treatment :Input “SON” signal to turn ON the servo-motor. 082 Movement Command in Incomplete Home Return Cause :The movement command is input while the home return has not been completed. Treatment :Input ST0 signal to perform the home return operation.
/ Error Level Code Magnetic Pole Indeterminate )RU WKLV FRQWUROOHU ZKHQ WKH VHUYR PRWRU LV WXUQHG 21 IRU WKH ¿UVW WLPH DIWHU WKH SRZHU LV LQSXW the magnetic pole phase detection (pole sensing) is performed. At that time, the magnetic pole SKDVH LV QRW GHWHFWHG DIWHU WKH VSHFL¿HG WLPH SHULRG Cause :(1) A looseness in the connection section of the actuator connecting cable or wire breakage is considered. (2) In the case of the unit with the brake, the brake is not released.
/ Error Level 0C1 Alarm Name Servo-Motor Error 3. Operation Operation Cancellation Code Cause/Treatment The motor operation is not available for 2 seconds or more after the movement command is received and before the actuator reaches the target position. Cause :(1) A looseness in the connection section of the actuator connecting cable or wire breakage is considered. (2) In the case of the unit with the brake, the brake is not released. (3) The motor load might be too large due to the external force.
/ Error Level Code Alarm Name Cause/Treatment Cause Software Stroke LimitOver Error 0DC Pressing Motion Range Over Error This alarm is generated when the reaction force after the pressing operation complete is too high and the actuator is pushed back to the start point of pressing operation. Revise the construction of the whole system. Operation Cancellation Cause 0E0 Overload :(1) The load is increased too much due to a external force.
/ Error Level Code Alarm Name Cause/Treatment &DXVH 3. Operation Operation Cancellation 7 KH FXUUHQW YDOXH LV LQFUHDVHG WR WKH YHORFLW\ YDOXH PRUH WKDQ VSHFL¿HG LQ WKH PRWRU speed setting due to an external force, etc., while the power is turned OFF. Treatment :Take the measure so that the actuator is not moved at the speed more than the set value while the power is turned OFF. In the case that there is still enough time before the battery shutoff, increase the set value for the parameter No.19.
/ 4. Appendix /LVW RI 6SHFL¿FDWLRQV RI &RQQHFWDEOH $FWXDWRUV 7KH VSHFL¿FDWLRQV LQFOXGHG LQ WKLV VSHFL¿FDWLRQ OLVW DUH OLPLWHG WR WKRVH QHHGHG WR VHW RSHUDWLQJ FRQGLWLRQV DQG SDUDPHWHUV )RU RWKHU GHWDLOHG VSHFL¿FDWLRQV UHIHU WR WKH FDWDORJ RU RSHUDWLRQ PDQXDO for your actuator. • The push force is based on the rated push speed (factory setting) indicated in the list, and provides only a guideline. • Make sure the actual push force is equal to or greater than the minimum push force.
/ Actuator series Type Feed screw No. of encoder pulses Lead [mm] 16 RA6C Ball screw 800 8 4 4. Appendix 16 RGS6C RCP2 (rod type) Ball screw 800 8 4 16 RGD6C Ball screw 800 8 4 SRA4R SRGS4R RCP2 (slider type) SRGD4R 76 5 Ball screw 800 Ball screw 800 Ball screw 800 Mounting direction 2.5 5 2.5 5 2.
/ Actuator series Type Feed screw No. of encoder pulses Lead Mounting direction [mm] Minimum speed [mm/s] Horizontal 25 Vertical SA5C Ball screw 800 Horizontal 12 15 Vertical Horizontal RCP2 (slider type) 6 7.5 Vertical Horizontal 3 3.75 Vertical Horizontal 12 15 Vertical SA5R Ball screw Horizontal 800 6 7.5 Vertical Horizontal 3 3.
/ Actuator series Type Feed screw No. of encoder pulses Lead Mounting direction [mm] Minimum speed [mm/s] 4. Appendix Horizontal 20 25 Vertical SA6C Ball screw 800 Horizontal 12 15 Vertical RCP2 (slider type) Horizontal 6 7.5 Vertical Horizontal 3 3.75 Vertical Horizontal 12 15 Vertical SA6R Ball screw Horizontal 800 6 7.5 Vertical Horizontal 3 3.
/ Actuator series Type Feed screw No. of encoder pulses Lead Mounting direction [mm] Minimum speed [mm/s] Horizontal 16 SA7C Ball screw Vertical 800 8 4 SA7R 800 8 4 12 SS7C Ball screw 800 6 3 RCP2 (slider type) Horizontal Vertical Horizontal Vertical Horizontal Vertical Horizontal Vertical Horizontal Vertical Horizontal Vertical Horizontal Vertical Horizontal Vertical 10 5 20 10 SS7R Ball screw 133 (at 50 to 700st) 120 (at 800st) 15 600 (at 50 to 500st) 470 (at 600st) 7.
/ Actuator series Type Feed screw No. of encoder pulses Lead Mounting direction [mm] Minimum speed [mm/s] Horizontal 20 25 Vertical 4. Appendix Horizontal SS8R Ball screw 800 10 12.5 Vertical RCP2 (slider type) Horizontal 5 6.25 Vertical Horizontal HS8C Ball screw 800 30 37.
/ Actuator series Type Feed screw No.
/ Actuator series Type Feed screw No. of encoder pulses Lead [mm] 4 RA2AC Lead screw 800 RA2BC Lead screw 800 Mounting direction 2 1 [mm/s] Horizontal/ vertical 4. Appendix 6 RCP3 (rod type) 4 4 Lead screw 800 RA2BR Lead screw 800 2 1 6 4 Lead screw SA2BC Lead screw 2 1 RCP3 (slider type) SA2AR Lead screw SA2BR Lead screw 2 1 7.5 300 5 200 2.5 100 2.5 1.25 7.5 Horizontal 4 6 4 2 82 100 5 Horizontal 4 800 2.5 2.
/ Actuator series Type Feed screw No. of encoder pulses Lead [mm] 10 SA4C Ball screw 800 5 2.5 10 Ball screw 800 5 2.5 Horizontal Vertical Horizontal Vertical Horizontal Vertical Horizontal Vertical Horizontal Vertical Horizontal Vertical Minimum speed [mm/s] [mm/s] 12.5 380 (at 50st) 500 (at 100 to 500st) 6.25 250 3.12 125 12.5 380 (at 50st) 500 (at 100 to 500st) 6.25 250 3.
/ Actuator series Type Feed screw No. of encoder pulses Lead Mounting direction [mm] Minimum speed [mm/s] Horizontal 12 15 4. Appendix Vertical SA5R Ball screw Horizontal 800 6 7.5 Vertical Horizontal 3 3.75 Vertical Horizontal RCP3 (slider type) 20 25 Vertical SA6C Ball screw 800 Horizontal 12 15 Vertical Horizontal 6 7.5 Vertical Horizontal 3 3.
/ Actuator series Type Feed screw No. of encoder pulses Lead Mounting direction [mm] Minimum speed [mm/s] Horizontal 12 15 Vertical SA6R Ball screw Horizontal 800 6 7.5 Vertical Horizontal 3 3.75 Vertical 6 TA3C Ball screw 800 4 2 6 TA3R Ball screw 800 4 2 6 TA4C Ball screw 800 4 2 RCP3 (table type) 6 TA4R Ball screw 800 4 2 10 TA5C Ball screw 800 5 2.5 10 TA5R Ball screw 800 5 2.
/ Actuator series Type Feed screw No. of encoder pulses Lead [mm] 12 TA6C Ball screw 800 6 3 4.
/ [2] ASEP Actuator series Type RA3C RGD3C RA3D Ball screw Ball screw Ball screw Ball screw Motor No. of Lead output encoder pulses [W] [mm] 20 20 20 20 800 800 800 800 RCA (rod type) RGS3D RGD3D RA3R RGD3R Ball screw Ball screw Ball screw Ball screw 20 20 20 20 800 800 800 800 Mounting direction Minimum speed Maximum speed [mm/s] [mm/s] 10 Horizontal/ vertical 12.5 500 5 Horizontal/ vertical 6.25 250 2.5 Horizontal/ vertical 3.
/ Actuator series Type Feed screw Motor No. of Lead output encoder pulses [W] [mm] 20 Ball screw 4. Appendix RA4C 20 RCA (rod type) RGS4C Ball screw 20 RGD4C Ball screw 88 [mm/s] 12 15 600 6 Horizontal/ vertical 7.5 300 3 Horizontal/ vertical 3.75 150 12 Horizontal/ vertical 15 600 6 Horizontal/ vertical 7.5 300 3 Horizontal/ vertical 3.75 150 12 Horizontal/ vertical 15 600 6 Horizontal/ vertical 7.5 300 3 Horizontal/ vertical 3.
/ Actuator series Type Feed screw Motor No. of Lead output encoder pulses [W] [mm] 20 RA4D Ball screw RGS4D Ball screw 20 RCA (rod type) RGD4D Ball screw 20 RA4R [mm/s] [G] 12 15 600 0.3 6 Horizontal/ vertical 7.5 300 0.3 3 Horizontal/ vertical 3.75 150 0.2 12 Horizontal/ vertical 15 600 0.3 6 Horizontal/ vertical 7.5 300 0.3 3 Horizontal/ vertical 3.75 150 0.2 12 Horizontal/ vertical 15 600 0.3 6 Horizontal/ vertical 7.5 300 0.
/ Actuator series Type SRA4R 4. Appendix RCA (rod type) SRGS4R SRGD4R Feed screw Motor No. of Lead output encoder pulses [W] [mm] 5 Ball screw 20 Ball screw 20 Ball screw 20 800 2.5 5 800 2.5 5 800 2.5 10 SA4C Ball screw 20 800 5 2.5 10 SA4D Ball screw 20 800 5 2.5 10 SA4R Ball screw 20 800 5 2.
/ Actuator series Type Feed screw Motor No. of Lead output encoder pulses [W] [mm] 20 Mounting direction Minimum speed [mm/s] Horizontal 25 Vertical SA6C Ball screw 30 30 Ball screw 30 15 6 Horizontal/ vertical 7.5 3 Horizontal/ vertical 3.75 12 Horizontal/ vertical 15 6 Horizontal/ vertical 7.5 3 Horizontal/ vertical 3.75 12 Horizontal/ vertical 15 6 Horizontal/ vertical 7.5 3 Horizontal/ vertical 3.
/ Actuator series 4. Appendix RCA (arm type) RCA2 (rod type) Type Feed screw A4R Ball screw A5R Ball screw A6R Ball screw RN3N Lead screw RP3N Lead screw GS3N Lead screw GD3N Lead screw SD3N Lead screw Motor No.
/ Actuator series Type Feed screw Motor No.
/ Actuator series Type Feed screw Motor No. of Lead output encoder pulses [W] [mm] 6 SA3C Ball screw 10 800 4 2 4. Appendix 6 SA3R Ball screw 10 800 4 2 RCA2 (slider type) 10 SA4C Ball screw 20 800 5 2.5 10 SA4R Ball screw 20 800 5 2.
/ Actuator series Type Feed screw Motor No. of Lead output encoder pulses [W] [mm] Mounting direction Minimum speed [mm/s] Horizontal 25 Vertical SA5C Ball screw 20 800 Horizontal 12 15 Vertical Horizontal RCA2 (slider type) 6 7.5 Vertical Horizontal 3 3.75 Vertical Horizontal 12 15 Vertical SA5R Ball screw 20 Horizontal 800 6 7.5 Vertical Horizontal 3 3.
/ Actuator series Type Feed screw Motor No. of Lead output encoder pulses [W] [mm] Mounting direction Minimum speed [mm/s] Horizontal 4. Appendix 20 25 Vertical SA6C Ball screw 30 800 Horizontal 12 15 Vertical RCA2 (slider type) Horizontal 6 7.5 Vertical Horizontal 3 3.75 Vertical Horizontal 12 15 Vertical SA6R Ball screw 30 Horizontal 800 6 7.5 Vertical Horizontal 3 3.
/ Actuator series Type Feed screw TC3N Lead screw TW3N Lead screw TF3N Lead screw TC4N Lead screw RCA2 (table type) Ball screw TW4N Lead screw Ball screw TF4N Lead screw TA4C Ball screw Maximum speed [mm/s] 200 100 50 200 100 50 200 100 50 270 220 200 100 220 200 100 270 220 200 100 220 200 100 270 220 200 100 220 200 100 300 200 100 Maximum acceleration/ deceleration [G] Minimum Maximum Rated push push push force force speed [N] [N] [mm/s] 0.2 - - - 0.2 - - - 0.2 - - - 0.
/ Actuator series Type Feed screw Motor No. of Lead output encoder pulses [W] [mm] 6 TA4R Ball screw 10 800 4 2 4. Appendix 10 TA5C Ball screw 20 800 5 2.5 10 TA5R Ball screw 20 800 5 2.
/ 4.2 Pressing Force and Current Limit Value RCP2 Series Rod Type RA4C/RGS4C/RGD4C RA6C/RGS6C/RGD6C Pressing Force (N) High Speed Type RA3C/RGD3C Pressing Force (N) Current Limit Value (Ratio ) • The correlation of the pressing force and the current limit value is the rated pressing speed (in the setting at the delivery) and is a reference value. • Use the actuator with the setting above the minimum pressing force value.
/ RCP2 Series Short Length Type Pressing Force (N) SRA4R/SRGS4R/SRGD4R Lead 2.5 4.
/ Current Limit Value (Ratio ) Grip Force (N) Grip Force (N) Current Limit Value (Ratio ) Current Limit Value (Ratio ) Pressing Force (N) 4.
/ Three-finger Gripper Grip Force (N) 4.
/ RCP3 Series Thin and Small Rod Type *Inside the red box is the specification value RA2BC/RA2BR Lead4 Pressing Force (N) Pressing Force (N) RA2AC/RA2AR Lead1 Current Limit Value (Ratio ) RA2AC/RA2AR Lead2 RA2BC/RA2BR Lead4 Pressing Force (N) Pressing Force (N) 4.
/ RCP3 Series Slider Type SA4CType 4.
/ Micro Cylinder 4. Appendix Pressing Force (N) RCL Series Current Limit Value (Ratio ) RCD Series Ultra-small ROBO Cylinder RA1D Type 7 Pressing Force (N) 6 5.98 5 4.99 4 4.01 3 3.02 2.60 2.16 2.04 2 0.41 0 0 10 20 1.72 1.28 1.05 1 30 0.
/ 5. 5.1 Warranty Warranty Period One of the following periods, whichever is shorter: • 18 months after shipment from our factory PRQWKV DIWHU GHOLYHU\ WR D VSHFL¿HG ORFDWLRQ 5. Warranty 5.2 Scope of Warranty Our products are covered by warranty when all of the following conditions are met. Faulty products covered by warranty will be replaced or repaired free of charge: (1) The breakdown or problem in question pertains to our product as delivered by us or our authorized dealer.
/ 5.5 Conditions of Conformance with Applicable Standards/ Regulations, Etc., and Applications (1) If our product is combined with another product or any system, device, etc., used by the FXVWRPHU WKH FXVWRPHU PXVW ¿UVW FKHFN WKH DSSOLFDEOH VWDQGDUGV UHJXODWLRQV DQG RU UXOHV 7KH FXVWRPHU LV DOVR UHVSRQVLEOH IRU FRQ¿UPLQJ WKDW VXFK FRPELQDWLRQ ZLWK RXU SURGXFW FRQIRUPV to the applicable standards, etc.
/ Change History Change History Revision Date 108 Revision Description 2010.11 First Edition 2011.01 Second Edition • P23 Pollution Standard Number changed from “EN60947-5-1” to “IEC60664-1” 2011.04 Third Edition • Swapped over the page for CE Marking • Explanation added regarding Absolute Battery 2011.07 Fourth Edition &RQWHQWV FKDQJHG DQG DGGHG LQ $SSHQGL[ /LVW RI 6SHFL¿FDWLRQV RI Connectable Actuators. • Contents changed in Warranty in p. 105 to p. 106 2011.
Manual No.: ME0267-9A (January 2013) Head Office: 577-1 Obane Shimizu-KU Shizuoka City Shizuoka 424-0103, Japan TEL +81-54-364-5105 FAX +81-54-364-2589 website: www.iai-robot.co.jp/ Technical Support available in USA, Europe and China Head Office: 2690 W.