ROBO Cylinder� Arm Type RCA RCS2 Actuators Operation Manual Sixth Edition� � Arm Type: RCA Type: A4R, A5R, A6R RCS2 Type: A4R, A5R, A6R � IAI America, Inc.
Please Read Before Use Thank you for purchasing our product. This Operation Manual describes all necessary information to operate this product safely such as the operation procedure, structure and maintenance procedure. Before operation, read this manual carefully and fully understand it to operate this product safely. The DVD that comes with the product contains operation manuals for IAI products.
Table of Contents Safety Guide ·················································································································· 1 Caution in Handling ·········································································································· 8 International Standards Compliances··············································································· 9 Names of the Parts····································································································
2. 3. 4. 5. 6. 7. Installation······································································································· 25 2.1 Transportation ···································································································25 2.2 Installation and Storage • Preservation Environment ········································27 2.3 How to Install ·····································································································28 2.3.
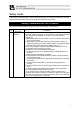
Safety Guide “Safety Guide” has been written to use the machine safely and so prevent personal injury or property damage beforehand. Make sure to read it before the operation of this product. Safety Precautions for Our Products The common safety precautions for the use of any of our robots in each operation. No.
No. 2 2 Operation Description Transportation 3 Storage and Preservation 4 Installation and Start Description � When carrying a heavy object, do the work with two or more persons or utilize equipment such as crane. � When the work is carried out with 2 or more persons, make it clear who is to be the leader and who to be the follower(s) and communicate well with each other to ensure the safety of the workers.
No. 4 Operation Description Installation and Start Description (2) Cable Wiring � Use our company’s genuine cables for connecting between the actuator and controller, and for the teaching tool. � Do not scratch on the cable. Do not bend it forcibly. Do not pull it. Do not coil it around. Do not insert it. Do not put any heavy thing on it. Failure to do so may cause a fire, electric shock or malfunction due to leakage or continuity error.
No. 4 5 4 Operation Description Installation and Start Teaching Description (4) Safety Measures � When the work is carried out with 2 or more persons, make it clear who is to be the leader and who to be the follower(s) and communicate well with each other to ensure the safety of the workers. � When the product is under operation or in the ready mode, take the safety measures (such as the installation of safety and protection fence) so that nobody can enter the area within the robot’s movable range.
No. 6 7 Operation Description Trial Operation Automatic Operation Description � When the work is carried out with 2 or more persons, make it clear who is to be the leader and who to be the follower(s) and communicate well with each other to ensure the safety of the workers. � After the teaching or programming operation, perform the check operation one step by one step and then shift to the automatic operation.
No. 8 9 6 Operation Description Maintenance and Inspection 10 Modification and Dismantle Disposal 11 Other Description � When the work is carried out with 2 or more persons, make it clear who is to be the leader and who to be the follower(s) and communicate well with each other to ensure the safety of the workers. � Perform the work out of the safety protection fence, if possible.
Alert Indication The safety precautions are divided into “Danger”, “Warning”, “Caution” and “Notice” according to the warning level, as follows, and described in the Operation Manual for each model. Level Degree of Danger and Damage Danger This indicates an imminently hazardous situation which, if the product is not handled correctly, will result in death or serious injury.
Caution in Handling 1. Ensure use of the product in the specified conditions, environments and ranges. Operation out of the specified conditions could cause a drop in performance or malfunction of the product. 2. Do not attempt to establish the settings for the speed and acceleration/deceleration above the allowable range. An operation with speed and acceleration/deceleration beyond the allowable range may cause an abnormal noise, vibration, malfunction or shortened life. 3.
International Standards Compliances This actuator complies with the following overseas standards. Refer to Overseas Standard Compliance Manual (ME0287) for more detailed information.
Names of the Parts In this Operation Manual, the left and right sides are indicated by looking at the actuator from the motor end, with the actuator placed horizontally, as shown in the figure below.
1. Specifications Check Checking the Product The standard configuration of this product is comprised of the following parts. See the component list for the details of the enclosed components. If you find any faulty or missing parts, contact your local IAI distributor. 1.1.1 Parts No. 1 Name Actuator Accessories Motor • encoder cables 2 (Note1) Model number Refer to “How to Read the Model Nameplate” and “How to Read the Model Number.
1. Specifications Check [2] Manuals Related to Controllers for RCS2 Actuator (1) Manuals Related to XSEL-J/K Controllers No.
1.1.3 Control No. ME0161 ME0243 ME0155 ME0178 ME0227 ME0174 ME0175 ME0182 ME0124 ME0123 ME0153 How to Read the Model Nameplate Model Serial Number MODEL RCA-A4R-I-20-10-50-A1-P-B SERIAL No.200090266 MADE IN JAPAN 13 1. Specifications Check (4) Manuals Related to SCON Controllers No.
1.1.4 How to Read the Model Number 1.
1.2 Specification 1.2.1 Speed 1. Specifications Check � � Speed limits (Unit: mm/s)� Size Motor Type A4R 20W A5R 20W A6R 30W 1.2.2 Lead [mm] 10 5 12 6 12 6 Stroke [mm]� 50 to 200 (Every 50mm) 330 165 400 200 400 200 Maximum Acceleration and Transportable Weight � When the transported weight is low, the acceleration/deceleration and speed can be increased.
1.2.3 Driving System • Position Detector 1. Specifications Check Series RCA RCS2 1.2.4 Type Motor Type A4R 20W A5R 20W A6R 30W A4R 20W A5R 20W A6R 30W Lead No. of Encoder Pulses 10 5 12 6 800 12 6 10 5 12 6 12 6 16,384 Ball Screw Type Type Diameter Accuracy Rolled �8 C10 Rolled �8 C10 Rolled �10 C10 Rolled �8 C10 Rolled �8 C10 Rolled �10 C10 Positioning Repeatability � ±0.02 [mm] 1.2.5 Lost Motion � 0.
1.2.6 Allowable Load Moments of the Actuator Allowable Dynamic Load Moment [N�m] ([kgf�m])� Ma Mb Mc A4R 2.7 (0.28) 3.1 (0.32) 2.9 (0.30) A5R 4.5 (0.46) 5.4 (0.55) 4.1 (0.42) A6R 8.1 (0.83) 10.0 (1.02) 6.5 (0.66) 1.
1. Specifications Check 1.3 Options 1.3.1 Brake Type (Model: B) This is a protection structure not to damage the attached objects by the rod being dropped when the power of the servo is turned OFF in case the actuator is mounted vertically. 1.3.2 Low Power Consumption Type (Model: LA) It is an option to decrease the power consumption of the controller. By selecting the low power consumption type, the consumption drops to 3.4A at maximum, where it is 5.
1.4 1.4.1 Motor • Encoder Cables Motor • Encoder Integrated Cables for the RCA Actuator 1 3 Controller Side Mechanical Side Width Electric Wire Color Signal Name AWG22 (Solderless) Red U 1 White� V 2 � � � � Black� W 3 � � � � 3 Pin No. Electric Wire Color Pin No. Signal Name 1 U Red 2 V White� W Black� Width AWG22 (Solderless) 19 1.
1. Specifications Check [2] Encoder Cable • Encoder Robot Cable Model : CB-ACS-PA��� • CB-ACS-PA���-RB 18 17 2 1 Controller Side AWG26 (Solderless) Signal Name Electric Wire Color For ABS For Serial Electric Wire Color Signal Name Pin No.
[3] Motor • Encoder Integrated Cables for AMEC/ASEP Model : CB-ASEP-MPA��� AWG22 (Solderless) Electric Wire Color Signal Name Pin No. � � � � Pin No.
Motor • Encoder Integrated Cables for the RCS2 Actuator [1] Motor Cable • Motor Robot Cable Model : CB-RCC-MA��� • CB-RCC-MA���-RB (20) 4 (20) (Front View) 1 (18) 1 4 (Front View) Mechanical Side Controller side Electric Wire Signal Color Name PE Green U Red AWG18 White V Black W Width 22 (10) (21) L (φ9) (16) (41) 1. Specifications Check 1.4.2 Pin No. 1 2 3 4 Pin No.
[2] Encoder Cable � Encoder Robot Cable [For SCON, SSEL, XSEL-P/Q] Model : CB-RCS2-PA��� • CB-RCS2-PA���-RB 1. Specifications Check (41) (14) L (15) (13) 1 26 13 (25) (37) 1 10 14 9 18 (Front View) Width AWG26 (Soldered) Controller side Mechanical Side Electric Wire Color Signal Name Pin No. - - 10 - - 11 - E24V 12 Gray/White 0V 13 Brown/White LS 26 - CREEP 25 - OT 24 - RSV 23 - - 9 - - 18 - - 19 Pink A+ Purple White (Front View) Pin No.
[3] Encoder Cable • Encoder Robot Cable [For XSEL-J/K] 1. Specifications Check Model : CB-RCBC-PA��� • CB-RCBC-PA���-RB (16) (14) L (15) (36) (57) (33) (25) (φ8) 1,10 (Front View) Width AWG25 (Soldered) Electric Wire Color Signal Name Pin No. � � � � Pin No.
2. Installation� 2.1 Transportation 2. Installation [1] Handling of the Actuator Unless otherwise specified, the actuator is shipped with 1 axis unit packaged separately. (1) Handling the Packed Unit � Do not damage or drop. The package is not applied with any special treatment that enables it to resist an impact caused by a drop or crash. � Transport a heavy package with at least more than two operators. Consider an appropriate method for transportation.
[2] Handling in Assembled Condition 2. Installation This is the case when the product is delivered from our factory under a condition that it is assembled with other actuators. The combined axes are delivered in a package that the frame is nailed on the lumber base. The rods are fixed so they would not accidently move. The actuators are also fixed so the tip of it would not shake due to the external vibration. (1) How to Handle in Package � Do not hit or drop the package.
2.2 Installation and Storage • Preservation Environment [1] Installation Environment � Where the actuator receives radiant heat from strong heat sources such as heat treatment furnaces � Where the ambient temperature exceeds the range of 0 to 40�C � Where the temperature changes rapidly and condensation occurs � Where the relative humidity exceeds 85% RH � This actuator possesses the water durability of IP67 protection structure.
2.3 How to Install This chapter explains how to install the actuator on your mechanical system. 2. Installation 2.3.1 General Rules on Installation Follow the information below when installing the actuator, as a rule. Do pay attention to these items (except with custom-order models).
2.3.2 Installation of Main Unit The surface to mount the main unit should be a machined surface or a plane that possesses an equivalent accuracy and the flatness should be within 0.05mm/m. Pull out the slider to the stroke end. Remove four screw cover mounting screws with an Allen wrench of 1.5mm across flats to remove the screw cover.
Secure the main body with the mounting holes on the base of this machine. 2. Installation Use the hexagon socket head bolts shown below. After securing the main body, reinstall the screw cover. Type A4R A5R A6R In the case that steel is used for the bolt seating surface: M3×8 M4×8 M5×10 In the case that aluminum is used for the bolt seating surface: M3×12 M4×12 M5×15 Caution: Pay special attention when selecting the bolt length.
2.3.4 Attachment of the Transported Object � Use four M4 screws to install the transported object to the slider. Tapped hole to install the workpiece 2. Installation Slider Caution: Check to see that the workpiece seating surface is flat to prevent the slider from becoming deformed when the workpiece is installed. Slider deformation may cause it to move rigidly or shorter its life.
3. Connecting with the Controller 3. Connecting with the Controller As the connection cable for the controller and actuator, use the IAI-dedicated controller and dedicated connection cable. This section explains the wiring method for a single axis. � If the dedicated connection cable cannot be secured, reduce the load on the cable by allowing it to deflect only by the weight of the cable or wire it in a self-standing cable hose, etc., having a large radius.
Dedicated Connection Cable (Connect RCA with the dedicated controller.) r 3. Connecting with the Controller [Connection with the AMEC, ASEP controller] � � � � � � � � � � � � � � � Dedicated Controller AMEC, ASEP � � r = 68mm or more (Movable Use) r = 34mm or more (Fixed Use) Dedicated cables � Motor encoder cable�CB-ASEP-MA��� ��� indicates the cable length. A desired length up to 20m can be specified.
3. Connecting with the Controller RCS2 Actuator [Connection with the SCON, SSEL controller] � � Dedicated Connection Cable � (Connect RCS2 with the dedicated controller.) � � � � r � � r � � � Robot Cable � r = 58mm or more (Movable Use) � Dedicated Controller Standard Cable � SCON r = 93mm or more (Fixed Use) � SSEL � Use robot cables if the cables tend to move.
Warning: For wiring, please follow the warnings stated below. When constructing a system as the machinery equipment, pay attention to the wiring and connection of each cable so they are conducted properly. Not following them may cause not only a malfunction such as cable breakage or connection failure, or an operation error, but also electric shock or electric leakage, or may even cause a fire. 3. Connecting with the Controller • Use dedicated cables of IAI indicated in this instruction manual.
• Do not let the cable bend, kink or twist. 3. Connecting with the Controller • Do not pull the cable with a strong force. • Pay attention not to concentrate the twisting force to one point on a cable. • Do not pinch, drop a heavy object onto or cut the cable. • When a cable is fastened to affix, make sure to have an appropriate force and do not tighten too much. Do not use spiral tube in any position where cables are bent frequently.
• PIO line, communication line, power and driving lines are to be put separately from each other and do not tie them together. Arrange so that such lines are independently routed in the duct. 3. Connecting with the Controller Power line Duct I/O lines (flat cable) Follow the instructions below when using a cable track. • If there is an indication to the cable for the space factor in a cable track, refer to the wiring instruction given by the supplier when storing the cable in the cable track.
4. Maintenance Inspection 4.1 Inspection Items and Schedule Follow the maintenance inspection schedule below. It is assumed that the equipment is operating 8 hours per day. If the equipment is running continuously night and day or otherwise running at a high operating rate, inspect more often as needed.
4.4 Interior Inspection � Turn off the power, remove the side covers, and then visually inspect the interior. Check the following items during interior inspection. Main unit Loose mounting bolts Guides Lubrication appropriate, Soiling Ball screw Lubrication appropriate, Soiling � 4. Maintenance Inspection How to inspect the interior: (1) Remove both side covers. Use an Allen wrench of 1.5mm across flats.
4.5 Internal Cleaning � Use a soft cloth to wipe away dirt and buildup. � Do not use strong compressed air on the actuator as this may force dust into the crevices. � Do not use petroleum-based solvent, neutral detergent or alcohol. 4. Maintenance Inspection Caution: Do not use flushing oil, molybdenum grease or anti-rust lubricant. When grease is soiled with a large amount of foreign substances, wipe off the dirty grease and then apply new grease. 4.6 Grease supply 4.6.
4.6.2 How to Apply Grease Tightening torque Thin-head screw M3×6� 87.2N • cm (8.90kgf�cm) � � Caution: In case the grease got into your eye, immediately go see the doctor to get appropriate care. After finishing the grease supply work, wash your hands carefully with water and soap to rinse the grease off. � � � 41 4. Maintenance Inspection (1) When greasing the ball screw, apply grease using a finger and then move the slider back and forth several times to let the grease spread evenly.
4.7 Reduction Belt 4.7.1 Inspection of the Belt 4. Maintenance Inspection For inspection work, detach the cover of a pulley cover and carry it out visually. The replacement period cannot be determined in general because the durability of the deceleration belt can be greatly influenced by the conditions of operation. It generally has life of hundreds of times for bending movement.
4.7.3 Adjusting the Belt Tension Remove the pulley cover and loosen the four motor-unit affixing bolts. Pass a looped string (or long tie-band) around the motor housing, and pull the string to the specified tension using a tension gauge. In this condition, uniformly tighten the motor-unit affixing bolts. [Recommended tightening torque of adjustment bolts] 162 N•cm (16.5 kgf•cm) � 4. Maintenance Inspection Tension: 2.5Kgf Motor-unit affixing bolts (Use an Allen wrench of 3mm across flats.
4. Maintenance Inspection 4.7.4 Replacing the Motor of the Motor Reversing Type [Items Required for Replacement] � Replacement belt 60S2M180R Rubber, cleanroom type (Bando Chemical Industries) 6mm wide � Allen wrenches � Tension gauge (capable of tensioning to 7 kgf or greater) � Strong string, looped (or long tie-band) � Scale � Oil-based marker pen � PC or teaching pendant [Overview of Replacement] (1) Move the slider to a position where Z phase turns ON (home position) (A4R is 0.6mm, A5R and A6R is 0.
Cause the slider to project A4R is 0.6mm, A5R and A6R is 0.7mm from the mechanical end. A4R: 0.6mm A5R and A6R: 0.7mm � � � Apply countermarks once the slider has projected A4R is 0.6mm, A5R and A6R is 0.7mm from the mechanical end. If the actuator has a brake, connect this machine to the controller and pull out the slider to the stroke end after the brake has been released with the brake release switch. Then, turn OFF the controller power for safety.
4. Maintenance Inspection (3) Loosen the motor-unit affixing bolts using an Allen wrench of 3mm across the flats. � � � Motor-unit affixing bolts � (Use an Allen wrench of 3mm across flats.) � � � � � � � � � � � � � Motor-unit affixing bolts � (Use an Allen wrench of 3mm across flats.) � � � (4) Check the following points before restoring the home position: � The motor side should be aligned with the initial countermark. If the position is offset, adjust it to achieve proper alignment.
(5) Adjust the belt tension. Pass a looped string (or long tie-band) around the motor housing, and pull the string to the specified tension using a tension gauge. In this condition, uniformly tighten the motor-unit affixing bolts. [Recommended tightening torque of adjustment bolts] 162 N•cm (16.5 kgf•cm) � 4. Maintenance Inspection � � � � � � � � � � � � � � � � � � � � � � � � � � � � � � � � � � � � � � � � � � � Tension: 2.5Kgf Motor-unit affixing bolts (Use an Allen wrench of 3mm across flats.
4. Maintenance Inspection (6) Remove the pulley cover using Allen wrenches, 2.5mm across flats. � � � � � � � � � � � M3 hexagon socket head screws � � � (7) Connect a PC or teaching pendant to the controller to perform homing. (If the actuator is of absolute encoder specification, an absolute reset must be performed.) Check for deviation from the initial home position. If there is a deviation, adjust the home offset if you are using a parameter.
4.8 Replacing the Motor � 4. Maintenance Inspection [Items Required for Replacement] � Replacement motor unit � Allen wrenches � Tension gauge (capable of tensioning to 7 kgf or greater) � Strong string, looped (or long tie-band) � Scale � Oil-based marker pen � PC or teaching pendant Replacement motor unit � [Overview of Replacement] (1) Loosen the motor-unit affixing bolts to remove the belt, and replace the motor. (2) Restore the home position. Affix the slider at a position A4R is 0.
4. Maintenance Inspection [Procedure] (1) Remove the pulley cover using Allen wrenches, 2.5mm across flats. � � � � � � � � � � � M3 hexagon socket head screws � (2) Loosen the motor-unit affixing bolts using an Allen wrench of 3mm across the flats. Slider the motor, and loosen and remove the belt. After the belt has been removed, remove the motor-unit affixing bolts. � � � � � � � � � � � � � � � � � � � Motor-unit affixing bolts (Use an Allen wrench of 3mm across flats.
(4) Install the replacement motor unit. If the actuator has a brake, solder and connect the brake cable. Cover the soldered portion of the cable with a vinyl tube and then temporarily secure it with the motor-unit affixing bolts. � � � � � � � Replacement motor Solder and connect the brake cable. (5) Move the slider to a position where Z phase turns ON. This corresponds to a position where the rod projects A4R is 0.6mm, A5R and A6R is 0.7mm from the mechanical end. Apply countermarks in this position.
4. Maintenance Inspection (6) Check the following points before restoring the home position: � The motor side should be aligned with the initial countermark. If the position is offset, adjust it to achieve proper alignment. � The ball screw side should be at a position where the slider projects A4R is 0.6mm, A5R and A6R is 0.7mm from the mechanical end. After the check, attach a new belt while holding the pulleys on both sides in position. � � � � � � Corresponding to the slider position of 0.
(7) Adjust the belt tension. Pass a looped string (or long tie-band) around the motor housing, and pull the string to the specified tension using a tension gauge. In this condition, uniformly tighten the motor-unit affixing bolts. 4. Maintenance Inspection � � � � � � � � � � � � � � � � � � � � � � � � � � � � � � � � � � � � � � � � � � � [Recommended tightening torque of adjustment bolts] 162 N•cm (16.5 kgf•cm) Tension: 2.5Kgf Motor-unit affixing bolts (Use an Allen wrench of 3mm across flats.
4. Maintenance Inspection (8) Remove the pulley cover using Allen wrenches, 2.5mm across flats. � � � � � � � � � � � M3 hexagon socket head screws � � � (9) Connect a PC or teaching pendant to the controller to perform homing. (If the actuator is of absolute encoder specification, an absolute reset must be performed.) Check for deviation from the initial home position. If there is a deviation, adjust the home offset if you are using a parameter.
5. External Dimensions RCA-A4R Motor Reversed on Bottom Side (Option Code: MB) 90 P B×C D E-3.6 drilled hole, 6.5 counterbored depth 3.3 (back side) ME 3 Datum Point for Moment 35 30 Home ME P B×C 90 3 Stroke D L 46 52 122.5 3 37 1.5 10 52 (13) 30 (2) Cable Joint Connector 35 A 105 37 1.5 10 3 A SE Motor Reversed on Left Side (Option Code: ML) 33 Stroke P B×C 37 1.5 10 52 3 105 35 (13) 122.5 (2) 53 Work Piece Attachment Area E-3.6 drilled hole, 6.
RCA-A5R 105 122.5 Stroke 52 (2) 105 11 30 3 Home P B×C 110 ME D L 38 A 46 (2) (13) SE 4 2.7 ME 122.5 Motor Reversed on Left Side (Option Code: ML) Detail: A � 56 38 Section of Base Attachment Hole (2) (13) φ4.5 105 (42.4) 3.5 Work Piece Attachment Area D 122.5 Cable Joint Connector 52 4.5 6 P B×C 11 110 30 Home ME 3 4-M4, depth 5 5 10 65 Work Piece Attachment Area E-4.5 drilled hole, 8 counterbored depth 4.5 (back side) A φ8 42 Stroke 11 SE 26 ME 2.
RCA-A6R D 4-M4, depth 6 5 4-M4, depth 6 5 10 137.5 79 107 20 E-φ6, φ9.5 counterbored depth 7 (back side) Datum Point for Moment 38 A 70 (Work Piece Attachment Area) (13) 10 ME 3 SE Home Stroke 46 A ME 3 130 P B×C L 28 D 38 70 (Work Piece Attachment Area) 46 (58) (13) 137.5 (58) (3) (53) 5. External Dimensions 107 57 53.5 14.5 3.5 3.5 30 56 31 30 Home SE 130 (54) 3 ME E-φ6, φ9.
RCS2-A4R Motor Reversed on Bottom Side (Option Code: MB) 90 B×C P D E-3.6 drilled hole, 6.5 counterbored depth 3.3 (back side) Datum Point for Moment ME 3 SE Home ME 35 30 P D L 46 3 37 1.5 10 52 122.5 30 (2) (13) 35 A 105 37 52 Cable Joint Connector Motor Reversed on Left Side (Option Code: ML) 33 Stroke 90 B×C D 105 4-M4, depth 5 5 10 35 � 58 37 1.5 10 3 52 (13) 122.5 (2) 53 Work Piece Attachment Area E-3.6 drilled hole, 6.5 counterbored depth 3.
RCA-A5R 105 52 105 11 30 3 Home P B×C 110 ME D L 38 A 46 (2) 122.5 Stroke 5. External Dimensions (13) Cable Joint Connector SE 122.5 65 26 52 2.7 ME 4 38 E-4.5 drilled hole, 8 counterbored depth 4.5 (back side) Datum Point for Moment 46 53 49 4 11 A 4-M4, depth 5 5 10 11 20 4-M4, depth 5 52 D (13) 11 P B×C 11 110 53 Home ME 3 5 10 Work Piece Attachment Area Motor Reversed on Left Side (Option Code: ML) Work Piece Attachment Area E-4.
RCA-A6R L P B×C E-φ6, φ9.5 counterbored depth 7 (back side) D 4-M4, depth 6 5 4-M4, depth 6 5 10 E-φ6, φ9.5 counterbored depth 7 (back side) 20 ME 3 Datum Point for Moment 38 A 70 (Work Piece Attachment Area) 137.5 Stroke A ME 3 70 (Work Piece Attachment Area) P B×C L 130 28 D 38 46 (13) 137.5 (58) (3) (53) 107 57 53.5 14.5 3.5 3.5 30 Home SE 46 (58) 49 7.5 Motor Reversed on Left Side (Option Code: ML) 7 φ9.5 130 L P B×C � 60 57 53.5 14.5 3.
6. Life The product life is assumed to be 5,000km (reference) under the condition that it runs with maximum transportable weight and maximum acceleration/deceleration. 6.
7. Warranty 7.1 Warranty Period One of the following periods, whichever is shorter: � 18 months after shipment from IAI � 12 months after delivery to the specified location � 2,500 hours of operation 7. Warranty 7.2 Scope of the Warranty Our products are covered by warranty when all of the following conditions are met.
7.5 Conditions of Conformance with Applicable Standards/Regulations, Etc., and Applications (1) If our product is combined with another product or any system, device, etc., used by the customer, the customer must first check the applicable standards, regulations and/or rules. The customer is also responsible for confirming that such combination with our product conforms to the applicable standards, etc.
Change History Revision Date Description of Revision First edition Change History April 2011 Third edition A page for CE Marking added March 2012 Fourth edition CAUTION deleted Pg. 1 to 7 Contents added and changed in Safety Guide Pg. 8 Caution in Handling added Pg. 10, 11 Contents changed in 3. Warranty Pg. 25 Warning notes added such as in case the grease got into your eye, immediately go to see the doctor for an appropriate care. Pg.
Manual No.: ME3655-6A (January 2013) Head Office: 577-1 Obane Shimizu-KU Shizuoka City Shizuoka 424-0103, Japan TEL +81-54-364-5105 FAX +81-54-364-2589 website: www.iai-robot.co.jp/ Technical Support available in USA, Europe and China Head Office: 2690 W.