
Installation Instructions
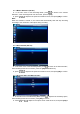


6. Connecting camera to PC
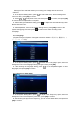
◆ After the SD card is inserted into the camera, connect it to the computer with a USB
cable. At this time, two options will appear on the camera's screen:
1 Storage: A removable disk will appear on the computer, and the device will enter U
disk mode. In this mode, the recorded files can be copied or cut to the computer for
playback.
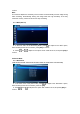
② Camera: The camera can be used as a PC CAM.
Note:
Connect to the computer via a USB cable. The output voltage of the USB interface of
some computers is insufficient, which will cause the camera's screen to flicker.
Some computer systems do not support this function, such as Windows 7 64-bit, or
Windows 8 and above.
7. FAQ
Under normal operating conditions, if the product appear problem, please refer to the foll
owing solution:
7.1. No videos
Check whether TF card has enough space or locked.
7.2. When recording, it stop automatically
Due to the huge video data, please use the SDHC compatible high speed TF card and the
identification of high speed TF card with C10.
7.3.The image was foggy
Please check the lens if with dirt and finger marks; before shooting, clean the lens paper.
7.4.When shooting the sky, water and other scenes, the image is very dark.
The automatic exposure function of the camera will be affected in large contrast scenes,
which can be corrected by adjusting the “EV” value in the setting Menu.
7.5.Horizontal stripe interference in image
This is caused by setting the wrong light frequency. Please set it to “50Hz” or “60Hz”
according to the local power supply frequency.
7.6.The Car DVR crashed
When the Car DVR crashed, please press the reset key to resume restart.