6/4 Token-Ring PCI Management Adapter User’s Guide
Note Before using this information and the product it supports, be sure to read “Safety Information” on page 81 and “Appendix G. Notices” on page 79. First Edition (April 2000) This edition applies to the IBM 16/4 Token-Ring PCI Management Adapter. You can submit comments online to http://www.ibm.com/networking/support/feedback.nsf/docsoverall © Copyright International Business Machines Corporation 2000. All rights reserved.
Contents About this manual . . . . Who should read this manual. How this manual is organized Related publications . . . . . . . . . . . . . . . . . . . . . . . . . . . . . . . . . . . . . . . . . . . . . . . . Chapter 1. Introduction to the IBM 16/4 Token-Ring PCI Adapter . . . . . . . . . . . . . . . . . . Adapter installation checklist . . . . . . . . . . . Environment limitations on number of adapters . . . . Package contents . . . . . . . . . . . . . . .
Running Managed Driver Upgrade remotely . . . . . . . . . . . . . 35 Chapter 4. Problem solving. . . . . . . . . . . Starting the troubleshooting process . . . . . . . . Using Troubleshooting Utility . . . . . . . . . . . Installing Troubleshooting Utility. . . . . . . . . Starting Troubleshooting Utility . . . . . . . . . Using Troubleshooting Utility . . . . . . . . . . Running adapter diagnostics . . . . . . . . . . . Running 4/16 Mbps diagnostics . . . . . . . . .
Industry Canada Class A Emission Compliance Statement . . . . . . . European Norm (EN) Statement . . . . . . . . . . . . . . . . Japanese Voluntary Control Council for Interference (VCCI) Statement . . Taiwanese Class A Warning Statement . . . . . . . . . . . . . . Power Cord Notices for UTP Media . . . . . . . . . . . . . . . IBM License Agreement for Productivity Aids . . . . . . . . . . . . . IF YOU DOWNLOAD OR USE THIS PROGRAM YOU AGREE TO THESE TERMS. . . . . . . . . . . . . . . . . . . . . . . . .
vi IBM 16/4 Token-Ring PCI Management Adapter
About this manual This manual contains the information you need to install and use the IBM 16/4 Token-Ring PCI Management Adapter. Also on the CD-ROM are the installation aids, device drivers, and documentation for the adapter. Who should read this manual This manual is intended for use by network administrators and other end users of the IBM 16/4 Token-Ring PCI Management Adapter who install token-ring adapter hardware and software. How this manual is organized “Chapter 1.
Related publications Refer to these publications for additional information: v IBM Token-Ring Adapter Features v ISO/IEC 8802-5:1998 Base Standard 4/16 HDX and related amendments v IBM Token-Ring Network Problem Determination Guide, SX27-3710 v IBM LAN Technical Reference IEEE 802.2 and NETBIOS API, SC30-3587 v IBM Transmission Control Protocol/Internet Protocol Version 2.
Chapter 1. Introduction to the IBM 16/4 Token-Ring PCI Management Adapter This chapter describes the adapter, the contents of the adapter kits, and the other materials you will need to install the adapter. It is important that you are familiar with the computer in which the adapter will be installed and the computer’s operating system and network software. The adapter is 32-bit, bus-master, token-ring for the PCI bus architecture.
2. Check the shipping package contents list “Package contents”. 3. Install the adapter hardware. See “Chapter 2. Installing the adapter hardware” on page 5. 4. Install the adapter software. See “Chapter 3. Software installation” on page 7. After the software is installed, installation is complete. Environment limitations on number of adapters There is a limit to the number of adapters that can be accommodated in certain operating environments. The limits are listed in the following table. Table 1.
the system is powered off (system power cord is connected to a live power outlet). When the system is powered off, the adapter automatically inserts into the network and looks for a special frame. This frame is commonly referred to as a magic packet. Upon detection of the magic packet, the adapter signals the system to turn on the power supply, thus turning on the computer system.
4 IBM 16/4 Token-Ring PCI Management Adapter
Chapter 2. Installing the adapter hardware This chapter describes how to install the IBM 16/4 Token-Ring PCI Management Adapter. Installing the adapter Your adapter comes configured from the factory with RPL/PXE and expansion ROM enabled. Before you begin to install this adapter, be sure to read “Safety Information” on page 81. To install your adapter, perform the following procedure: 1. Switch OFF the PC and all attached devices. Note: In the U.K.
Figure 1. STP and UTP cables The network end of the cable must be compatible with the network faceplate or other device to which the adapter will be connected. Note: No more than one data cable may be connected to the adapter at a time. Your adapter can use any of these cables.
Chapter 3. Software installation This chapter describes how to install the driver software for your token-ring adapter. To install the software, perform the following procedures: 1. Get the latest level of LAN driver updates for your operating system to ensure that your code is at the latest level. 2. Make sure that your adapter has already been installed in your computer. If it has not, follow the instructions in “Chapter 2. Installing the adapter hardware” on page 5. 3.
Table 2. Driver file directory structure Operating System ® Windows NT 4.0 Windows NT 3.
Table 3. Installation instructions Environment Page DOS with Windows Version 3.1x NetWare Requester 22 DOS LAN Services 21 IBM TCP/IP for DOS (Version 2.1) 21 Windows for Workgroups with NDIS 33 DOS (without Windows) NetWare Requester 22 DOS LAN Services 21 IBM TCP/IP for DOS (Version 2.1) 21 NetWare Requester 22 NDIS2 21 OS/2 OS/2 (MPTS) 19 NetWare Requester 20 OS/2 Warp Connect or Server 20 NetWare Server NetWare Server Version 3.12 9 NetWare Server Version 4.
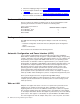
Server driver installation in new NetWare 3.12 Server Changes from the usual NetWare installation are necessary because this driver is written to a new specification level that requires new NetWare loadable modules (NLMs). The installation program is not aware of this, though, and these NLMs must be loaded during installation of the server device driver and after the server installation. 1. Create a diskette containing the extracted files from the NETWAREP.EXE package file on the adapter CD-ROM. 2.
Notes: a. See “Appendix D. Novell NetWare Server driver parameters” on page 65 for a complete list of parameters that you can specify on the LOAD IBMTRPO command in the AUTOEXEC.NCF file. b. If you experience any problems after loading the Novell NLM files, contact Novell to ensure that you have the current version of these files. Press Esc and answer Yes to save the new file to disk. Press Esc again to return to the server console. 8.
Note: If you experience any problems after loading the Novell NLM files, check the Novell Web site to ensure that you have the current version of these files. 4. In the directory where Novell is installed on your hard disk, enter server at the DOS prompt to start the server. 5. At the server console prompt, enter load install. 6. From the Installation Options menu, select System Options and press Enter. 7. Select Edit STARTUP.NCF File and press Enter. 8. Add the following line to the STARTUP.
If Novell NetWare is not installed on your machine, use the following instructions. If it is installed, follow the instructions in “Server driver installation in existing NetWare 4.11 Server” on page 14. Server driver installation in new NetWare 4.11 Server Changes from the usual NetWare installation are necessary because this driver is written to a new specification level that requires new NetWare loadable modules (NLMs).
10. Perform the following COPY commands, making sure that the diskette that you created in step 1 is inserted in drive A. Note that it will prompt you at each of the following files to ask if you want to perform a file overwrite; it is OK to overwrite these files. COPY COPY COPY COPY COPY A:\NOVELL\NETWARE\NBI.NLM C:\NWSERVER A:\NOVELL\NETWARE\MSM.NLM C:\NWSERVER A:\NOVELL\NETWARE\TOKENTSM.NLM C:\NWSERVER A:\NOVELL\NETWARE\IBMTRPO.LAN C:\NWSERVER A:\NOVELL\NETWARE\IBMTRPO.LDI C:\NWSERVER 11.
12. Insert the diskette that you created in step 1. 13. Press F3 and specify the path a:\novell\netware. 14. Follow the instructions on the panels to complete the installation of the driver. If you need to make any custom configuration changes to the driver, do so at this time. 15. Follow the instructions in the Novell manual Create an AUTOEXEC.NCF file. In addition to the instructions in the manual, add the following lines to the AUTOEXEC.
Novell NetWare 5.0 Server If Novell NetWare is not installed on your machine, use the following instructions. If it is installed, follow the instructions in “Server driver installation in existing NetWare 5.0 Server” on page 17. Server driver installation during NetWare 5.0 Server installation Installation of the network board and its device driver occurs during the combined storage device and network board installation step.
3. Add, delete, or modify drivers as needed. v To add a driver: a. In the Options box, select Modify. b. Select the driver and press Enter. c. Press Insert to select from a list of drivers provided with NetWare. d. Press Insert again to install a driver from diskette. v To a. b. c. v To delete a driver: In the Options box, select Modify. Select the driver and press Enter. Select the driver to delete and press Delete. modify a driver: a. In the Options box, select Modify. b.
Note: For some drivers, a message might appear indicating that the driver must be loaded manually (at the console prompt). To load a driver manually, follow the screen prompts or press F1 for more information. 6. Set protocols. When the window containing protocol choices is displayed, select the protocol that you want to use and press the space bar. If you select TCP/IP, enter the IP address and the IP mask. 7. Set parameters. Use the down arrow key to move the cursor to the parameter window.
12. Check for the following conditions to determine whether the adapter is working correctly and whether installation has been completed successfully: v The device driver files are loading successfully. There are no error messages. v The adapter LEDs indicate normal operation: Green ON, Amber OFF. See “Understanding the adapter LEDs and labels” on page 43. If you experience problems, see “Chapter 4. Problem solving” on page 37.
9. Select OK when you have finished selecting and editing protocols in the MPTS Configuration panel. 10. Select Close on the Configure panel. 11. Select Exit in the MPTS dialog box. 12. Select Exit on the Update CONFIG.SYS panel to update the CONFIG.SYS file. 13. Select OK when you get the message that the CONFIG.SYS has been successfully updated. 14. Select Exit on the Exiting MPTS panel. 15. Shut down and restart the computer to apply the changes. 16.
1. If you are installing the NetWare Requester on a workstation, select Edit CONFIG.SYS and Copy All Files.... If the NetWare Requester is already installed on the workstation and only a driver update is needed, then select Only Edit CONFIG.SYS.... 2. On the next panel, specify the name of the adapter driver: IBMTRPO.SYS. 3. When you get to the panel labeled Copy ODI LAN Driver files, select Copy only the default driver. 4. Follow the instructions on the panels to continue installation. 5.
Note: If you use Microsoft Windows for Workgroups and want to configure the NetAddress parameter for the NDIS device driver, remember to enclose the address in double quotes (" "). The NetAddress parameter is used to set a locally administered address for the adapter. 4. Shut down and restart the computer to apply the changes. 5.
C:\NWCLIENT\ROUTE 10. Shut down and restart the computer to apply the changes. 11. Check for the following conditions to determine whether the adapter is working correctly and whether installation has been completed successfully: v The device driver files load successfully with no error messages. If error messages are displayed or if you do not see messages that indicate that the drivers were installed, see “Starting the troubleshooting process” on page 37.
Select Restart now in order to have Windows NT automatically restart your computer. Note: You might need to reinstall Service Pack 5 due to changes to your services or protocols during installation. 12. Check for the following conditions to determine whether the adapter is working correctly and whether installation has been completed successfully: v The device driver files loaded successfully. v There are no error messages logged for the IBMTRP service in the Event Viewer.
Note: You might need to reinstall the Service Pack due to changes to your services or protocols during installation. 12. Check for the following conditions to determine whether the adapter is working correctly and whether installation has been completed successfully: v The device driver files loaded successfully. v There are no error messages logged for the IBMTRP service in the Event Viewer. v The adapter LEDs indicate normal operation: Green ON, Amber OFF. If you experience problems, see “Chapter 4.
v The device driver files loaded successfully. v The device manager (System control panel applet) reports that the device is working correctly. v The adapter LEDs indicate normal operation: Green ON, Amber OFF. If you experience problems, see “Chapter 4. Problem solving” on page 37. Installing the driver when Windows 95 OSR2 is already installed 1.
5. Within the Device Manager, expand the Other Devices section by selecting the + icon that appears to the left of the words Other Devices. Select the entry for PCI Token Ring Controller and then select Properties. 6. Select the Driver tab. Depending on which version of Windows 95 you have (retail or OSR2), this dialog will look different. v If the Driver properties sheet has a Change Driver button, see “Continuing installation of the driver without the Device Wizard”.
Note: If the search fails, select Other Locations and type the letter of your drive. 4. Select OK and then select Finish. 5. Although Windows has already found the driver diskette in a previous step, you might be prompted for its location. Enter a:\ if installing from a diskette or the letter of the CD-ROM drive. Note: Some of the files on the diskette are located in the DOS subdirectory. If necessary, you will have to supply this subdirectory to get additional files copied onto your computer. 6.
This wizard searches for updated drivers for: IBM PCI Token-Ring Adapter,NDIS4. 7. 8. 9. 10. 11. Select Next to continue. On the next page, select Search for the best driver for your device and then select Next. The next page of the wizard will ask where you would like to look for the device driver. v If you are installing the device driver from the product CD-ROM, insert the CD-ROM into the CD-ROM drive and make sure that the CD-ROM drive checkbox is checked.
Select Next to continue. 2. On the next page, select Search for the best driver for your device and then select Next. 3. The next page of the wizard will ask where you would like to look for the device driver. v If you are installing the device driver from the product CD-ROM, insert the CD-ROM into the CD-ROM drive and make sure that the CD-ROM drive checkbox is checked.
1. On the desktop, click My Network Places with the right mouse button and select Properties. A Network and Dial-up Connections window will appear containing one or more Local Area Connection icons. 2. Place the cursor over each icon until you see a description box containing IBM PCI Token-Ring Adapter. 3. Click the appropriate Local Area Connection icon with the right mouse button and select Properties. 4. Select the Configure button in the Local Area Connection Properties window. 5.
Windows has finished installing an updated driver for your hardware device. Select Finish to continue. 12. Select Yes when asked to reboot the system. 13. Check for the following conditions to determine whether the adapter is working correctly and whether installation has been completed successfully: v The device driver files loaded successfully. v The Local Area Connection icon shows that the device is working correctly. v The adapter LEDs indicate normal operation: Green ON, Amber OFF.
2. 3. 4. 5. 6. 7. 8. Note: If you are connecting to a Novell server through IPX, you need to install the NWLink IPX/SPX Compatible Transport protocol and also the Client Service for NetWare service under the Services → Workstation tab. Download IntranetWare Client™ for Windows NT V4.11a or later from Novell’s support Web site at http://support.novell.com. Unzip the downloaded file to a local directory. Run I386\SETUPNW.EXE from the directory where you placed the files.
4. 5. 6. 7. 8. Select Drivers and then Add Adapter.... Select Unlisted or updated network adapter and then OK Enter x:\wfw, where x is your drive letter. Select OK. Select CLOSE. Select OK. 9. You will be prompted to reinstall specific network-related files. Reinstall them as needed. 10. You will also be prompted to insert the Windows for Workgroups program application diskettes or CD-ROM. Follow the instructions. 11. Select OK for any messages regarding updates to the SYSTEM.INI and PROTOCOL.INI files.
Table 4. Managed Driver Upgrade command line options Option Explanation /boot=[y,n] The adapter needs to be rebooted before the upgrade takes effect. The Managed Driver Upgrade executable can force the system to reboot after it completes. Set /boot=y if you want the system to reboot. Set /boot=n if you do not want the system to reboot. The default is /boot=y. /down=[y,n] There are times when you might want to revert to a previous version of a driver. Set /down=y in these cases.
36 IBM 16/4 Token-Ring PCI Management Adapter
Chapter 4. Problem solving This chapter contains procedures that help you troubleshoot problems and optimize the performance of your adapter. Starting the troubleshooting process If you cannot successfully install the adapter or the adapter does not operate properly, perform the following steps: v If yours is the first station on the ring, make sure that AutoSense is disabled. v Refer to the following table. Locate the symptom that best describes the problem.
provides detailed information about your system to enable your network administrator or other support personnel to efficiently assist you. You can also use it to create a Diagnostic diskette. If Troubleshooting Utility verifies that your adapter is working correctly, yet you are still having networking problems, you should use Windows Help to verify that the correct services and protocols are installed for your network.
Window / Tab Task Contact Information Provides a place to enter your name, address, telephone number, and customer report ID (if one has previously been assigned by support personnel). This information is printed on the adapter information report. See “Entering contact information” on page 41. Adapter Information Report Gives you access to the functions for generating a report containing information collected about your system.
v Hardware status. This is the current status of the NIC. The status is represented by the following values that correspond to the NDIS_HARDWARE_STATUS-type values: Status NDIS_HARDWARE_STATUS-type value Explanation Ready NdisHardwareStatusReady The NIC is available and capable of sending and receiving data over the wire. Initializing NdisHardwareStatusInitializing The NIC is initializing. Resetting NdisHardwareStatusReset The NIC is resetting.
Viewing the event log The event log displays all messages relating to the token-ring PCI adapters that have been generated since the last reboot of the machine. On NT systems, these messages are parsed from the Event Viewer, which is an NT Common Administrative Tool. On Windows 9x systems, these messages are parsed from the NDISLOG.txt file. This screen or tab is displayed only when there are messages to present.
To generate the report, perform the procedure that is applicable to your operating system. Windows 9x: To generate an adapter information report on Windows 9x, perform the following steps. 1. Click the Generate button to create the report file (ADPTINFO.PCI). 2. Click the Print button to print the report on your default printer. Windows NT: To generate an adapter information report on Windows NT, perform the following steps. 1.
3. If there is more than one adapter installed in your computer, a selection menu displays each adapter by its universally administered address. Use the cursor keys or the mouse to select the adapter to test. 4. Connect the adapter to the network and press the Enter key to select Test. There are two test options: wrap test and on-ring test. v The wrap test tests the adapter and cable through the hub or concentrator, or through a wrap plug attached to the cable.
Universally Administered Address Label Green Amber Figure 2. The adapter LEDs and labels Understanding the adapter LEDs The LEDs provide information useful for monitoring the status of the adapter and for solving problems. If the green LED is on and the amber LED is off, the adapter is operating correctly. If the amber LED is blinking and the green LED is on, a problem with the adapter has been detected.
Table 6 lists LED states that indicate problems. Table 6. Problems shown by adapter LED states Amber Green Explanation Action On Off The adapter self-diagnostic tests failed or there is a problem with the adapter. Go to “Running adapter diagnostics” on page 42 to test the adapter. Blinking Off The adapter is closed due to one of the following conditions: v The adapter open failed. v The adapter detected a wire fault. v The adapter failed the auto-removal test.
Environment Message Type and Action OS/2 with MPTS Check LANTRAN.LOG, usually found in the subdirectory \IBMCOM, for messages. LAN Server users can use the NET ERROR function to view the error log. v Message prefix LA1 or reference to IBMTRP: See Appendix C. NDIS 2 device driver messages. Other OS/2 stations Refer to the documentation provided with the network operating system or network application that you used to install the adapter and protocol driver. DOS NDIS 2 See Appendix C.
3. Make the following line the first executable line in the AUTOEXEC.BAT file: PCISETUP DOS, Novell, Windows, or Windows 95 (adapter driver in CONFIG.SYS) 1. Insert the CD-ROM in the drive. 2. Copy x:\pcisetup\pcisetup.dos (where x is your CD-ROM drive) to the root directory of the diskette from which the system boots. 3. Make the following line the first executable line in the CONFIG.SYS file: DEVICE=PCISETUP.DOS OS/2 1. Insert the CD-ROM in the drive. 2. Copy x:\pcisetup\pcisetup.
48 IBM 16/4 Token-Ring PCI Management Adapter
Appendix A. CD-ROM content and software packages The CD-ROM contains adapter drivers, supporting applications, publications, technical tips, and frequently asked questions related to the IBM 16/4 Token-Ring PCI Management Adapter. A navigational tool is provided to assist you in accessing the contents of the CD-ROM. You can launch this tool by opening the file x:\startcd.htm (where x is your CD-ROM drive) in a Web browser.
Software packages The package files can be executed to expand the files to a hard disk, or to a diskette where noted with an asterisk (*). The directory structure is maintained as it exists on the CD-ROM. Table 7. Software packages Package Description Executable CD-ROM Complete CD-ROM content CDIMAGE.EXE Device Drivers (*) DOS and Windows 3.1x (NDIS 2) Novell NetWare DOS Requester (16-bit) Novell NetWare Server and Client OS/2 (NDIS 2) Windows 95 Retail/NT 3.51 Windows 95 OSR2/98/NT 4.
Table 8. Diskette images (continued) Image Description Executable RUI Remote Unattended Install diskette for Windows 95/98/NT/2000 RUI.EXE Product documentation Complete product documentation is available for downloading from the CD-ROM and the Web in both PDF and HTML formats. The HTML version can also be viewed directly from your Web browser. Four documents are provided on the CD-ROM — one User’s Guide for each of the three IBM Token-Ring PCI Management Adapters and a Features Guide.
52 IBM 16/4 Token-Ring PCI Management Adapter
Appendix B. NDIS 2 device driver parameters The following table describes the NDIS 2 device driver parameters. For sample PROTOCOL.INI files, see Figure 3 on page 58 and Figure 4 on page 58. Table 9. DOS and OS/2 NDIS device driver parameters in PROTOCOL.INI Parameter Explanation NetAddress Use this parameter to specify a locally administered address for the adapter. The address must be enclosed in double quotes (“ ”) and be unique among all the addresses on the network.
Table 9. DOS and OS/2 NDIS device driver parameters in PROTOCOL.INI (continued) Parameter Explanation MaxTxFrameSize (OS/2 only) This parameter specifies the maximum frame size that can be transmitted on the LAN. The parameter value serves as an upper limit. The actual maximum frame size might be smaller.
Table 9. DOS and OS/2 NDIS device driver parameters in PROTOCOL.INI (continued) Parameter Explanation LoopBack Determines whether or not the adapter will copy a frame that it is transmitting if the destination address is recognized by the adapter. Valid values: Yes Indicates that transmit frames whose destination is this adapter will be transmitted and then received by the adapter. No Indicates that transmit frames whose destination is this adapter must be looped back by the protocol stack.
Table 9. DOS and OS/2 NDIS device driver parameters in PROTOCOL.INI (continued) Parameter Explanation RTSWMode (OS/2 only) This parameter indicates whether the driver should enable code that attempts to send routable traffic directly to a destination rather than through the router. This can improve the performance of these connections and reduce the workload at the router. If the value is Disable, all routable frames will be sent through the router.
Table 9. DOS and OS/2 NDIS device driver parameters in PROTOCOL.INI (continued) Parameter Explanation TCPPortRangeN (OS/2 only) This represents a set of parameters which designates the transmit frame priority value for a specified TCP port range. N is 1, 2, 3, 4, or 5. The format of this 9-digit hexadecimal string is: PortNumber PortNumber PriorityValue where each PortNumber is a four-character hex value and PriorityValue is a one-character hex value.
;Protocol Manager Section [PROT_MAN] Drivername = PROTMAN$ ;Section A: Protocol Driver (IBM TCP/IP V1.2 for DOS) [TCPIP_nif] Drivername = TCPIP$ Bindings = IBMTRP_NIF ;Section B: NDIS Device Driver [IBMTRP_NIF] Drivername = IBMTRP$ NetAddress = “400000000000” DataRate = “M16” EnableTxEofInt = “Yes” FullDuplex = “Yes” TxPriMax = 6 TxPriThresh = 1 LLCOnly = “No” Figure 3. Sample PROTOCOL.
Appendix C. NDIS 2 device driver messages This appendix contains messages that can be received from the NDIS device driver. These messages can come from DOS and OS/2 message files. The messages are either displayed or logged to a file. The term Port nnnnnnnn appears in several messages. It is used to identify the adapter’s instance and bears no relationship to the physical slots in the computer. If this is the only adapter, the number will be 00000000.
LA10008 Unable to register interrupt level xx for this adapter. Explanation: The hardware interrupt level assigned to this adapter was not able to be registered (hooked) by the device driver. User Action: Check the configuration of your computer, looking for other devices that are assigned the same interrupt level as this adapter. Try removing the conflicting device from the machine and restarting the computer to see if the problem is resolved.
LA10016 A ring failure condition was detected while attempting to insert into the network. Explanation: The token-ring network is not functioning correctly. User Action: Contact your local network administrator to determine the status of your network, or try connecting again at a later time. LA10017 A ring beaconing condition was detected while attempting to insert into the network. Explanation: The token-ring network is not functioning correctly.
The possible remedies are to try to connect again at a later time when at least one other ring station is active on the network (such as a network server), or to change the configuration value so that the DataRate parameter is set to a specific ring-speed value of M16 or M4 and restart the computer. Note that setting a specific value of M16 or M4 for the DataRate parameter will cause this adapter to establish the operational speed of the token-ring network if it is still the first active ring station.
LA10042 A device driver initialization error occurred (failure code xx). Explanation: An unexpected error occurred during initialization of the device driver. User Action: Shut down the computer and switch OFF the power to the machine. Restart the computer by switching it ON again. If the error persists, contact your support personnel. LA10043 No adapter instances recognized by this device driver were found in PROTOCOL.INI. Explanation: The PROTOCOL.
LA10049 The configuration parameter xx was specified incorrectly. Its default value will be used. Explanation: An invalid value was specified for a configuration parameter in the PROTOCOL.INI file. A default value has been substituted. User Action: Change the PROTOCOL.INI file to specify a valid value for the configuration parameter that is in error. Refer to the installation manual that came with the adapter for more information on the allowable settings for this particular parameter.
Appendix D. Novell NetWare Server driver parameters For Novell NetWare Server, the parameters are set on the command line or on the load IBMTRPO line in the AUTOEXEC.NCF file. Table 10. Novell NetWare Server driver parameters Parameter Explanation DATARATE= Configures the token-ring data rate for the adapter. It is recommended for servers that the DATARATE be set to M16 or M4, and clients be set to AUTO. This parameter is ignored for 100-Mbps network operation.
Table 10. Novell NetWare Server driver parameters (continued) Parameter Explanation NODE= This keyword is used to set a locally administered address for the adapter. A local address must contain 12 hexadecimal characters and can be specified in either most-significant bit (MSB) or least-significant bit (LSB) format. To specify an MSB node address, the letter M immediately follows the last digit of the node address.
Table 10. Novell NetWare Server driver parameters (continued) Parameter Explanation STANDBY This is a Server environment only keyword parameter. The STANDBY keyword prohibits the adapter from opening on the ring and should only be used in conjunction with IBMRNIC.NLM. When the STANDBY keyword is specified, the adapter will not function until an IBMRNIC failover event occurs to this adapter.
Table 10. Novell NetWare Server driver parameters (continued) Parameter Explanation RTTS= Route Switching Table Size. This parameter specifies the number of entries allowed in the route table kept for Route Switching support. This should be set equal to or greater than the number of remote stations this station will send data to using routable IP frames. If it is set too low, some of the traffic that could be sent directly will instead be sent through the router.
Table 10. Novell NetWare Server driver parameters (continued) Parameter Explanation UPRn= UDP Port Range. This represents a set of parameters which designate the transmit frame priority value for a specified UDP port range. n is 1, 2, 3, 4, or 5. The format of this 9-digit hexadecimal string is: PortNumber PortNumber PriorityValue where each PortNumber is a four-character hex value and PriorityValue is a one-character hex value.
70 IBM 16/4 Token-Ring PCI Management Adapter
Appendix E. Novell NetWare Server messages IBMTRPO-xx-202: The adapter UAA (BIA) is xxx. Explanation: Information only. User Action: None. IBMTRPO-xx-203: The adapter is using an LAA of xxx. Explanation: Information only. User Action: None. IBMTRPO-xx-204: Revision level xxx of the adapter is incompatible with this driver version. Explanation: The Revision ID of the adapter is not one that is supported by this version of the device driver.
system resources to the devices found in the computer, including the interrupt level. IBMTRPO-xx-210: A hardware failure occurred while attempting to open the adapter. Explanation: A hardware error was detected when opening the adapter for network operation. User Action: Run the diagnostics program. See “Running adapter diagnostics” on page 42. IBMTRPO-xx-211: A possible lobe wire failure was detected while attempting to insert into the network.
IBMTRPO-xx-217: A ring beaconing condition was detected while attempting to insert into the network. Explanation: The token-ring network is not functioning correctly. User Action: Contact your local network administrator to determine the status of your network, or try connecting again at a later time. IBMTRPO-xx-218: A duplicate network address was detected while attempting to insert into the network.
Check the installation instructions for additional information on setting the DataRate parameter. This message is relevant for 4-Mbps and 16-Mbps operation only. IBMTRPO-xx-225: A network protocol error occurred while attempting to operate the adapter in full-duplex mode. Explanation: The adapter was unable to successfully communicate with a token-ring switch when attempting to open for full-duplex operation.
IBMTRPO-xx-305: Condition restored. The adapter is connected to the media. Explanation: Information only. User Action: None. IBMTRPO-xx-315: Rnicopen keyword was ignored. Update your microcode level with the flash utility tool. Explanation: The microcode level present on the identified hardware does not support the Quick Failover function of IBMRNIC.NLM. User Action: Using the flash update tool, update your NIC’s microcode level to a more recent version.
76 IBM 16/4 Token-Ring PCI Management Adapter
Appendix F. Novell NetWare DOS ODI driver parameters The following parameters can be configured in the NET.CFG file. Table 11. DOS and OS/2 Configurable Driver Parameters in the NET.CFG file. Parameter Explanation FRAME This keyword defines the frame type used with the adapter. Valid values: v TOKEN-RING MSB v TOKEN-RING LSB v TOKEN-RING_SNAP MSB v TOKEN-RING_SNAP LSB The default value is TOKEN-RING MSB.
Table 11. DOS and OS/2 Configurable Driver Parameters in the NET.CFG file. (continued) Parameter Explanation DATARATE This keyword defines the data-rate setting for the adapter. It is recommended that clients be set to AUTO. This keyword is ignored for 100-Mbps network operation. Valid values: AUTO AutoSense – automatic ring-speed detection. Note: The adapter will not function with AutoSense if the adapter is the first one on the ring.
Appendix G. Notices This information was developed for products and services offered in the U.S.A. IBM may not offer the products, services, or features discussed in this document in other countries. Consult your local IBM representative for information on the products and services currently available in your area. Any reference to an IBM product, program, or service is not intended to state or imply that only that IBM product, program, or service may be used.
compatibility or any other claims related to non-IBM products. Questions on the capabilities of non-IBM products should be addressed to the suppliers of those products. This information is for planning purposes only. The information herein is subject to change before the products described become available.
Safety Information Danger: Before you begin to install this product, read the safety information in Caution: Safety Information—Read This First, SD21-0030. This booklet describes safe procedures for cabling and plugging in electrical equipment. Gevaar: Voordat u begint met de installatie van dit produkt, moet u eerst de veiligheidsinstructies lezen in de brochure PAS OP! Veiligheidsinstructies—Lees dit eerst, SD21-0030.
Fare! Før du installerer dette produkt, skal du læse sikkerhedsforskrifterne i NB: Sikkerhedsforskrifter—Læs dette først SD21-0030. Vejledningen beskriver den fremgangsmåde, du skal bruge ved tilslutning af kabler og udstyr. Gevaar Voordat u begint met het installeren van dit produkt, dient u eerst de veiligheidsrichtlijnen te lezen die zijn vermeld in de publikatie Caution: Safety Information - Read This First, SD21-0030.
Vigyázat: Mielôtt megkezdi a berendezés üzembe helyezését, olvassa el a Caution: Safety Information— Read This First, SD21-0030 könyvecskében leírt biztonsági információkat. Ez a könyv leírja, milyen biztonsági intézkedéseket kell megtenni az elektromos berendezés huzalozásakor illetve csatlakoztatásakor.
Fare: Før du begynner å installere dette produktet, må du lese sikkerhetsinformasjonen i Advarsel: Sikkerhetsinformasjon — Les dette først, SD21-0030 som beskriver sikkerhetsrutinene for kabling og tilkobling av elektrisk utstyr. Perigo: Antes de iniciar a instalação deste produto, leia as informações de segurança Cuidado: Informações de Segurança — Leia Primeiro, SD21-0030. Este documento descreve como efectuar, de um modo seguro, as ligações eléctricas dos equipamentos.
Peligro: Antes de empezar a instalar este producto, lea la información de seguridad en Atención: Información de Seguridad — Lea Esto Primero, SD21-0030. Este documento describe los procedimientos de seguridad para cablear y enchufar equipos eléctricos. Varning — livsfara: Innan du börjar installera den här produkten bör du läsa säkerhetsinformationen i dokumentet Varning: Säkerhetsföreskrifter— Läs detta först, SD21-0030. Där beskrivs hur du på ett säkert sätt ansluter elektrisk utrustning.
Federal Communications Commission (FCC) Statement Note: This equipment has been tested and found to comply with the limits for a Class B digital device, pursuant to Part 15 or the FCC Rules. These limits are designed to provide reasonable protection against harmful interference in a residential installation. This equipment generates, uses, and can radiate radio frequency energy and, if not installed and used in accordance with the instructions, may cause harmful interference to radio communications.
Properly shielded and grounded cables and connectors must be used in order to reduce the potential for causing interference to radio and TV communications and to other electrical or electronic equipment. IBM cannot accept responsibility for any interference caused by using other than recommended cables and connectors. Hinweis zur Elektromagnetischen Verträeglichkeit (EMVG) Dieses Gerät ist berechtigt in Übereinstimmung mit dem deutschen EMVG vom 9. Nov. 92 das EG-Konformitätszeichen zu führen.
unauthorized changes or modifications to this equipment. Unauthorized changes or modifications could void the user’s authority to operate the equipment. This device complies with Part 15 of the FCC Rules. Operation is subject to the following two conditions: (1) this device may not cause harmful interference, and (2) this device must accept any interference received, including interference that may cause undesired operation.
Anmerkung: Um die Einhaltung des EMVG sicherzustellen sind die Geräte, wie in den IBM Handbüchern angegeben, zu installieren und zu betreiben. Japanese Voluntary Control Council for Interference (VCCI) Statement This is a Class A product based on the standard of the Voluntary Control Council for Interference by Information Technology Equipment (VCCI). If this equipment is used in a domestic environment, radio disturbance may arise.
For all PCs intended to be operated at 230 volts outside the United States and Canada, use the shielded line cord specific to your country as shown in the following table. These shielded power cords are available through your country IBM Marketing Representative. Table 12.
You must reproduce the copyright notice and any other legend of ownership on each copy or partial copy, of the Program. You may NOT: 1. distribute the Program over electronic networks (except internally), or by means of electronic ″bulletin boards″. 2. sublicense, rent, lease, or assign the Program. 3. reverse assemble, reverse compile, or otherwise translate the Program.
NetWare Network Computing Products from IBM The following additional license terms apply to the Novell IntranetWare Client for DOS and Windows 3.1 code, included with IBM’s LAN Client program. In the event of any inconsistency between the following terms and the terms of the IBM License Agreement for Productivity Aids, the following terms shall prevail. IF YOU DOWNLOAD OR USE THIS PROGRAM YOU AGREE TO THESE TERMS.
The label on documentation must also include the words: Reprinted by permission of IBM. Appendix G.
International Business Machines Corporation Armonk, NY 10504 Statement of Limited Warranty The warranties provided by IBM in this Statement of Limited Warranty apply only to Machines you originally purchase for your use, and not for resale, from IBM or an IBM authorized reseller. The term “Machine” means an IBM machine, its features, conversions, upgrades, elements, or accessories, or any combination of them.
When a type of service involves the exchange of a Machine or part, the item IBM or your reseller replaces becomes its property and the replacement becomes yours. The replacement may not be new, but will be in good working order and at least functionally equivalent to the item replaced. It is your responsibility to: 1. obtain authorization from the owner (for example, your lessor) to have IBM or your reseller service a Machine that you do not own; 2. where applicable, before service is provided — a.
96 IBM 16/4 Token-Ring PCI Management Adapter
Glossary The following symbols are used in this glossary: v The symbol (A) identifies definitions from the American National Standard Dictionary for Information Systems, ANSI X3.172-1990, copyright 1990 by the American National Standards Institute (ANSI). Copies can be purchased from the American National Standards Institute, 1430 Broadway, New York, New York 10018.
C DOS. See IBM Personal Computer Disk Operating System (DOS). CPU. Central processing unit. duplex. In data communication, pertaining to a simultaneous two-way independent transmission in both directions. Synonymous with full-duplex. Contrast with half-duplex. CRC. See cyclic redundancy check (CRC). CSD. corrective service diskette. cable segment. A section of cable between components or devices on a network.
H L half-duplex. In data communication, pertaining to transmission in only one direction at a time. Contrast with duplex. LAN. See local area network (LAN). hard error. An error condition on a network that requires that the source of the error be removed or that the network be reconfigured before the network can resume reliable operation. See also beaconing. Contrast with soft error. I IBM Personal Computer Disk Operating System (DOS). A disk operating system based on MS-DOS. IDE.
medium. A physical carrier of electrical or optical energy. specific ISO standards. (2) The use of standardized procedures to enable the interconnection of data processing systems. media access control (MAC) protocol.
Peripheral Component Interconnect (PCI). The PCI Local Bus is a high performance 32-bit or 64-bit bus. It is intended for use as an interconnect mechanism between highly integrated peripheral controller components, peripheral add-in boards, and processor/memory systems. power-on self-test (POST). A series of diagnostic tests that are run automatically each time the computer’s power is turned on. protocol.
the counter reaches zero or the threshold value, a decision is made and/or an event occurs. token. A sequence of bits passed from one device to another on the token-ring network that signifies permission to transmit over the network. It consists of a starting delimiter, an access control field, and an end delimiter. The access control field contains a bit that indicates to a receiving device that the token is ready to accept information.
Index A AutoSense features, overview 1 (continued) drivers, installing 9 labels 45 LED states, startup 44 LEDs 43 problem indications, LEDs 45 problems, communication 46 53, 65, 78 C cables 5 CD-ROM content 49 Client 32 33 client system installation 7 communication problem, solving contents, package 2 46 G green dot label D device driver parameters 53 device driver problems 47 device drivers downloading from Internet 47 diagnostics 42 DOS NDIS 2 device driver installation 21 Novell NetWare Requester (
media access control (MAC) 45 messages NDIS device driver 59 NetWare Server 71 MPTS 19 Multiple Protocol Transport Services (MPTS) 19 N NDIS device driver 19 manual installation 53 parameters 53 version 3.1 with Windows NT 3.51 23 version 4.0 with Windows NT 4.0 24 with MPTS 19 with other programs 20 NDIS device driver protocol 58 NDIS MAC parameters 53 NDIS3 MAC driver using Windows 95 to install 25 NetWare 3.12 Server driver installation 9 4.11 Server driver installation 12 5.
UPRn= 69 URL for downloading device drivers TCP/IP Version 2.0 for OS/2 20 TCPPortRangeN 57 TPRn= 68 trademarks 80 troubleshooting problems 37 LED indications 45 Troubleshooting Utility 37 installing 38 starting 38 TXPRIMAX= 67 TXPRITHRESH 67 W warranty 94 Web Browser 47 Windows 95 25 installation, drivers 25 installing NDIS3 MAC driver with 25 Windows NT 23 Version 3.51 with NDIS 3.1 installation 23 Version 4.0 with NDIS 4.