ENGLISH 6633 - 4LE E52 Color Monitor User Guide
First Edition (May / 2002) Note : For important information, refer to the Monitor Safety and Warranty manual that comes with this monitor. This publication could contain technical inaccuracies or typographical errors. Changes are made periodically to the information herein; these changes will be made in later editions. IBM may make improvements and/or changes in the product(s) and/or program(s) at any time.
Table of Contents Precautions.......................................................................................A2 Workplace Preparation .................................................................A2 Working Practices .........................................................................A2 Monitor Driver Installation............................................................A4 Driver installation for Windows 95 or Windows 98 ......................
Precautions Workplace Preparation Positioning the Monitor Choose a suitable place to position the monitor where it is not near fluorescent desk lighting or any equipment that produces magnetic fields that could cause interference. Ensure that the furniture or equipment can support the weight of the monitor. Allow at least 50mm (2 in.) ventilation space around the monitor. Height Position the monitor so that the top of the screen is slightly below your eye level when you sit at your workstation.
Precautions Screen settings Set the screen brightness and contrast to a comfortable level. You may have to adjust this as the lighting changes during the day. Many application programs let you select color combinations which can help you to view in comfort. Power Cord For safe operation, use the power cord supplied with the unit.
Monitor Driver Installation Driver installation for Windows 95 or Windows 98 To use the Plug and Play feature in Microsoft®Windows®95 or Windows 98, files should be loaded from the IBM Monitor CD. 1. Turn off the computer and all attached devices. 2. Ensure that the monitor is connected correctly. 3. Turn on the monitor and then the system unit. Allow the system to boot into Windows 95 or Windows 98. Your computer’s Plug and Play code may warn you that your system hardware has changed.
Monitor Driver Installation Driver installation for Windows 2000 or Windows Me To use the Plug and Play feature in Microsoft Windows 2000 or Microsoft Windows Millennium Edition(Me) files should be loaded from the IBM Monitor CD. 1. Turn off the computer and all attached devices. 2. Ensure that the monitor is connected correctly. 3. Turn on the monitor and then the system unit. Allow the system to boot into Windows 2000 or Windows Me. 4.
Monitor Driver Installation Driver installation for Windows XP To use the Plug and Play feature in Microsoft Windows XP files should be loaded from the IBM Monitor CD. 1. Turn off the computer and all attached devices. 2. Ensure that the monitor is connected correctly. 3. Turn on the monitor and then the system unit. Allow the system to boot into Windows XP. 4. Open the DISPLAY PROPERTIES window by clicking START, SETTINGS, and then double - clicking on the DISPLAY icon. 5. Click the SETTINGS tab. 6.
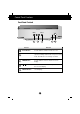
Control Panel Functions Front Panel Controls MENU SELECT Control Function Power Button Use this button to turn the monitor on or off. Power Indicator This Indicator lights up green when the monitor operates normally. If the monitor is in power saving mode, this indicator color changes to amber. MENU Button Use this button to enter or exit the on screen display. Buttons SELECT Button Use these buttons to choose or adjust items in the on screen display.
On Screen Display (OSD) Control Adjustment Screen Adjustment NOTE Allow the monitor to stabilize for at least 30 minutes before making image adjustments. To make adjustments in the On Screen Display, follow these steps: Press the MENU Button, then the main menu of the OSD appears. To access a control, use the or Buttons. When the icon you want becomes highlighted, press the SELECT Button. Use the Buttons to adjust the item to the desired level. Accept the changes by pressing the SELECT Button.
On Screen Display(OSD) Selection and Adjustment The following table indicates all the On Screen Display control, adjustment, and setting menus.
On Screen Display(OSD) Selection and Adjustment You were introduced to the procedure of selecting and adjusting an item using the OSD system. Listed below are the icons, icon names, and icon descriptions of the all items shown on the Menu. 1 0 2 4 X 7 6 8 / 7 5 H z C O N T R A S T 5 0 U Icon Sub menu Description To adjust the contrast of the screen. CONTRAST To adjust the brightness of the screen. BRIGHTNESS To move image left and right. H POSITION To adjust image width.
On Screen Display(OSD) Selection and Adjustment 1 0 2 4 X 7 6 8 / 7 5 H z H M O I R E 5 0 U Icon Sub menu This item allows you to reduce the degree of moire. (Moire is caused by interference Horizontal Scan Line with the periodical dot screen). It is normally OFF(H:0/V:0). The moire adjustments may affect the focus of the screen. Moire adjustments may shake slightly while the moire reduction function is on. H MOIRE V MOIRE COLOR 9300 Slightly bluish white. 6500 Slightly reddish white.
On Screen Display(OSD) Selection and Adjustment 1 0 2 4 X 7 6 8 / 7 5 H z H M O I R E 5 0 U Icon Sub menu • OK • CANCEL RESET • 5 • 10 • 20 • 30 • 60 Set the OSD time, i.e. the length of time a menu will remain on-screen before it shuts off automatically. Adjust the time to 5, 10, 20, 30 or 60 seconds. • 0.7V • 1.0V This item is used to select the monitor's input signal level. The normal level used for most PCs is 0.7V. If the screen becomes suddenly washed-out or blurred, please select 1.
Troubleshooting No image appears Is the power cord of the monitor connected? Check and see if the power cord is connected properly to the power outlet. Is the power indicator light on? Press the Power button. Is the power on and the power indicator green? Adjust the brightness and the contrast. Is the power indicator amber? If the monitor is in power saving mode, try moving the mouse or pressing any key on the keyboard to bring up the screen.
Troubleshooting The screen color is not normal. Do you see basic discoloration (16 colors)? Is the screen color unstable or monochrome? Do you see a partial blurring on the screen? Set the color depth to 256 colors or higher: use 'Control Panel' 'Display' 'Settings' 'Color Palette' Check the connection of the signal cable. This happens due to interference from surrounding magnetic fields, as created when speakers, steel structures, or high-voltage lines are placed near the monitor.
Specifications Picture Tube Sync Input Video Input Plug & Play Power Consumption Dimensions &Weight (with tilt/ swivel stand) Power Input Environmental Conditions Tilt/Swivel Stand Signal cable Power cord Regulations 15 inches (13.7 inches viewable) 90 degree deflection 0.28mm diagonal, 0.25mm horizontal dot pitch AGAS(Anti-Glare Anti-Static) coating Horizontal Freq. 30 - 61kHz (Automatic) Vertical Freq.
Specifications Preset Modes (Resolution) Display Modes (Resolution) 1 2 3 4 5 6 7 VESA VESA VESA VESA VESA VESA VESA Horizontal Freq. (kHz) Vertical Freq. (Hz) 31.47 37.50 43.27 31.47 46.88 53.68 60.02 60 75 85 70 75 85 75 640 x 480 640 x 480 640 x 480 720 x 400 800 x 600 800 x 600 1024 x 768 Service Information The following parts are for use by IBM services, or IBM authorized dealers, to support customer warranty. Parts are for service use only.