
User's Manual


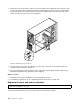

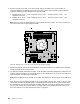


Table Of Contents
- Safety information
- Chapter 1. General information
- Chapter 2. Server setup road map
- Chapter 3. Product overview
- Chapter 4. Turning on and turning off the server
- Chapter 5. Configuring the server
- Chapter 6. Installing, removing, or replacing hardware
- Guidelines
- Removing the server cover
- Removing and reinstalling the front bezel
- Installing, removing, or replacing hardware
- Installing or removing a memory module
- Installing or removing a PCI card
- Installing or removing the Ethernet card
- Installing or removing the RAID card
- Installing or removing the ThinkServer 9240-8i RAID 5 Upgrade Key
- Installing or removing the ThinkServer SATA Software RAID 5 Key
- Installing or removing the ThinkServer iKVM Remote Management Module
- Installing or removing the TPM module
- Installing or removing the DIT module
- Installing or replacing an optical drive
- Installing or replacing a hot-swap hard disk drive
- Removing or installing a non-hot-swap hard disk drive
- Replacing the hot-swap hard disk drive backplane
- Replacing the non-hot-swap power supply assembly
- Replacing a hot-swap redundant power supply module
- Replacing the power distribution board and cage assembly
- Replacing the front panel board assembly
- Replacing the front system fan
- Replacing the rear system fan
- Replacing the heat sink and fan assembly
- Replacing the microprocessor
- Replacing the system board battery
- Completing the parts replacement
- Chapter 7. Troubleshooting and diagnostics
- Chapter 8. Getting information, help, and service
- Appendix A. Notices
- Index
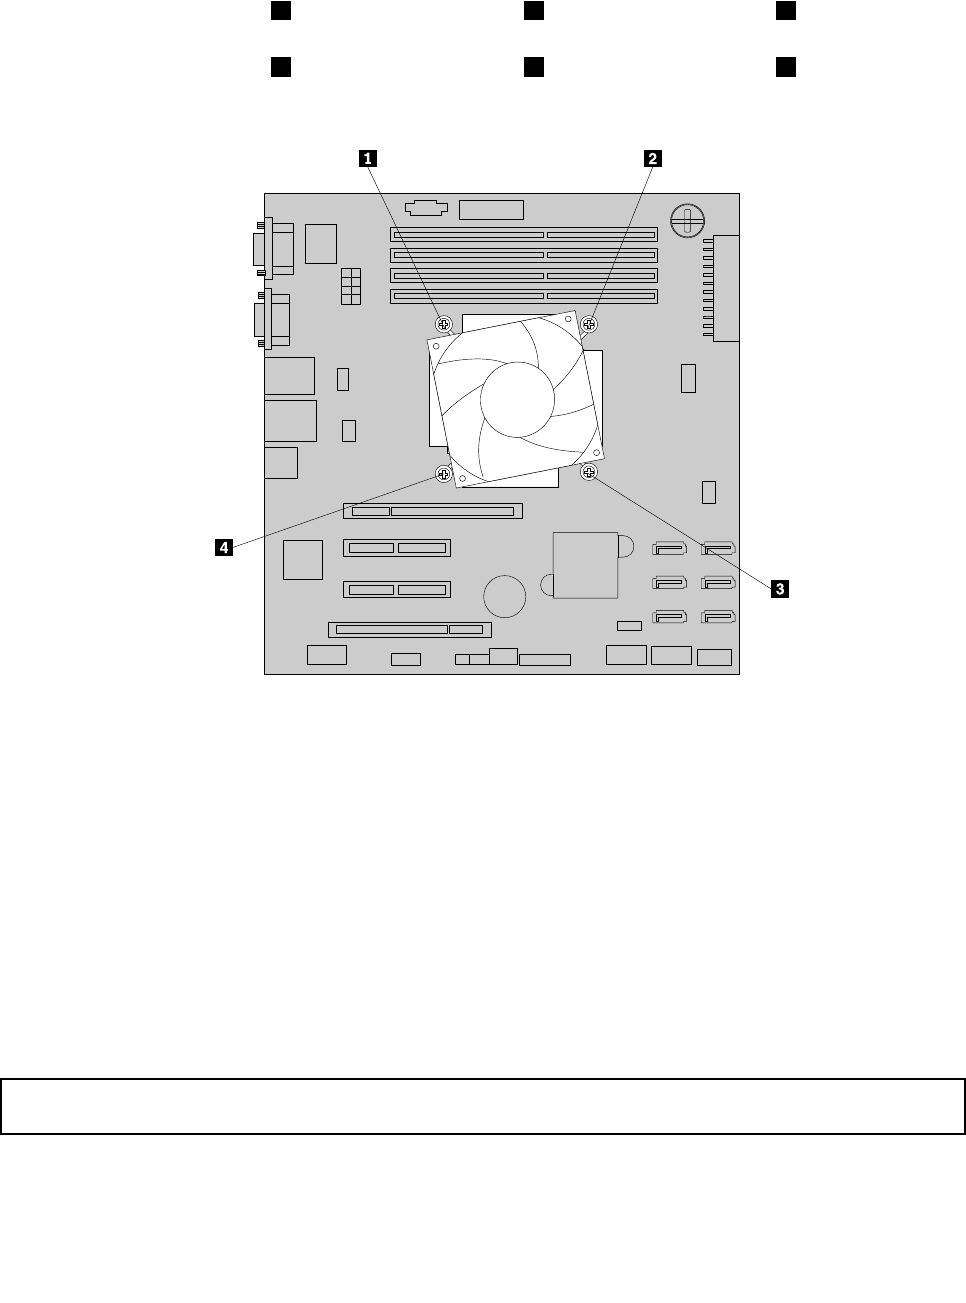
10.Installthefourscrewstosecurethenewheatsinkandfanassemblyonthesystemboard.Itis
recommendedthatyoucarefullyinstallthefourscrewsusingthefollowingmethodtoavoidanypossible
damagetothesystemboard.
a.Partiallytightenscrew1,thenrmlytightenscrew3,andthenreturntoscrew1andrmlytighten
it.Donotover-tightenthescrews.
b.Partiallytightenscrew2,thenrmlytightenscrew4,andthenreturntoscrew2andrmlytighten
it.Donotover-tightenthescrews.
Figure91.Installingthescrewstosecuretheheatsinkandfanassembly
11.Connecttheheatsinkandfanassemblycabletothemicroprocessorfanconnectoronthesystem
board.See“Systemboardcomponents”onpage42
.
Note:Iftheheatsinkandfanassemblycableistoolong,looselyknotthecableforpropercablerouting.
12.Ifyouareinstructedtoreturntheoldheatsinkandfanassembly,followallpackaginginstructionsand
useanypackagingmaterialsthataresuppliedtoyouforshipping.
Whattodonext:
•Toworkwithanotherpieceofhardware,gototheappropriatesection.
•Tocompletethereplacement,goto“Completingthepartsreplacement”onpage162.
Replacingthemicroprocessor
Attention:Donotopenyourserverorattemptanyrepairbeforereadingandunderstandingthe“Safetyinformation”
onpageiii
and“Guidelines”onpage83.
Thistopicprovidesinstructionsonhowtoreplacethemicroprocessor.
Chapter6.Installing,removing,orreplacinghardware157