i
Note: Before using this information and the product it supports, be sure to read the general information under “Safety information” on page vii, and “Notices” on page 134. For ergonomics information, see the Online User's Guide.
Thank you for choosing an IBM ThinkPad i Series 1200/1300 computer We at IBM have developed this ThinkPad computer to meet both your technical requirements and your high expectations. To help us continue to build products that address your mobile computing needs, please take a moment to complete the ThinkPad Registration.
Functional highlights Slim and compact design with core technology The slim and compact design of the ThinkPad i Series 1200/1300 brings ease-of-use and portability to your computing needs. High-speed processor The Intel high-speed processor enables high-speed data processing and provides advanced performance. Large-capacity hard disk drive The large-capacity hard disk drive can respond to a wide variety of your business demands.
Functional highlights TrackPoint with Enhanced Controls Your computer has an enhanced TrackPoint function that enables you to make selections merely by pressing on the TrackPoint. A new center button, the Internet Scroll Bar, converts the TrackPoint into a scroll controlling device or a magnifying glass on the screen. For more information on using the TrackPoint, see “TrackPoint” on page 9.
About this book About this book This book contains information that will help you operate the IBM ThinkPad i Series 1200/1300 computer. Be sure to read the ThinkPad i Series 1200/1300 Setup Guide and Chapter 1 of this book before using the computer. Chapter 1. "Getting familiar with your computer," acquaints you with the basic features of your computer Chapter 2. "Extending the features of your computer," provides information on installing options and using your computer's high-technology features.
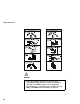
Safety information Safety information Electrical safety notice DANGER Electrical current from power, telephone, and communication cables is hazardous. Reduce the risk of fire and electric shock by always following basic safety precautions, including the following: Do not use your computer in or near water. During electrical storms, do not connect the cable to or disconnect it from the telephone outlet on the wall.
Safety information DANGER Do not disassemble, incinerate, or short-circuit the rechargeable battery pack. Do not put it in trash that is disposed of in landfills. Dispose of it as required by local ordinances or regulations. In the United States, call IBM at 1-800-IBM-4333 for information on disposal.
Safety information DANGER There is a danger of an explosion if the battery is incorrectly replaced. The lithium battery (IBM P/N 02K6502 UL-recognized component [file no. MH12210]) contains lithium and can explode if it is not properly handled or disposed of. Replace only with a battery of the same type. Do not: (1) throw or immerse it into water, (2) allow it to heat to more than 100°C (212°F), or (3) attempt to repair or disassemble it. Dispose of it as required by local ordinances or regulations.
Safety information APPAREIL A LASER DE CLASSE 1 KLASS 1 LASER APPARAT The CD-ROM drive is certified in the U.S. to conform to the requirements of the Department of Health and Human Services 21 Code of Federal Regulations (DHHS 21 CFR) Subchapter J for Class 1 laser products. In other countries, the drive is certified to conform to the requirements of EN60825. CAUTION: Do not open the CD-ROM drive; no user adjustments or serviceable parts are inside.
Contents Thank you for choosing an IBM ThinkPad i Series 1200/1300 computer . . . . . . . . . . . . . . . . . . . . . . . . . . . . . . . iii Functional highlights . . . . . . . . . . . . . . . . . . . . . . . . . . iv About this book . . . . . . . . . . . . . . . . . . . . . . . . . . . . . vi Safety information . . . . . . . . . . . . . . . . . . . . . . . . . . . vii Electrical safety notice . . . . . . . . . . . . . . . . . . . . . . . vii Laser compliance statement . . . . . . . . . . . . . . . . . .
Enabling the scrolling feature . . . . . . . . . . Enabling the magnifying glass . . . . . . . . . . Changing TrackPoint button assignments . . . Increasing memory . . . . . . . . . . . . . . . . . . Upgrading the hard disk drive . . . . . . . . . . . Attaching an external mouse, keypad or keyboard Attaching an external mouse or numeric keypad Attaching an external keyboard and mouse . . Disabling the TrackPoint . . . . . . . . . . . . . Attaching an external monitor . . . . . . . . . . . .
Printer problems . . . . . . . . . . . . . . . . External monitor problems . . . . . . . . . . Other option problems . . . . . . . . . . . . Software problems . . . . . . . . . . . . . . Other problems . . . . . . . . . . . . . . . . Recovering lost or damaged software . . . . . Using the PC-Doctor program . . . . . . . . Using the ThinkPad Software Selections CD . . . . . . . . . . . Using the Recovery CD ThinkPad Web site or Bulletin Board . . . . Getting service . . . . . . . . .
Notice to European Users of the IBM ThinkPad Modem . . Warning notice to New Zealand users of the IBM ThinkPad modem . . . . . . . . . . . . . . . . . . . . . . . . . . . . . Index xiv . 142 . 142 . . . . . . . . . . . . . . . . . . . . . . . . . . . . . . . . . .
Getting familiar with your computer This chapter provides basic information about your computer. Identifying the hardware features . . . . . . . . Front view of the computer . . . . . . . . . . Rear view of the computer . . . . . . . . . . Bottom view of the computer . . . . . . . . System status indicators . . . . . . . . . . . . . Distinctive functions of your computer . . . . . Keyboard functions . . . . . . . . . . . . . . TrackPoint . . . . . . . . . . . . . . . . . . Fn key . . . . . . . . . . . . .
Identifying the hardware features Front view of the computer 1 1 15 3 2 14 3 4 13 5 12 11 10 6 9 (1) (2) (3) (4) (5) (6) (7) (8) (9) (10) (11) 2 ThinkPad i Series 1200/1300 User's Reference 8 7 The LCD latches release the LCD when pressed and allow it to be opened. The color LCD screen displays computer output. The indicator panel consists of the system-status indicators and their associated symbols. The left and right internal speakers generate stereo sound.
Identifying the hardware features (12) (13) (14) (15) The Internet Scroll Bar works with the TrackPoint (10) and functions as a scroll controlling device to easily scroll through Web pages or program windows. The Fn key is used with the function keys to activate the Fn key functions. The Easy Launch buttons are four customizable keys that allow you to run programs at a single press of a button. See “Easy Launch buttons Customization Utility” on page 33 for more information.
Identifying the hardware features Rear view of the computer 1 2 15 3 14 4 5 13 6 7 8 9 10 11 12 16 17 18 (1) (2) The security keyhole is used with a mechanical lock. The power jack is where the AC Adapter cable is connected. (3) The PS/2 mouse and keyboard connector is used to attach a mouse, external keyboard, or external numeric keypad to the computer. (4) The parallel connector is where you connect a parallelprinter signal cable.
Identifying the hardware features (10) The line-in jack, a ⅛inch (3.5mm) diameter jack, is where you connect an external audio device. (11) The microphone jack, a ⅛inch (3.5mm) diameter jack, is where you connect a self-powered stereo microphone. (12) (13) (14) (15) (16) (17) (18) Note: Do not plug any device into the microphone jack except a microphone. The two universal serial bus (USB) portsallow you to connect any device that conforms to the USB standard. The PC Card slot accepts a PC Card.
Identifying the hardware features Bottom view of the computer 3 2 1 (1) (2) (3) (4) The The The The battery pack is a built-in power source for the computer. battery-pack latch locks or releases the battery pack. hard disk screw secures the hard disk drive. memory-slot cover covers the memory slot. The memory slot accepts a dual inline memory module (DIMM) option. Note: Base memory (32 MB or 64 MB) is internal and cannot be upgraded.
System status indicators System status indicators The system-status indicators on the computer show the current status of your computer by their on or off states and colors (green and orange). Each indicator is identified with a symbol.
System status indicators Symbol Color Meaning (1) Battery status Green Enough battery power remains for operation. Blinking orange The battery pack needs to be charged Orange The battery pack is being charged. Green The computer is in standby mode Blinking green The computer is entering or resuming from hibernation mode. (3) Drive in use Orange Data is being read from or written to the hard disk. Do not enter standby mode or power off the computer when this indicator is on.
Distinctive functions of your computer Distinctive functions of your computer Your computer has unique keyboard functions and utility programs for easy configuration.
Distinctive functions of your computer Stick Right click button Internet Scroll Bar Left click button If you are not familiar with using the TrackPoint, these instructions will help you get started: 1. Place your hands in the typing position and press gently with your left or right index finger on the stick in the direction you want the cursor to move. Pressing the stick away from you moves the cursor up the screen; pressing it toward you moves the cursor down the screen.
Distinctive functions of your computer Cursor Stick Right click button Left click button Internet Scroll Bar 2. Press the click buttons with your left or right thumb to select and drag as required by your software. Changing the Cap The cap (1) on the end of the TrackPoint is removable. You can replace it with the spare shipped with your computer. 1 For more information on customizing the TrackPoint and using the Internet Scroll Bar, see “Customizing the TrackPoint” on page 46.
Distinctive functions of your computer Fn key The Fn key function allows you to change operational features instantly. When you use the following functions, press and hold the Fn key; then press the appropriate function key (F1 to F12) or other keys (Insert, Delete, Home, End, PgUp, PgDn and Backspace).
Distinctive functions of your computer The following table shows the function of the Fn key combined with keys: Feature and Icon Key Combination Meaning Previous track Fn+F9 This plays the previous track of an audio CD in the CD-ROM drive. Next track Fn+F10 This plays the next track of an audio CD in the CD-ROM drive. Play/Pause Fn+F11 This starts the playback of an audio CD in the CD-ROM drive. Press this Fn key function again to pause playback.
Distinctive functions of your computer Feature and Icon Key Combination Meaning Power Management Properties Fn+F2 If you press this key combination, the Power Management Properties window appears. You can view and set parameters for battery status in the window. Sleep Fn+F4 The computer enters sleep mode. You can set the sleep button function in the "Advanced" section of the Power Management Properties window. Fn+F1 The Controls at a glance screen appears.
Distinctive functions of your computer Numeric keypad The keyboard has some keys that, when enabled, work as if they were on a 10-key numeric keypad. (The numeric keypad on the keyboard is not active when the external keyboard or the external numeric keypad is attached to the computer.) To enable or disable the numeric keypad, press and hold Shift and then press NumLk. If the numeric keypad is enabled, press and hold Shift to temporarily use the cursor- and screen-control keys.
Distinctive functions of your computer CD-ROM drive The ThinkPad i Series 1200/1300 computer comes with a built-in CD-ROM drive. The CD-ROM drive allows you to use compact discs (CDs). The following CDs are supported by the computer: Music CDs Photo CDs CD-ROM or CD-ROM XA Video CDs Using the CD-ROM drive To use the CD-ROM drive, do the following: 1. Turn on the computer. 2. Push the CD-ROM eject button on the side of the computer; then pull out the CD-ROM tray. 3. Fit your CD on the center pivot.
Distinctive functions of your computer 2. Push the CD-ROM eject button on the side of the computer; then pull out the CD-ROM tray. 3. Lift the CD by its edge while pressing the pivot. 4. Push the tray into the computer until it fully closes. Handling CDs CDs are high-density media that must be handled with care and kept clean to ensure that data remains readable. Keep in mind the following to maintain reliability: Hold the disc by the edges. Do not touch the surface of the disc.
Distinctive functions of your computer Sleep Manager program Easy Launch buttons Customization Utility This section summarizes these utility programs. BIOS Utility Your computer provides a BIOS Utility which allows you to select various setup parameters: System Information: View information about the computer. Basic System Settings: Set date and time. Startup Configuration: Set startup options. Onboard Devices Configuration: Set device resource settings. System Security: Set a password.
Distinctive functions of your computer BIOS Utility System Information Basic System Settings Startup Configuration Onboard Devices Configuration System Security Load Default Settings ↑↓ = Move highlight bar, ↵ = Select, Esc = Exit 4. Move to an item you want to change using the up/down arrow keys, and press Enter. A submenu is displayed. 5. Change the items you wish to change. To change the value of an item, use the left/right arrow keys. 6. Press Esc to exit from the submenu. 7.
Distinctive functions of your computer System Information Page 1/1 CPU Type & Speed ---------------------- Pentium(R) III 500 MHz Diskette Drive A --------------------------- 1.44MB 3.5-inch (USB) Hard Disk Drive --------------------------- 5729 MB HDD Serial Number --------------------- xxxxxx System with -------------------------------- CD-ROM Attached System BIOS Version ------------------- VA.00Q VGA BIOS Version ----------------------- 2.21.
Distinctive functions of your computer Basic System Settings: Selecting the Basic System Settings item and pressing Enter displays the following "Basic System Settings" submenu. Basic System Settings Page 1/1 Date ----------------------------------------------- [Thu Feb 17, 2000] Time ----------------------------------------------- [10:32:30] ↑↓ = Move highlight bar, ←→ = Change setting, F1 = Help The "Basic System Settings" submenu includes the following: Date sets the system date.
Distinctive functions of your computer Startup Configuration Page 1/1 Boot Display ---------------------------------------------------- [ Auto ] Screen Expansion --------------------------------------------- [Enabled ] Hotkey Beep ---------------------------------------------------- [Enabled ] Fn Key Lock ----------------------------------------------------- [Disabled ] Fast Boot -------------------------------------------------------- [Enabled ] Boot Drive Sequence: 1st.
Distinctive functions of your computer Choosing a temporary boot device: You can choose a temporary boot device when you start up your computer. Do as follows: 1. While the ThinkPad logo is being displayed, the following lines appear: Press F1 for IBM BIOS Setup Utility Press F12 to choose temporary device Press F12. The Boot Menu appears: Boot Menu Floppy Disk Hard Disk CD-ROM Network Esc = Exit, F1 = Enter Setup 2. Use the cursor keys to select the device you want to boot from and press Enter.
Distinctive functions of your computer Onboard Devices Configuration Page 1/1 Parallel Port ----------------------------------------------------- [Enabled ] Base Address -------------------------------------------- [3BCh] IRQ --------------------------------------------------------- [7 ] Operation Mode ----------------------------------------- [Bi-directional] ECP DMA Channel ------------------------------------- [-] ↑↓ = Move highlight bar, ←→ = Change setting, F1 = Help Note: You do not need to chang
Distinctive functions of your computer System Security: Selecting the System Security item and pressing Enter displays the following "System Security" submenu.
Distinctive functions of your computer Notebook Manager The Notebook Manager allows you to set passwords, the startup sequence of drives and power management settings. It also shows the current hardware configuration. Note: Display-related Fn key functions are disabled when you access the Notebook Manager. To start the Notebook Manager program, do as follows: 1. Click Start. 2. Move the cursor to Programs, Notebook Manager; then click Notebook Manager.
Distinctive functions of your computer Note: The values and settings in the window above may differ from the ones on your computer. Click the Help button to learn more about these system components.
Distinctive functions of your computer The POST page displays the following items: Enable Fast Boot enables or disables the Fast Boot feature on your computer. Fast Boot allows your computer to start up and resume faster. When enabled, the BIOS communicates with the Windows operating system with ACPI about Plug-and-Play resources settings and information about previous start ups. Enable hotkey beep When enabled, the computer gives off beeps when an Fn key function is pressed.
Distinctive functions of your computer drives in the list window. Click the Help button to learn more about these startup sequence settings. Password: In the Password page, you can set, modify, or delete the password(s) for your computer. The Password page displays the following items: Power-On Password. The Power-On Password prevents unauthorized access to your computer at startup and when the computer resumes from hibernation mode. Setup Password.
Distinctive functions of your computer Display Device: In the Display Device page, you can set options related to your display and attached external display devices. The Display Device page displays the following items: Boot Display Device. Sets the default display device on startup. Switching Display Device. Sets the current display device. Notes: 1. You can also press Fn+F7 to switch between display devices. 2. Make sure an external monitor is connected before External Monitor is selected.
Distinctive functions of your computer Parallel Port: In the Parallel Port page, you can specify the settings for your computer's parallel port. The Parallel Port page displays the following items: Enable Parallel Port. Enables or disables the parallel port. Mode. When the parallel port is enabled, allows you to set the mode used by the parallel port. Base Address. When the parallel port is enabled, allows you to set the base address used by the parallel port. IRQ.
Distinctive functions of your computer computer into your hard disk drive. The next time you power on your computer, it resumes from where you left off.
Distinctive functions of your computer Note: The computer automatically loads Sleep Manager everytime you start Windows 98. When Sleep Manager is active, it takes care of the hibernation file management chores in the background. Do not close this application or the computer may not enter hibernation mode properly. Click the Help button to learn more about the Sleep Manager program.
Distinctive functions of your computer This window shows the current assignments of the Easy Launch buttons and includes instructions on how to use the Easy Launch buttons Customization Utility. Easy Launch buttons options: When you click the Options button in the Easy Launch buttons Customization Utility window, the options window shows the following items: On Screen Display. When enabled, the title of an application or a Web site is drawn on the desktop. You can customize the color and font.
Distinctive functions of your computer Note: This feature is available for Easy Launch buttons, Fn+F1, Fn+F2, and audio CD playback buttons. Sound. When a wave file is defined as the event for an Easy Launch button in Sound Properties, the utility plays the wave file. Note: This feature is available for Easy Launch buttons, Fn+F1, Fn+F2, and audio CD playback buttons. Show icon on taskbar. When enabled, the Easy Launch buttons icon appears on the taskbar.
Distinctive functions of your computer If you mark Launch an Application, the following window appears: 4. Select a Web site or an application you want to assign to the button; then click Set.
Distinctive functions of your computer The main window of Easy Launch buttons Customization Utility reopens. 5. Click Finish to complete the customization. Online User's Guide Your ThinkPad computer features an online user's guide, so that you will always have key information at your fingertips even if you are traveling.
Reinstalling software Reinstalling software To back up your system or reinstall the operating system, your ThinkPad computer has the following features: Note: You can also get the latest hardware device drivers from the ThinkPad Web site (see “ThinkPad Web site or bulletin board”). The ThinkPad Software Selections CD The Recovery CD ThinkPad Web site or bulletin board For more information about recovering lost or damaged software, see “Recovering lost or damaged software” on page 109.
Replacing the battery pack Replacing the battery pack To replace the battery pack, do as follows: 1. Power off your computer. 2. Disconnect the AC Adapter and cables. 3. Close the LCD and turn the computer over. 4. Slide and hold the battery-pack latch (1); then remove the battery pack (2). 1 3 2 5. To install the new battery pack, insert it into the battery bay. The battery-pack latch automatically snaps into place. 6. Slide the battery-pack latch to the lock position (3).
Handling your ThinkPad computer Handling your ThinkPad computer Laptop computers are precision machines that require a bit of careful handling. Though the IBM ThinkPad computer is designed and tested to be a durable notebook computer that functions reliably in normal work environments, following the ThinkPad do's and don'ts will help ensure many years of comfortable and productive use from your computer.
Handling your ThinkPad computer Do not pack your computer in a tightly packed suitcase or bag. The compression might cause internal damage. Do not disassemble your computer. Only an authorized IBM ThinkPad repair person should disassemble and repair your computer. Do not scratch, twist, hit, or push the surface of your computer display. Do not place any objects between the display and keyboard or under the keyboard. Do not pick up or hold your computer by the display.
Handling your ThinkPad computer line other than PSTN can damage your modem. If you are not sure which kind of phone line you are using, contact your telephone company. Many hotels or office buildings use digital telephone extension lines, so check before connecting the telephone cable in such places. Do not place an active cellular phone on the computer. Carrying your computer When carrying your computer, follow these instructions to prevent possible damage to your computer and data: 1.
Handling your ThinkPad computer that all chemicals in the battery are fully activated by cycling the battery (fully charge, then fully discharge) three times. This procedure is also recommended if you stored the battery for a few months. Do not charge the battery pack until all of its power is used. Recharging a battery pack that is not completely discharged can shorten battery life. Once you start charging the battery pack, do not use it until it is fully charged.
44 ThinkPad i Series 1200/1300 User's Reference
Extending the features of your computer This chapter provides information on how to customize and extend the ThinkPad computer's features. You can use the ThinkPad computer with external devices and increase the memory. Customizing the TrackPoint . . . . . . . . . . . . . Changing TrackPoint sensitivity . . . . . . . . . Enabling Press-to-Select . . . . . . . . . . . . . Enabling the scrolling feature . . . . . . . . . . Choosing the scrolling method . . . . . . . . Enabling the magnifying glass . . . . .
Customizing the TrackPoint You can customize the TrackPoint by doing the following: 1. Click Start. 2. Move the cursor to Settings, then click on Control Panel. 3. Double-click Mouse. The "Mouse Properties" window appears. 4. Click the TrackPoint tab. You can set the following features in this window: TrackPoint sensitivity Press-to-Select Scrolling Magnifying Glass Note: To use these special TrackPoint functions, you must disconnect any PS/2 mouse and enable the TrackPoint.
Customizing the TrackPoint You can change the way the TrackPoint cursor pointing device responds to your touch. You might prefer to use a light touch, or you might want to use more pressure. Experiment with the sensitivity control to find the setting you like best. Of course, you can always adjust the setting by using Mouse Properties from the Control Panel. To change TrackPoint sensitivity, do as follows: 1. Move the slider toward Firm Touch or Light Touch, depending on your preference. 2. Click Apply.
Customizing the TrackPoint stick, then move the cursor to select text or items in a window. You can also set how the Press-to-Select feature functions. Press-to-Select allows you to make the TrackPoint stick funcction the same as the left or right click button. To enable Press-to-Select and set advanced settings, do as follows: 1. Click the Enable Press-to-Select check box. 2. Once Press-to-Select is enabled, you can click Advanced... under TrackPoint Stick.
Customizing the TrackPoint you might notice unintended clicks, a cursor delay, or a dragging delay. If you set the pace too fast, you might find Press-to-Select hard to use. Enabling the scrolling feature The scrolling feature enables you to navigate easily through long documents or large spreadsheets with the press of a button. When scrolling is enabled, press the Internet Scroll Bar and then use the TrackPoint stick to scroll through text. To enable scrolling, click the Scrolling radio button.
Customizing the TrackPoint Use External Mouse: This option sets an externally attached mouse to scroll, or move the magnifying glass, horizontally or vertically. The TrackPoint controls only the cursor. Use TrackPoint: This option sets the TrackPoint to scroll horizontally or vertically without holding down the Internet Scroll Bar. Use an externally attached mouse to control the cursor.
Customizing the TrackPoint Note: When you click a button, the descriptions of the mouse button functions change to show the functions that you have assigned.
Customizing the TrackPoint Increasing memory Increasing memory capacity is an effective way to make programs run faster. You can increase the amount of memory in your computer by installing a dual inline memory module (DIMM), available as an option. Different capacities of DIMM are available. You can install DIMMs directly in the memory slots on the bottom of the computer. Your computer memory capacity can be expanded up to 192 MB (one 128 MB DIMM option).
Increasing memory 4. Install the DIMM into the memory slot. Note: To avoid damaging the DIMM, do not touch its contact edge. a. Find the notch on the side of the DIMM. b. With the notched end of the DIMM toward the right side of the socket, insert the DIMM, at an angle or approximately 20°, into the socket; then press it firmly (1). c. Pivot the DIMM until it snaps into place (2). 1 2 5.
Increasing memory a. While the ThinkPad logo is being displayed, wait for the BIOS Utility prompt before pressing F1. b. Select Startup Configuration and press Enter. c. Disable Fast Boot. d. Save the changes and exit the BIOS Utility. e. Verify the memory value (shown near the top left corner of the screen) when the computer restarts. Note: After you have verified the memory value, shutdown and restart the computer. Enter the BIOS Utility to enable Fast Boot. 9. You have finished installing the DIMM.
Increasing memory 1. Power off the computer an disconnect the AC Adapter and all cables from the computer. 2. Close the LCD, turn the computer over, and then remove the battery pack. 3. Loosen the screw and remove the memory slot cover. 4. Press out on the latches on both edges of the socket at the same time. 5. Remove the DIMM. Be sure to save the DIMM for future use. 6. Replace the memory slot cover; then tighten the screws. 7. Replace the battery pack. 8.
Upgrading the hard disk drive Upgrading the hard disk drive You can increase the storage capacity of your computer by replacing the original, built-in hard disk drive with an optional one. You can purchase the option from your IBM reseller or IBM marketing representative. Note: Replace the hard disk drive only if you upgrade it or have it repaired. You should not replace it often. Attention: Do not drop or apply any shock to the hard disk drive. The drive is sensitive to physical shock.
Upgrading the hard disk drive 5. Pull the strap of the hard disk drive to remove the drive (3). 6. To install the new hard disk drive, do the following: a. Insert the new hard disk drive into the bay. Make sure you connect the drive firmly. b. Replace the hard disk drive cover, and tighten the screw. c. Turn the computer right-side up, and power it on.
Attaching an external mouse, keypad or keyboard Attaching an external mouse, keypad or keyboard This section explains how to attach an external mouse, external numeric keypad, and external keyboard to your computer. Attaching an external mouse or numeric keypad You can attach an external mouse or numeric keypad to the PS/2 mouse and keyboard connector ( ) on the rear of the computer.
Attaching an external mouse, keypad or keyboard If you want to use both the external numeric keypad and mouse at the same time, first connect the keypad cable to the computer; then connect the mouse cable to the connector at the rear of the keypad. Note: You can remove the keypad cover and use it as a stand for the keypad.
Attaching an external mouse, keypad or keyboard Attaching an external keyboard and mouse Mouse External keyboard You can connect an external keyboard to your computer either directly through the PS/2 mouse and keyboard connector or through the keyboard/mouse cable (available separately as an option). When the external keyboard is attached, the following keys are not available: Numeric keypad on the computer keyboard External numeric keypad Instead, use the numeric keypad on the external keyboard.
Attaching an external mouse, keypad or keyboard Using the IBM ThinkPad Space Saver Keyboard When using the IBM ThinkPad Space Saver Keyboard, do not install the device driver supplied with the Space Saver Keyboard. The TrackPoint on the ThinkPad is disabled when you use the Space Saver Keyboard. Disabling the TrackPoint Attaching a PS/2 mouse automatically disables the TrackPoint. You can use a USB mouse simultaneously with the TrackPoint.
Attaching an external monitor Attaching an external monitor This section provides information about using the computer LCD and an external monitor. It also provides things to consider when using DOS applications. The LCD of your computer uses thin-film transistor (TFT) technology or high performance addressing (HPA) technology.
Attaching an external monitor Notes: 1. If you select Both, do not attach an external monitor that supports only VGA mode (640x480 resolution). Otherwise, the external monitor is scrambled and output is not displayed, or the screen might be damaged. Use External monitor instead. 2. Set your monitor type and display device driver as follows: If you are attaching an SVGA monitor, refer “Display modes” on page 65 for information on the supported color depth or resolution. a.
Attaching an external monitor If no external monitor is attached to the computer and the display output location is set to External Display, the output is displayed on the LCD. Both: The computer output is displayed on both the LCD and the external monitor. You can also change the display output location using the Fn key function. Press and hold the Fn key; then press the F7 key.
Attaching an external monitor 2. Move the cursor to Settings; then click Control Panel. 3. Double-click Display. 4. Click the LynxEM tab. 5. Click the ON radio button for the "Stretch" feature in the Special Modes section. However, the image might look slightly distorted. Display modes The ThinkPad i Series 1200/1300 computer has an LCD that supports an XGA (1024x768 resolution) video mode or an SVGA (800x600 resolution) video mode.
Attaching an external monitor Resolution Supported Color Depth Frame Rate 256 640x480 (VGA) 65,536 60 Hz, 70 Hz, 75 Hz, or 85 Hz 16,777,216 256 800x600 (SVGA) 65,536 60 Hz, 70 Hz, 75 Hz, or 85 Hz 16,777,216 256 1024x768 (XGA) 65,536 16,777,216 (available only on select models) 60 Hz, 70 Hz, or 75 Hz 256 1280x1024 (SXGA) 65,536 43 Hz 16,777,216 Notes: 1. The resolution and color depth you can set depends on your external monitor. 2.
Attaching an external monitor 4. Double-click Display. 5. Click the Settings tab. 6. Click the Monitor-2 icon (for the secondary display, the CRT). 7. Click Yes to enable monitor 2 (if disabled). 8. Click the Monitor-1 icon (for the primary display, the LCD). 9. Select the color depth and the resolution of the primary display. 10. Click the Monitor-2 icon (for the secondary display, the CRT). 11. Select the color depth and the resolution of the secondary display. 12.
Attaching an external monitor You cannot use the Fn+F7 (display switching) function when you are in dual display mode.
Attaching a printer Attaching a printer Any parallel printer with the standard Centronics** interface can be attached to the 25–pin, parallel connector at the rear of the computer. 1. Attach the printer as shown. 2. Turn on the printer.
Inserting a PC Card Inserting a PC Card This section describes how to prepare to use a PC Card. Your computer has one PC Card slot and supports the following types of cards: PC Card (Type I, Type II, and Type III) CardBus Zoomed Video (ZV) To install a PC Card in your computer, do the following: 1. Find the notched edge (1) of the PC Card as shown. 2. Insert the PC Card into the PC Card slot.
Inserting a PC Card PC Card slot 3. Press the PC Card firmly into the connector. A window appears and informs you about the new card. Note: If you have not installed the PC Card driver, Windows 98 starts "PCMCIA Card Services Wizard" to install it. Follow the instructions on the screen. You have completed setting up the PC Card, and you can now use it. For more information on how to use the PC Card software, refer to Windows help. Removing the PC Card Before removing a PC Card, you must stop it.
Inserting a PC Card Eject button For more information on using a PC Card, see the Online User's Guide.
Protecting your computer This chapter provides information about how to protect your computer from theft or unauthorized use. Using passwords . . . . . . . . . . . . Setting a password . . . . . . . . . Entering a password . . . . . . . . Removing and changing a password Using locks . . . . . . . . . . . . . . . Copyright IBM Corporation 1999 . . . . . . . . . . . . . . . . . . . . . . . . . . . . . . . . . . . . . . . . . . . . . . . . . . . . . . . . . . . . . . . . . . . . . . . . . .
Using passwords The password-setting feature helps to prevent your computer from being used by others. Once you set a password, a prompt appears on the screen each time you turn on the computer. You must enter your password at the prompt. You cannot use the computer unless you type the correct password. You can set the following passwords on your computer: Power-on password Set the power-on password to protect your computer from use by another person.
Using passwords disk without knowing the password. It provides the following features: – You need to type the hard disk password at startup. – If the hard disk drive is moved to another computer, the hard disk password must be typed at startup. Therefore, unauthorized users cannot access your hard disk even if the drive is removed from the computer. – The hard disk password is required when the computer resumes from hibernation mode.
Using passwords Press F1. 3. The BIOS Utility menu appears. 4. Select System Security and press Enter.
Using passwords 9). Uppercase and lowercase letters (for example, A and a) are treated as the same character. If you type a wrong character, use the Backspace key to erase it and then type the correct one. 7. Type your password again and press Enter to verify it. Note: Write down the password and keep it in a safe place. Do Not Forget Your Password If you forget your setup password, you have to take your computer to an IBM reseller or IBM marketing representative to have the password reset.
Using passwords Once you set a setup password, the setup password prompt ( ) appears at the top left corner of the screen when you press F1 to enter the BIOS Setup Utility. Hard Disk Password Once you set a hard disk password, the hard disk password prompt ( ) appears at the top left corner of the screen each time you turn on your computer or when your computer returns from hibernation mode to normal operation. Notes: 1.
Using passwords If the setup password is set, the setup password prompt appears. Enter the setup password correctly and press Enter. 3. Select System Security and press Enter. The "System Security" submenu appears. 4. Select the type of password you want to change or remove, and press the left/right arrow key to remove the current password. Note: If you want to change or remove the hard disk password, you need to enter the hard disk password correctly. 5.
Using locks Using locks You can attach a mechanical lock to your computer, to help to prevent it from being removed without your permission. Attach a mechanical lock to the keyhole on the rear side of the computer; then secure the chain on the lock to a secure stationary object. Note: You are responsible for evaluating, selecting, and imple- menting the locking devices and security features you choose to use.
Solving computer problems Frequently asked questions . . . . . . . . . . . Hints, tips and considerations . . . . . . . . . . Troubleshooting guide . . . . . . . . . . . . . . Troubleshooting charts . . . . . . . . . . . . . . Error codes or messages . . . . . . . . . . No error codes or messages . . . . . . . . Input problems . . . . . . . . . . . . . . . . . Standby or hibernation problems . . . . . . LCD problems . . . . . . . . . . . . . . . . . Indicator problems . . . . . . . . . . . . . . .
Frequently asked questions This section addresses frequently asked questions. Go to the page indicated in the following chart and do the specified action.
Frequently asked questions My screen keeps blanking when I do not want it to. How do I stop this? You can change the power management timers with the Power Management Properties window. 1. Press Fn+F2. 2. Set a longer time-out value for "Turn off monitor". 3. Click OK. How can I use an external mouse when I am at my desk, but then use the TrackPoint when I am away from my desk? For a PS/2 mouse: Connect the PS/2 mouse. The TrackPoint is automatically disabled.
Frequently asked questions You can set any resolution for either the ThinkPad LCD or the external monitor. When you use both at the same time, the resolution of both is the same. If you set a higher resolution for the ThinkPad LCD, you can see only part of the screen at a time. You can see other parts by moving the image with the TrackPoint or other pointing device.
Frequently asked questions If the external monitor you connected does not work properly, then the computer has not recognized the Plug and Play monitor. Do as follows: 1. Click Start and move the cursor to Settings; then click Control Panel. 2. Double-click Display. The "Display Properties" window appears. 3. Click the Settings tab. 4. Click Advanced... button. 5. Click the Monitor tab. 6. Make sure that Automatically detect Plug & Play monitors. is checked. 7.
Frequently asked questions See the Online User's Guide for information on installing device drivers. You can get the ThinkPad device drivers by using the ThinkPad Software Selections CD. Before installing a new operating system, do the following: Print the software installation section of the Online User's Guide. Make a Windows startup diskette. How do I use the Recovery CD to reload my factory-installed ThinkPad operating system and applications? See “Using the Recovery CD” on page 110.
Hints, tips and considerations Hints, tips and considerations This section provides hints, tips, and considerations. If you are using the Intel USB camera and the system resumes from standby mode, the USB camera is disabled. To enable it, unplug it and plug it in again. If the computer does not recognize your USB device, unplug and plug in the USB device. If your computer is in standby mode, your system might not recognize USB devices when operation resumes.
Troubleshooting guide Troubleshooting guide The PC-Doctor program is available on your computer to help you perform diagnostics tests on your computer. See “Using the PC-Doctor program” on page 109 for instructions on how to use the program. If a beep sounds, a message appears, or a function-related problem occurs: 1. Find your symptom in the Troubleshooting Charts and try solving the problem. See “Troubleshooting charts” on page 89 2.
Troubleshooting charts Troubleshooting charts If your computer has an error, it often displays a message or an error code, or a beep sounds when you power it on. Go through the charts and look for your problem. If you find the problem, go to the page indicated and do the specified action.
Troubleshooting charts Error codes or messages Note: In the charts, x can be any character. Problem Action 006 (Equipment Configuration Error) Restart the computer. If the problem persists, have the computer serviced. 007 (Floppy Disk Controller Error) 070 (Real Time Clock Error) Have the computer serviced. 071 (CMOS Battery Bad) 072 (CMOS Checksum Error) Do as follows: 1. Enter the BIOS Setup Utility. 2. Load default settings and exit the BIOS Setup Utility.
Troubleshooting charts Problem Action The setup password prompt If the setup password prompt appears when you press F1 to access the BIOS Utility, a setup password is set. Type the correct password and press Enter to use the computer (see “Entering a password” on page 77). Attention: If you forget your setup password, you have to take your computer to an IBM reseller or IBM marketing representative to have the password reset.
Troubleshooting charts No error codes or messages Problem Action The screen is blank and you don't hear any beeps. Make sure that: Note: If you are not sure whether you hear any beeps, turn the computer off; then turn it on again, and listen again. Also check the volume control and the power indicator. The battery pack is installed correctly. The AC Adapter is connected to the computer and the power cord is plugged into a working electrical outlet. The computer power is on.
Troubleshooting charts Input problems Problem Action The cursor does not move after the computer awakens from one of the power management modes. Make sure you followed the instructions in the Online User's Guide correctly if you reinstalled Windows 98. All or some keys on the keyboard do not work. If the problem occurred immediately after the computer returned from hibernation mode, enter the power-on password if it set.
Troubleshooting charts Problem Action The scrolling or Magnifying Glass function does not work. See the General tab page in "Mouse Properties", and make sure that the PS/2 TrackPoint driver is loaded. A number appears when you type a letter. The numeric lock function is on. To disable it, press and hold Shift; then press NumLk. All or some keys on the external numeric keypad do not work. Make sure that the external numeric keypad is correctly connected to the computer.
Troubleshooting charts Standby or hibernation problems Problem Action The computer enters standby mode automatically. The computer enters standby mode automatically when the processor temperature reaches a certain level. This is not a defect. Performance degrade when the computer gets hot during use. The processor speed might decrease under the following conditions: Use in a hot environment. High-powered processing that requires high-power consumption. This is not a defect.
Troubleshooting charts Problem Action When creating a hibernation file, Sleep Manager gives off a "Not Enough Space for Allocation" message. Sleep Manager needs enough, contiguous hard disk drive space to create and manage the hibernation file. Make sure the hard disk drive space is sufficient for Sleep Manager's requirements. This can be viewed from the Sleep Manager main screen. If there are still problems, there might not be enough contiguous free space to create the hibernation file.
Troubleshooting charts LCD problems Problem Action The screen is unreadable or distorted. Make sure that the ThinkPad display driver is installed correctly: 1. Click Start and move the cursor to Settings; then click Control Panel. 2. Double-click Display. 3. Select the Settings tab in the "Display Properties" window. 4. Click Advanced...; then click the Adapter tab. Make sure that the display driver information is correct. Incorrect characters appear on the screen.
Troubleshooting charts Indicator problems Problem Action The battery status indicator does not go on even though a battery pack is installed in the computer. The over-current protection device inside the battery pack has been activated. Wait several hours and try again. If the indicator still does not go on, replace the battery pack or have the computer serviced. Battery problems Problem Action The battery pack cannot be fully charged in 3.5 hours by the power-off charging method.
Troubleshooting charts CD-ROM Problems Problem Action The CD-ROM does not work. Make sure that: The computer power is turned on and a compact disc is in the CD-ROM drive. The CD-ROM tray is firmly closed. The device drivers are correctly installed. You hear a noise from the CD-ROM when the disc is spinning. The CD-ROM drive cover might be bent. Have the computer serviced. The CD-ROM tray does not open even if you press the CD-ROM drive eject button.
Troubleshooting charts Audio Problems Problem Action General problems. Problems may be due to such factors as: The audio volume control is not adjusted to the desired level. Press Fn+PgUp and Fn+PgDn to increase and decrease the volume respectively. The audio volume in Windows is muted or not adjusted to the desired level. Press Fn+Backspace to turn sounds off and on. The audio cable configuration is not correct for your application. The audio cable is defective.
Troubleshooting charts Modem problems Problem Action Your modem application does not work with the ThinkPad modem. Make sure that the internal modem port is enabled by opening the "Device Manager" window and running the Modem Wizard. If the modem does not work correctly, see the Online User's Guide and correct the resource conflict. If the modem works correctly, set the following modem settings by doing the following: 1. Double-click My Computer, Control Panel, and Modem.
Troubleshooting charts PC Card problems Problem Action The PC Card shows "Ready", but it does not work correctly. Make sure that: The system resources reserved for the PC Card do not conflict with other system devices. Refer to "Resolving System Resource Conflicts" in the Online User's Guide. The resources reserved for the PC Card match the settings in the application program. If you are using a network card, check the I/O port address, IRQ level, and memory window address.
Troubleshooting charts Printer problems Problem Action The printer does not work. Make sure that: The parallel port is enabled. 1. Save your work and quit any program you are using. 2. Shutdown and restart your computer. 3. While the ThinkPad logo is being displayed, wait for the BIOS Utility prompt to appear, then press F1. 4. Select Onboard Devices Configuration and press Enter. 5. Verify if the Parallel Port is enabled. 6. Save the changes and exit the BIOS Utility.
Troubleshooting charts External monitor problems Problem Action The external monitor is blank. Do the following: 1. Connect the external monitor to another computer and make sure it works. 2. Reconnect the external monitor to your computer. 3. Press Fn+F7. Note: You can also change the display output location using the Notebook Manager: a. Start the Notebook Manager program. b. Click the Display Device tab. c. Click External monitor or Both radio button. d. Click OK.
Troubleshooting charts Problem Action The screen is unreadable or distorted. Make sure that: The ThinkPad display driver is installed correctly. 1. Click Start and move the cursor to Settings; then click Control Panel. 2. Double-click Display. 3. Select the Settings tab in the "Display Properties" window. 4. Click Advanced...; then click the Adapter tab. Make sure that the ThinkPad display driver is installed. If you are not sure that the ThinkPad display driver is installed correctly, reinstall it.
Troubleshooting charts Other option problems Problem Action An IBM option that you just installed does not work. Make sure that: The option is designed for your computer. The option was installed following the instructions supplied with the option or this book. Other installed options or cables are not loose. There is no I/O address or interrupt level (IRQ) DMA channel conflict. To see the system resource status, double-click Device Manager from the Control Panel.
Troubleshooting charts Software problems Problem Action An application does not run correctly. Check the following to make sure that the problem is not being caused by the application: Your computer has the minimum required memory to run the application. Refer to the manuals supplied with the application. The application is designed to operate with the Windows operating system. Other applications run correctly on your computer. The necessary device drivers are installed.
Troubleshooting charts Other problems Problem The computer locks or does not accept any input. Action Push and hold the power switch for about five seconds, then release it to turn off the computer. Restart the computer. The computer does not turn off with the power switch. If the standby lamp is on and you are working under battery power, change the battery to a fully charged one or change your power source to ac power. The computer does not start from a diskette.
Recovering lost or damaged software Recovering lost or damaged software This section describes how to recover lost or damaged software. The following table shows what is needed to recover your system. Problem Tools Provided For More Information You need to diagnose the computer. Use the PC-Doctor** program. See “Using the PC-Doctor program” for general information. You need to recover a lost or damaged device driver. Use the ThinkPad Software Selections CD.
Recovering lost or damaged software Your Software Selections CD contains telephone numbers for some software vendors. These vendors can help you with questions about their software. See the CD for details. The following features are included: Welcome This main page describes the Software Selections CD and its features.
Recovering lost or damaged software restores your operating system and hard disk to its factory-shipped configuration. The Recovery CD consists of the original preinstalled software and device drivers. The recovery process might take up to 2 hours. Your computer supports startable (or bootable) CDs. To use the Recovery CD, do as follows: 1. Insert the Recovery CD into the CD-ROM drive. 2. Power off the computer; then turn on the computer. Notes: a.
112 ThinkPad i Series 1200/1300 User's Reference
Getting service Preparations If you need further assistance, you can call your IBM reseller or IBM marketing representative. You will need to know the following information when requesting repair service: Identification number of your computer Options installed in your system Note: Use the record sheet on “Option list” on page 114. Error message or problem Note: Error messages can help identify which service action is required and help the service representative provide quick and efficient service.
Information on your computer Information on your computer Option list Ø DIMM _____MB _____MB Ø _____GB Hard Disk Drive Ø PC Cards ___________________ ___________________ Ø Battery Pack Identification numbers The serial number label is on the bottom of your computer. Write down the machine type and serial number (S/N) in the following box.
Information on your computer Problem recording sheet Computer information: Machine type:__________ Serial number:__________ Date of purchase:___/___/___ Type of problem: Ø Continuous problem Ø Intermittent problem Error code: The operating system and its version number, if available: Ø Windows 98 Version_____ Ø Windows 2000 Version_____ Application programs running at the time of the problem: _________________________________________________ _________________________________________________ P
Customer service and support Customer service and support Purchasing an IBM PC hardware product entitles you to receive support and services during the limited warranty period. If you need additional support and services, a wide variety of extended solutions that addresses most needs are available for purchase. Online support services You can contact us on the Internet for answers to your technical support questions.
Customer service and support week. Follow the recorded instructions, and the information that you request will be sent to your fax machine. To access the IBM PC Company Automated Fax System, call: In the U.S., 1-800-426-3395. In Canada, 1-800-465-3299. Help by telephone You can get support and information by telephone during the limited warranty period at no additional charge, through the IBM PC Support Line.
Customer service and support These lines are available 24 hours a day, 7 days a week. The answering technical-support representative can also fax or mail you technical or product information, such as: Sales information Product brochures Locations of IBM resellers Services available from IBM EasyServ ThinkPad EasyServ is a courier repair service for IBM mobile products whereby your ThinkPad computer will be picked up, sent to IBM for repair, and then returned to the location of your choice.
Purchasing additional services Purchasing additional services During and after the limited warranty period, you can purchase additional services, such as: Support for IBM and non-IBM hardware, operating systems, and application programs Network setup and configuration Upgraded or extended hardware repair services Custom installation The availability of the service and its name might vary by country.
Purchasing additional services Ordering support line services The Enhanced PC Support Line, Client Support Line, and Network and Server Support Line services are available for products on the Supported Products list. To receive a Supported Products list: In the U.S.: – Call 1-800-772-2227. – Select the automated fax system option. – Select the service for which you would like a Supported Products list: - For the Enhanced PC Support Line, select document 11682.
Purchasing additional services In Canada, for more information on warranty extensions: call 1-800-465-7999. In other countries, contact your IBM reseller or IBM marketing representative.
Purchasing additional services 122 ThinkPad i Series 1200/1300 User's Reference
Appendix A. Features and specifications This appendix describes the features and specifications for the computer.
Features Features Processor Intel Mobile Celeron processor with on-die external cache Memory Base: 32MB or 64MB Option: 32/64/128MB DIMM Total: Max. 192 MB Storage devices 2.5–inch hard disk drive Display The color display uses TFT technology or HPA technology Up to 1024–by-768 resolution on the 13.3–inch TFT LCD Up to 800–by-600 resolution on the 12.1–inch TFT/HPA LCD or 13.
Features To get the best performance from your diskette drive, use highquality diskettes (such as IBM diskettes) that meet or exceed the following standards: 1–MB, 3.5–inch, unformatted diskette: ANSI (American National Standards Institute) X3.137 ISO (International Standards Organization) 8860 ECMA (European Computer Manufacturers Association) 100 2–MB, 3.5–inch, unformatted diskette: ANSI X3.171 ISO 9529 ECMA 125 Internal CD-ROM drive 24X max.
Specifications Specifications Size Width: 310 mm (12.20 in.) Depth: 250 mm (9.84 in.) Height: 35 mm (1.38 in.) Environment Temperature (at altitudes less than 2438 m 8000 ft.“): Operating with no diskette: 5°C to 35°C (41°F to 95°F) Operating with a diskette: 10°C to 35°C (50°F to 95°F) Nonoperating: -20°C to 60°C (-4°F to 140°F) Note: When you charge the battery pack, its temperature must be at least 10°C (50°F).
IBM power cords IBM power cords To use the AC Adapter outside the country where you purchased your computer, you need an ac power cord that is certified for the country or region you are visiting. You can purchase one through an IBM authorized reseller or IBM marketing representative in that country or region. Attention: Using an incompatible power cord might cause severe damage to your computer.
IBM power cords For 3–pin power cords: Note: The grounded adapter is required for full MPRII compliance. If a 3–pin power cord came with your computer, see “Safety information” on page vii.
Appendix B. Product warranties and notices International Business Machines Corporation Armonk, New York 10504 Statement of Limited Warranty The warranties provided by IBM in this Statement of Limited Warranty apply only to Machines you originally purchase for your use, and not for resale, from IBM or your reseller. The term "Machine" means an IBM machine, its features, conversions, upgrades, elements, or accessories, or any combination of them.
During the warranty period IBM or your reseller, if approved by IBM to provide warranty service, will provide repair and exchange service for the Machine, without charge, under the type of service designated for the Machine and will manage and install engineering changes that apply to the Machine.
Unless IBM specifies otherwise, IBM provides non-lBM machines WITHOUT WARRANTIES OF ANY KIND. Any technical or other support provided for a Machine under warranty, such as assistance via telephone with "how-to" questions and those regarding Machine set-up and installation, will be provided WITHOUT WARRANTIES OF ANY KIND. Warranty Service To obtain warranty service for the Machine, you should contact your reseller or call IBM. In the United States, call IBM at 1-800-IBM-SERV (426–7378).
Before IBM or your reseller exchanges a Machine or part, you agree to remove all features, parts, options, alterations, and attachments not under warranty service. You also agree to: 1. ensure that the Machine is free of any legal obligations or restrictions that prevent its exchange. 2. obtain authorization from the owner to have IBM or your reseller service a Machine that you do not own; and 3. where applicable, before service is provided a.
Circumstances may arise where, because of a default on IBM's part or other liability, you are entitled to recover damages from IBM. In each such instance, regardless of the basis on which you are entitled to claim damages from IBM (including fundamental breach, negligence, misrepresentation, or other contract or tort claim), IBM is liable for no more than: 1. damages for bodily injury (including death), and damage to real property and tangible personal property; and 2.
Notices Notices References in this publication to IBM products, programs, or services do not imply that IBM intends to make these available in all countries in which IBM operates. Any reference to an IBM product, program, or service is not intended to state or imply that only IBM's product, program, or service may be used. Any functionally equivalent product, program, or service that does not infringe any of IBM's intellectual property rights may be used instead of the IBM product, program, or service.
Notices To learn more about IBM PC products and the Year 2000, visit our Web site at http://www.pc.ibm.com/year2000. The information and tools there can help you with your Year 2000 transition plan, especially if you have multiple IBM PCs. IBM encourages you to check periodically for updated information.
Notices reception, which can be determined by turning the equipment off and on, the user is encouraged to try to correct the interference by one or more of the following measures: Reorient or relocate the receiving antenna. Increase the separation between the equipment and receiver. Connect the equipment into an outlet on a circuit different from that to which the receiver is connected. Consult an IBM authorized dealer or service representative for help.
Notices Avis de conformité aux normes du ministère des Communications du Canada Cet équipement ne depase pas les limites de Classe B d'émission de bruits radioélectriques pour les appareils numériques, telles que prescrites par le Règlement sur le brouillage radioélectrique étabili par le ministerè des Communications du Canada.
Notices 3. The REN is useful to determine the quantity of devices you may connect to your telephone line and still have those devices ring when your number is called. IN most, but not all, areas, the sum of the RENs of all devices should not exceed five (5.0). To be certain of the number of devices you may connect to you line, as determined by the REN, you should call your local telephone company to determine the maximum REN for your calling area. 4.
Notices clearly contains in a margin at the top or bottom of each transmitted page or on the first page of the transmission, the date and time it is sent and an identification of the business or other entity, or other individual sending the message and the telephone number of the sending machine or such business, other entity, or individual. (The telephone number provided may not be a 900 number or any other number for which charges exceed local or long-distance transmission charges.
Notices ment malfunctions, may give the telecommunications company cause to request the user to disconnect the equipment. Users should ensure for their own protection that the electrical ground connections of the power utility, telephone lines and internal metallic water pipe system, if present, are connected together. This precaution may be particularly important in rural areas.
Notices Les réparations de matériel homologué doivent être effectuées par un centre d'entretien canadien autorisé désigné par le fournisseur. La compagnie de télécommunications peut demader à l'utilisateur de débrancher un appareil à la suite de réparations ou de modifications effectuées par l'utilisateur ou à cause de mauvais fonctionnement.
Notices Italy Latin America Netherlands New Zealand Norway Portugal (tone only, no pulse dialing) Singapore Sweden Switzerland UK US Notice to European Users of the IBM ThinkPad Modem This equipment has been approved to Council Decision 98/ 482/EC "CTR 21" for pan-European single terminal connection to the Public Switched Telephone Network (PSTN).
Notices 2. the application using the modem is compatible with the application at the other end of the call - e.g. accessing the Internet requires suitable software in addition to a modem. Some parameters required for compliance with Telecom's Telepermit requirements are dependent on the equipment (PC) associated with this device. The associated equipment shall be set to operate within the following limits for compliance with Telecom's Specifications: 1.
Notices Note that where DTMF dialling is used, the numbers should be entered normally. NOTE THAT FAULT CALLOUTS CAUSED BY ANY OF THE ABOVE CAUSES MAY INCUR A CHARGE FROM TELECOM.
Index Numerics 1394 connector, location 4 A attaching 69 audio CD next track 13 play/pause 13 previous track 13 stop/eject 13 audio problems 100 B battery life, extending 42 battery pack latch location 6 location 6 maximizing the battery life 85 replacing 39 battery problems 98 battery status 8 location 7 BIOS Utility 18 Basic System Settings menu 21 Load Default Settings menu 25 Onboard Devices Configuration menu 23 starting 18 Startup Configuration menu 21 System Security menu 25 built-in microphone,
external-input-device connector location 4 K key combinations 12 keyboard, specifications F facsimile assistance 116 FAQ 82 features 124 FireWire connector, location 4 Fn key location 3 Fn key functions 12 Frequently Asked Questions 82 G getting service 116 63 5 N network connector, location 4 Notebook Manager program 26 notices and warranties product 129 numeric keypad, using 15 numeric lock lamp 8 I ThinkPad i Series 1200/1300 User's Reference LCD display modes 65 latch location 2 problems 97 sw
O S online support services 116 online user's guide 37 options hard disk drive, upgrade 56 memory, increase 52 safety notice vii scroll lock lamp 8 scrolling 49 security mechanical lock 80 passwords 74 security keyhole, location 4 sensitivity 46 service how to get 116 setup password 74 size, machine specifications 126 Sleep button 14 Sleep Manager program 31 software problems 107 speakers, location 2 specifications 124, 126 battery pack 126 environment 126 heat output 126 input voltage 126 power cords 12
TrackPoint (continued) disabling 61 location 2 magnifying glass 50 press-to-select 47 scrolling 49 sensitivity 46 tips on using 10 using 9 TrackPoint, setting 83 troubleshooting audio problems 100 battery problems 98 CD-ROM problems 99 charts 89 error codes 90 error messages 90 external monitor problems guide 88 hibernation problems 95 indicator problems 98 input problems 93 LCD problems 97 LED problems 98 modem problems 101 no error codes 92 no error messages 92 option problems 106 other problems 108 PC Ca