
Owner manual


96
7.3 LAN Mode
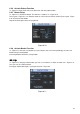
For the LAN mode, after you logged in, you can see the main window. See Figure 7-9.
This main window can be divided into the following sections.
Section 1: there are five function buttons: Live(chapter 7.4), setup (chapter 7.8), search (chapter
7.9), alarm (chapter 7.10), and logout (chapter 7.11).
Section 2: There are channel number and one button: Start all. Start all button is to enable/disable
all-channel real-time monitor. Click it the button becomes yellow. See Figure 7-4.
Figure 7-4
Please refer to Figure 7-5 for main stream and extra stream switch information.
Figure 7-5
Section 3: Start dialogue button.
You can click this button to enable audio talk. Click 【▼】 to select bidirectional talk mode. There are
four options: DEFAULT,G711a,G711u and PCM. After you enable the bidirectional talk, the Start talk
button becomes End Talk button and it becomes yellow. See Figure 7-6.
Please note, the audio input port from the device to the client-end is using the first channel audio input
port. During the bidirectional talk process, system will not encode the audio data from the 1-channel.
Figure 7-6
Section 4: Instant record button. Click it, the button becomes yellow and system begins manual
record. See Figure 7-7. Click it again, system restores previous record mode..
Figure 7-7
Section 5: Local play button.
The Web can playback the saved (Extension name is dav) files in the PC-end.
Click local play button, system pops up the following interface for you to select local play file. See Figure
7-8.