
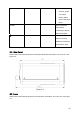
User guide


12
3 Installation
3.1 Lens Installation
3.1.1 Auto Aperture Lens
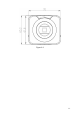
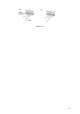
Please follow the steps listed below for auto aperture lens installation. The interface is shown as
in Figure 3-1 and Figure 3-2.
z Remove the CCD protection cap of the device, and then line up the lens to the proper
installation position. Turn clockwise until the lens is fixed firmly.
z Insert the lens cable socket to the auto lens connector in the side panel.
z When it is ∞, you can turn the ADJUST screw to adjust the focus circle to adjust the focal
distance.
Figure 3-1
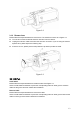
3.1.2 Manual Lens
Install C type lens
z Remove the CCD protection cap; use the cross-head screwdriver to remove the screw near
the focal circle. Then please turn counter clockwise to move the focal circle out for several
millimeters. Now you can focus manually.
z Then please use the cross-head screwdriver to fix the screw back firmly. Secure the focal
circle.
z Install the C/CS adapter to the camera.
z Finally, line up lens to the proper installation. Turn clockwise to fix the lens firmly.
Install CS type lens
z Remove the CCD protection cap; use the cross-head screwdriver to remove the screw near
the focal circle. Then please turn counter clockwise to move the focal circle to the end and
now you can focus manually.
z Then please use the cross-head screwdriver to fix the screw back firmly. Secure the focal
circle.
z Finally, line up lens to the proper installation. Turn clockwise to fix the lens firmly.