IC-T2H_RTTE.qxd 03.6.20 18:57 Page A (1,1) INSTRUCTION MANUAL 144 MHz FM TRANSCEIVER iT2H This device complies with Part 15 of the FCC rules. Operation is subject to the following two conditions: (1) This device may not cause harmful interference, and (2) this device must accept any interference received, including interference that may cause undesired operation.
IC-T2H_RTTE.qxd 03.6.20 18:57 Page ii (1,1) CAUTIONS IMPORTANT READ ALL INSTRUCTIONS carefully and com- pletely before using the transceiver. SAVE THIS INSTRUCTION MANUAL—This instruction manual contains important operating instructions for the IC-T2H. EXPLICIT DEFINITIONS The explicit definitions below apply to this instruction manual. WORD DEFINITION Personal injury, fire hazard or electric RWARNING shock may occur. CAUTION NOTE Equipment damage may occur. If disregarded, inconvenience only.
IC-T2H_RTTE.qxd 03.6.20 18:57 Page iii (1,1) SUPPLIED ACCESSORIES DO NOT push the PTT when not actually desiring to trans- Accessories included with the transceiver: mit. Place unit in a secure place to avoid inadvertent use by children. DO NOT operate the transceiver near unshielded electrical blasting caps or in an explosive atmosphere. AVOID using or placing the transceiver in direct sunlight or in areas with temperatures below –10°C (+14°F) or above +60°C (+140°F).
IC-T2H_RTTE.qxd 03.6.20 18:57 Page iv (1,1) TABLE OF CONTENTS IMPORTANT ................................................................................................... ii EXPLICIT DEFINITIONS ................................................................................ ii CAUTIONS ..................................................................................................... ii SUPPLIED ACCESSORIES ...........................................................................
IC-T2H_RTTE.qxd 03.6.20 18:57 Page 1 (1,1) ACCESSORY ATTACHMENT 1 D Antenna D Belt clip Connect the supplied flexible antenna to the antenna connector and rotate the antenna clockwise. To attach: Slide the belt clip into the plastic loop on the back of the battery case/pack. u CAUTION: Transmitting without an antenna may damage the transceiver. To remove: Push the top of the belt clip towards the transceiver and at the same time, push it downwards and free of the plastic loop.
IC-T2H_RTTE.qxd 03.6.
IC-T2H_RTTE.qxd 03.6.20 18:57 Page 3 (1,1) PANEL DESCRIPTION q PTT SWITCH [PTT] (p. 12) Push and hold to transmit; release to receive. w POWER/VOLUME CONTROL [PWR/VOL] ➥ Rotate to turn power on and off. ➥ Rotate clockwise to increase volume and counterclockwise to decrease volume. e EXTERNAL SPEAKER AND MICROPHONE JACKS [SP/MIC] Connect an optional speaker-microphone or headset, if desired. The internal microphone and speaker will not function when either is connected. (See p. 37 for options.
IC-T2H_RTTE.qxd 03.6.20 18:57 2 Page 4 (1,1) PANEL DESCRIPTION !0 SQUELCH KEY [SQL]* ➥ Push [SQL], then push [Y]/[Z] one or more SQL times to select squelch level. “AUto”, “Sql 1” to “Sql 8” are available to suit personal preferences and operating conditions. (p. 13) !1 SCAN START/STOP KEY [SC]* ➥ Push [SC] to start the scan. (p. 25) SC • To change the scan direction, push [Y] or [Z]. ➥ Push [SC] again to stop the scan. (p.
IC-T2H_RTTE.qxd 03.6.20 18:57 Page 5 (1,1) PANEL DESCRIPTION ■ *Customizable keys 2 ■ Custom key assignment [SQL], [SC], [DUP], [H/L], [A V], [B M], [C T], [D L] These keys can be assigned a variety of functions (see p. 32 for a list of available functions). NOTE: In this manual, the customized keys are represented by the “ ” icon.
IC-T2H_RTTE.qxd 03.6.20 18:57 2 Page 6 (1,1) PANEL DESCRIPTION ■ Function display MR DUP T SQL SKIP LOW q MEMORY MODE INDICATOR (p. 13) Appears while in memory mode. w LOCK INDICATOR (p. 13) Appears while the lock function is activated. e DUPLEX INDICATOR (p. 15) Appears during semi-duplex operation. • “–DUP” appears for minus duplex; “DUP” appears for plus duplex. r TONE INDICATORS “T” appears when the subaudible tone encoder (p. 16) is in use; “T SQLS” appears during pocket beep operation (p.
IC-T2H_RTTE.qxd 03.6.20 18:57 Page 7 (1,1) PANEL DESCRIPTION 2 ➥ In set mode or initial set mode, indicates the selected item, condition, etc. i BUSY AND S/RF INDICATORS (p. 12) ➥ “BUSY” appears when receiving a signal or when the squelch is open. ➥ The S/RF indicators show the relative signal strength while receiving and the output power when transmitting (2 segments appear for low power and all segments appear for high power). o LOW POWER INDICATOR (p. 12) Appears when low output power is set.
03.6.20 18:57 3 Page 8 (1,1) BATTERY PACKS ■ Battery pack charging ■ About battery packs The supplied BP-194 BATTERY CASE includes rechargeable Ni-Cd batteries* and can be charged approx. 300 times. Charge the batteries before first operating the transceiver or when they become exhausted. D Operating period If you want to be able to charge the batteries more than 300 times, the following points should be observed: 1. Avoid overcharging. The charging period should be less than 48 hours. 2.
IC-T2H_RTTE.qxd 03.6.20 18:57 Page 9 (1,1) BATTERY PACKS 3 ■ Charging connections D Regular charging D Rapid charging with the BC-119 When charging a battery case (pack) attached to the transceiver the power must be OFF. The optional BC-119 provides rapid charging of optional Ni-Cd battery packs (power to the transceiver must be OFF during charging).
IC-T2H_RTTE.qxd 03.6.20 18:57 3 Page 10 (1,1) BATTERY PACKS ■ Installing batteries in the battery case When using a battery case attached to the transceiver, install 8 AA(R6) size Ni-Cd or alkaline batteries as illustrated below. ➀ Remove the battery case from the transceiver. ➁ Install 8 × R6(AA) size Ni-Cd or alkaline batteries. • Be sure to observe the correct polarity. ● NEVER connect DC power to the transceiver when installing dry cell or alkaline batteries.
IC-T2H_RTTE.qxd 03.6.20 18:57 Page 11 (1,1) BASIC OPERATION ■ Power ON ■ Setting a frequency Rotate [PWR/VOL] clockwise to turn power ON. D Via the keypad 4 ➀ Push [A V] to select VFO mode, if necessary. ➁ Push 6 digit keys, starting from the 100 MHz digit, to input a frequency. D Toggling frequency/channel indication mode AT POWER ON Channel indication mode is used to simplify operation.
IC-T2H_RTTE.qxd 03.6.20 18:57 4 Page 12 (1,1) BASIC OPERATION ■ Dial select function ■ Receive and transmit Use the dial select function to adjust the tuning behaviour or the [Y]/[Z] keys—use 1 MHz tuning when you want to change the frequency in large increments; use the selected tuning step when you want to change the frequency in smaller increments. ➀ Rotate [PWR/VOL] clockwise to turn power ON. ➁ Adjust volume to the desired level.
IC-T2H_RTTE.qxd 03.6.20 18:57 Page 13 (1,1) BASIC OPERATION 4 ✔ Convenient ■ Selecting a memory channel Monitor function: Push and hold [ ] to listen to weak signals that do not open the squelch; or push [ ] twice to monitor a signal without having to continuously hold [ ]. ➀ Push [A V] to select memory channel mode, if necessary. P0 MR • “X” appears.
IC-T2H_RTTE.qxd 03.6.20 18:57 4 Page 14 (1,1) BASIC OPERATION ■ Notes for “Set mode” The following items can be set from VFO mode. Set mode items: Tuning steps (p. 14) Duplex setting (p. 15) Repeater tones (p. 16) Offset frequency (p. 16) Subaudible tones (p. 16) Call channel (p. 20) CTCSS tones (p. 26) ■ Setting tuning steps USING SET MODE The transceiver has 8 tuning steps as follows: 5 kHz 10 kHz 12.5 kHz 15 kHz 20 kHz 25 kHz 30 kHz 50 kHz ➀ Push [A V] or [f(CALL)]* for 1 sec.
IC-T2H_RTTE.qxd 03.6.20 18:57 Page 15 (1,1) REPEATER OPERATION ■ General When using a repeater, the transmit frequency is shifted from the receive frequency by the offset frequency. It is convenient to program repeater information into memory channels (p. 19). ➀ Set the receive frequency (repeater output frequency). ➁ Push [DUP] one or more times to select –DUP or DUP. • “–DUP” indicates the transmit frequency is shifted down; “DUP” indicates the transmit frequency is shifted up.
IC-T2H_RTTE.qxd 03.6.20 18:57 5 Page 16 (1,1) REPEATER OPERATION ■ Subaudible tones USING SET MODE USING SET MODE Some repeaters require subaudible tones to be accessed. Subaudible tones are superimposed over your normal signal and must be set in advance. When communicating through a repeater, the transmit frequency is shifted from the receive frequency by an amount determined by the offset frequency. ➀ Push [A V] for 1 sec. to enter set mode.
IC-T2H_RTTE.qxd 03.6.20 18:57 Page 17 (1,1) REPEATER OPERATION 5 INITIAL SET MODE ■ Auto repeater function (USA version only) USING The USA version automatically activates the repeater settings (duplex, ON/OFF, duplex direction, tone encoder ON/OFF) when the operating frequency falls within or outside of the general repeater output frequency range. The offset and repeater tone frequencies are not changed by the auto repeater function, reset these frequencies, if necessary.
IC-T2H_RTTE.qxd 03.6.20 18:58 5 Page 18 (1,1) REPEATER OPERATION WEATHER CHANNELS (USA version only) There are 10 weather channels for monitoring weather channels from the NOAA (National Oceanographic and Atmospheric Administration) broadcasts. NOTE: The weather channel frequencies are out of the guaranteed frequency range (see p. 38). Intermittent reception and/or poor signal quality may occur depending on conditions. ➀ Enter key customize mode (p.
IC-T2H_RTTE.qxd 03.6.20 18:58 Page 19 (1,1) 6 MEMORY/CALL PROGRAMMING ■ General The transceiver has 40 memory channels (plus 1 pair of scan edge channels and 1 call channel) for storage of often-used frequencies. In addition, the USA version has 10 marine weather channels (however, these are not programmable). D Memory/call channel contents The following information can be programmed into memory/call channels: • Operating frequency • Duplex direction (DUP or –DUP) with an offset frequency (pgs.
IC-T2H_RTTE.qxd 03.6.20 18:58 6 Page 20 (1,1) MEMORY/CALL PROGRAMMING ■ Programming the call channel USING SET MODE ➀ Push [f (CALL)] to select call channel mode. • “C” appears. ➁ Push [f(CALL)] for 1 sec. to enter set mode. ➂ Push [t] one or more times until “FR” appears. ➃ Push [6] digit keys to input the desired frequency. ➄ If desired, push [t] again, then push [Y]/[Z] to select another item (e.g. tone setting) and condition.
IC-T2H_RTTE.qxd 03.6.20 18:58 Page 21 (1,1) MEMORY/CALL PROGRAMMING ■ Memory editing 6 D Clearing a memory ➀ Push [B M] to enter memory transfer mode. Memory (call) channel contents can be moved to VFO or to another memory. ➁ Push [Y]/[Z] to select the memory channel to be cleared. D Memory/call ➾ VFO ➂ Push [B M] momentarily, then within ➀ Select the memory (call) channel to be transferred: ➥ Push [A V] ([ (CALL)]) to select memory (call) mode.
IC-T2H_RTTE.qxd 03.6.20 18:58 Page 22 (1,1) 7 DTMF MEMORY ■ Programming a DTMF code ■ Transmitting a DTMF code The transceiver has 5 DTMF memory channels (d1 to d5) for storage of often-used DTMF codes of up to 32 digits. D Using a DTMF memory channel ➀ Push [f (DTMF)] to enter DTMF memory. ➀ Push [f(DTMF)] to enter DTMF memory mode. ➁ Push [Y]/[Z] to select a DTMF memory channel to transmit. ➂ Push [f(DTMF)] to transmit the displayed DTMF memory. • One of “d1” to “d5” appears.
IC-T2H_RTTE.qxd 03.6.20 18:58 Page 23 (1,1) DTMF MEMORY 7 INITIAL SET MODE ■ DTMF transmission speed USING When slow DTMF transmission speeds are required (as for some repeaters), the transceiver’s rate of DTMF transmission can be adjusted. ➀ While pushing [8] + [0], turn power on to enter initial set mode. ➁ Push [t] one or more times until “dt” appears. ➂ Push [Y]/[Z] to select the desired DTMF transmission speed. Fastest • Four speeds are available: “100” (100 msec.
IC-T2H_RTTE.qxd 03.6.20 18:58 Page 24 (1,1) 8 SCAN OPERATION ■ Scan types D Scan resume condition USING INITIAL SET MODE PROGRAMMED SCAN Band edge Scan edges PA Pb Band edge Scan Jump MEMORY (SKIP) SCAN Mch 3 Mch 4 Mch 5 Mch 7 Mch 11 Mch 10 Pause scan 2 sec. Timer scan 10 sec. mode.
IC-T2H_RTTE.qxd 03.6.20 18:58 Page 25 (1,1) SCAN OPERATION 8 ■ Programmed scan ■ Memory (skip) scan Programmed scan repeatedly scans between two user-programmed frequencies (memory channels “PA” and “Pb”). This scan is useful for checking for signals within a specific frequency range such as repeater output frequencies, etc. Memory scan repeatedly scans all programmed memory channels, except those set as skip channels. ➀ Push [A V] to select VFO mode, if necessary. ➁ Push [SC] to start the scan.
IC-T2H_RTTE.qxd 03.6.20 18:58 9 Page 26 (1,1) SUBAUDIBLE TONE OPERATION ■ Tone squelch D Operation The tone squelch opens only when receiving a signal containing a matching subaudible tone. You can silently wait for calls from group members using the same tone. ➀ Set the operating frequency. ➁ Set the desired subaudible tone in set mode. • See right for programming. ➂ Push [C T] one or more times until “TSQL” appears.
IC-T2H_RTTE.qxd 03.6.20 18:58 Page 27 (1,1) SUBAUDIBLE TONE OPERATION 9 ■ Tone scan ■ Pocket beep operation The transceiver can detect the subaudible tone frequency in a received signal. By monitoring a signal, such as that being transmitted on a repeater input frequency, you can determine the tone frequency required to access the repeater.
IC-T2H_RTTE.qxd 03.6.20 18:58 10 Page 28 (1,1) OTHER FUNCTIONS ■ Initial set mode AT POWER ON Initial set mode is accessed at power on and allows you to set seldom-changed settings. In this way you can “customize” transceiver operations to suit your preferences and operating style. D Entering initial set mode ➀ While pushing [8] + [0], rotate [PWR] to turn power on. D Mic simple mode (Optional HM-75A required) This item turns the microphone simple mode on or off.
IC-T2H_RTTE.qxd 03.6.20 18:58 Page 29 (1,1) OTHER FUNCTIONS 10 D Auto power OFF D Auto repeater (U.S.A version only, see p. 17) This item allows you to set a time at which the transceiver will automatically turn OFF. The power OFF time can be set to 20, 40, 60 min. or turned off. D Power saver This item sets the power saver duty cycle—the ratio of receive circuit on to receive circuit off while standing by. The duty cycle can be set to automatic, 1:4 or OFF.
IC-T2H_RTTE.qxd 03.6.20 18:58 Page 30 (1,1) 10 OTHER FUNCTIONS D Scan resume condition (see p. 24) D Active memory channels This item allows you to adjust the number of active memory channels. Selectable values are 10, 20, 30 or 40. ■ Resetting the CPU AT POWER ON Reset the CPU before operating the transceiver for the first time, or when the internal CPU malfunctions. ➥ While pushing [A V] + [C T], turn MR power on to reset the transceiver.
IC-T2H_RTTE.qxd 03.6.20 18:58 Page 31 (1,1) OTHER FUNCTIONS ■ Key customize mode AT POWER ON The functions of the [SQL], [SC], [DUP], [H/L], [A V], [B M], [C T] and [D L] keys on the IC-T2H can be customized to suit your operating needs. ➀ While pushing [#] + [0], turn power on to enter key customize mode. • “CUStom” appears. ➁ Push the key you wish to program. • The key’s currently programmed function appears and scrolls across the display.
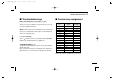
IC-T2H_RTTE.qxd 03.6.20 18:58 Page 32 (1,1) 10 OTHER FUNCTIONS ASSIGNABLE FUNCTIONS NULL DISPLAY READOUT DESCRIPTION No function. Backlight (LIGHT) Toggles display backlighting on/off. Power output ([H/L]) Toggles high and low power output. Scan start/stop ([SC]) Starts and stops the scan function. (DTMF) Selects a DTMF memory. DTMF re-dial (RE-DIAL) Redials the last-used DTMF code. Lock function ([D L]) Toggles the lock function on/off.
IC-T2H_RTTE.qxd 03.6.20 18:58 Page 33 (1,1) 11 ANI OPERATION ■ ANI mode ON ANI (Automatic Number Identification) mode can only be turned ON using the optional CS-T2 CLONING SOFTWARE. Consult the HELP file in the CS-T2 CLONING SOFTWARE for details. If ANI mode is already on, resetting the CPU (see above) effectively turns ANI mode off.
IC-T2H_RTTE.qxd 03.6.20 18:58 11 Page 34 (1,1) ANI OPERATION ■ Operation D Calling a specific station ➀ Turn power on and set the [VOL] control to the 10 or 12 o’clock position. ➁ Push the [Y]/[Z] keys to set the desired channel. •“ ” appears when the ANI function has been programmed via cloning. nect code. • While pushing [PTT], push [#]. • Some transceivers cannot transmit a disconnect code depending on programming.
IC-T2H_RTTE.qxd 03.6.20 18:58 Page 35 (1,1) ANI OPERATION D Calling group stations D Waiting for a call ➀ Turn power on, then select the desired group channel. ➁ Enter the 3-digit ANI code including the group code “D”— ➀ Turn power on, then select the de- the transceiver calls the desired station automatically. • The transceiver transmits the pre-programmed selective code. • When entering a 3-digit code, the transceiver automatically transmits a group code after the 3rd digit is entered.
IC-T2H_RTTE.qxd 03.6.20 18:58 12 Page 36 (1,1) CLONING Cloning allows you to quickly and easily transfer the programmed contents from one transceiver to another transceiver; or, data from a PC to a transceiver using the optional CS-T2 CLONING SOFTWARE. D Transceiver-to-transceiver cloning AT POWER ON ➀ Connect the OPC-474 CLONING CABLE with adapter plugs to the [SP] jack of the master and slave transceivers. • The master transceiver is used to send data to the slave transceiver.
IC-T2H_RTTE.qxd 03.6.20 18:58 Page 37 (1,1) TROUBLESHOOTING 13 If your transceiver seems to be malfunctioning, please check the following points before sending it to a service center. PROBLEM No power comes on. POSSIBLE CAUSE • The battery is exhausted. (A slight current flows in the circuits even when the power is off.) SOLUTION REF. • Charge the battery pack or place new dry cell bat- pgs. 9, teries in the battery case.
IC-T2H_RTTE.qxd 03.6.20 18:58 14 Page 38 (1,1) SPECIFICATIONS GENERAL • Frequency coverage : (Unit: MHz) USA TX RX 144–148 136–174* ASIA 136–174* EUR KOR 144–146 144–146 TAIWAN 145–146 *Guaranteed range: 144–148 MHz. • Operating mode • Frequency stability • Antenna impedance • Power supply • Current drain( at 9.6 V; typ.) Tx : F2/F3 : ±10 ppm (0°C to 50°C; 32°F to 122°F) : 50 Ω (nominal) : 9.6 V DC (Ni-Cd × 8; negative ground) : 1.6 A (at 6 W; typ.) 1.
IC-T2H_RTTE.qxd 03.6.20 18:58 Page 39 (1,1) OPTIONS D Battery packs BATTERY VOLTAGE CAPACITY OUTPUT OPERATING PACK POWER PERIOD*1 Battery case for R6(AA)×8 BP-194 6.0 W 3.7 h*2 alkaline or Ni-Cd cells BP-195 9.6 V 700 mAh 6.0 W 3.7 h BP-196 9.6 V 1050 mAh 6.0 W 5.5 h *1 Operating ranges are calculated under the following conditions: Tx : Rx : standby=1 : 1 : 8 *2 When Ni-Cd batteries are installed.
IC-T2H_RTTE.qxd 03.6.20 18:58 Page 40 (1,1) 16 MODE ARRANGEMENT SET MODE TO ENTER # TO ENTER 8 [A V]/[ (CALL)] for 1 sec. VFO MODE CALL frequency (p. 20) [A V]/[ (CALL)] momentarily [ (CALL)] [A V] [A V] NOTE: indicates one of the customizable keys (see page at right). Tuning step (p. 14) MR [ (DTMF)] [ (CALL)] (Transmit DTMF code.) MEMORY MODE CALL MODE Duplex setting (p. 15) DUP [ (DTMF)] CHANNEL INDICATION MODE Frequency offset (p. 16) MIC simple mode (p.
IC-T2H_RTTE.qxd 03.6.20 18:58 Page 41 (1,1) MODE ARRANGEMENT MODE TO ENTER # + KEY CUSTOMIZE MODE 0 Power OFF then ON TO EXIT at power ON ➀ Push a key to program—currently assigned function is displayed. ➁ Push the [ ]/[ ] keys to select the desired function. (See p. 32 for a list of available functions.) ➂ Push the selected key for 1 sec. to program the function. equency (p. 20) step (p.
IC-T2H_RTTE.qxd 03.6.20 18:58 17 Page 42 (1,1) CE ABOUT CE CE Versions of the IC-T2H which display the “CE” symbol on the serial number seal, comply with the essential requirements of the European Radio and Telecommunication Terminal Directive 1999/5/EC. INSTALLATION NOTES • When transmitting with a portable radio, hold the radio in a vertical position with its microphone 2.5 to 5 centimeters away from your mouth. Keep antenna at least 2.5 centimeters from your head and body.
IC-T2H_RTTE.qxd 03.6.20 18:58 Page 43 (1,1) CE 17 DECLARATION OF CONFORMITY We Icom Inc. Japan 1-1-32, Kamiminami, Hirano-ku Osaka 547-0003, Japan Declare on our sole responsibility that this equipment complies the essential requirements of the Radio and Telecommunications Terminal Equipment Directive, 1999/5/EC, and that any applicable Essential Test Suite measurements have been performed.
IC-T2H_RTTE.qxd 03.6.20 18:58 Page 44 (1,1) ‘ GER ‘ AUT ‘ GBR ‘ IRL ‘ FRA A-5530H-1EX-w Printed in Japan © 1998–2003 Icom Inc.