The i-7540D CAN-Ethernet Gateway User’s Manual Warranty All products manufactured by ICP DAS are under warranty regarding defective materials for a period of one year from the date of delivery to the original purchaser. Warning ICP DAS assumes no liability for damages resulting from the use of this product. ICP DAS reserves the right to change this manual at any time without notice. The information furnished by ICP DAS is believed to be accurate and reliable.
Table of Contents 1. Introduction.......................................................................................................4 1.1 1.2 1.3 2. Features.............................................................................................................. 5 Specifications ..................................................................................................... 6 VxComm Technology .......................................................................................
4.6 4.7 4.8 4.9 4.10 4.11 4.12 4.13 4.14 4.15 4.16 4.17 4.18 4.19 4.20 4.21 4.22 4.23 4.24 5. 99C.................................................................................................................. 65 99RA............................................................................................................... 66 99#P01 .............................................................................................................. 67 99#P02 .................................................
1. Introduction “Embedded Internet” and “Embedded Ethernet” are hot topics today. Nowadays the Ethernet protocol becomes the de-facto standard for local area network. Via Internet, connectivity is occurring everywhere, from home appliances to vending machines to testing equipment to UPS…etc. Using Ethernet for network in industrial area is appealing because the required cabling is already installed.
The main features and specification of this are described as below: 1.
1.
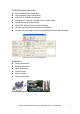
i-7540D Software Utility tool: z z z z z z z z CAN bus Baud Rate configuration; CAN acceptance filter configuration; CAN 2.0A or 2.0B specific selection; Setting the IP, Gateway and Mask of the network status; Setting the Web ID and password RS-232/RS-485 baud rate and data bit setting; CAN bus pair connection parameters configuration.
1.3 VxComm Technology The i-7540D is designed as a RS-232/RS-485/CAN to Ethernet Gateway. So it follows that they can be used to link these RS-232/RS-485/CAN devices to central computer as follows: Figure 1-2: Application of i-7540D Compared to the RS-485 network, these Ethernet network hubs are already in existence for system network. Therefore, the RS-232 devices can find the closest hub and link to the central computer with the help of the i-7540D.
In some factories, there are old systems still running and in case. These old systems only support COM port applications. Therefore, the Vxcomm technology can be used to upgrade these old systems to support Ethernet network. To recap, the VxComm technology is useful as follows: z Provides a much easier interface for software programmers.
2. Hardware 2.1 Block Diagram Figure 2-1 is a block diagram illustrating the functions on the i-7540D module. It provides the 2500Vrms Isolation in the CAN interface site. And hardware media in RS-232 interface is only adopted 5-wire connection. Figure 2-1: Block diagram of i-7540D i-7540D CAN-Ethernet Gateway User’s Manual (Version 1.
2.2 Pin Assignment CAN Bus Connector Bypass CAN Bus Connector CAN Bus Status LED Power LED 7-segment LED displays Power Input Ethernet 10/100 Base T RS-485 Port RS-232 Port Figure 2-2: INIT * pin Pin assignment on the i-7540D i-7540D CAN-Ethernet Gateway User’s Manual (Version 1.
2.2.1 RS-232 & RS-485 & Power supply Interface The I-7540D provides one RS-232 interface and one RS-485 interface with hardware flow control. The GND-signal of COM1 is shared with pin-9, GND. The pin assignment is shown in table 2-1. Table 2-1: COM Connector Pin Assignment Pin Name Description 1 CTS1 2 RTS1 CTS pin of COM1 (RS-232) RTS pin of COM1 (RS-232) 3 RXD1 RXD pin of COM1 (RS-232) 4 TXD1 TXD pin of COM1 (RS-232) 5 INIT* Initial pin for enable/disable AUTOEXEC.
2.2.2 Connect to CAN Bus In order to provide an easy CAN bus wiring, the i-7540D supplies one CAN port with two CAN bus connector interfaces. Each connecter built on the i-7540D looks like as figure 2-3 and table 2-2. Pin No. Table 2-2: CAN bus Connector Pin Assignment Signal Description 1 N/A Not Connected 2 CAN_L CAN_L bus line (dominant low) 3 N/A Not Connected 4 CAN_H CAN_H bus line (dominant high) 5 N/A Not Connected Note that the bypass CAN bus connector is not another CAN channel.
2.2.3 Ethernet Connect The Ethernet (10/100 Base-TX) signals are routed to an RJ45 socket for easy connection using a standard CAT 3 or CAT 5 network cable. On power on of the i-7540D, it will auto-negotiate the network speed and connection. Table 2-3: Ethernet Connector Pin Assignment Pin Name Description 1 TX+ Transmit Data + 2 TX- Transmit Data - 3 RX+ Receive Data + 4 N.C. Not Connected 5 N.C. Not Connected 6 RX- Receive Data - 7 N.C. Not Connected 8 N.C.
2.3 Terminator resistor settings In order to minimize reflection effects on the CAN bus line, the CAN bus lines have to be terminated at both ends by two terminal resistances. Based on the ISO 11898-2 spec, each terminal resistance is 120Ω (or between 108Ω~132Ω). The length related resistance should have 70 mΩ/m. Users should check the resistances of their CAN bus, before they install a new CAN network as figure 2-4.
Therefore, the i-7540D module supplies a jumper for users to connect the terminator resistor or not. If users want to use this terminator resistor, please open the i-7540D cover and use the JP3 jumper to activate the 120Ω terminator resistor built in the system, as in the figure 2-5. Note that the default setting is active. And about the J3 jumper setting, please refer the table 2-5.
2.4 LED Indication The i-7540D provides the Converter function between the Ethernet port and the RS-232 & RS485 & CAN port. It can handle both 11-bits and 29-bits ID format according to whether it is a CAN 2.0A or 2.0B. It also provides some LEDs to indicate to users what situation the i-7540D is in. 2.4.
2.4.2 CAN bus indicator LED The i-7540D includes three single-color LED displays to indicate the status of module, network and I/O device. They are ER LED (it is red), TX LED (it is green), and RX LED (it is red). The Indicators assist maintenance personnel in quickly identifying a problem unit. The LED test is to be performed at power–up. When the CAN communication events occur, these indicators will be triggered to glitter with different conditions.
z RX LED This LED indicates the status of message received. Table 2-8 shows the conditions for RX status. Therefore, when the device receives CAN messages, the RX-LED would be flashed. Table 2-8 RX led conditions Condition Description Off No data is being received Flashing red Data is being received Solid red Receive error messages i-7540D CAN-Ethernet Gateway User’s Manual (Version 1.
2.4.3 5-digits 7-Segment LED Displays The 5-digits 7-SEG LED will show as figure 2-6.
z LED-2~5: IP The LED will show Group-ID first, and then show its IP as the above diagram indicates. If users change IP, the value shown will change immediately. The default shipping IP = 192.168.255.1 Î the LED-show sequence is given as above diagram. The DHCP function formats are given as follows: z dHCP.0 Î DHCP function disable z dHCP.1 Î DHCP function enable and get an IP z dHCP.
The configuration of CAN port is given as follows: z LED-1: CAN port number z LED-2~5: CAN specification (2.0A or 2.0B) The connection-client and CAN bus pair connection information are given as follows: z Group-ID of 5-digit LED: 44444. z LED-1: indicator, can be 0 or 1 or 2 or 3 or 4 or 5. Indicator 0: z LED-2: ‘P’ for CAN bus pair connection z LED-3: “Enable CAN pair” parameter, 0: Enable, 1: Disable z LED-4: “TCP or UDP” parameter, 0: TCP, 1: UDP.
3. Software Utilities We support some software utilities for users to set and test the status of the i-7540D. 1. i-7540D Utility The i-7540D Utility tool can be used to configure the operation condition between the CAN and Ethernet communications. Also it can be used to transmit or receive a CAN message for simple testing of the module’s functions. 2. MiniOS7 Utility MiniOS7 Utility is a tool for configuring, uploading files to all products embedded with ICPDAS MiniOS7 3.
3.1 i-7540D Utility The i-7540D Utility tool can be used to configure the operation condition between the CAN and Ethernet communications. Also it can be used to transmit or receive a CAN message for simple testing of the module’s functions. To start the “i-7540D Utility”, please install the i-7540D Utility setup file and run the i-7540D.exe file. The screenshot of the startup screen for this Utility is given in the below figure.
3.1.1 Install & uninstall the i-7540D Utility Install i-7540D Utility Step1: Download the i-7540D Utility setup file from the web site http://www.icpdas.com/products/Remote_IO/can_bus/i-7540.htm or the CD-ROM disk following the path of “Fieldbus_CD:\\CAN\ Converter\i-7540D\Utility Step 2: Execute the setup.exe file to install i-7540D Utility. Step 3: A “Welcome” window pops up to prompt user to begin the installation. See figure 3-2.
Step 4: Click the “Next” button and a “Choose Destination Location” window will pop up for deciding the installation path. Figure 3-3: “Choose Destination Location” dialog Step 5: Click “Next” button and a “Ready to Install the Program” window will pop up to prompt user that the wizard is ready to begin the installation See figure 3-4. Figure 3-4: “Ready to Install the Program” dialog i-7540D CAN-Ethernet Gateway User’s Manual (Version 1.
Step 6: Click “Install” button and start to install the i-7540D Utility to the system. After finishing the process, a “Complete” window will pop up to prompt users that the successful completion of the installation. And click “Finish” button to exit. See figure 3-5. Figure 3-5: “Successful Completion of the Installation” dialog Step 7: After finishing the installation of the i-7540D Utility, users can find it as shown in figure 3-6.
Uninstall i-7540D Utility You can uninstall i-7540D Utility software by the following means described below: Step 1: Click “Start” in the task bar, then click the “Control Panel” as shown in figure 3-7. Figure 3-7: Select settings Step 2: Click the “Add or Remove Programs” button icon to open the dialog. See figure 3-8. Figure 3-8: “Add/Remove Programs” i-7540D CAN-Ethernet Gateway User’s Manual (Version 1.
Step 3: Find out the i-7540D Utility, and click the Change/Remove button. See figure 3-9. Figure 3-9: Click “Add/Remove Programs” Step 4: Select the “Remove” option button, and press the “Next” button to remove i-7540D Utility. See figure 3-10. Figure 3-10: “Modify, repair, or remove the program” dialog i-7540D CAN-Ethernet Gateway User’s Manual (Version 1.
Step 5: Click the button “Yes” to remove the software as shown in figure 3-11. Figure 3-11: Click the button “Yes” to remove the software Step 6: Finally, click the “Finish” button to finish the uninstall process. Figure 3-12: “Maintenance Complete” dialog. i-7540D CAN-Ethernet Gateway User’s Manual (Version 1.
3.1.2 How to configure the module parameters The following procedure will guide you on how to configure the communication parameters for the CAN and Ethernet interface. The configuration steps are depicted as below: 1. Connect the power source (the 10~30 DC volts) into the i-7540D module. 2. The i-7540D module’s Power LED will flash approximately once per second. And the 5-digits 7-segment LED will scroll to display some messages, please refer to section 2.4.3.
5. Then the i-7540D configuration window will be brought out. The i-7540D Utility will show the communication information from the i-7540D module in the window, as shown in the following figure. i-7540D’s CAN Status Error code Response or not Time-Stamp value response or not Figure 3-14: Connect to the configuration mode of the i-7540D 6. Choose the “Settings” tab to open the configuration window for the CAN and the Network status parameters of the i-7540D.
Note: If users click the “Defaults” icon, all of the CAN communication parameters in the i-7540D will be set to the default values, which are: CAN Specification = 2.0B CAN bus Baud rate = 1Mbps BTR0 = 00 BTR1 = 00 Acceptance Code = 00 00 00 00 Acceptance Mask = FF FF FF FF Error Response = No Timestamp Response = No 7. The “Network Status” frame displayed the IP, Gateway, Mask and MAC address of the i-7540D. Users can change these network parameters by click the “Set” button and “Modify IP” button.
IP/Gateway/Mask/ Web ID/Password CAN Pair Status RS-232/RS485 Figure 3-15: Network status, COM status and CAN pair status i-7540D CAN-Ethernet Gateway User’s Manual (Version 1.
3.1.3 How to set the Bus Timing Registers BTR0, BTR1: Set the special user-defined baud rate. Users can set arbitrary baud with these parameters. But users need to have the background of SJA1000 CAN controller and 82C251 CAN transceiver, and calculate the values of BT0 and BT1 by themselves (The clock frequency of CAN controller is 16MHz.). i-7540D CAN-Ethernet Gateway User’s Manual (Version 1.
3.1.4 How to set the Acceptance Code and Mask Acceptance Code (AC): The CAN ID bits that you want to get. Acceptance Mask (AM): The CAN ID bits that you want to filter. In the acceptance code, the bit value ‘1’ means that you want to get this CAN ID bit. And in the acceptance mask, the bit value ‘0‘ means that you want to filter this CAN ID bit.
Note: 1. AccCode[0] means the most significant byte of AccCode and AccCode[3] means the least significant byte of AccCode. 2. AccMask[0] means the most significant byte of AccMask and AccMask[3] means the least significant byte of AccMask. 3. Bit10 is most significant bit and Bit0 is least significant bit. For example (In 29 bit ID message): AccCode: 00h 00h 00h A0h AccMask: 00h 00h 00h 1Fh ID Value : ?? ?? ?? Ah and Bh will be accepted.
3.1.5 Enable Error Response Figure 3-16: Error Response When the i-7540D receives a command that it doesn’t accept, it will response syntax and/or communication error information to the host. These general error codes are shown in below table. AsciiToHex (Error code) Description 1 The head character of the command string is invalid. 2 The length of the command string is invalid. 3 The value of CAN identifier is invalid. 4 The value of CAN data length is invalid.
3.1.6 Enable Time-stamp Response Figure 3-17: Time-Stamp Response When the time-stamp response is enabled, the i-7540D will send CAN message with it’s time-tick vale, hexadecimal eight ASCII chars for a unit of microsecond, to the host as it receive a CAN message. For example: Receive the first CAN message at 33B7AA17h us Receive the second CAN message at 33E054EBh us i-7540D CAN-Ethernet Gateway User’s Manual (Version 1.
3.1.7 How to change web ID/PASSWORD configuration The i-7540D module has a built-in web server that allows user to easily configure the module from a remote location using a regular web browser. When users want to modify the configuration of i-7540D via Setup web page, they need to fill these two fields, ID and PASSWORD, with correct values. Or they can view the configuration of i-7540D, and can’t modify the configuration. i-7540D CAN-Ethernet Gateway User’s Manual (Version 1.
If users want to change the ID and PASSWORD, they need to modify these two parameters by using Utility tool. The default setting of ID is “7540D”, and default PASSWORD is “icpdas7540D”. i-7540D CAN-Ethernet Gateway User’s Manual (Version 1.
3.1.8 How to test the module transmission performance The following procedure will guide you to learning how to transmit/receive CAN messages to/from other devices/PCs by using the i-7540D converter. 1. Connect the i-7540D’s CAN port into the CAN network, which must at least have one CAN device on the network. 2. Supply the 10~30 volts DC source into the i-7540D module through the power terminal. 3. The i-7540D module’s Power LED will flash approximately once per second.
6. Select the “Test” tab in order to test the function of transmission and reception via the i-7540D module. In “Send CAN Message” frame, user can send the necessary CAN message to Ethernet port 10003 of 7540D. Then 7540D will transfer and transmit this message to CAN bus. In the “Send Command to 7540D” frame, users can send command to 7540D for getting or setting the status or parameters of 7540D.
7. Users also can use the timer mode to send CAN message in fixed period. And the start/stop time would be displayed in Date/Time format. And when receiving correct CAN message, these CAN message will be displayed on the “Receive” box. Start/stop time of timer mode Fixed period to send CAN message Figure 3-19: Timer mode to send CAN message i-7540D CAN-Ethernet Gateway User’s Manual (Version 1.
3.1.9 How to use CAN Bus Pair Connection The firmware v1.06 or later and Utility v1.04 or later support CAN bus pair connection UDP/TCP function. User can refer the following application to use this function. Note: After setting “Enable CAN Bus Pair Connection”, all data send to this i-7540D via Ethernet port 10003 will become no effective. And the VxComm port of 7540D’s COM3(CAN port) will become no effective. CAN Pair Status i-7540D CAN-Ethernet Gateway User’s Manual (Version 1.
Application 01: one-to-one communication CAN Bus Pair Connection by using UDP method (port: 57540). After setting “CAN Bus Pair connection Status” of the two i-7540D and re-start the system of them, CAN messages between “CAN Network 01” and “CAN Network 02” can be exchanged by UDP/IP protocol through Ethernet network. Note: When setting to use UDP method, the “Server/Client” parameters will be no effective. i-7540D CAN-Ethernet Gateway User’s Manual (Version 1.
Application 02: one-to-many communication (broadcast) CAN Bus Pair Connection by using UDP method (port: 57540). 1. After setting “CAN Bus Pair connection Status” of these i-7540D and re-start the system of them, CAN messages on “CAN Network 01” will be sent to “CAN Network 02“ and “CAN Network 03“ by using UDP/IP protocol via Ethernet network. 2. All CAN message on “CAN Network 02“ will sent to “CAN Network 01“ by using UDP/IP protocol via Ethernet network. 3.
Application 03: One acts as a server, the other acts as a client. CAN Bus Pair Connection by using TCP method (port: 10003). After setting “CAN Bus Pair connection Status” of the two i-7540D and re-start the system of them, CAN messages between CAN Network 01 and CAN Network 02 can be exchanged by TCP/IP protocol through Ethernet network. Note: When setting to act as a TCP server, the “Connect to (Destination IP)” will be no effective. i-7540D CAN-Ethernet Gateway User’s Manual (Version 1.
3.2 MiniOS7 Utility MiniOS7 Utility is a tool for configuring, uploading files to all products embedded with ICPDAS MiniOS7. And it provides some PC diagnostic tools which can help users to diagnose the status of the i-7540D and other controllers.
3.2.1 Install the MiniOS7 Utility Step 1: The installation software can be obtained from the following location. 8000cd:\\Napdos\MiniOS7\utility\MiniOS7_utility\ or http://ftp.icpdas.com/pub/cd/8000cd/napdos/minios7/utility/minios7_utility/ Step 2: Go to where you downloaded the file, and double-click on the installation file in Windows to execute it. Step 3: To finish the installation of the MiniOS7 Utility, click the Finish button to exit the setup process.
3.2.2 PC Diagnostic tools The MiniOS7 Utility provides serial PC diagnostic tools. These PC diagnostic tools can be opened from the Tools menu of MiniOS7 Utility. The PC Diagnostic tools include: z 7188XW: is the PC side utility for modules using the ICPDAS MiniOS7. It is the Win32 version of 7188x.exe. For 7188x.exe just can use the standard COM PORT(RS-232) of PC, But on Win32 systems (WIN95/98/ME/NT/2K/XP) also have RS-232 port use PCMCIA or USB interface, 7188x.
z Send232: uses serial port (RS-232) interface to communicate with devices. And it can be used to test the Virtual COM technology. Set the Com port parameters of PC. Key-in the string that you want to send The send/receive messages will be displayed over here. i-7540D CAN-Ethernet Gateway User’s Manual (Version 1.
z SendTCP: uses TCP protocol to communicate with the 7188E/8000E/7540D and other devices from Ethernet. Step 1: Run SendTCP in host-PC. Step 2: Input the IP of i-7540D and press the “Connect” button to connect with i-7540D. And then it will display “7188E3 is connected”. i-7540D CAN-Ethernet Gateway User’s Manual (Version 1.
Step 3: Send command “10” to the i-7540D. And it will response “7188E3 message. Step 4: Select “Port 2” and “CR”. Then send “$02M” to read 7000 module’s ID which is connected to i-7540D’s COM2. If you enable 7000 module’s checksum function, select “CS_CR”. The “CS_CR” option will add two checksum bytes, then adds “CR”. 2 1 2 3 i-7540D CAN-Ethernet Gateway User’s Manual (Version 1.
Step 5: If you want to change the 7540D’s COM ports settings, click “Set” to change them. The 7540D’s COM port that you want to configure is specified by “Select Port” combo list. Port 2 means you want to configure the 7188E’s COM2. 1 3 2 z 7188E: Command-prompt mode program, used to send data to specific machines using TCP protocol. Usage: 7188e [-S:IP] [-P:Port]: Connect to a device by using TCP protocol. *Q: Quit program and disconnect. i-7540D CAN-Ethernet Gateway User’s Manual (Version 1.
3.3 VxComm Utility The VxComm (Virtual Comm) Driver and VxComm Utility are very easy to install and use. This document shows how to install and configure the driver correctly. For more information, please refer to section 5, VxComm application. i-7540D CAN-Ethernet Gateway User’s Manual (Version 1.
4. Support Command List For easy application, we provide 4 command strings to allow users to send specific commands from i-7540D’s Ethernet port10003 to CAN bus. And receiving response message form CAN bus. Also, we provide several commands for i-7540D’s Ethernet port10000 to set and get the status of 7540D. It can cover most applications of different requests.
Port 10000 Command Format: 99 : 99 Specific command for getting or setting the status of the 7540D Table 4-2: Command list table (port 10000) Command Description S Read the status value of i-7540D C Clear CAN error flag and FIFO RA Reboot the i-7540D module.
4.1 tIIILDD… Description: Send or receive a standard CAN data frame. ¾ Syntax: tIIILDD… t III L DD… Represent a standard (2.0A) data frame. 11 bits Identifier (000~7FF) Data length (0~8) Input data frame value according to the data length (00~FF) ¾ Response: Valid command: No response Invalid command: ? ¾ Note: It is necessary to enable the “Error Response” function in the i-7540D Utility, in order to receive Syntax and/or communication error information at the host PC.
4.2 TIIIL Description: Send or receive a standard CAN remote frame. ¾ Syntax: TIIIL T III L Represents a standard (2.0A) remote frame. 11 bits Identifier (000~7FF) Data length (0~8) ¾ Response: Valid command: No response Invalid command: ? ¾ Note: It is necessary to enable the “Error Response” function in the i-7540D Utility, in order to receive Syntax and/or communication error information at the host PC.
4.3 eIIIIIIIILDD… Description: Send or receive an extended CAN data frame. ¾ Syntax: eIIIIIIIILDD… e IIIIIIII L DD… Stands for the extended (2.0B) data frame.
4.4 EIIIIIIIIL Description: Send or receive an extended CAN remote frame. ¾ Syntax: EIIIIIIIIL E IIIIIIII L Stands for the extended (2.0B) CAN remote frame. 29 bits Identifier (00000000~1FFFFFFF) Data length (0~8) ¾ Response: Valid command: No response Invalid command: ? ¾ Note: It is necessary to enable the “Error Response” function in the i-7540D Utility, in order to receive Syntax and/or communication error information at the host PC.
4.5 99S Description: Read the i-7540D CAN Baud Rate and error flag message. ¾ Syntax: 99S 99S ¾ Response: Valid Command: !CFFTTRRO Invalid command: ERROR ! C FF TT RR O ¾ Command character. Delimiter for valid command current baud rate setting of CAN CAN register CAN transmit error counter CAN receive error counter CAN FIFO Overflow flag Note: Furthermore, all response results are shown in the ASCII format.
Table 4-4: CAN status register list AsciiToHex(FF) Name Value 1 Bit 7 (MSB) Bus Status Bit 6 Error Status 0 1 0 Bit 5 Transmit Status Bit 4 Receive Status Bit 3 Transmission Complete Status Bit 2 Transmit Buffer Status Bit 1 Data Overrun Status Bit 0 (LSB) Receive Buffer Status 1 0 1 0 1 0 1 0 1 0 1 0 Function Bus-off; the SJA100 is not involved in bus activities Bus-on; the SJA1000 is involved in bus activities Error; at least one of the error counter has reached or exceeded the CPU wa
4.6 99C Description: Clear the CAN error flag and FIFO on the module. ¾ Syntax: 99C 99C Command character. ¾ Response: Valid Command: No response. Invalid command: ERROR ¾ Note: After sending this command, the CAN receive and transmit FIFO will be clear. The error counter of reception and transmission will be set to zero. And the TX and RX LEDs will turn OFF.
4.7 99RA Description: Reboot the i-7540D module. Users can use this command to reboot the module in order to allow it to work in order again. ¾ Syntax: 99RA 99RA Command character ¾ Response: Valid Command: Reboot the i-7540D module. Invalid command: ERROR ¾ Example: Command: 99RA The i-7540D module will reboot after it had received this command. Note: This command can only be accepted by 7540D’s port 10000 i-7540D CAN-Ethernet Gateway User’s Manual (Version 1.
4.
¾ Example: Command: 99#P01 Response: 0610B100 The response will show the following results: RS-232 baud rate=115.2K bps, data bits=8, stop bits=1, none parity. Note: This command can only be accepted by 7540D’s port 10000 i-7540D CAN-Ethernet Gateway User’s Manual (Version 1.
4.
¾ Example: Command: 99#P02 Response: 06207111 The response will show the following results: RS-485 baud rate=9600 bps, data bits=8, stop bits=2, even parity. Note: This command can only be accepted by 7540D’s port 10000 i-7540D CAN-Ethernet Gateway User’s Manual (Version 1.
4.10 99#P1 Description: Read the CAN configuration ¾ Syntax: 99#P1 99#P1 ¾ Command character Response: Valid Command: 14PBCCCCCCCCMMMMMMMMET Invalid command: ERROR 14 P B CCCCCCCC MMMMMMMM E T Delimiter for valid command CAN specification 0 = 2.0A 1 = 2.
¾ Example: Command: 99#P1 Response: 140400000000FFFFFFFF00 The response will show the following results: CAN specification=2.0A, CAN baud rate=125Kbps, acceptance code register=00000000, acceptance mask register=FFFFFFFF, disable error response, disable timestamp response. Note: This command can only be accepted by 7540D’s port 10000 i-7540D CAN-Ethernet Gateway User’s Manual (Version 1.
4.11 99#P1B Description: Read the CAN Bus Timing Register ¾ Syntax: 99#P1 99#P1B ¾ Command character Response: Valid Command: 06PBTTRR Invalid command: ERROR 06 P Delimiter for valid command CAN specification 0 = 2.0A 1 = 2.
¾ Example: Command: 99#P1B Response: 06090014 The response will show the following results: CAN specification=2.0A, CAN baud rate=User defined, BTR0=00, BTR1=14. Note: 1. This command can only be accepted by 7540D’s port 10000 2. Supported by the firmware v1.04 or later. i-7540D CAN-Ethernet Gateway User’s Manual (Version 1.
4.
¾ Example: Command: 99$P01050B100 Response: OK Set the setting of RS-232 baud rate= 115.2Kbps, data bits=8, stop bit=1, none parity bit into the i-7540D and the 7540D response “OK” command to mean that the configuration of RS-232 has been changed. Note: This command can only be accepted by 7540D’s port 10000 i-7540D CAN-Ethernet Gateway User’s Manual (Version 1.
4.
¾ Example: Command: 99$P02050B100 Response: OK Set the setting of RS-485 baud rate= 115.2Kbps, data bits=8, stop bit=1, none parity bit into the i-7540D and the 7540D response “OK” command to mean that the configuration of RS-485 has been changed. Note: This command can only be accepted by 7540D’s port 10000 i-7540D CAN-Ethernet Gateway User’s Manual (Version 1.
4.14 99$P114PBCC…MM…ET Description: Change the CAN configuration of the i-7540D ¾ Syntax: 99$P114PBCCCCCCCCMMMMMMMMET 99$P114 P B CCCCCCCC MMMMMMMM E T Command character CAN specification 0 = 2.0A 1 = 2.
¾ Example: Command: 99$P1140400000000FFFFFFFF00 Response: OK Set the setting of CAN specification=2.0A, CAN baud rate= 125 Kbps, acceptance code=00000000, acceptance mask=FFFFFFFF, disable error response, disable timestamp response into the i-7540D and the 7540D response “OK” command to mean that the configuration of CAN has been changed. Note: This command can only be accepted by 7540D’s port 10000 i-7540D CAN-Ethernet Gateway User’s Manual (Version 1.
4.15 99$P1B04TTRR Description: Change the CAN Bus Timing Register of the i-7540D ¾ Syntax: 99$P1B04TTRR 99$P1B04 TT RR ¾ Command character Bus Timing Register 0 (00~FF) Bus Timing Register 1 (00~FF) Response: Valid Command: OK Invalid command: ERROR Note: 1. This command can only be accepted by 7540D’s port 10000 2. Supported by the firmware v1.04 or later. 3.
4.16 99#PWID Description: Read the Wed ID configuration ¾ Syntax: 99#PWID 99#PWID ¾ Response: Valid Command: LLxxxxx… Invalid command: ERROR LL xxxxx… ¾ Command character Web ID data length, in hexadecimal format. Web ID saved in the EEPROM, the default Web ID setting is “7540D” Example: Command: 99$PWID Response: 057540D Read the Web ID setting of the 7540D, and the 7540D responses the the Web ID setting is “7540D”. Note: 1. This command can only be accepted by 7540D’s port 10000. 2.
4.17 99#PWPW Description: Read the Wed Password configuration ¾ Syntax: 99#PWID 99#PWPW ¾ Response: Valid Command: LLxxxxx… Invalid command: ERROR LL xxxxx… ¾ Command character Web password data length, in hexadecimal format. Web password saved in the EEPROM, the default Web password setting is “icpdas7540D” Example: Command: 99$PWPW Response: 0Bicpdas7540D Read the Web password setting of the 7540D, and the 7540D responses the Web password setting is “icpdas7540D”. Note: 1.
4.18 99$PWIDLLxxxxx… Description: Change the Wed ID configuration ¾ Syntax: 99$PWIDLLxxxxx… 99$PWID LL xxxxx… Command character Web ID data length, in hexadecimal format. Web ID data, at most 30 ASCII characters ¾ Response: Valid Command: OK Invalid command: ERROR ¾ Example: Command: 99$PWID047540 Response: OK Change the Web ID data setting of the 7540D to “7540” and the 7540D responses “OK” command to mean that the configuration of Web ID data has been changed. Note: 1.
4.19 99$PWPWLLxxxxx… Description: Change the Wed password configuration ¾ Syntax: 99$PWPWLLxxxxx… 99$PWPW LL xxxxx… Command character Web password data length, in hexadecimal format. Web password data that you want to configure.
4.20 99#PPC Description: Read the CAN bus pair connection configuration.
4.21 99#PPIP Description: Read the destination IP of CAN bus pair connection. ¾ Syntax: 99#PPIP 99#PPIP ¾ Command character Response: Valid Command: XXX.XXX.XXX.XXX Invalid command: ERROR XXX.XXX.XXX.XXX ¾ Destination IP address. Example: Command: 99#PPIP Response: 192.168.255.2 Read the CAN bus pair connection destination IP of the 7540D, and the 7540D responses that destination IP address is “192.168.255.2”. Note: 1. This command can only be accepted by 7540D’s port 10000. 2.
4.22 99$PPCLLABC Description: Change the CAN bus pair connection configuration. After setting successfully, all parameters will take effective after system restart. ¾ Syntax: 99$PPCLLABC 99$PPC LL A B C Note: 1. 2. 3.
4.23 99$PPIPxxx… Description: Change the CAN bus pair connection destination IP address. After setting successfully, all parameters will take effective after system re-start ¾ Syntax: 99$PPIPxxx… 99$PPIP Command character xxx… IP address, iii/ppp/III/PPP: 3 digits number Note: This IP address is effective when enable CAN bus pair connection and acting as TCP client or using UDP connection method.
4.24 General Error codes for commands from port 10003 Table 4-6: Error code table AsciiToHex (Error code) Description 1 The head character of the command string is invalid. 2 The length of the command string is invalid. 3 The value of CAN identifier is invalid. 4 The value of CAN data length is invalid. 5 Reserved i-7540D CAN-Ethernet Gateway User’s Manual (Version 1.
5. VxComm Applications z z z z z 5.1 Overview Installing the VxComm Driver Adding a i-7540D and configuring the VxComm Driver Removing a i-7540D Uninstalling the VxComm Driver Overview The VxComm (Virtual Comm) Driver and VxComm Utility are very easy to install and use. The first thing to do is to find the installation file in the included CD. The directory is: ¾ 8000cd:\\napdos\7188e\tcp\vxcomm\driver(pc)\nt\ (for Windows NT 4.
5.1.1 Architecture The VxComm Driver creates COM port(s) and maps them to the COM port(s) of the i-7540D. The user's RS-232 client programs need only to change to the different COM port to access the serial devices that are allocated to the Internet or Ethernet network via the i-7540D. i-7540D CAN-Ethernet Gateway User’s Manual (Version 1.
5.1.2 Ports mapping Vxcomm Driver/Utility supports Port 1 to Port 3 in accessing COM1 to COM3 of the i-7540D. Another Port I/O is designed to access the I/O boards mounted on i-7540D, but it doesn’t use now. With the help of the VxComm Driver/Utility, uses can map remote COM port to become a virtual COM port of PC. One PC can control maximum number of 256 COM ports (including COM1 and COM2).
5.2 Installing the VxComm Driver Step 1: The installation software can be obtained from the following location. z http://ftp.icpdas.com/pub/cd/8000cd/napdos/7188e/tcp/vxcomm/ driver(pc)/ z 8000cd:\\Napdos\7188e\TCP\vxcomm\driver(pc)\ Please choose the version that suits your Windows operation system. z vxcomm2K_vNNNNN.exe for Windows 2000/XP z vxcommnt_vNNNNN.exe for Windows NT z vxcomm98.
Step 3: Select the “Yes, …” option and click the Finish button to restart your computer. Step 4: After rebooting the computer, the VxComm Utility will ask you to configure the virtual COM port(s). Please refer to the next section (5.3) for more information. i-7540D CAN-Ethernet Gateway User’s Manual (Version 1.
5.3 Adding an i-7540D and configuring the VxComm Driver Step 1: Obtain the IP address of the i7540D. The MiniOS7 Utility can help you in obtaining the IP address of the i-7540D. Note: The default IP address of the i-7540D is 192.168.255.1 Step 2: From the Winsows Start Menu, go to Program/7188e/Vxcomm2K/ and locate the VxComm Utility. Step 3: Before adding an i-7540D, ensure that the Check Duplicated IP and Connect to Server options are both checked.
Note: z Check Duplicated IP option This option checks whether the IP address is already listed in the server window (left hand window). It is automatically checked by default. The following alert will be displayed if an IP address is duplicated. z Connect to Server option This option connects to the i-7540D and retrieves the name of device before adding it to the server window (left hand window). It is automatically checked by default.
Step 4: And then it will display the name of “7186E3” and it’s IP. Select one of the i-7540D devices and configure the virtual COM port(s) by double clicking "Port 1", "Port 2" or “Port 3”. Step 5: Select an appropriate COM port number, and then click the OK button. Note: z Re-assign COM number for all subsequent ports option This option automatically sequentially assigns the ports with the available COM port numbers.
Step 6: Select one of the i-7540D modules, and then click the Server Options button to configure the server options. Step 7: Enter the new configuration settings. The new settings will replace any text already in the Server Options window text boxes. Click the OK button to save the new settings. Notes: z Keep Alive Time (ms) field: After connecting to the μPAC-7186E, the VxComm Driver will automatically and periodically send commands to keep the i-7540D alive.
layer may respond with a “Disconnect” event to the VxComm Driver if it fails to send the message after 20 seconds or more. Users can set a smaller Connection-Broken time (for example: 10000 ms) to force the VxComm Driver to re-connect again and get a quicker response. If the connection has no sending/receiving signal before the Connection-Broken time has timed out, the connection will be marked as broken. The VxComm Driver will also re-connect it again.
Step 8: Click the Exit button to exit the VxComm Utility. Before exiting, the Re-starting the Driver dialog window will automatically display. Click the Re-start button to stop/start the driver. i-7540D CAN-Ethernet Gateway User’s Manual (Version 1.
5.4 Removing an i-7540D Step 1: Open the VxComm Utility. Step 2: Click the server name you want to remove, and then click the Remove Server button. Step1 Step2 Step 3: The following window will be displayed, make sure of your choice, and then click the Yes button to remove it. i-7540D CAN-Ethernet Gateway User’s Manual (Version 1.
Step 4: Click the Exit button to finish this utility. i-7540D CAN-Ethernet Gateway User’s Manual (Version 1.
5.5 Uninstalling the VxComm Driver Step 1: Select the "Control Panel". Step 2: Click the "Add or Remove Programs" to open the dialog. i-7540D CAN-Ethernet Gateway User’s Manual (Version 1.
Step 3: Find out the VxComm Driver, and click the “Remove” button. Step 4: Click the button “Yes” to remove the software Step 5: Finally, click the “OK” button to finish the uninstall process i-7540D CAN-Ethernet Gateway User’s Manual (Version 1.
6. Application with PISO-CAN 200/400 T In this chapter, we describe the i-7540D application in CAN network. On the CAN bus side, the device is the PISO-CAN200/400-T of ICP DAS. And here the i-7540D is a CAN-Ethernet gateway device. It allows users to send specific commands from It’s Ethernet port10003 to CAN bus. Receive response message form CAN bus and then convert these CAN messages to specific commands.
Please do the following steps to setup the system before you execute this application program. Step 1: Setup the VxComm Utility. And the virtual COM port of PC is setting as following figure. The installing steps about the VxComm Utility tool, please see section 5.2. Figure 6-2: VxComm Utility tool Step 2: Install the PISO-CAN200/400 PCI card. For more information, please see PISO-CAN user manual. Step 3: Setup the system of i-7540D by using the i-7540D’s utility tool.
Step 4: Now, start to send and receive message between PC’s RS-232 port and CAN port by the i-7540D. The following figures display the sending and receiving messages CAN card received messages t12381122334455667788 Messages sent from RS-232 port by VxComm technology Figure 6-4: Send Messages from RS-232 to CAN Send messages from CAN card Figure 6-4: RS-232 port received messages Send Messages from RS-232 to CAN i-7540D CAN-Ethernet Gateway User’s Manual (Version 1.
7. Diagnostics and Troubleshooting 7.1 Diagnostics After configuring the VxComm Driver by using the VxComm Utility, the VxComm Driver should work without error. However, users can use a simple test to make sure it's working properly. Note: The test method depends on the user's devices and client programs. Example 1: Loop-Back Testing Step 1: Connect the TXD1 to the RXD1 of the i-7540D.
Step 3: On the Tools menu of the MiniOS7 Utility, and then click the Send232 to open the Send232 application. Step 4: Select the COM4, and then click the Open button to open COM4 of the Host PC. i-7540D CAN-Ethernet Gateway User’s Manual (Version 1.
Step 5: Type any characters in the Send text box, and then click the Send button. The characters will be sent from COM4 of the Host PC to COM1 of the i-7540D (via Path 1), and will be immediately returned from COM1 of the i-7540D to COM4 of the Host PC (via Path 2) then displayed on the Receive text box of the Send232. i-7540D CAN-Ethernet Gateway User’s Manual (Version 1.
Example 2: Close-Loop Testing Step 1: Establish a connection as follows: Labels of CA0910 COM1 COM4 (Real COM) (Virtual COM) COM1 Path 1 RXD1 TXD1 GND RX TX GND Path 2 CA0910 Cable Step 2: On the Tools menu of the MiniOS7 Utility, and then click the Send232 to open the Send232 application. Step 3: Select the COM1, and then click the Open button to open COM4 of the Host PC. Step 4: Set COM1 of the i-7540D as virtual COM4 of the Host PC using the VxComm Utility.
Step 6: Type “COM1” in left hand window, and then click Send button. Data will be sent from COM1 of the Host PC through Path1 to COM1 of the i-7540D and will be immediately returned through Path2 to COM4 of the Host PC. Step 7: Type “Virtual COM” in right hand window, and then click Send button. Data will be sent from COM1 of the Host PC through Path1 to COM1 of the i-7540D and will be immediately returned through Path2 to COM4 of the Host PC. i-7540D CAN-Ethernet Gateway User’s Manual (Version 1.
Example 3: External-Devices Testing Connect 7000 series modules to COM2 of the i-7540D. Set COM2 of the as virtual COM10 of the Host PC using the VxComm Utility. Thus, we can use the DCON Utility to search the 7000 series module through COM10. Note: z z The DCON Utility has to be installed on your Host PC. The installation software can be obtained from the following location: http://ftp.icpdas.
Step2: Establish connection as follows: COM1 (Real COM) COM4 Labels of CA0910 COM1 Path 1 RXD1 TXD1 GND (Virtual COM) RX TX GND Path 2 7000 series module CA0910 Cable 7520 Male Male Step 3: Click the COM Port to choose the COM port number, baud rate, and checksum. For example: COM10, 115200, 19200, 9600 and No-Checksum. (These settings depend on the settings of 7000 series module.) i-7540D CAN-Ethernet Gateway User’s Manual (Version 1.
Step 4: Click the search icon. Step 5: If the VxComm Driver works properly, the DOCN Utility can search the module(s) connected to COM2 of the i-7540D. i-7540D CAN-Ethernet Gateway User’s Manual (Version 1.
7.2 Trouble Shooting Problem 1: The client program fails to open the COM port that was created by the VxComm Driver. Solution 1: Check the power supply, network cable, IP address, subnet mask and gateway of the i-7540D. Problem 2: The client program still fails to open the COM port. Solution 2: Step1: Right click the My Computer icon and select the Manage option. i-7540D CAN-Ethernet Gateway User’s Manual (Version 1.
Step 2: Select the Device Manager icon from the Computer Management program. Step 3: Click Show hidden devices from the View menu i-7540D CAN-Ethernet Gateway User’s Manual (Version 1.
Step 4: Select the Non-Plug and Play Drivers/Ynsernet item. Step 5: Right-click the mouse button on the Ynsernet item and click the Properties. i-7540D CAN-Ethernet Gateway User’s Manual (Version 1.
Step 6: Check that the message “This device is working properly” is displayed. If the driver is shown as not working properly, remove it and then re-install and reconfigure the driver. Problem 3: The client programs successfully open the COM port, but fail to access the device. Solution 3: Check the power supply and wiring (RS-232: RXD, TXD; RS-485: D+, D-; GND) of the device. i-7540D CAN-Ethernet Gateway User’s Manual (Version 1.
Error Code: Only For i-7540D’s COM3 (CAN port) If the Error response function on the i-7540D module is set to be “Yes”(that mean enable) via the i-7540D Utility during the configuration period, the i-7540D will send the error code to the device of the host PC through the Ethernet port 10003 when the i-7540D produces an error message automatically during the operation mode.