
User Manual


ACT-457A Panel PC
Page 23
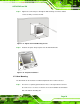
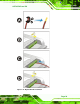
Step 7: Tighten the screws that pass through the wall mounting screw holes until the
screws are firmly secured to the wall.
Figure 2-11: Tighten the In-wall Mounting Screws
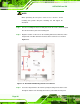
Step 8: Install the faceplate. Snap faceplate onto the ACT-457A frame.Step 0:
Figure 2-12: Faceplate Installation
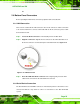
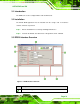
2.7.3 Arm Mounting
The ACT-457A can be mounted on a VESA compliant 75 mm x 75 mm connector.
Step 1: The arm is a separately purchased item. Please correctly mount the arm onto
the surface it uses as a base. To do this, refer to the installation documentation
that came with the mounting arm.