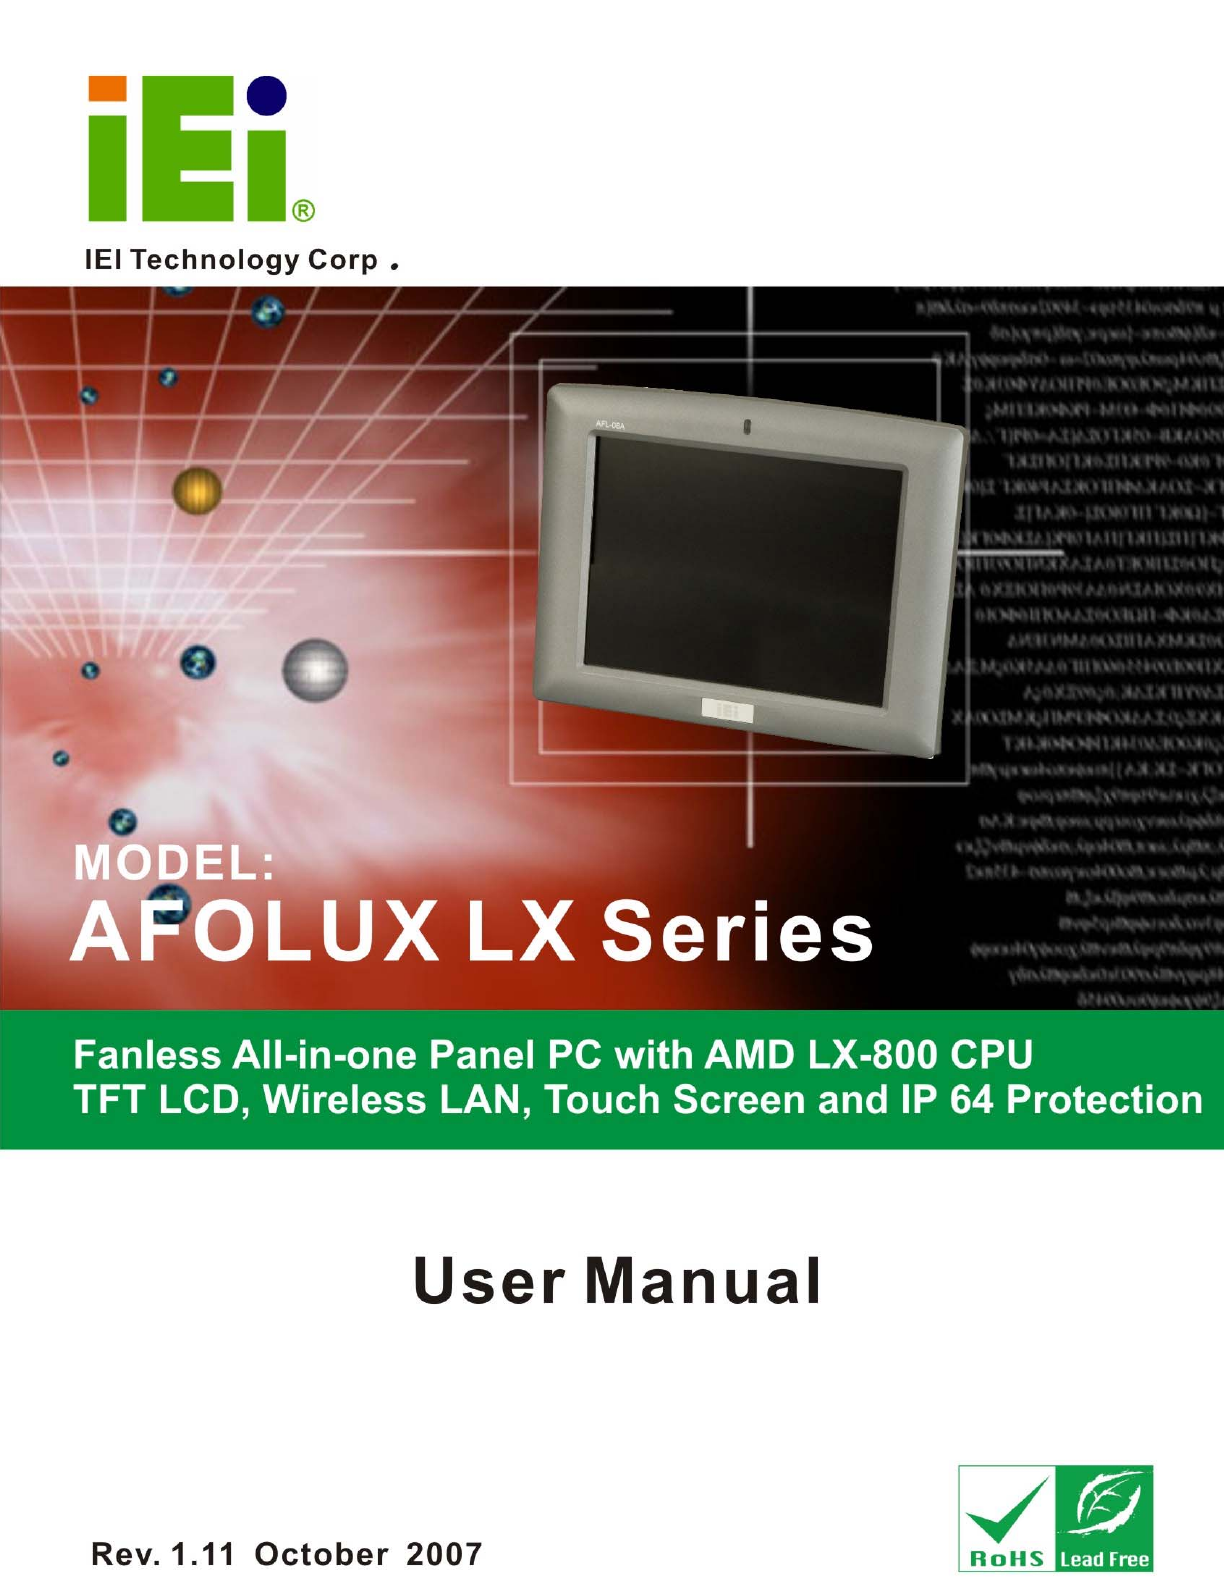
AFOLUX LX Series Flat Panel PC AFOLUX LX Series Flat Panel PC Page i
AFOLUX LX Series Flat Panel PC Revision Date Version Changes 2007-10 1.11 Added new model (AFL-10A-LX) information 2007-08 1.10 - Added Bluetooth module specifications - Added optional GPRS module specifications - Added AT/ATX mode selection description - Modified jumper settings information - Added Watchdog Timer appendix 2007-01 Page ii 1.
AFOLUX LX Series Flat Panel PC Copyright COPYRIGHT NOTICE The information in this document is subject to change without prior notice in order to improve reliability, design and function and does not represent a commitment on the part of the manufacturer. In no event will the manufacturer be liable for direct, indirect, special, incidental, or consequential damages arising out of the use or inability to use the product or documentation, even if advised of the possibility of such damages.
AFOLUX LX Series Flat Panel PC Manual Conventions WARNING! Warnings appear where overlooked details may cause damage to the equipment or result in personal injury. Warnings should be taken seriously. Warnings are easy to recognize. The word “warning” is written as “WARNING,” both capitalized and bold and is followed by text. The text is the warning message. A warning message is shown below: WARNING: This is an example of a warning message.
AFOLUX LX Series Flat Panel PC CAUTION: This is an example of a caution message. Failure to adhere to cautions messages may result in permanent damage to the AFOLUX LX series. Please take caution messages seriously. NOTE: These messages inform the reader of essential but non-critical information. These messages should be read carefully as any directions or instructions contained therein can help avoid making mistakes. Notes are easy to recognize.
AFOLUX LX Series Flat Panel PC Packing List NOTE: If any of the components listed in the checklist below are missing, please do not proceed with the installation. Contact the IEI reseller or vendor you purchased the AFOLUX LX series from or contact an IEI sales representative directly. To contact an IEI sales representative, please send an email to sales@iei.com.tw. The items listed below should all be included in the AFOLUX LX series package.
AFOLUX LX Series Flat Panel PC Table of Contents 1 INTRODUCTION..................................................................................................... 1 1.1 AFOLUX LX SERIES FLAT PANEL PC OVERVIEW..................................................... 2 1.1.1 Model Variations ................................................................................................ 2 1.1.2 Applications .......................................................................................................
AFOLUX LX Series Flat Panel PC 2.3 SYSTEM CHIPSET ..................................................................................................... 19 2.4 GRAPHICS SUPPORT ................................................................................................. 20 2.5 ETHERNET CONTROLLER SPECIFICATIONS ............................................................... 22 2.5.1 Overview .......................................................................................................... 22 2.5.
AFOLUX LX Series Flat Panel PC 4.3 INTERNAL ALUMINUM COVER REMOVAL ................................................................. 50 4.3.1 AFL-07A-LX Internal Aluminum Cover Removal............................................ 51 4.3.2 AFL-08A-LX Internal Aluminum Cover Removal............................................ 52 4.3.3 AFL-10A-LX Internal Aluminum Cover Removal............................................ 54 4.3.4 AFL-12A-LX Internal Aluminum Cover Removal........................................
AFOLUX LX Series Flat Panel PC B.1 BIOS CONFIGURATION OPTIONS ............................................................................. 98 C SOFTWARE DRIVERS ....................................................................................... 101 C.1 REMOTE MANAGEMENT TOOL .............................................................................. 102 C.2 TOUCH PANEL DRIVER .......................................................................................... 102 C.2.1 Introduction ..........
AFOLUX LX Series Flat Panel PC List of Figures Figure 1-1: Front View...................................................................................................4 Figure 1-2: AFL-07A-LX/AFL-08A-LX Rear View ........................................................5 Figure 1-3: AFL-08A-LX Top View ...............................................................................5 Figure 1-4: AFL-08A-LX Side View ..............................................................................
AFOLUX LX Series Flat Panel PC Figure 3-19: AFL-10A-LX/AFL-12A-LX Arm Mounting Retention Screw Holes.....41 Figure 3-20: The Rack/Cabinet Bracket ....................................................................42 Figure 3-21: Secure the Rack/Cabinet Bracket (AFL-10A-LX/AFL-12A-LX) ..........43 Figure 3-22: Install into a Rack/Cabinet ....................................................................44 Figure 3-23: LAN Connection..........................................................................
AFOLUX LX Series Flat Panel PC List of Tables Table 1-1: Model Variations..........................................................................................2 Table 1-2: AFOLUX LX Series System Specifications...............................................9 Table 1-3: Motherboard Specifications .......................................................................9 Table 1-4: TFT LCD Monitor Specifications..............................................................
AFOLUX LX Series Flat Panel PC THIS PAGE IS INTENTIONALLY LEFT BLANK Page xiv
AFOLUX LX Series Flat Panel PC Chapter 1 1 Introduction Page 1
AFOLUX LX Series Flat Panel PC 1.1 AFOLUX LX Series Flat Panel PC Overview The AFOLUX LX series flat panel PC is a flexible, multi-functional and fanless flat panel PC that can be applied in diverse operational environments and implemented in multi-faceted applications. The AFOLUX LX series comes fully kitted with a high-performance motherboard and a host of other peripheral interface connectors. The integrated wireless LAN module and Bluetooth module ensure an uninterrupted wireless connection.
AFOLUX LX Series Flat Panel PC 1.1.2 Applications The AFOLUX LX series all-in-one panel PC is designed for multiple applications. Its durability and strength makes it an ideal choice for public access computers.
AFOLUX LX Series Flat Panel PC Wireless LAN integrated with PIFA antenna Dual 10/100Mbps Ethernet support One CompactFlash® Type II socket support Simplified installation process RoHS compliance 1.2 External Overview 1.2.1 General Description The AFOLUX LX series is a stylish flat panel PC that comprises of a screen, rear panel, top panel, bottom panel and two side panels (left and right). An ABS/PC plastic front frame surrounds the front screen.
AFOLUX LX Series Flat Panel PC 1.2.3 Rear Panel The rear panel provides access to retention screw holes that support the wall mounting. Refer to Figure 1-2. Figure 1-2: AFL-07A-LX/AFL-08A-LX Rear View 1.2.4 Top Panel and Side Panels The top panel and side panels of AFOLUX LX series provides access to slots that support panel mount and rack mount (Figure 1-3 and Figure 1-4).
AFOLUX LX Series Flat Panel PC Figure 1-4: AFL-08A-LX Side View 1.2.5 Bottom Panel The bottom panel of the AFOLUX LX series has the following I/O interfaces (Figure 1-5): 1 x RS-232 serial port connector 1 x RS-232 or RS-422/485 serial port connector (selected by a jumper) 1 x AC power adapter connector 2 x RJ-45 10/100Mbps Ethernet connectors 2 x USB 2.
AFOLUX LX Series Flat Panel PC 1.3 Internal Overview The AFOLUX LX series internal components are protected in a plastic back cover. An AT/ATX switch is in the left side of the aluminum chassis inside the plastic cover. Other internal components, the motherboard, wireless LAN module and DDR memory module, are installed in the aluminum chassis on a metal sheet that protects the rear of the TFT LCD screen. Below the metal sheet is a circuit board that is connected to the screen and the motherboard. 1.
AFOLUX LX Series Flat Panel PC SPECIFICATION AFL-07A-LX AFL-08A-LX AFL-10A-LX AFL-12A-LX Resolution 800 x 480 800 x 600 800 x 600 1024 x 768 Brightness 350cd/m2 220cd/m2 or 400cd/m2 450cd/m2 450cd/m2 Contrast Ratio 400:1 500:1 500:1 700:1 Viewing Angle (H-V) 140/100 130/110 120/100 160/160 Backlight MTBF 30000 20000 50000 50000 Touch Screen 4-wire resistive type 4-wire resistive type 5-wire resistive type 5-wire resistive type Extension 1 x Mini PCI (for wireless LAN module)
AFOLUX LX Series Flat Panel PC SPECIFICATION Front Panel AFL-07A-LX AFL-08A-LX AFL-10A-LX AFL-12A-LX IP 64 compliant Protection Safety Meets UL / CE / CCC EMC Meets CE / FCC class B Table 1-2: AFOLUX LX Series System Specifications 1.4.3 Motherboard Specifications The AFOLUX LX series come with an AFLMB-LX800 motherboard. The technical specifications of the motherboard are listed in Table 1-3.
AFOLUX LX Series Flat Panel PC 1.4.4 Flat Panel Screen Specifications The AFOLUX LX series come with a TFT LCD monitor at the front of the flat panel PC (see Figure 1-1). The specifications for the LCD monitor are shown in Table 1-4 below. SPECIFICATION Model AFL-07A-LX DATA IMAGE AFL-08A-LX AUO-G084SN03 AFL-10A-LX Toshiba AFL-12A-LX CMO-G121X1-L01 LTA104D182F FG070050DNCWAG01 Size 7” 8.4” 10.4” 12.
AFOLUX LX Series Flat Panel PC Viewing Area (mm) 154.90 x 93.94 130.75 x 173.38 219.8 x 166.8 188.0 x 250.0 Active Area (mm) 152.40 x 91.44 127.78 x 170.38 212.1 x 159.3 185.0 x 246.0 Total Transmission 78% Maximum Voltage DC7V Connector Type FPC. Operating Temperature -10°C ~ 60°C Operating Humidity 20% ~ 90% RH Storage Temperature -20°C ~ 70°C Storage Humidity 20% ~ 90% RH Dimensions 165 x 104 x 1.4 -10°C ~ 40°C 145.5 x 188 x 2.1 238.8x 188.7 x 2.6 204 x 268 x 2.
AFOLUX LX Series Flat Panel PC RF Output Power Class 2 (under 4dBm) Antenna Terminal 50 Ohms DC Power DC 3.3V or DC 5V I/O Interface USB 2.0 interface Two GPIO Interface LED link indicator interface Dimensions 35mm x 11mm Operating System Windows XP, Windows 2000, Windows 98SE, Windows Me Table 1-6: Bluetooth Module Specifications 1.4.7 Optional GPRS Module Specifications The GPRS module is one of the OEM options for the AFOLUX LX series.
AFOLUX LX Series Flat Panel PC 1.5 Dimensions 1.5.1 AFL-07A-LX Dimensions The dimensions of the AFL-07A-LX flat panel PC are shown in Figure 1-6 below.
AFOLUX LX Series Flat Panel PC 1.5.2 AFL-08A-LX Dimensions The dimensions of the AFL-08A-LX flat panel PC are shown in Figure 1-7 below.
AFOLUX LX Series Flat Panel PC 1.5.3 AFL-10A-LX Dimensions The dimensions of the AFL-10A-LX flat panel PC are shown in Figure 1-7 below.
AFOLUX LX Series Flat Panel PC 1.5.4 AFL-12A-LX Dimensions The dimensions of the AFL-12A-LX flat panel PC are shown in Figure 1-7 below.
AFOLUX LX Series Flat Panel PC Chapter 2 2 Motherboard Page 17
AFOLUX LX Series Flat Panel PC 2.1 Introduction The AFOLUX LX series flat screen PC contains the AFLMB-LX800 motherboard. The motherboard is the heart of any computer and is responsible for transmitting, receiving and processing data as well as driving the different onboard devices. This chapter gives a brief introduction to the AFLMB-LX800 motherboard. 2.2 CPU Support The AFLMB-LX800 motherboard comes with a preinstalled AMD® Geode™ LX 800 500MHz CPU. 2.2.
AFOLUX LX Series Flat Panel PC 2.2.2 AMD® Geode™ LX 800 500MHz Power Management The power management for the 500MHz AMD® Geode™ LX 800 is listed below: 1.8W Typical (3.9W TDP) @ 500MHz GeodeLink active hardware power management Hardware support for standard ACPI software power management I/O companion SUSP#/SUSPA# power controls Lower power I/O Wakeup on SMI/INTR 2.3 System Chipset The AFLMB-LX800 motherboardl has a preinstalled AMD® Geode™ CS5536 system chipset.
AFOLUX LX Series Flat Panel PC Audio Codec 97 (AC97) Controller o AC97 specification v2.3 compliant interface to multiple audio codecs: Serial In, Serial Out, Sync Out, Bit Clock In o Legacy “PC Beep” support Diverse Device o o o o o o o o o 82xx Legacy Devices IR Communication Port System Management Bus (SMB) Controller LPC (Low Pin Count) Port General Purpose I/Os (GPIOs) 8 Multi-Function General Purpose Timers (MFGPTs) Real-Time Clock (RTC) with CMOS RAM Power Management Controller ACPI v2.
AFOLUX LX Series Flat Panel PC Feature AMD Geode™ LX Processor Color Depth 8, 16, 32 bpp (A) RGB 4 and 8-bit indexed ROPs 256 (2-src, dest and pattern) BLT Buffers FIFOs in Graphics Processor BLT Splitting Managed by hardware Video Synchronized BLT/Vector Throttle by VBLANK Bresenham Lines Yes Patterned (stippled) Lines Yes Screen to Screen BLT Yes Screen to Screen BLT with mono expansion Yes Memory to Screen BLT Yes (throttled rep movs writes) Accelerated Text No Pattern Size (Mono)
AFOLUX LX Series Flat Panel PC 2.5 Ethernet Controller Specifications 2.5.1 Overview The Realtek RTL8100C(L) is a highly integrated and cost-effective single-chip Fast Ethernet controller. It is enhanced with an ACPI (Advanced Configuration Power Interface) management function for PCI in order to provide efficient power management for advanced operating systems with OSPM (Operating System Directed Power Management).
AFOLUX LX Series Flat Panel PC Provides LED pins for network operation status indication 2.5/3.3V power supply with 5V tolerant I/Os 2.6 Peripheral Device Interfaces, Connectors, and Slots The peripheral device connectors, interfaces and slots on the WAFER-LX motherboard are listed in the sections below. 2.6.1 OEM Options Many of the peripheral device connectors listed below are not connected to any devices. These connectors are reserved for OEM customizations.
AFOLUX LX Series Flat Panel PC Figure 2-1: AFLMB-LX800 Connector Overview 2.6.4 External Peripheral Device Connectors The peripheral device connectors listed below are located on the rear panel of the AFLMB-LX800 motherboard.
AFOLUX LX Series Flat Panel PC Chapter 3 3 Installation Page 25
AFOLUX LX Series Flat Panel PC 3.1 Installation Precautions When installing the flat panel PC, please follow the precautions listed below: Power turned off: When installing the flat panel PC, make sure the power is off. Failing to turn off the power may cause severe injury to the body and/or damage to the system. Certified Engineers: Only certified engineers should install and modify onboard functionalities. Mounting: The flat panel PC is a heavy device.
AFOLUX LX Series Flat Panel PC 3.3 Installation and Configuration Steps The following installation steps must be followed. Step 1: Unpack the flat panel PC Step 2: Install CF card Step 3: Install HDD (AFL-12A-LX model only) Step 4: Mount the flat panel PC Step 5: Connect peripheral devices to the bottom panel of the flat panel PC Step 6: Configure the systemStep 0: 3.
AFOLUX LX Series Flat Panel PC Step 6: Pull the plastic cover off the flat panel PC. Step 7: Make sure all the components listed in the packing list are present. Step 0: 3.4.
AFOLUX LX Series Flat Panel PC 1 1GB CompactFlash® card with Windows XPE pre-installed If any of these items are missing or damaged, contact the distributor or sales representative immediately. 3.5 CF Card Installation The AFOLUX LX series has one CF Type II slot inside the rear panel. To install the CF card, follow the instructions below. Step 1: Remove the nine retention screws (Figure 3-1) and lift the cover off the flat panel PC.
AFOLUX LX Series Flat Panel PC Figure 3-2: AFL-08A-LX Plastic Back Cover Removal Step 3: Locate the CF slot. Insert a CF card into the slot (Figure 3-3). Figure 3-3: CF Card Location Step 4: Replace the plastic back cover. For AFL-08A-LX, more strength is required when pushing the bottom part of the cover down to the chassis (Figure 3-4). Figure 3-4: AFL-08A-LX Plastic Back Cover Replacement Step 5: Once replaced reinsert the nine previously removed retention screws.
AFOLUX LX Series Flat Panel PC 3.6 HDD Installation (AF-12A-LX Only) To install the HDD into the AF-12A-LX, please follow the steps below: Step 1: Remove the plastic back cover. See Section 3.5 above. Step 2: Remove the eight retention screws securing the internal aluminum cover (Figure 3-5). Figure 3-5: AFL-12A-LX Aluminum Back Cover Retention Screws Step 3: Remove the four hexagonal pillars on the bottom panel.
AFOLUX LX Series Flat Panel PC Figure 3-7: AFL-12A-LX HDD Bracket Retention Screws Step 7: Attach the HDD brackets to the HDD. To do this, align the four retention screw holes in the both sides of the HDD bracket with the retention screw holes on the sides of the HDD. Insert four retention screws into the HDD bracket (Figure 3-8). Figure 3-8: AF-12A-LX HDD Retention Screws Step 8: Connect the IDE cable to the rear of HDD.
AFOLUX LX Series Flat Panel PC 3.7 AT/ATX Mode Selection AT and ATX power modes can both be used on the AFOLUX LX series. The selection is made through an AT/ATX switch on the aluminum chassis inside the plastic back cover (Figure 3-9). To select AT mode or ATX mode, follow the steps below. Step 1: Remove the plastic back cover. See Section 3.5 above. Step 2: Locate the AT/ATX switch on the aluminum chassis (Figure 3-9). Figure 3-9: AT/ATX Switch Location Step 3: Adjust the AT/ATX switch. Step 0: 3.7.
AFOLUX LX Series Flat Panel PC 3.7.2 ATX Power Mode With the ATX mode selected, the AFOLUX LX panel PC goes in a standby mode when it is turned off. The panel PC can be easily turned on via network or a power switch in standby mode. Remote power control is perfect for advertising applications since the broadcasting time for each panel PC can be set individually and controlled remotely. Other possible application includes Security surveillance Point-of-Sale (POS) Advertising terminal 3.
AFOLUX LX Series Flat Panel PC Step 3: Drill four pilot holes at the marked locations on the wall for the bracket retention screws. Step 4: Align the wall-mounting bracket screw holes with the pilot holes. Step 5: Secure the mounting-bracket to the wall by inserting the retention screws into the four pilot holes and tightening them (Figure 3-10).
AFOLUX LX Series Flat Panel PC Figure 3-11: Chassis Support Screws NOTE: In the diagram below the bracket is already installed on the wall. Step 9: Secure the panel PC by fastening the retention screw of the wall-mounting bracket. (Figure 3-12).
AFOLUX LX Series Flat Panel PC Figure 3-12: Secure the Panel PC 3.8.2 Panel Mounting To mount the AFOLUX LX series flat panel PC into a panel, please follow the steps below. Step 1: Select the position on the panel to mount the flat panel PC. Step 2: Cut out a section from the panel that corresponds to the rear panel dimensions of the flat panel PC.
AFOLUX LX Series Flat Panel PC Figure 3-13: AFL-07A-LX Panel Opening Figure 3-14: AFL-08A-LX Panel Opening Figure 3-15: AFL-10A-LX Panel Opening Page 38
AFOLUX LX Series Flat Panel PC Figure 3-16: AFL-12A-LX Panel Opening Step 3: Slide the flat panel PC through the hole until the aluminum frame is flush against the panel. Step 4: Insert the panel mounting clamps into the pre-formed holes along the edges of the chassis, behind the aluminum frame. There are a total of 4 panel mounting clamps for AFL-07A-LX/ AFL-08A-LX and 6 panel mounting clamps for AFL-10A-LX/AFL-12A-LX.
AFOLUX LX Series Flat Panel PC Figure 3-17: Tighten the Panel Mounting Clamp Screws (AFL-10A/12A-LX) 3.8.3 Arm Mounting The AFOLUX LX series is VESA (Video Electronics Standards Association) compliant and can be mounted on an arm with a 75mm or 100mm interface pad. To mount the AFOLUX LX series on an arm, please follow the steps below. Step 1: The arm is a separately purchased item. Please correctly mount the arm onto the surface it uses as a base.
AFOLUX LX Series Flat Panel PC Step 2: Once the mounting arm has been firmly attached to the surface, lift the flat panel PC onto the interface pad of the mounting arm. Step 3: Align the retention screw holes on the mounting arm interface with those in the flat panel PC. The AFL-07A-LX/ AFL-07A-LX arm mount retention screw holes are shown in Figure 3-18 and the AFL-10A-LX/AFL-12A-LX are shown in Figure 3-19.
AFOLUX LX Series Flat Panel PC Step 4: Secure the flat panel PC to the interface pad by inserting four retention screws through the bottom of the mounting arm interface pad and into the flat panel PC. Step 0: 3.8.4 Cabinet and Rack Installation The AFL LX series flat panel PC can be installed into a cabinet or rack. The installation procedures are similar to the panel mounting installation.
AFOLUX LX Series Flat Panel PC mounting clamps for AFL-07A-LX/ AFL-08A-LX and 6 rack mounting clamps for AFL-10A-LX/AFL-12A-LX. Step 3: Tighten the screws that pass through the rack mounting clamps until the plastic caps at the front of all the screws are firmly secured to the bracket (Figure 3-21). Figure 3-21: Secure the Rack/Cabinet Bracket (AFL-10A-LX/AFL-12A-LX) Step 4: Slide the flat panel PC with the attached rack/cabinet bracket into a rack or cabinet (Figure 3-22).
AFOLUX LX Series Flat Panel PC Figure 3-22: Install into a Rack/Cabinet Step 5: Once the flat panel PC with the attached rack/cabinet bracket has been properly inserted into the rack or cabinet, secure the front of the rack/cabinet bracket to the front of the rack or cabinet (Figure 3-22).Step 0: 3.9 Bottom Panel Connectors 3.9.1 LAN Connection There are two external RJ-45 LAN connectors. The RJ-45 connectors enable connection to an external network.
AFOLUX LX Series Flat Panel PC Figure 3-23: LAN Connection Step 3: Insert the LAN cable RJ-45 connector. Once aligned, gently insert the LAN cable RJ-45 connector into the onboard RJ-45 connector. Step 0: 3.9.2 Serial Device Connection The AFOLUX LX Series has two single female DB-9 connectors on the bottom panel for a serial device. Follow the steps below to connect a serial device to the AFOLUX LX Series panel PC. Step 1: Locate the DB-9 connector.
AFOLUX LX Series Flat Panel PC Figure 3-24: Serial Device Connector Step 3: Secure the connector. Secure the serial device connector to the external interface by tightening the two retention screws on either side of the connector.
AFOLUX LX Series Flat Panel PC 3.9.3 USB Device Connection There are four external USB 2.0 connectors. All connectors are perpendicular to the AFOLUX LX Series. To connect a USB 2.0 or USB 1.1 device, please follow the instructions below. Step 1: Located the USB connectors. The locations of the USB connectors are shown in Chapter 2. Step 2: Align the connectors. Align the USB device connector with one of the connectors on the bottom panel. See Figure 3-25.
AFOLUX LX Series Flat Panel PC THIS PAGE IS INTENTIONALLY LEFT BLANK Page 48
AFOLUX LX Series Flat Panel PC Chapter 4 4 System Maintenance Page 49
AFOLUX LX Series Flat Panel PC 4.1 System Maintenance Introduction If the components of the AFOLUX LX series fail they must be replaced, such as the wireless LAN module or the motherboard. Please contact the system reseller or vendor to purchase the replacement parts. Back cover removal instructions and jumper settings for the AFOLUX LX series are described below. 4.2 Motherboard Replacement A user cannot replace a motherboard. If the motherboard fails it must be shipped back to IEI to be replaced.
AFOLUX LX Series Flat Panel PC Motherboard DDR memory module Wireless LAN module Inverter The internal aluminum back cover of the AFOLUX LX series must be removed. To remove the aluminum back cover, please follow the steps below. 4.3.1 AFL-07A-LX Internal Aluminum Cover Removal Step 1: Remove the two retention screws securing the internal aluminum cover (Figure 4-1). Figure 4-1: AFL-07A-LX Aluminum Back Cover Retention Screws Step 2: Remove the four hexagonal pillars on the bottom panel (Figure 4-2).
AFOLUX LX Series Flat Panel PC 4.3.2 AFL-08A-LX Internal Aluminum Cover Removal Step 1: Remove the four retention screws (Figure 4-3). Figure 4-3: AFL-08A-LX Aluminum Back Cover Retention Screws Step 2: Remove the four hexagonal pillars on the bottom panel (Figure 4-4). Figure 4-4: Four Hexagonal Pillars on the Bottom Panel (AFL-08A-LX) Step 3: Detach the tapes securing the wireless module cables on the chassis (Figure 4-5).
AFOLUX LX Series Flat Panel PC Figure 4-5: Wireless Module Cables Step 5: Push the external interface connector apart from the aluminum cover and lift the cover (Figure 4-6). Figure 4-6: The Internal Aluminum Cover Removal Step 6: Disconnect the power switch cable (Figure 4-7) from the motherboard and remove the aluminum cover.
AFOLUX LX Series Flat Panel PC Figure 4-7: Power Switch Cable 4.3.3 AFL-10A-LX Internal Aluminum Cover Removal Step 1: Remove the eight retention screws securing the internal aluminum cover (Figure 4-10). Figure 4-8: AFL-10A-LX Aluminum Back Cover Retention Screws Step 2: Remove the four hexagonal pillars on the bottom panel (Figure 4-11).
AFOLUX LX Series Flat Panel PC Step 3: Push the external interface connector apart from the aluminum cover and lift the aluminum cover off the AFL-10A-LX. Step 4: Disconnect the power switch cable from the motherboard and remove the aluminum cover. Step 0: 4.3.4 AFL-12A-LX Internal Aluminum Cover Removal Step 1: Remove the eight retention screws securing the internal aluminum cover (Figure 4-10).
AFOLUX LX Series Flat Panel PC 4.4 Memory Module Replacement The flat panel PC is preinstalled with a 256MB/512MB DDR memory module. If the memory module is fail, follow the instructions below to replace the memory module. Step 1: Remove the back cover. See Section 3.5 above. Step 2: Remove the internal aluminum back cover. See Section 4.3 above. Step 3: Locate the DDR memory module on the motherboard of the flat panel PC (Figure 4-12).
AFOLUX LX Series Flat Panel PC Figure 4-13: DDR SO-DIMM Module Installation 4.5 Jumper Settings NOTE: A jumper is a metal bridge that is used to close an electrical circuit. It consists of two metal pins and a small metal clip (often protected by a plastic cover) that slides over the pins to connect them. To CLOSE/SHORT a jumper means connecting the pins of the jumper with the plastic clip and to OPEN a jumper means removing the plastic clip from a Jumper jumper.
AFOLUX LX Series Flat Panel PC Figure 4-14: Jumper Locations 4.5.1 JP3: COM3 Pin-9 Signal Select Jumper Settings The COM3 pin-9 signal can be selected as 12V, 5V or Ring.
AFOLUX LX Series Flat Panel PC 4.5.2 JP4: COM1 and COM2 Pin-9 Signal Select Jumper Settings The COM1 and COM2 pin-9 signal can be selected as 12V, 5V or Ring.
AFOLUX LX Series Flat Panel PC 4.5.4 JP6: COM2 Mode Select Jumper Settings The COM2 can be selected as RS-232 or RS-485.
AFOLUX LX Series Flat Panel PC Chapter 5 5 Award BIOS Setup Page 61
AFOLUX LX Series Flat Panel PC 5.1 Introduction A licensed copy of Phoenix Award BIOS is preprogrammed into the ROM BIOS. The BIOS setup program allows users to modify the basic system configuration. This chapter describes how to access the BIOS setup program and the configuration options that may be changed. 5.1.1 Starting Setup The Phoenix Award BIOS is activated when the computer is turned on. The setup program can be activated in one of two ways. 1.
AFOLUX LX Series Flat Panel PC F2 Item help F5 Previous values for the page menu items F6 Fail-safe defaults for the current page menu items F7 Optimized defaults for the current page menu items F9 Menu in BIOS F10 Save changes and Exit BIOS Table 5-1: BIOS Navigation Keys 5.1.3 Getting Help When F1 is pressed a small help window describing the appropriate keys to use and the possible selections for the highlighted item appears. To exit the Help Window press ESC or the F1 key again. 5.1.
AFOLUX LX Series Flat Panel PC NOTE: The following sections will completely describe the menus listed below and the configuration options available to users. The following menu options are seen in BIOS Menu 1. Standard CMOS Features: Changes the basic system configuration. Advanced BIOS Features: Changes the advanced system settings. Advanced Chipset Features: Changes the chipset configuration features. Integrated Peripherals: Changes the settings for integrated peripherals.
AFOLUX LX Series Flat Panel PC press ENTER in the “Enter Password: ” dialogue box, then press any key in the “Password Disabled !!!” dialogue box. Set User Password Use the Set User Password option to set the user password. By default no user password is set. To install a user password, select this field and enter the password. After this option is selected, a red dialogue box appears with “Enter Password: ”. Type the password and press ENTER.
AFOLUX LX Series Flat Panel PC BIOS Menu 2: Standard CMOS Features Date [Day mm:dd:yyyy] Use the Date option to set the system date. Time [hh/mm/ss] Use the Time option to set the system time. IDE Master and IDE Slave When entering setup, BIOS auto detects the presence of IDE devices. The Standard CMOS Features menu shows the status of the auto detected IDE devices.
AFOLUX LX Series Flat Panel PC IDE device configurations are changed or set in the IDE Configuration menu. If an IDE device is detected, and one of the above listed two BIOS configuration options is selected, the IDE configuration options shown in Section 5.2.1 appear. Halt On [All, But Keyboard] Use the Halt On option to specify what errors detected during the power up process stop the system. Whenever BIOS detects a non-fatal error the All Errors system is stopped and the user prompted.
AFOLUX LX Series Flat Panel PC 5.2.1 IDE Primary Master/Slave Use the IDE Primary Master/Slave menu to set or change the master/slave IDE configurations. IDE HDD Auto-Detection [Press Enter] Use the IDE HDD Auto-Detection option to enable BIOS to automatically detect the IDE settings. Select IDE HDD Auto-Detection and press ENTER. BIOS automatically detects the HDD type. Do not set this option manually.
AFOLUX LX Series Flat Panel PC translation modes. Most systems now use hard drives with large capacities and therefore either the LBA translation mode or auto mode should be selected. Select this mode if the HDD capacity is less than CHS 504MB. Select this mode if the HDD capacity is more than LBA 8.4GB. This mode is an extended ECHS mode and while it Large supports HDDs larger than 504MB, it is not recommended. Auto (Default) If you are unsure of what access mode to set, select this option.
AFOLUX LX Series Flat Panel PC Landing Zone The Landing Zone specification indicates where the disk head will park itself after the system powers off. Sector The Sector specification indicates how many logical sectors the HDD has been divided into. 5.3 Advanced BIOS Features Use the Advanced BIOS Features menu (BIOS Menu 3) to configure the CPU and peripheral device configuration options.
AFOLUX LX Series Flat Panel PC Virus Warning [Disabled] NOTE: Many disk diagnostic programs can cause the above warning message to appear when the program attempts to access the boot sector table. If you are running such a program, it is recommended that the virus protection function be disabled beforehand. Use the Virus Warning option to enable BIOS to monitor the boot sector and partition table of the HDD for any attempted modification.
AFOLUX LX Series Flat Panel PC Disabled (Default) The system cannot be booted from a remote system through the LAN. Enabled The system can be booted from a remote system through the LAN. Boot Device Use the Boot Device options to select the order of the devices the system boots from.
AFOLUX LX Series Flat Panel PC Boot Other Device [Enabled] Use the Boot Other Device option to determine whether the system uses a second or third boot device if the first boot device is not found. The system does not look for second and third boot Disabled devices if the first one is not found. Enabled (Default) The system looks for second and third boot devices if the first one is not found.
AFOLUX LX Series Flat Panel PC Disabled (Default) Disables the typematic rate. Enables the typematic rate. Enabled Typematic Rate (Chars/sec) [6] The Typematic Rate option can only be configured if the Typematic Rate Setting is enabled. Use the Typematic Rate option to specify the rate keys are accelerated.
AFOLUX LX Series Flat Panel PC Security Option [Setup] Use the Security Option to limit access to both the system and Setup, or just Setup. Setup (Default) The system does not boot and access to Setup is denied if the correct password is not entered at the prompt. The system boots, but access to Setup is denied if the System correct password is not entered at the prompt. NOTE: To disable security, select the password setting in the Main Menu.
AFOLUX LX Series Flat Panel PC Enabled EPA logo appears during boot up. 5.4 Advanced Chipset Features Use the Advanced Chipset Features menu (BIOS Menu 4) to change chipset configuration options. BIOS Menu 4: Advanced Chipset Features CPU Frequency [500MHz] Use the CPU Frequency option to set the CPU frequency.
AFOLUX LX Series Flat Panel PC 433MHz 500MHz (Default) Memory Frequency [Auto] Use the Memory Frequency option to set the frequency of the installed DRAM modules. The Memory Frequency options are: Auto (Default) 100MHz 133MHz 166MHz 200MHz Video Memory Size [32M] Use the Video Memory Size option to determine how much memory is allocated to the video graphics device.
AFOLUX LX Series Flat Panel PC 5.5 Integrated Peripherals Use the Integrated Peripherals menu (BIOS Menu 5) to change the configuration options for the attached peripheral devices. BIOS Menu 5: Integrated Peripherals On-Chip IDE Channel 1 [Enabled] Use the On-Chip IDE Channel 1 option to specify if the system uses the integrated primary IDE channel or not. The primary IDE channel is not used. Disabled Enabled Page 78 (Default) The primary IDE channel is used.
AFOLUX LX Series Flat Panel PC Drive PIO Mode [Auto] Use the Drive PIO Mode options below to select the Programmed Input/Output (PIO) mode for the following HDDs: Master Drive PIO Mode Slave Drive PIO Mode (Default) Auto The computer selects the correct mode. Mode 0 PIO mode 0 selected with a maximum transfer rate of 3.3MBps. Mode 1 PIO mode 1 selected with a maximum transfer rate of 5.2MBps. Mode 2 PIO mode 2 selected with a maximum transfer rate of 8.3MBps.
AFOLUX LX Series Flat Panel PC use PIO mode transfers. Enabled (Default) All IDE drive DMA transfers are enabled. IDE HDD Block Mode [Enabled] If the drive connected to the system supports block mode, use the IDE HDD Block Mode option to enable the system to detect the optimal number of block read/writes per sector the system IDE drive can support. Block mode is also called block transfer, multiple commands, or multiple sector read/write. Block mode is not supported.
AFOLUX LX Series Flat Panel PC 3E8/IRQ4 2E8/IRQ3 Auto Touch controller Port [2E8] Use the Touch controller Port option to select the I/O address for the onboard touch panel controller port. The touch panel controller port can be disabled or the I/O address can be automatically selected by the BIOS. The Touch controller Port options are: Disabled 3F8 2F8 3E8 2E8 (Default) Touch controller Use IRQ [IRQ7] Use the Touch controller Use IRQ option to select the IRQ for the onboard touch panel controller port.
AFOLUX LX Series Flat Panel PC BIOS Menu 6: Power Management Setup ACPI Function [Enabled] Use the ACPI Function to enable the ACPI (Advanced Configuration and Power Interface) function. ACPI function disabled. Disabled Enabled Page 82 (Default) ACPI function enabled.
AFOLUX LX Series Flat Panel PC ACPI Suspend Type [S1(POS)] Use the ACPI Suspend Type BIOS option to specify the sleep state the system enters when not being used. S1 (POS) (Default) System appears off. The CPU is stopped; RAM is refreshed; the system is running in a low power mode. System appears off. The CPU has no power; RAM is in S3 (STR) slow refresh; the power supply is in a reduced power mode.
AFOLUX LX Series Flat Panel PC Disabled (Default) 1 Sec 5 Sec 10 Sec 15 Sec 30 Sec 45 Sec 1 Min 5 Min 10 Min 15 Min 30 Min 45 Min 60 Min 90 Min 120 Min x Suspend Mode [Disabled] The Suspend Mode option can only be selected if the Power Management option is set to Legacy. The Suspend Mode specifies the amount of time the system can be inactive before the system enters suspend mode.
AFOLUX LX Series Flat Panel PC 45 Min 60 Min 90 Min 120 Min Modem Use of IRQ Use the Modem Use of IRQ to select the IRQ address for the system modem. The following IRQ addresses are available. N/A 3 (Default) 4 5 7 9 10 11 Wake-on Lan Control [Disabled] Use the Wake-on Lan Control option to enable activity on the LAN to rouse the system from a suspend or doze state. Disabled (Default) Wake event not generated by LAN activity. Wake event generated by LAN activity.
AFOLUX LX Series Flat Panel PC down longer than four seconds otherwise the system enters a low power usage state. Power-On by Alarm [Disabled] Use the Power-On by Alarm option to specify when the computer is roused from a suspended state.
AFOLUX LX Series Flat Panel PC BIOS Menu 7: IRQ Wakeup Events The following IRQs can be used to generate wake events: IRQ1 (KeyBoard) ON IRQ3 (COM 2) OFF IRQ4 (COM 1) OFF IRQ5 (LPT 2) OFF IRQ6 (Floppy Disk) OFF IRQ7 (LPT 1) OFF IRQ8 (RTC Alarm) OFF IRQ9 (IRQ2 Redir) OFF IRQ10 (Reserved) OFF IRQ11 (Reserved) OFF IRQ12 (PS/2 Mouse) OFF IRQ13 (Coprocessor) OFF IRQ14 (Hard Disk) OFF IRQ15 (Reserved) OFF Page 87
AFOLUX LX Series Flat Panel PC 5.7 PnP/PCI Configurations Use the PnP/PCI Configurations menu (BIOS Menu 8) to set the plug and play, and PCI options. BIOS Menu 8: PnP/PCI Configurations PNP OS Installed [No] The PNP OS Installed option determines whether the Plug and Play devices connected to the system are configured by the operating system or the BIOS. No (Default) If the operating system does not meet the Plug and Play specifications, BIOS configures all the devices in the system.
AFOLUX LX Series Flat Panel PC Init Display First [Onboard] Use the Init Display First option to select the primary display device. The display connected to the PCI slot is the primary PCI Slot display. Onboard (Default) The display connected to the onboard connector is the primary display. Reset Configuration Data [Disabled] Use the Reset Configuration Data option to reset the Extended System Configuration Data (ESCD) when exiting setup if booting problems occur after a new add-on is installed.
AFOLUX LX Series Flat Panel PC The IRQ Resources menu has the following options: IRQ-3 assigned to IRQ-4 assigned to IRQ-10 assigned to IRQ-11 assigned to The above options all have the following default options. PCI Device (Default) The IRQ is assigned to legacy ISA for devices compliant with the original PC AT bus specification, PCI/ISA PNP for devices compliant with the Plug and Play standard whether designed for PCI or ISA bus architecture. The IRQ is reserved by BIOS.
AFOLUX LX Series Flat Panel PC palette on the graphics card. Enabled Allows the graphics devices to examine the VGA palette on the graphics card. 5.8 PC Health Status The PC Health Status menu (BIOS Menu 9) has no user configurable options, but shows system operating parameters that are essential to the stable operation of the system. BIOS Menu 9: PC Health Status The following system parameters are monitored by the PC Health Status menu. Voltages The following voltages are monitored: Vcore VccMem +3.
AFOLUX LX Series Flat Panel PC +12 V VBAT(V) 5VSB(V) Page 92
AFOLUX LX Series Flat Panel PC Appendix A A Safety Precautions Page 93
AFOLUX LX Series Flat Panel PC WARNING: The precautions outlined in this chapter should be strictly followed. Failure to follow these precautions may result in permanent damage to the AFOLUX LX series. A.1 Safety Precautions Please follow the safety precautions outlined in the sections that follow: A.1.1 General Safety Precautions Please ensure the following safety precautions are adhered to at all times. Follow the electrostatic precautions outlined below whenever the AFOLUX LX series is opened.
AFOLUX LX Series Flat Panel PC A.1.2 Anti-static Precautions WARNING: Failure to take ESD precautions during the installation of the AFOLUX LX series may result in permanent damage to the AFOLUX LX series and severe injury to the user. Electrostatic discharge (ESD) can cause serious damage to electronic components, including the AFOLUX LX series. Dry climates are especially susceptible to ESD.
AFOLUX LX Series Flat Panel PC components. To clean the LCD panel, gently wipe it with a piece of soft dry cloth or a slightly moistened cloth. The interior of the AFOLUX LX series does not require cleaning. Keep fluids away from the AFOLUX LX series interior. Be cautious of all small removable components when vacuuming the AFOLUX LX series. Turn the AFOLUX LX series off before cleaning the AFOLUX LX series. Never drop any objects or liquids through the openings of the AFOLUX LX series.
AFOLUX LX Series Flat Panel PC Appendix B B BIOS Configuration Options Page 97
AFOLUX LX Series Flat Panel PC B.1 BIOS Configuration Options Below is a list of BIOS configuration options described in Chapter 5. BIOS Menu 1: Award BIOS CMOS Setup Utility .......................................................63 Load Fail-Safe Defaults .........................................................................................64 Load Optimized Defaults.......................................................................................64 Set Supervisor Password ........................
AFOLUX LX Series Flat Panel PC Precomp...................................................................................................................... 69 Landing Zone ............................................................................................................. 70 Sector.......................................................................................................................... 70 BIOS Menu 3: Advanced BIOS Features...........................................................
AFOLUX LX Series Flat Panel PC IDE HDD Block Mode [Enabled] ...........................................................................80 Onboard Serial Port 1 [3F8/IRQ4].........................................................................80 Onboard Serial Port 2 [2F8/IRQ3].........................................................................80 Touch controller Port [2E8] ..................................................................................81 Touch controller Use IRQ [IRQ7]..............
AFOLUX LX Series Flat Panel PC Appendix C C Software Drivers Page 101
AFOLUX LX Series Flat Panel PC C.1 Remote Management Tool IEI provides optional pre-installed Windows XP Embedded or Windows CE 5.0 turnkey solutions tailored for the AFOLUX series. For information about configuring the operating system, adding remote management tools or additional software and drivers, refer to the software user manuals on IEI AFOLUX series Utility CD that came with the AFOLUX series flat panel PC. C.2 Touch Panel Driver C.2.
AFOLUX LX Series Flat Panel PC C.2.2 Driver Installation To install the touch panel software driver, please follow the steps below. Step 1: Insert the driver CD that came with the AFOLUX series into the CD drive. Step 2: Once the CD drive is installed, the screen in Figure C-1 appears. Figure C-1: Driver CD Pop Up Screen Step 3: Select the operating system installed on the system from the menu on the screen. NOTE: The following description is for driver installation using a Windows 2000 OS.
AFOLUX LX Series Flat Panel PC Step 4: Once the OS system is selected, a welcome screen appears (Figure C-2). To continue the installation process click NEXT. Figure C-2: Welcome Screen Step 5: The license agreement shown in Figure C-3 appears. Agree to the license by selecting “I accept the terms in the license agreement”. Figure C-3: License Agreement Step 6: Click NEXT and the Installshield Wizard is ready to install the program (Figure C-4).
AFOLUX LX Series Flat Panel PC Figure C-4: Ready to Install the Program Step 7: Click INSTALL to continue. The Installing PenMount DMC9000 screen appears as the program is installed (Figure C-5). Figure C-5: Installing PenMount DMC9000 Step 8: The user is then prompted to select to restart the computer now or later (Figure C-6). For the settings to take effect, the computer must be restarted. Click Yes to restart the computer.
AFOLUX LX Series Flat Panel PC Figure C-6: Reboot the Computer C.2.3 Touch Panel Driver Configuration To configure the touch panel driver options, refer to the PenMount user manual located on the driver installation CD.
AFOLUX LX Series Flat Panel PC Appendix D D Watchdog Timer Page 107
AFOLUX LX Series Flat Panel PC NOTE: The following discussion applies to DOS environment. IEI support is contacted or the IEI website visited for specific drivers for more sophisticated operating systems, e.g., Windows and Linux. The Watchdog Timer is provided to ensure that standalone systems can always recover from catastrophic conditions that cause the CPU to crash. This condition may have occurred by external EMI or a software bug.
AFOLUX LX Series Flat Panel PC NOTE: When exiting a program it is necessary to disable the Watchdog Timer, otherwise the system resets.
AFOLUX LX Series Flat Panel PC THIS PAGE IS INTENTIONALLY LEFT BLANK Page 110
AFOLUX LX Series Flat Panel PC Appendix E E Hazardous Materials Disclosure Page 111
AFOLUX LX Series Flat Panel PC E.1 Hazardous Material Disclosure Table for IPB Products Certified as RoHS Compliant Under 2002/95/EC Without Mercury The details provided in this appendix are to ensure that the product is compliant with the Peoples Republic of China (China) RoHS standards. The table below acknowledges the presences of small quantities of certain materials in the product, and is applicable to China RoHS only.
AFOLUX LX Series Flat Panel PC Part Name Toxic or Hazardous Substances and Elements Lead Mercury Cadmium Hexavalent Polybrominated Polybrominated (Pb) (Hg) (Cd) Chromium Biphenyls Diphenyl Ethers (CR(VI)) (PBB) (PBDE) Housing X O O O O X Display X O O O O X Printed Circuit X O O O O X Metal Fasteners X O O O O O Cable Assembly X O O O O X Fan Assembly X O O O O X Power Supply X O O O O X O O O O O Board Assemblies Battery O O: This to
AFOLUX LX Series Flat Panel PC 此附件旨在确保本产品符合中国 RoHS 标准。以下表格标示此产品中某有毒物质的含量符 合中国 RoHS 标准规定的限量要求。 本产品上会附有”环境友好使用期限”的标签,此期限是估算这些物质”不会有泄漏或突变”的 年限。本产品可能包含有较短的环境友好使用期限的可替换元件,像是电池或灯管,这些 元件将会单独标示出来。 部件名称 有毒有害物质或元素 铅 汞 镉 六价铬 多溴联苯 多溴二苯醚 (Pb) (Hg) (Cd) (CR(VI)) (PBB) (PBDE) 壳体 X O O O O X 显示 X O O O O X 印刷电路板 X O O O O X 金属螺帽 X O O O O O 电缆组装 X O O O O X 风扇组装 X O O O O X 电力供应组装 X O O O O X 电池 O O O O O O O: 表示该有毒有害物质在该部件所有物质材料中的含量均在 SJ/T11363-2006 标准规定
AFOLUX LX Series Flat Panel PC F Index Page 115
AFOLUX LX Series Flat Panel PC A E ABS/PC plastic frame ............................4, 42 Ethernet connectors...................................24 AC power adapter........................................6 ACPI power management .........................22 Active Area.................................................10 AMD® Geode LX-800..................................3 anti-static precautions anti-static pad ........................................95 anti-static wristband...............................
AFOLUX LX Series Flat Panel PC Power Consumption ..................................10 T power switch ................................................4 Power switch......................................6, 8, 26 Touch screen................................................7 R U Reset button ......................................6, 8, 24 USB Resolution..............................................8, 10 external USB device connection ...........47 Response Time..........................................