iVIEW-975TPC 9.
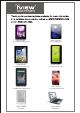
iVIEW-975TPC (9.7" Tablet with Dual Core) iVIEW-1030TPC (10" 4:3 Tablet PC) iVIEW-795TPC (7" Tablet with Dual Core) iVIEW-972TPC (7" Tablet with Phone) iVIEW-760TPC (7" Tablet with Leather Case) iVIEW-700EB-T (7" Ebook) iView-430TPC (4.
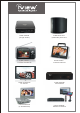
iVIEW-1000GB (Google TV Box) iVIEW-HFR2-SU3 (eSata 4 Bay Enclosure) iVIEW-368PTV 3.
Main menu operation 7 Bluetooth Funct ion 10 11 11 14 15 17 17 18 19 20 21 23 23 24 24 25
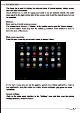
iVIEW's new 9.7" CyberPad 975TPC Tablet PC is the next generation of mobile internet device. It features with 9.7" high resolution screen (1024x 768) and strong processors of Dual Core Cortex A9 CPU and GPU of Quadra Core for graphic processing with bluetooth function. In addition, it provides access to the web, customization through Android Apps, and viewing of multimedia content.
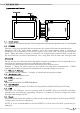
return key iVIEW-975TPC USB HDMI DC-9V 9.7" Capacitive five point touch panel: Click or drag on the touch panel to operate to most of 5 touch points Start-up: Long press and hold the power button, the system will enter the main interface. Shutdown: In n the main menu interface, press the power button about 5 seconds to shutdown. The system shows "Power Off" option. Then, click "OK", and you can safely shut down .
Start-up: Pree the power key and the system will enter the process of Start-up, as Shutdown: Press the power key then pop-up options will show on the desktop.
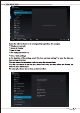
Bluetooth Funct ion At the homepage interface, press Menu key to display the Setting menu. 1. Click on Setttings. 2. Click on Bluetooth. 3 . Click "ON" 4. Then, the bluetooth devices nearby can be detected. 5. Click search Device, so that available device in the Search Device can find the matching bluetooth . 6. Click the bluebooth name of counterpart, boothtooth send matching request ,click macthing, then bluetooth matching is successful. 7.
Online video Music playback
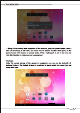
Change desktop wallpaper Touch the screen of main interface for a few seconds, then appear the below interface: Click the picture or wallpaper to select pictures.
Select the “recording” button to record and after recording is completed press “stop” button. At this time you can select the “play” button to play the recorded sound. Select “Use this recording” button to save the recording, so that you can find the corresponding audio files in “NAND”; if you do not need to save, you can select the “give up” button. Photo taking functions 1. Click on Camera. 2. The system enters the camera interface. 3. Click on shoot button to have photos taken easily. 4.
25