
User's Manual


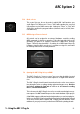


Table Of Contents
- I Contents
- II License Agreement
- III What's New in ARC System 2
- What's New in ARC System 2
- Chapter 1 ARC System 2 Overview
- Chapter 2 The ARC System 2 components
- Chapter 3 Setup for measurements
- Chapter 4 Using the ARC 2 Measurement
- 4.1 Opening the ARC 2 Measurement software
- 4.2 Welcome to the ARC System 2
- 4.3 STEP 1 - Microphone Selection
- 4.4 STEP 2 - Set up your Audio I/O
- 4.5 STEP 3 - Put the Measurement Microphone at the main position and adjust levels
- 4.5.1 Microphone orientation
- 4.5.2 Microphone height
- 4.6 STEP 4 - Take measurements
- 4.6.1 Examples of measurement locations in various room types
- 4.6.2 Take Measurements
- 4.7 STEP 5 - Save your system correction
- Chapter 5 Using the ARC 2 Plug-In
- 5.1 ARC 2 Plug-In interface
- 5.1.1 Play Window
- 5.1.2 Measurement menu
- 5.1.3 Target Curve menu
- 5.1.4 Virtual Monitoring Feature
- 5.1.5 Frequency Response Graphs
- 5.1.6 Speaker Icons
- 5.1.7 Peak Meter
- 5.1.8 Correction ON switch and TRIM knob
- 5.1.9 Other controls
- 5.2 Edit Window
- 5.2.1 EQ points
- 5.2.2 Custom 1-4 buttons
- 5.2.3 Apply button
- 5.2.4 Flat button
- 5.2.5 Combined L/R Correction
- 5.2.6 Full Range Bass Correction
- 5.3 Monitor Control Window
- 5.3.1 Main volume knob
- 5.3.2 Dim switch
- 5.3.3 Mute switch
- 5.3.4 Mode selector
- 5.3.5 MIDI Assign of Remote Controls
- 5.4 Opening the ARC 2 Plug-In in your DAW
- 5.5 Using the ARC 2 Plug-In
- 5.6 Suggestions for the best ARC System 2 usage
- Chapter 6 Frequently Asked Questions
- Chapter 7 Troubleshooting
- Chapter 8 Support

5 - Using the ARC 2 Plug-In
5 1
ARC System 2
5.3.4 Mode selector
This control lets you choose the mode in which ARC 2 will monitor your
audio (figure 5.29). When set to “Stereo,” ARC 2 will reproduce the corrected
L/R program on your DAW's master bus. Setting it to “Mono” or “Side” will
allow you to monitor the program in Mono (channels sum) or in Side (chan-
nels difference).
5.3.5 MIDI Assign of Remote Controls
All controls can be assigned to an external hardware controller sending
MIDI commands for hands on-operation. To do this, just right click on the
parameter you want to be remotely controlled. A “MIDI learn” message
(figure 5.30) will show that ARC 2 is waiting for a MIDI input. Move the
hardware controller (dial, encoder, etc..) you want to assign to it, and it will
be instantly linked to the selected parameter.
figure 5.30
5.4 Opening the ARC 2 Plug-In in your DAW
The ARC 2 Plug-In is a “stereo-to-stereo” processor that should be inserted
on the stereo master bus of your audio sequencer or digital audio worksta-
tion.
The ARC 2 Plug-In should remain inserted and active on the stereo master
bus during the entire recording, mixing and mastering processes. But then
just before printing the final mix to a file or to an external recording
device, it should be turned OFF.
This is because the ARC 2 Plug-In is used to correct the monitoring/room sys-
tem response. It is NOT intended to process the actual mixdown of your project.
A few DAWs support a dedicated monitoring bus where you can insert plug-ins.
In this case, the ARC 2 Plug-In should be inserted on the monitoring bus instead
of the stereo master bus so that the ARC 2 Plug-In will not affect the actual
mixdown of your project even if you don’t turn it OFF before printing the mix.
figure 5.29