AU KULINARISK
ENGLISH Please refer to the chapter IKEA GUARANTEE for contact details of the after sales customer service centre.
ENGLISH 4
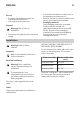
ENGLISH Contents Safety information Conditions of Use Safety instructions Installation Product description Control panel Before first use Daily use Clock functions Automatic programmes 4 5 6 8 9 9 11 12 16 17 Using the accessories Additional functions Hints and tips Care and cleaning Troubleshooting Technical data Energy efficiency Environmental concerns IKEA guarantee 18 20 21 23 26 27 28 29 29 Subject to change without notice.
ENGLISH • • • 5 Keep children and pets away from the appliance when it operates or when it cools down. Accessible parts are hot. If the appliance has a child safety device, it should be activated. Children shall not carry out cleaning and user maintenance of the appliance without supervision. General Safety • • • • • • • • • • Only a qualified person must install this appliance and replace the cable. WARNING: The appliance and its accessible parts become hot during use.
ENGLISH • By clients in serviced apartments, holiday apartments and other residential type environments. Safety instructions Installation Warning! Only a qualified person must install this appliance. • Remove all the packaging. • Do not install or use a damaged appliance. • Follow the installation instructions supplied with the appliance. • Always take care when moving the appliance as it is heavy. Always use safety gloves and enclosed footwear. • Do not pull the appliance by the handle.
ENGLISH • Do not operate the appliance with wet hands or when it has contact with water. • Do not apply pressure on the open door. • Do not use the appliance as a work surface or as a storage surface. • Open the appliance door carefully. The use of ingredients with alcohol can cause a mixture of alcohol and air. • Do not let sparks or open flames to come in contact with the appliance when you open the door.
ENGLISH Service • To repair the appliance contact an Authorised Service Centre. • Use original spare parts only. Disposal Warning! Risk of injury or suffocation. • Disconnect the appliance from the mains supply. 8 • Cut off the mains electrical cable close to the appliance and dispose of it. • Remove the door to prevent children and pets to get closed in the appliance. • Packaging material: The packaging material is recyclable.
ENGLISH 9 Product description General overview 1 2 4 5 6 7 8 9 4 11 1 2 3 4 5 6 7 8 9 10 11 3 3 2 1 10 Control panel Electronic programmer Water drawer Socket for the core temperature sensor Grill Lamp Rating plate Fan Steam generator with cover Shelf support, removable Shelf positions For absorbing the remaining water from the steam generator. Warning! Remove the sponge from the cavity before cooking. Do not use the sponge when the appliance is hot.
ENGLISH 10 Symbol Function Comment Heating Functions Press once to enter to the Heating Functions Menu. or Assisted Cook- Press again to switch to Assisted Cooking. To turn ing on or off the light, press for 3 seconds. 2 3 4 5 - 6 7 8 9 10 11 Back key To go back one level in the menu. To show the main menu, press the symbol for 3 seconds. Temperature selection To set the temperature or show the current temperature in the oven. Favourites To save and access your favourite programmes.
ENGLISH 11 Other indicators of the display: Symbol Function Minute Minder The function works. Time of day The display shows the current time. Duration The display shows the necessary time for cooking. End Time The display shows when the cooking time is complete. Temperature The display shows the temperature. Time Indication The display shows how long the heating function works. Press and at the same time to reset the time. Calculation The oven calculates the time for cooking.
ENGLISH 12 1. Set the function: Conventional Cooking (Top/Bottom Heat) and the maximum temperature. 2. Let the oven operate for 1 hour. 3. Set the function: True Fan Cooking and the maximum temperature. 4. Let the oven operate for 15 minutes. Accessories can become hotter than usual. The oven can emit an odour and smoke during preheating. Make sure that the airflow in the room is sufficient. Using the Mechanical child lock The oven has the child lock installed.
ENGLISH Symbol / Menu item Specials 13 Application Contains a list of additional heating functions. Symbol / Menu item Key Tones Submenu for: Basic Settings Symbol / Menu item Set Time of Day Description Sets the current time on the clock. Time Indication When ON, the display shows the current time when you deactivate the appliance. Set + Go To set a function and activate it later with a press of any symbol on the control panel.
ENGLISH Heating function 14 Application Food reheating with steam prevents surface Steam Regener- drying. Heat is distributed in a gentle and ating even way, which allows to recover taste and aroma of food as just prepared. This function can be used to reheat food directly on a plate. You can reheat more than one plate at the same time, using different shelf positions.
ENGLISH Heating function Application Heating function Grill Fast Grilling Turbo Grilling Keep Warm To grill flat food in large quantities and to toast bread. Application Bread Baking Dough Proving For dishes such as lasagna or potato gratin. To make gratins and to brown. To rise the yeast dough before baking. When you use this function the lamp automatically turns off after 30 seconds. To preheat plates for serving. Plate Warming To make vegetable preserves (e.g. pickles).
ENGLISH 16 3. Push the water drawer to its initial position. 4. Turn on the oven. 5. Set a steam heating function and the temperature. 6. If necessary, set the function: Duration or: End Time . The steam appears after approximately 2 minutes. When the oven reaches the set temperature, the signal sounds. When the steam generator is empty, the signal sounds. The signal sounds at the end of the cooking time. 7. Turn off the oven. Caution! The oven is hot. There is a risk of burns.
ENGLISH Setting the clock functions Before you use the functions: Duration, End Time, you must set a heating function and temperature first. The oven turns off automatically. You can use the functions: Duration and End Time at the same time if you want to automatically turn on and turn off the oven on a given time later. The functions: Duration and End Time do not work when you use the core temperature sensor. 1. Set a heating function. again and again until the 2.
ENGLISH Recipes online You can find the recipes for the automatic programmes specified for this oven on the website www.ikea.com. To find the proper Recipe Book check the article number on the rating plate on the front frame of the oven cavity. 18 1. Turn on the oven. 2. Select the menu: Assisted Cooking. Press to confirm. 3. Select the category and dish. Press to confirm. to confirm. 4. Select a recipe. Press Assisted Cooking This oven has a set of recipes you can use.
ENGLISH Small indentation at the top increase safety. The indentations are also anti-tip devices. The high rim around the shelf prevents cookware from slipping of the shelf. Core temperature sensor There are two temperatures to be set: the oven temperature and the core temperature. The core temperature sensor measures the core temperature of the meat. When the meat is at the set temperature, the oven turns off. Caution! Only use the core temperature sensor supplied or the correct replacement parts.
ENGLISH Additional functions Favourites Using the Child Lock You can save your favourite settings, such as duration, temperature or heating function. They are available in the menu: Favourites. You can save 20 programmes. When the Child Lock is on, the oven cannot be turned on accidentally. Saving a programme 1. Turn on the oven. 2. Set a heating function or an automatic programme. 3. Press again and again until the display shows: SAVE. 4. Press to confirm.
ENGLISH 21 Press any symbol (except for ) to start the function: Set + Go. The set heating function starts. When the heating function ends, a signal sounds. • Function Lock is on when the heating function works. • The menu: Basic Settings lets you turn the function: Set + Go on and off. Brightness of the display There are two modes of display brightness: • Night brightness - when the oven is turned off, the brightness of the display is lower between 10 PM and 6 AM.
ENGLISH 22 If you use two baking trays at the same time, keep one empty level between them. Cooking meat and fish Leave the meat for approximately 15 minutes before carving so that the juice does not seep out. To prevent too much smoke in the oven during roasting, add some water into the deep pan. To prevent the smoke condensation, add water each time after it dries up.
ENGLISH 23 Accessories Size Picture Baking dish, dark, non-re- 26 cm diameter flective Ramekins, ceramic 8 cm diameter, 5 cm height Flan base tin, dark, nonreflective 28 cm diameter Information for test institutes Cooking tables Fast Grilling Preheat the empty oven for 3 minutes. For additional cooking tables please refer to the Recipe Book which you can find on the website www.ikea.com.
ENGLISH If you have nonstick accessories, do not clean them using aggressive agents, sharpedged objects or a dishwasher. It can cause damage to the nonstick coating. Clean the moisture from the cavity after each use. 2. Pull the front end of the shelf support away from the side wall. 3. Pull the supports out of the rear catch. Install the shelf supports in the opposite sequence. Steam Cleaning Stainless steel or aluminium ovens Remove the worst dirt manually.
ENGLISH 2. 3. 4. 5. generator. Wait for approximately 10 minutes. Remove the water and vinegar with the sponge. Put clean water (100 - 200 ml) into the water drawer to flush the steam generation system. Remove the water from the steam generator with the sponge and rub it dry. Keep the door open to let the appliance dry fully. Removing and installing the door 2 B 1 7. Pull the door trim to the front to remove it. 8.
ENGLISH 26 Warning! Danger of electrocution! Disconnect the fuse before you replace the lamp. The lamp and the lamp glass cover can be hot. 1. Turn off the oven. 2. Remove the fuses from the fuse box or turn off the circuit breaker. 3. Turn the lamp glass cover counterclockwise to remove it. 4. Clean the glass cover. 5. Replace the oven light bulb with a 40 W, 220 - 240 V (50 Hz), 350 °C heat resistant oven light bulb (connection type: G9). 6. Install the glass cover.
ENGLISH 27 Problem Possible cause Remedy The display shows an error code that is not in this table. There is an electrical fault. • Turn off the oven with the house fuse or the safety switch in the fuse box and turn it on again. • If the display shows the error code again, contact an Authorised Service Centre. Steam and condensation settle on the food and in the cavity of the oven. You left the dish in the oven for too long.
ENGLISH 28 Area of baking tray 1424 cm² Top heating element 1900 W Bottom heating element 1000 W Grill 1900 W Ring 1650 W Total rating 3000 W Voltage 230 - 240 V Frequency 50 Hz Number of functions 22 Energy efficiency Product information according to EU 66/2014 Model identification KULINARISK 504.168.22 Energy Efficiency Index 94.5 Energy consumption with a standard load, conventional mode 0.93 kWh/cycle Energy consumption with a standard load, fan-forced 0.
ENGLISH General hints Make sure that the oven door is closed properly when the oven operates. Do not open the door too often during cooking. Keep the door gasket clean and make sure it is well fixed in its position. Use metal dishes to improve energy saving. When possible, do not preheat the oven before you put the food inside. 29 time is longer than 30 minutes, the heating elements automatically deactivate earlier in some oven functions. The fan and lamp continue to operate.
ENGLISH Cebas Pty Ltd, ABN 15 009 156 003 (Both Trading as IKEA). The original sales receipt is required as proof of purchase. If service work is carried out under guarantee, this will not extend the guarantee period for the appliance. Who will execute the service? IKEA service provider will provide the service through its own service operations or authorized service partner network. Contact IKEA for further information.
ENGLISH What is not covered under this guarantee? • Normal wear and tear. • Deliberate or negligent damage, damage caused by failure to observe operating instructions, incorrect installation or by connection to the wrong voltage, damage caused by chemical or electro-chemical reaction, rust, corrosion or water damage including but not limited to damage caused by excessive lime in the water supply, damage caused by abnormal environmental conditions. • Consumable parts including batteries and lamps.
ENGLISH 32 number, online email and opening times. Please describe the problem that you are facing with the appliance in detail along with your product article number (8 digit code) and date of purchase at the time of call registration. SAVE THE SALES RECEIPT! Kindly keep all these details and original invoice of purchase handy during the service technician's visit to enable him to carry out the job. It is your proof of purchase and required for the guarantee to apply.
ENGLISH 33
ENGLISH 34
ENGLISH 35
867344295-A-102018 © Inter IKEA Systems B.V.