AU MIRAKULÖS
ENGLISH Please refer to the chapter IKEA GUARANTEE for contact details of the after sales customer service centre.
ENGLISH 4
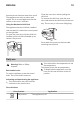
ENGLISH Contents Safety information Conditions of Use Safety instructions Installation Product description Before first use Daily use Clock functions Using the accessories 4 5 6 8 9 9 10 12 14 Additional functions Hints and tips Care and cleaning Troubleshooting Technical data Energy efficiency ENVIRONMENTAL CONCERNS IKEA GUARANTEE 15 16 17 20 22 22 23 23 Subject to change without notice. Safety information Before the installation and use of the appliance, carefully read the supplied instructions.
ENGLISH • • 5 Children shall not carry out cleaning and user maintenance of the appliance without supervision. Children aged 3 years and under must be kept away from this appliance when it is in operation at all times. General Safety • • • • • • • • • • Only a qualified person must install this appliance and replace the cable. WARNING: The appliance and its accessible parts become hot during use. Care should be taken to avoid touching heating elements.
ENGLISH Safety instructions Installation Warning! Only a qualified person must install this appliance. • Remove all the packaging. • Do not install or use a damaged appliance. • Follow the installation instruction supplied with the appliance. • Always take care when moving the appliance as it is heavy. Always use safety gloves and enclosed footwear. • Do not pull the appliance by the handle. • Keep the minimum distance from the other appliances and units.
ENGLISH • Do not use the appliance as a work surface or as a storage surface. • Open the appliance door carefully. The use of ingredients with alcohol can cause a mixture of alcohol and air. • Do not let sparks or open flames to come in contact with the appliance when you open the door. • Do not put flammable products or items that are wet with flammable products in, near or on the appliance. Warning! Risk of damage to the appliance.
ENGLISH Plastic parts are marked with international abbreviations such as PE, PS, etc. Dispose of the packaging material in the containers provided for this purpose at your local waste management facility. 8 Service • To repair the appliance contact an Authorised Service Centre. • Use original spare parts only. Installation Warning! Refer to Safety chapters. Assembly Refer to the Assembly Instructions for the installation.
ENGLISH 9 Product description General overview 1 2 3 4 5 5 6 4 10 3 7 2 1 9 1 2 3 4 5 6 7 8 9 10 Control panel Knob for the oven functions Electronic programmer Knob for the temperature Grill Lamp Fan Shelf support, removable Rating plate Shelf positions 8 Accessories • Wire shelf x 1 For cookware, cake tins, roasts. • Baking tray x 1 For cakes and biscuits. • Grill- / Roasting pan x 1 To bake and roast or as pan to collect fat. • Telescopic runners x 2 sets For shelves and trays.
ENGLISH 10 Accessories can become hotter than usual. The appliance can emit an odour and smoke. This is normal. Make sure that the airflow in the room is sufficient. Using the Mechanical child lock Close the oven door without pulling the child lock. To remove the child lock, open the oven door and remove the child lock with the torx key. The torx key is in the oven fitting bag. The appliance has the child lock installed and activated. It is below the control panel on the right side.
ENGLISH 11 Oven function Application Forced Air Cook- To bake on up to 3 shelf positions at the same time and ing to dry food. When you use this function, decrease the oven temperature by 20 - 40 °C from the standard temperatures you use for cooking with the function Conventional (Top and Bottom Heat). Conventional (Top and Bottom Heat) To bake and roast food on one shelf position. Grilling To grill flat food in the middle of the shelf. To make toasts.
ENGLISH 12 Display G A G F B E C A. B. C. D. Time and temperature Heat-up and residual heat indicator Water tank (selected models only) Core temperature sensor (selected models only) E. Door lock (selected models only) F. Hours / minutes G. Clock functions D Buttons Button Function MINUS To set the time. CLOCK To set a clock function. PLUS To set the time.
ENGLISH Clock function 00:00 Application MINUTE MINDER Use to set a countdown time. This function has no effect on the operation of the appliance. You can set the MINUTE MINDER at any time, also if the appliance is off. COUNT UP TIMER If you do not set any other clock function the COUNT UP TIMER automatically monitor how long the appliance operates. It is on immediately when the oven starts to heat. The Count Up Timer cannot be used with the functions: DURATION, END.
ENGLISH Appliance turns on automatically later on, works for the set DURATION time and stops at the set END time. At the set time an acoustic signal sounds for 2 minutes. Time setting flash in the display. The oven stops. 4. Press any button to stop the acoustic signal. Setting the MINUTE MINDER 1. Press again and again until and "00" flash in the display. or to set the MINUTE 2. Press MINDER. First you set the seconds, then the minutes.
ENGLISH 15 2 1 °C Small indentation at the top increase safety. The indentations are also anti-tip devices. The high rim around the shelf prevents cookware from slipping of the shelf. Using the telescopic runners Keep the installation instructions for the telescopic runners for future use. With telescopic runners you can put in and remove the shelves more easily. °C Put the wire shelf on the telescopic runners and carefully push them into the appliance.
ENGLISH Temperature (°C) 16 Switch-off time (h) 200 - 245 5.5 250 - maximum 1.5 After an automatic switch-off, deactivate the appliance fully. Then you can activate it again. The Automatic switch-off does not work with the functions: Duration, End. Residual heat indicator When you deactivate the appliance, the display shows the residual heat indicator if the temperature in the oven is more than 40 °C. Turn the knob for the temperature left or right to show the oven temperature.
ENGLISH 17 deep pan. To prevent the smoke condensation, add water each time after it dries up. Cooking times Initially, monitor the performance when you cook. Find the best settings (heat setting, cooking time, etc.) for your cookware, recipes and quantities when you use this appliance. Cooking times depend on the type of food, its consistency, and volume. Cooking table Quantity (kg) Food Function Shelf position Temperature (°C) Time (min) 1 - 1.5 Pork 2 180 90 - 120 1 - 1.
ENGLISH Notes on cleaning • Clean the front of the appliance with a soft cloth with warm water and a cleaning agent. • To clean metal surfaces, use a dedicated cleaning agent. • Clean the appliance interior after each use. Fat accumulation or other food remains may result in a fire. The risk is higher for the grill pan. • Clean stubborn dirt with a special oven cleaner. • Clean all accessories after each use and let them dry. Use a soft cloth with warm water and a cleaning agent.
ENGLISH Hold the door glass panels by their top edge and carefully pull them out one by one. Start from the top panel. Make sure the glass slides out of the supports completely. 2 1 Open the door fully and hold the two door hinges. 3 Lift and turn the levers on the two hinges. Clean the glass panels with water and soap. Dry the glass panels carefully. When the cleaning is completed, install the glass panels and the oven door. Do the above steps in the opposite sequence.
ENGLISH 20 Replacing the lamp A Put a cloth on the bottom of the interior of the appliance. It prevents damage to the lamp glass cover and the cavity. B Warning! Danger of electrocution! Disconnect the fuse before you replace the lamp. The lamp and the lamp glass cover can be hot. Caution! Always hold the halogen lamp with a cloth to prevent grease residue from burning on the lamp. Make sure that you install the middle panel of glass in the seats correctly. A B 1. Deactivate the appliance. 2.
ENGLISH 21 Problem Possible cause Remedy The oven does not heat up. The Child Lock is on. Refer to "Using the Child Lock". The oven does not heat up. The door is not closed correctly. Fully close the door. The oven does not heat up. The fuse is blown. Make sure that the fuse is the cause of the malfunction. If the fuse is blown again and again, contact a qualified electrician. The lamp does not operate. The lamp is defective. Replace the lamp.
ENGLISH 22 Technical data Technical data Dimensions (internal) Width Height Depth Area of baking tray 1438 cm² Top heating element 2300 W Bottom heating element 1000 W Grill 2300 W Ring 2400 W Total rating 2480 W Voltage 220 - 240 V Frequency 50 - 60 Hz Number of functions 9 480 mm 361 mm 416 mm Energy efficiency Product information according to EU 66/2014 Model identification MIRAKULÖS 903.220.44 Energy Efficiency Index 100.
ENGLISH EN 60350-1 - Household electric cooking appliances - Part 1: Ranges, ovens, steam ovens and grills - Methods for measuring performance. Energy saving The appliance contains features which help you save energy during everyday cooking. 23 the cooking time, depending on the duration of the cooking. The residual heat inside the oven will continue to cook. Use the residual heat to warm up other dishes. Cooking with fan When possible, use the cooking functions with fan to save energy.
ENGLISH IKEA service provider will provide the service through its own service operations or authorized service partner network. Contact IKEA for further information. If you encounter any trouble with the appliance and wish to register a service call or make a claim, please refer to www.ikea.com.au for your local store after sales customer service center phone number, online email and opening times.
ENGLISH • • • • • • • • • • ical reaction, rust, corrosion or water damage including but not limited to damage caused by excessive lime in the water supply, damage caused by abnormal environmental conditions. Consumable parts including batteries and lamps. Non-functional and decorative parts which do not affect normal use of the appliance, including any scratches and possible colour differences.
ENGLISH 26 Please do not hesitate to contact the dedicated after sales customer service center for IKEA appliances to: SAVE THE SALES RECEIPT! Kindly keep all these details and original invoice of purchase handy during the service technician's visit to enable him to carry out the job. It is your proof of purchase and required for the guarantee to apply. Note that the receipt reports also the IKEA article name and number (8 digit code) for each of the appliances you have purchased. 1.
ENGLISH 27
867339374-B-422016 © Inter IKEA Systems B.V.