
Instruction Manual
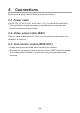
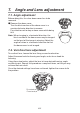
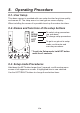
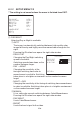
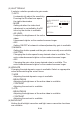
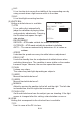
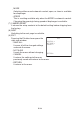

Table Of Contents
- 1. Handling Precautions
- 2. General
- 3. Features
- 4. Camera Installation
- 5. Name of each section and its function
- 6. Connections
- 7. Angle and Lens adjustment
- 8. Operating Procedure
- 9. Warranty and after-sale service
- 10. Specifications
- 11. External Appearance
- 12. Setup Flow Chart
- 1. Precauciones de manejo
- 2. Generalidades
- 3. Características
- 4. Instalación de la cámara
- 5. Nombre de cada sección y su función
- 6. Conexión
- 7. Ajuste de ángulo y objetivo
- 8. Procedimiento de operación
- 9. Garantía y servicio postventa
- 10. Especificaciones
- 11. External Appearance
- 12. Setup Flow Chart

E-8
8. Operating Procedure
8-1. User Setup
This dome camera is provided with user setup function for picture quality,
and camera ID. The setup menu is a tree type on-screen-display.
When installing the camera it is possible to set up the various functions.
8-2. Names and functions of the setup bottons
UP To select setup parameters
DOWN (up and down)
RIGHT To change setup parameters
LEFT
SET To get in or get out to setup
mode, and to enter and
execute procedures.
* To get into Setup mode, hold SET button
more than 2 seconds.
8-3. Setup mode Procedures
Hold down the SET button longer than 2 seconds, and the setup menu
screen at left appears on screen. A highlighted item is now selected.
Use the LEFT/RIGHT buttons to change the selection items.
SET UP DOWNRIGHTLEFT