USER’S GUIDE V:1425-0119-10 IT319 3.1 Channel Home Theater System with Dock for iPod For the most up-to-date version of this User’s Guide, go to www.ilive.
Warnings and Precautions • • • • • • • • • • • CAUTION: TO PREVENT ELECTRIC SHOCK, MATCH WIDE BLADE OF PLUG TO WIDE SLOT, FULLY INSERT. WARNING: To prevent fire or shock hazards, do not expose this unit to rain or moisture. CAUTION: Use of controls or adjustments or performance of procedures other than those specified may result in hazardous radiation exposure.
Additional Warnings Features • The apparatus shall not be exposed to dripping or splashing and that no objects filled with liquids, such as vases, shall be placed on apparatus. L'appareil ne doit pas être exposé aux écoulements ou aux éclaboussures et aucun objet ne contenant de liquide, tel qu'un vase, ne doit être placé sur l'objet. • • • • • • • • • • • • • • • • • • • • • • • Main plug is used as disconnect device and it should remain readily operable during intended use.
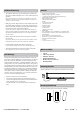
Introduction Motorized Dock for iPod DVD/CD Slot-Load Drive Power Press to turn the unit off and on. Volume Button Press to adjust the volume the unit. Timer Press to set the “on” and “off” timer for the unit. Source Press to switch between DVD, iPod, AM radio, FM radio, Aux, AV 1, and AV 2 mode. Play/Pause Button Press to play and pause a docked iPod or loaded CD/DVD. Tuning & Skip Buttons Press to skip tracks on a docked iPod or loaded CD, skip chapters on a loaded DVD, or tune the radio.
Power Press to turn the unit off and on. Sleep Press repeatedly to set the sleep timer between 1-90 minutes. Timer Press to set the “on” and “off” timer for the unit. Source Press to switch between DVD, iPod, AM radio, FM radio, Aux, AV 1, and AV 2 mode. Go To Button Press and enter a specific time using the Number Keypad to automatically skip to that time on the loaded DVD. Display Button Press to view the time when in radio, DVD, or Aux mode. Mute Button Press to mute the volume of the unit.
POWER MUTE iPod DRAWER DVD SLEEP 1 2 3 4 5 6 7 8 9 GOTO DISPLAY 0 10+ ALBUM CHAPTER PLAYLIST PRESET TIMER SOURCE MEMORY SETUP PR OG R EA CL Bass Button Press to adjust the bass of the unit. (The unit must be in Music 2.1 or Music 3.1 EQ mode.) Treble Button Press to adjust the treble of the unit. (The unit must be in Music 2.1 or Music 3.1 EQ mode.) SELECT TUN B A- Wide Press and hold to switch between 4:3LB, 4:3PS and 16:9 aspect ratio.
iPod Operations Docking an iPod Locate the numbered bracket that fits the iPod that will be docked. Each included Bracket has a number on it, indicating which iPod model that bracket is compatible with. See the separate bracket chart page to identify which bracket is needed. Press the Power Button to turn the unit on. Press the Source Button to switch the unit to iPod mode. Press the iPod Drawer Button to open the iPod motorized door on the unit.
Using the Built-In Dvd/CD Player LABEL SIDE Loading a CD or DVD IMPORTANT: The CD or DVD must be loaded with the label side facing in the same direction as the front of the unit. Playing a CD or DVD The unit must be connected to an external display before viewing a DVD. Press the Power Button to turn the unit on. Press the Source Button to switch to DVD Mode. Load a CD or DVD into the unit. Press the Play/Pause Button to play the loaded CD or DVD.
DVD Menu To access the DVD menu, press the Setup Button (on the remote) in DVD Mode. Advanced DVD features Go To Button Press and enter a specific time using the Number Keypad to automatically skip to that time on the loaded DVD. Set Up Button Press to enter the unit’s setup menu. (Must be in DVD Mode.) Program Press to program a loaded CD or DVD to play tracks or chapters in a specified order. Repeat Button Press to repeat a song, album or playlist from a docked iPod or a loaded CD or DVD.
Basic Connectivity Below, you’ll see a basic flow chart of how you can connect your home entertainment devices to the bar speaker, and in turn how the bar speaker connects to them. The following pages contain more detailed instructions on what exactly needs to be done to make these connections.
Connecting a Display Connecting a DVD Player or VCR You will need: a display, s-video cable or composite video cable or component video cable or a HDMI cable. You will need: a DVD player or VCR, composite video and RCA stereo cables. Connect the display’s video inputs to the corresponding Video Output on the bar speaker. Connect the DVD player or VCR audio and video outputs to the corresponding Audio and Video Inputs on the bar speaker.
Installation Bar Speaker Placement The bar speaker depends, in part, on it’s environment to help produce a realistic surround sound environment. We’ve suggested two potential placement options in the diagrams below to help you get the most out of your 3.1 Channel Music System. Ventilation When placing the bar speaker on an entertainment center, bookshelf, or any time of enclosed space, be sure to allow at least 2-3 inches of space around the bar speaker for ventilation.
Mounting the Bar Speaker Important Notes Required Tools We recommend having this bar speaker professionally mounted. • Manual or Power Screwdriver The included spacers should be used at your discretion to extend the face of the bar speaker farther from the wall. These are typically used when mounting the bar speaker under a television, and the face of the bar speaker needs to be flush with the face of the television.
Basic Operations Setting the Clock Setting a Timer for the unit to Power On IMPORTANT: This operation cannot be done from the remote. IMPORTANT: This operation cannot be done from the remote. Press the Power Button to turn the bar speaker off. Press the Power Button to turn the bar speaker on. Press and hold the Timer Button, the display will begin to flash. Press and hold the Timer Button until “ON” appears on the display.
Advanced Sound Built-in Sound Technologies If you press the EQ Button on the remote, you can cycle through the available sound technologies that are built into the bar speaker. SRS TruSurround XT® creates a truly immersive surround sound experience with rich bass and clear dialog. SRS TruSurround XT® Dialog Clarity Mode enhances the vocals so dialog is clear and easy to understand.
Company Information Green Initiative Environmental Commitment to ‘Protect for Today and Sustain for Tomorrow’ 2009 marks the official launch of DPI, Inc.’s corporate campaign for a greener and cleaner world. DPI and its four brands, iLive, WeatherX, Capri, and GPX, are building upon environmental initiatives introduced at all of their facilities to help formulate and sustain significant and important conservation efforts within its manufacturing and marketing communities.