
User's Manual


6
It should be noted that the information in all of the above fields is optional. However, to get the
maximum benefit of the logging and error checking algorithms built into the software Imation
recommends that the info in the fields be entered prior to scanning.
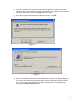
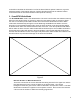
1. Scan/RFID Write Mode
The Scan/RFID Write mode is the default mode. This mode is active when the software starts up,
when the “New Order” button is pressed, or when the “New Sheet” button is pressed. It allows
the user to scan labels printed with barcodes and convert those identification codes to RFID
codes while simultaneously writing them to the RFID tags embedded in the labels. Once the
program is in the Scan/RFID Write mode, place the sheet of labels on the programming station
as shown below. Place the sheet between the tabs of the belt. Then the top two barcode labels
will be under the laser scanners and the labels will be initialized (there is an audible confirmation
and the barcode number will appear in the lower window). Then the belt will slide the sheet up
until the next two labels are in the scan region and pause there until the labels are initialized. The
belt will continue to push until all the tags on the sheet are initialized.
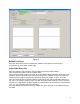
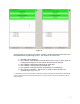
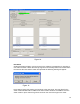
Barcode Scanner 1 / Barcode Scanner 2
These two columns list the current barcode label being scanned in the upper box and the
last label detected in each column of labels on the printed sheet. The column
background areas turn green when a label is detected in its respective column. The label
identification number then appears in the respective column. Each column also includes
a list count of the number of labels successfully programmed.
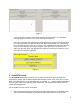
Figure 5