
Owner's Manual


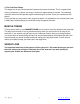

Table Of Contents
- BEFORE YOU BEGIN...................................................................................…. 1
- IMPORTANT SAFETY NOTICES..................................................................…. 2
- HARDWARE PACK …………………………………………………………………. 4
- ASSEMBLY INSTRUCTIONS........................................................................…. 7
- EXPLODED DIAGRAM………………………………………………………………. 15
- PARTS LIST...................................................................................................…. 17
- OPERATING NOTES………………………………………………………………… 19
- WARRANTY.................................................................................................……. 23
- ORDERING PARTS.....................................................................................……. 23
- A.) Attach left Stride Tube (#21L) to the left axle on Front Post (#22).
- B.) Secure the Stride Tube (#21L) to Front Post with one D Washer (#32), one Ø 1 ¼” x Ø ⅜” Flat Washer (#31), one Ø ⅜” Lock Washer (#30), and one M10 x ¾” Hex Bolt (#29).
- C.) Cover the pivot joint with two left Stride Tube Covers (#47L) and secure them together with two ST5 x ⅝” Self Tapping Screws (#33).
- D.) Cover the bottom of Left Stride Tube with one Stride Tube Bottom Cover Set (#52) and secure with two ST4 x 1 ⅛” Self Tapping Screws (#53)
- E.) Repeat A, B, C, and D to install Right Stride Tube (#21R) to Front Post.
- A.) Do not tighten Nuts and Bolts until instructed to do so.
- B.) Place the pivot on bottom of left Stride Tube (#21L) to the open bracket on Left Pedal Support (#9L). Secure the Tube to the Left Pedal Support with one M10 x 3 ⅛” Hex Bolt (#20), one Sleeve (#18), one Ø ¾” Washer (#17), and one M10 Aircraft Nut (#16).
- C.) Attach the Left Pedal Support rear pivot to the Crank (#24). Secure it with one Left Pedal Axle Bolt (#10L), one Wrinkled Washer (#11), one Ø 1 ⅛” Flat Washer (#12), and one left Hex Nut (#51L).
- D.) Securely tighten all Nuts and Bolts.
- E.) Cover the bottom of left Stride Tube and front Left Pedal Support with two left Pedal Support Covers (#54L), secure them with two M5 x ⅜” Self Tapping Screws (#55).
- F.) Place the Left Pedal (#13L) onto Left Pedal Support, secure with two M8 x 1 ¾” Hex Bolts (#14) and two Lock Knobs (#15).
- MUSCLE TONING
- WEIGHT LOSS

© IMPEX INC. www.impex-fitness.com 21
EXERCISE GUIDELINES
Using your MAGNETIC BIKE
will provide you with several benefits, it will improve your physical
fitness, tone muscle and in conjunction with calorie controlled diet help you lose weight.
1. The Warm Up Phase
This stage helps get the blood flowing around the body and the muscles working properly. It will
also reduce the risk of cramp and muscle injury. It is advisable to do a few stretching exercises as
shown below. Each stretch should be held for approximately 30 seconds, do not force or jerk your
muscles into a stretch - if it hurts, STOP.
2. The Exercise Phase
This is the stage where you put the effort in. After regular use, the muscles in your legs will
become more flexible. Work to your but it is very important to maintain a steady tempo throughout.
The rate of work should be sufficient to raise your heartbeat into the target zone shown on the
graph below.
This stage should last for a minimum of 12 minutes though most people start at about 15-20
minutes
SIDE BENDS OUTER THIGH
INNER THIGH
FORWARD
BENDS
CALF / ACHILLES