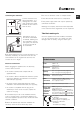
Instructions for use WASHER DRYER Contents F GB English,1 Français,13 GB Installation, 2-3 AR ,25 Unpacking and levelling Connecting the electricity and water supplies The first wash cycle Technical data Description of the washer-dryer and starting a wash cycle, 4-5 Control panel Indicator lights Starting a wash cycle Wash cycles, 6 Table of wash cycles Personalisation, 7 ARM7L 105 Setting the temperature Setting the drying cycle Functions Detergents and laundry, 8 Detergent dispenser drawer Ble
Installation GB This instruction manual should be kept in a safe place for future reference. If the washer-dryer is sold, transferred or moved, make sure that the instruction manual remains with the machine so that the new owner is able to familiarise himself/herself with its operation and features. Levelling the machine correctly will provide it with stability, help to avoid vibrations and excessive noise and prevent it from shifting while it is operating.
Do not use extension cords or multiple sockets. Connecting the drain hose 65 - 100 cm Connect the drain hose, without bending it, to a drainage duct or a wall drain located at a height between 65 and 100 cm from the floor; GB The cable should not be bent or compressed. The power supply cable must only be replaced by authorised technicians. Warning! The company shall not be held responsible in the event that these regulations are not respected.
Description of the washer-dryer and starting a wash cycle Control panel GB WASH CYCLE PROGRESS/ DELAY TIMER indicator lights DRYING knob ON/OFF button TEMPERATURE indicator light knob START/PAUSE Detergent dispenser drawer FUNCTION WASH CYCLE knob Detergent dispenser drawer: used to dispense detergents and washing additives (see Detergents and laundry). ON/OFF button: switches the washer-dryer on and off. WASH CYCLE knob: programmes the wash cycles. During the wash cycle, the knob does not move.
Indicator lights The indicator lights provide important information. This is what they can tell you: Delayed start If the DELAY TIMER function has been activated (see Personalisation), after the wash cycle has been started the indicator light corresponding to the selected delay period will begin to flash: Wash cycle phase indicator lights Once the desired wash cycle has been selected and has begun, the indicator lights switch on one by one to indicate which phase of the cycle is currently in progress.
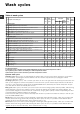
Wash cycles Table of wash cycles Wash cycles GB Detergents Max. temp. (°C) Max. speed (rpm) Drying 6 Sanitizing cycle: Extremely soiled whites. 6 Sanitizing cycle (1): Heavily soiled whites and resistant colours. 90° 1000 l l l l 60° 1000 l - l l 7 153 7 Goodnigt cycle: Lightly soiled delicate colours. 8 Baby cycle: Heavily soiled delicate colours. 40° 800 - l l 4 290 40° 800 l - l l 2 118 Description of the wash cycle Fabric Bleach Wash softener Max.
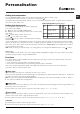
Personalisation Setting the temperature GB Turn the TEMPERATURE knob to set the wash temperature (see Table of wash cycles). The temperature may be lowered, or even set to a cold wash ( ). The washer-dryer will automatically prevent you from selecting a temperature which is higher than the maximum value set for each wash cycle. Setting the drying cycle Table of Drying times Fabric type (guideline values) Load type Max.
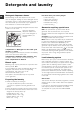
Detergents and laundry GB Detergent dispenser drawer Good washing results also depend on the correct dose of detergent: adding too much detergent will not necessarily result in a more efficient wash, and may in fact cause build up on the inside of your appliance and contribute to environmental pollution. Do not use hand washing detergents because these create too much foam. Open the detergent dispenser drawer and 3 pour in the detergent or washing additive, as follows.
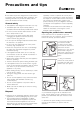
Precautions and tips This washer-dryer was designed and constructed in accordance with international safety regulations. The following information is provided for safety reasons and must therefore be read carefully. General safety This appliance was designed for domestic use only. The washer-dryer must only be used by adults, in accordance with the instructions provided in this manual. Do not touch the machine when barefoot or with wet or damp hands or feet.
Care and maintenance GB Cutting off the water and electricity supplies Turn off the water tap after every wash cycle. This will limit wear on the hydraulic system inside the washer-dryer and help to prevent leaks. Unplug the washer-dryer when cleaning it and during all maintenance work. Cleaning the washer-dryer The outer parts and rubber components of the appliance can be cleaned using a soft cloth soaked in lukewarm soapy water. Do not use solvents or abrasives.
Troubleshooting Your washer-dryer could fail to work. Before contacting the Technical Assistance Centre (see Assistance), make sure that the problem cannot be not solved easily using the following list. Problem: Possible causes / Solutions: The washer-dryer does not switch on. The appliance is not plugged into the socket fully, or is not making contact. There is no power in the house. The wash cycle does not start. The washer-dryer door is not closed properly.
Service Before calling for Assistance: Check whether you can solve the problem alone (see Troubleshooting); Restart the programme to check whether the problem has been solved; If this is not the case, contact an authorised Technical Assistance Centre using the telephone number provided on the guarantee certificate. GB Always request the assistance of authorised technicians. Have the following information to hand: the type of problem; the appliance model (Mod.); the serial number (S/N).
Mode demploi LAVANTE-SÉCHANTE Sommaire FR Français FR Installation, 14-15 Déballage et mise à niveau Raccordements eau et électricité Premier cycle de lavage Caractéristiques techniques Description du lavante-séchante et démarrage dun programme, 16-17 Bandeau de commandes Voyants Démarrage dun programme Programmes, 18 Tableau des programmes Personnalisations, 19 ARM7L 105 Sélection de la température Sélectionner le séchage Fonctions Produits lessiviels et linge, 20 Tiroir à produits lessiviels
Installation FR Conserver ce mode demploi pour pouvoir le consulter à tout moment. En cas de vente, de cession ou de déménagement, veiller à ce quil suive toujours le lavante-séchante pour que son nouveau propriétaire soit informé sur son mode de fonctionnement et puisse profiter des conseils correspondants. Une bonne mise à niveau garantit la stabilité de lappareil et évite quil y ait des vibrations, du bruit et des déplacements en cours de fonctionnement.
Raccordement du tuyau de vidange 65 - 100 cm Raccorder le tuyau dévacuation, sans le plier, à un conduit dévacuation ou à une évacuation murale placés à une distance du sol comprise entre 65 et 100 cm; Nutiliser ni rallonges ni prises multiples. FR Le câble ne doit être ni plié ni trop écrasé. Le câble dalimentation ne doit être remplacé que par des techniciens agréés. Attention! Nous déclinons toute responsabilité en cas de non-respect des normes énumérées ci-dessus.
Description du lavante-séchante et démarrage dun programme FR Bandeau de commandes Voyants DÉROULEMENT CYCLE/DÉPART DIFFÉRÉ Bouton SÉCHAGE Touche MARCHE/ ARRÊT Bouton TEMPÉRATURE Voyant HUBLOT VERROUILLÉ Touche avec voyant Tiroir à produits lessiviels Touches avec voyants FONCTION MARCHE/ PAUSE Bouton PROGRAMMES Tiroir à produits lessiviels: pour charger les produits lessiviels et les additifs (voir Produits lessiviels et linge).
Voyants Les voyants fournissent des informations importantes.
Programmes Tableau des programmes Programmes FR Description du Programme Temp. maxi. (°C) Vitesse Produits lessiviels ChargDurée maxi e maxi Séchage cycle (tours Assou(Kg) Javel Lavage minute) plissant Programmes Spécial 6 Anti-bactérien: blancs extrêmement sales. 6 Anti-bactérien (1): blancs et couleurs résistantes très sales. 90° 1000 l l l l 7 170 60° 1000 l - l l 7 153 7 Bonne Nuit: couleurs délicates peu sales. 8 Bébé: couleurs délicates très sales.
Personnalisations Sélection de la température FR Tourner le bouton TEMPÉRATURE pour sélectionner la température de lavage (voir Tableau des programmes). La température peut être abaissée jusquau lavage à froid ( ). La machine interdira automatiquement toute sélection dune température supérieure à la température maximale prévue pour chaque programme. Sélectionner le séchage Tableau temps de Séchage Type de tissu Type de charge (Valeurs indicatives) Charge max.
Produits lessiviels et linge FR Tiroir à produits lessiviels Linge ou vêtements particuliers Un bon résultat de lavage dépend aussi dun bon dosage de produit lessiviel: un excès de lessive ne lave pas mieux, il incruste lintérieur du lavanteséchante et pollue lenvironnement. Soie: sélectionner le programme de lavage spécial 9 pour vêtements en soie. Il est conseillé dutiliser une lessive spéciale pour linge délicat.
Précautions et conseils Ce lavante-séchante a été conçu et fabriqué conformément aux normes internationales de sécurité. Ces consignes sont fournies pour des raisons de sécurité, il faut les lire attentivement. Sécurité générale Cet appareil est conçu pour un usage domestique. Ce lavante-séchante ne doit être utilisé que par des adultes en suivant les instructions reportées dans ce mode demploi. Ne jamais toucher lappareil si lon est pieds nus et si les mains sont mouillées ou humides.
Entretien et soin FR Coupure de larrivée deau et du courant Fermer le robinet de leau après chaque lavage. Cela réduit lusure de linstallation hydraulique du lavante-séchante et évite tout danger de fuites. Débrancher la fiche de la prise de courant lors de tout nettoyage du lavante-séchante et pendant tous les travaux dentretien. Nettoyage du lavante-séchante Pour nettoyer lextérieur et les parties en caoutchouc, utiliser un chiffon imbibé deau tiède et de savon.
Anomalies et remèdes Il peut arriver que le lavante-séchante ne fonctionne pas bien. Avant dappeler le Service de dépannage (voir Assistance), contrôler sil ne sagit pas par hasard dun problème facile à résoudre à laide de la liste suivante. Anomalies: FR Causes / Solutions possibles: Le lavante-séchante ne sallume pas. La fiche nest pas branchée dans la prise de courant ou mal branchée. Il y a une panne de courant. Le cycle de lavage ne démarre pas.
Assistance Avant dappeler le service après-vente: Vérifier si on ne peut pas résoudre lanomalie par ses propres moyens (voir Anomalies et Remèdes); Remettre le programme en marche pour contrôler si linconvénient a disparu; Autrement, contacter le Centre dAssistance technique agréé au numéro de téléphone indiqué sur le certificat de garantie. FR Ne jamais sadresser à des techniciens non agréés. Communiquer: le type de panne; le modèle de lappareil (Mod.); son numéro de série (S/N).
تعليمات االستخدام ماكينة غسيل -ماكينة تجفيف المحتويات AR AR التركيب26-27 ، إفراغ المحتويات وتحديد المستوى وصل إمدادات الكهرباء والماء دورة الغسيل األولى البيانات التقنية وصف ماكينة الغسيل -التجفيف وتشغيل دورة الغسيل28-29 ، لوحة التحكم المصابيح المؤشرة تشغيل دورة الغسيل دورات الغسيل30 ، ARM7L 105 جدول دورات الغسيل التخصيصات31 ، ضبط درجة الحرارة إعداد دورة التجفيف الوظائف مواد التنظيف والغسيل32 ، درج وعاء مواد التنظيف دورة التبييض
ﺗﻌﻠﻴﻤﺎت ﻣﻦ أﺟﻞ اﻻﺳﺘﻌﻤﺎل AR ﻣـﻦ اﻟـﻤـﻬـﻢ اﻟـﺤـﻔـﺎظ ﻋـﻠـﻰ هـﺬا اﻟـﻜـﺘـﻴـﺐ ﻟـﻴـﻤـﻜـﻨـﻜـﻢ اﻟـﻌـﻮدة اﻟـﻴـﻪ ﻋـﻨـﺪ اﻟـﺤـﺎﺟـﺔ اﻟـﻰ اﻟـﺘـﻌـﺮف ﻋﻠﻰ ﻣﻌﻠﻮﻣﺎت ﻋﻦ اﻟﺠﻬﺎز ﻓﻲ أي ﻟﺤﻈﺔ ،ﻓﻲ ﺣﺎﻟﺔ ﺑﻴﻊ اﻟﺠﻬﺎز أو اﻋﻄﺎءه آﻬﺪﻳﺔ أو ﻋﻨﺪ ﻧﻘﻞ اﻟﺠﻬﺎز ﻣﻦ ﻣﻜﺎن ﻻﺧﺮ ،ﺗﺄآﺪوا ﻣﻦ أن ﻳﺒﻘﻰ هﺬا اﻟﻜﺘﻴﺐ ﻧﻊ اﻟﺠﻬﺎز وذﻟﻚ ﻟـﺘـﻘـﺪﻳـﻢ ﻣـﻌـﻠـﻮﻣـﺎت ﺗـﺘـﻌـﻠـﻖ ﺑـﺘـﺸـﻌـﻴـﻞ وﺑـﺮﻣـﺠـﺔ اﻟـﺠـﻬـﺎز ﺑـﺎﻻﺿـﺎﻓـﺔ اﻟـﻰ اﻟـﻨـﺼـﺎﺋـﺢ واﻟـﺘـﺤـﺬﻳـﺮ ﻟﻠﻤﺎﻟﻚ اﻟﺠﺪﻳﺪ ﻟﻠﺠﻬﺎز.
وصل خرطوم تصريف الماء 65 - 100 cm ! ال تستخدم كبالت اإلطالة أو المقابس المتعددة. قم بتوصيل خرطوم تصريف الماء ،من دون ثنيه ،بأنبوب تصريف أو بتصريف جداري على ارتفاع يتراوح بين 65 وحتى 100سم عن األرض؛ AR ! على الكبل أال يكون معوجا أو مضغوطا. ! يجب فحص الكبل بانتظام وتبديله من قبل فنّي مؤهل فقط. تحذير! لن تتحمل الشركة أية مسؤولية في حال لم يتم احترام هذه التعليمات.
وصف ماكينة الغسيل-ماكينة التجفيف وتشغيل دورة الغسيل AR لوحة التحكم المصابيح المؤشرة لبرنامج دورة الغسيل/عداد الوقت المؤجل مؤشر إغالق الباب مفتاح التجفيف مفتاح درحة الحرارة زر تشغيل/إيقاف تشغيل زر مع مصباح مؤشر تشغيل/إيقاف تشغيل مؤقت درج وعاء مواد التنظيف أزرار مع مصابيح مؤشرة للوظيفة درج وعاء مواد التنظيف :يتم استخدامه لتوزيع مواد التنظيف ومضافات الغسيل (انظر "مواد التظيف والغسيل").
المصابيح المؤشرة توفر المصابيح المؤشرة معلومات هامة. هذا ما يمكنها أن تخبرك به: المصابيح المؤشرة لمرحلة دورة الغسيل فور اختيار دورة الغسيل المرغوب بها وبدءها ،تضيئ المصابيح المؤشرة، الواحد تلو الآخر للإشارة لمرحلة الدوران التي تعمل حاليا.
دورات الغسيل دورات الغسيل AR جدول دورات الغسيل درجة حرارة قصوى. ()C° سرعة قصوىفي التجفيف (دورة التبييض غسيل الدقيقة) مواد التنظيف المادة المطرّية حمل أقصى (كغم) مدة الدور الدوارت الخاصة 6التعقيم :الغسيل األبيض المتسخ جدا. 90° 1000 ● ● ● ● 7 170 6التعقيم ( :)1المالبس البيضاء المتسخة جدا واأللوان الثابتة.
التخصيصات ضبط درجة الحرارة AR أدر مفتاح درجة الحرارة لضبط درجة حرارة الغسيل (انظر جدول دورات الغسيل). يمكن خفض درجة الحرارة أو حتى إعدادها للغسيل البارد( ). ستمنعك ماكينة الغسيل -ماكينة التجفيف أوتوماتيكيا من اختيار درجة حرارة أعلى من القيمة القصوى المحددة لكل دورة غسيل.
مواد التنظيف والغسيل AR درج وعاء مواد التنظيف تعتمد نتائج الغسيل الجيدة أيضا على كمية مواد التنظيف :إن إضافة مواد تنظيف أكثر مما يجب ال يزيد فاعلية الغسيل بالضرورة ،يمكن أن يؤدي إلى انسداد في األجزاء الداخلية من الجهاز لديك وحتى يمكن أن يلوث البيئة. ! ال تستخدم المواد المعدة للغسيل باليد ألنها يمكن أن تطلق رغوة فائضة. افتح درج وعاء مواد التنظيف واسكب مواد التنظيف أو 3 مضافات الغسيل ،كما يلي.
وسائل حذر ونصائح ! تم تصميم ماكينة الغسيل-ماكينة التجفيف وتصنيعها طبقا لمواصفات األمان العالمية .يتم تزويد التحذيرات التالية ألسباب وقائية ويجب قراءتها بعناية. الوقاية العامة • تم تصميم هذا الجهاز لالستخدام المنزلي فقط. • يجب استخدام ماكينة الغسيل-ماكينة التجفيف من قبل البالغين فقط ،بموجب التعليمات المزودة في هذا الدليل. • ال تالمس الماكينة وأنت حافي القدمين أو بيدين ورجلين مبللتين أو رطبتين.
العناية والصيانة AR قطع إمداد الماء والكهرباء ّ المضخة تنظيف • قم بإقفال حنفية الماء بعد كل دورة غسيل .سيحدد هذا من تآكل النظام الهيدروليكي داخل ماكينة الغسيل ويساعد على منع التسربات. ماكينة الغسيل مزودة بمضخة للتنظيف الذاتي ،حيث ال تحتاج إلى أية عناية في أي وقت .في بعض األحيان ،يمكن للقطع الصغيرة (مثل القطع النقدية أو األزرار) أن تسقط داخل الحجرة األولية التي تحمي المضخة ،والموجودة في جزئها األسفل.
استكشاف المشاكل وحلها يمكن لماكينة الغسيل-ماكينة التجفيف أن تفشل في العمل فجأة .قبل االتصال بمركز المساعدة التقنية (أنظر "الخدمة") تأكد من أن المشكلة ال يمكن حلها بسهولة باستخدام الجدول التالي. AR المشكلة: األسباب المحتملة /الحلول: ال يمكن تشغيل ماكينة الغسيل-ماكينة التجفيف. • الجهاز غير موصل بالمقبس الكهربائي بشكل كامل ،أو أنه لا يحدث تماس. • يوجد انقطاع كهرباء في البيت. • باب ماكينة الغسيل-ماكينة التجفيف غير مقفل بشكل صحيح.
195068643.