Instructions for use MICROWAVE OVEN COMBINED WITH GRILL Index IT Italiano, 1 DE Deutsch, 55 PT Portuges, 109 MWI 14IX GB English, 19 NL Nederland, 73 FR Français, 37 ES Espanol, 91 GB General Description of the oven Description of the control panel Building-in Important safety warnings Technical data Installation and electrical connection Ovenware to use How to get the best results from your oven Rules and general suggestions for using the oven page 20 page 20 page 21 page 22 page 23 page 24 page
Chapter general GB Description of the oven Description of the control panel Programme selector knob A Microwave only : Set the knob at Grill only: Set the knob at B . . Combined microwave + grill: Set the knob at . E D F Microwave power knob Microwave only : Turn the knob to the power you wish.
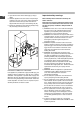
Building-in GB 368 Inside the oven there is a plastic bag with fixing material. Take this bag out of the oven. BEFORE USING THE OVEN, REMOVE THE PLASTIC PROTECTION ANGLES ON THE GLASS DOOR (IF EQUIPPED) 1. Fasten metal strip (A) using the two 13 mm. screws (all of which can be found in the accessory bag). 55 0m in. 595 20 50 min . ventilation passageway 8 0+ 0 56 360+2 0 A 2. Remove the 2 screws (x) from the fastening bar under the microwave oven. 3.
GB 4. Open the lid of the smoke discharge (C) fully (if fitted) 5. Slide the appliance into the recess. Keep sliding it until the front of the oven (G) is resting against the cupboard and the holes (D) under the oven are aligned with the holes (E) in the fastening bar (B). 6. Fasten the appliance to the fastening bar (B) using the previously removed screws (X).
10)Only use utensils that are suitable for use in microwave ovens. In order to avoid overheating and the consequent risk of fire, it is advisable to supervise the oven when cooking food in disposable containers made of plastic, cardboard or other inflammable materials, and when heating small quantities of food. 11)Never place the turntable in water after it has ben heated for a long time. The high thermal shock resulting would break the turntable.
GB and closes properly. 4) Place the support (H) in the centre of the circular groove and fix the turntable (G) to it. The spindle (D) should be inserted in the corresponding groove in the centre of the turntable. 5) After the installation has been performed, the power supply cable and the power socket must be easy to access. 6) Only a qualified electrician may install or relocate a socket outlet. 7) Only connect the appliance to a power socket with a power capacity of at least 16A.
How to get the best results from your oven What do I want to do? • Keep food warm • Defrost • • • Soften chocolate & icing Melt butter and soften cheese Heat pastry goods • Cook stew, chicken breasts • Cook fruit, vegetables, rice, soup, fish Heat up any type of already cooked or frozen food • • • • GB What function should I choose? Amount & time chart page (90W) 27 (135W) 27 28 (315W) 27 28 28 29 29 (450W) 30 31 (650W) 27 30 31 27 30 31 28 29 32 33 32 33 34 34 (900W)
GB Rules and general suggestions for using the oven Microwaves consist of electromagnetic radiation found in nature under the form of light waves (e.g., sunlight). Inside the oven, these waves penetrate food from all directions and heat up the water, fatty and sugar molecules. Heat is produced very quickly only in the food itself, whereas the container being used warms up indirectly by meansof heat given off by the heated food.
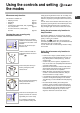
Using the controls and setting the modes Microwave-only function This function is suitable for: • Keeping food hot page 27 • Defrosting page 27 • Heating page 29 • Cooking stew, white meats, fruit, vegetables, rice, soup and fish page 31 • To brown the foods, to bake pastry and fruit page 33 Turning the oven on using only microwave function Place the food in a container suitable for microwave cooking and place it in the centre of the turntable N.B: You do not have to preheat the oven.
GB Defrosting time Type Quantity Time to be set (minutes) MEAT • Roasts (pork, beef, veal, etc.
- • follow the cooking times listed with great caution; remember that under certain conditions the timings given must be lengthened Frozen foods must be defrosted before the heating process begins. The lower the food’s initial temperature, the longer the time needed for heating. • Foodstuffs and drinks may be heated briefly in paper or plastic containers. In any event, however, such containers may become misshapen if the heating time is too long.
GB Using the microwave only functionfor cooking Soups and rice Soups or broth usually require a smaller amount of liquid because the evaporation in microwave ovens is rather limited. Because it is a dehydrating agent, salt must be added only when the cooking is finished or during the standing time.
Cooking times Type Fish • Filleted • Slices • Whole • Whole • Cut-up fish • Crayfish Greens and vegetables • Asparagus • Artichokes • Green beans • Broccoli • Brussels sprouts • White cabbage • Red cabbage • Carrots • Cauliflower • Celery • Eggplant • Leek • Mushrooms • Onions • Spinach • Peas • Fennel • Peppers • Potatoes • Zucchini Meats • Stew • Chicken breasts • Meat loaf GB Quantity Power level Time to be set (minutes) Standing time (minutes) Notes 2 2 2 2 2 2 300 300 500 250 400 500 gr gr gr g
GB Combined microwave + grill function This function is suitable for: • Quick preparation of roasts, poultry, skewered meat and potatoes. page 33 • Au gratin dishes (e.g., lasagne, vegetables au gratin, macaroni) page 33 Turning the oven on with the microwave + grill function Put the food in a receptacle made for microwave cooking and place it on the turntable. Turn the programme selector knob in position to Choose the power level you want by turning the power selector knob.
Using the combined microwave + grill function to cook This setting is ideal for all those dishes which have to be “au gratin” or must be given a certain colour. You must keep the following in mind. • Do not spunkle seasonings in general (use only 1/2 cup of water to keep meat tender). • Turn roasts and large cuts of meat over when they are half-cooked. • If the upper portion seems sufficiently browned before the set time has expired, turn the programme Timer knob to position “0”.
GB After about 5 to 8 minutes, put the food on the high wire rack and place everything on the turntable. While the grilling is in progress, the turntable will collect all the escaping fat. Set the cooking time desired by turning the timer knob in a clockwise direction. Grill-only function This function is suitable for: • All types of traditional grilling (e.g., chops, hamburgers, frankfurters, toast, etc.
Care and cleaning Cleaning Always switch off at the power socket, disconnect the plug and wait for the appliance to cool down, before any cleaning and maintenance is carried out. The internal cavity of your oven is covered with a special non-stick finish to which splashes and food particles do not stick, making cleaning particularly simple. Always keep the microwave outlet cover (C) clean and free from grease and splashes of fat.
GB Maintenance Before calling Service for assistance, check through the following list, there may be nothing wrong: PROBLEM The appliance does not work Condensation on the work surface, inside the oven or around the door. Sparks inside the oven CAUSE/SOLUTION • • • • The door is not closed properly. The plug is not correctly inserted. No power at the socket (check the fuse box) The time has not been set correctly.