TRI 633 C E English GB NL Nederland Operating Instructions Gebruiksaanwijzing HOB Contents Operating Instructions,1 WARNING,2 Description of the appliance-Control Panel,3 Installation,3 Start-up and use,5 Precautions and tips,10 Care and maintenance,11 Technical description of the models,11 KOOKPLAAT Inhoud Gebruiksaanwijzing,1 PAS OP,42 Beschrijving van het apparaatBedieningspaneel,43 Installatie, 43 Starten en gebruik, 45 Voorzorgsmaatregelen en advies,50 Onderhoud en verzorging,51 Technische besc
GB TRI 633 C E GB WARNING! • WARNING: The appliance and its accessible parts become hot during use. • Care should be taken to avoid touching heating elements. • Children less than 8 years of age shall be kept away unless continuously supervised.
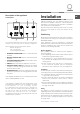
Installation Description of the appliance Control panel 6 1 GB 5 ! Before operating your new appliance please read this instruction booklet carefully. It contains important information concerning the safe operation, installation and maintenance of the appliance. ! Please keep these operating instructions for future reference. Pass them on to any new owners of the appliance. Positioning ! Keep all packaging material out of the reach of children.
GB Installation of the safety washer 1 2 CABINET DIMENSIONS 60 490 560 3 Min. 30/Max.
Fix the hob as follows: 1. Use short flat-bottomed screws to fix the 4 alignment springs in the holes provided at the central point of each side of the hob. 2. Place the hob in the cavity, make sure it is in a central position and push down on the whole perimeter until the hob is stuck to the supporting surface. ! The screws for the alignment springs must remain accessible. ! In order to adhere to safety standards, the appliance must not come into contact with electrical parts once it has been installed.
GB • Loud whistle: heard when two induction elements of the same group function simultaneously at maximum power and/or when the booster function is set on the larger element while the other is auto-adjusted. Noise is reduced by decreasing the power level of the auto-adjusted induction element; pot bottom layers made of different kinds of materials are among the main causes of this noise.
Switching on the cooking zones Each cooking zone is controlled using a selector button and a power adjustment device consisting of a double(-) and (+) button.
GB Switching off the hob Press the button to switch off the appliance - do not rely solely on the pan sensor. If the control panel lock has been activated, the controls will continue to be locked even after the hob is switched on again. In order to switch the hob on again, you must first remove the lock function. Practical advice on using the appliance ! Use cookware made from materials which are compatible with the induction principle (ferromagnetic material).
Power level Maximum operating time in hours 1 9 2 8 3 7 4 6 5 5 6 4 7 3 8 2 9 1 GB Very low-flame cooking Low-flame cooking Medium-flame cooking High-flame cooking Very high-flame cooking Practical cooking advice ª • • ¶ ¶ § § S S ¢ ¢ £ ™ ™ ¡ Pressure cooking Pressure cooker Frying Grilling Boiling Crêpes Cooking on a high flame and browning (roasts, steaks, escalopes, fish fillets, fried eggs) Fast thickening (liquid juices) Boiling water (pasta, rice, vegetables) Milk Sl
Precautions and tips GB ! This appliance has been designed and manufactured in compliance with international safety standards. The following warnings are provided for safety reasons and must be read carefully. This appliance conforms to the following European Economic Community directives: - 2006/95/EEC dated 12/12/06 (Low Voltage) and subsequent amendments; - 2004/108/EEC dated 15/12/04 (Electromagnetic Compatibility) and subsequent amendments; - 93/68/EEC dated 22/07/93 and subsequent amendments.
Care and maintenance Switching the appliance off Disconnect your appliance from the electricity supply before carrying out any work on it. Cleaning the appliance ! Do not use abrasive or corrosive detergents (for example, products in spray cans for cleaning barbecues and ovens), stain removers, anti-rust products, powder detergents or sponges with abrasive surfaces: these may scratch the surface beyond repair. ! Never use steam cleaners or pressure cleaners on the appliance.
TRI 633 C E ATTENTION ! • ATTENTION : cet appareil ainsi que ses parties accessibles deviennent très chauds pendant leur fonctionnement. • Il faut faire attention de ne pas toucher les éléments chauffants. •Ne laisser s’approcher les enfants de moins de 8 ans à moins qu’ils ne soient sous surveillance constante.
Description de l'appareil Installation Bandeau de commande 6 1 5 FR ! Veuillez lire attentivement ces instructions, avant d'utiliser votre nouvel appareil. Elles contiennent des conseils importants sur la sécurité, l'installation et l'entretien de cet appareil. ! Veuillez conserver ce mode d'emploi pour pouvoir le consulter à tout moment. Passez-le aux nouveaux propriétaires de l'appareil.
FR Installation de la rondelle de sécurité 1 2 DIMENSIONS DE L'ARMOIRE 60 490 560 3 Min. 30/Max.
Fixez la plaque comme suit : 1. Servez-vous des vis courtes sans pointe pour visser les 4 ressorts de centrage dans les trous prévus sur chaque côté de la table, en leur milieu. 2. Insérez la table de cuisson dans la découpe prévue, bien au centre et appuyez tout autour du cadre pour que la table adhère parfaitement au plan d'appui. ! Les vis des ressorts de centrage doivent être accessibles.
FR • Sifflement intense : Il se produit lorsque les deux éléments à induction du même groupe fonctionnent simultanément à leur puissance maximale et/ou lorsque la fonction booster est insérée sur le plus grand élément à induction tandis que l'autre est autorégulé. Le bruit diminue une fois que le niveau de puissance de l'élément à induction autorégulé baisse ; il est généralement causé par plusieurs couches de matériaux différents formant le fond de la casserole.
se fait entendre et le voyant correspondant affiche « 0 ». Pour achever l'opération sans enregistrer les modifications : ·Si pendant 60 secondes vous n'observez aucune action, alors les modifications ne sont pas enregistrées et le système peut être réinitialisé. . Comment activer les foyers Vous pouvez contrôler chaque foyer grâce à une touche de sélection et à un dispositif de régulation de puissance doté des touches (-) et (+).
FR pendant un moment, le voyant s'éteint et la fonction de verrouillage est désactivée. Toutes les touches de sélection du foyer seront verrouillées si : la table de cuisson est désactivée, si le verrouillage du bandeau de commande est activé ou si une erreur survient au niveau de la table de cuisson. Désactivation de la plaque de cuisson Pressez la touche pour désactiver votre appareil - ne comptez pas uniquement sur le capteur de casserole.
• Un débordement sur le bandeau de commande. • Une pression prolongée sur une touche. Tous ces cas énumérés ci-dessus peuvent déclencher un signal sonore. Veuillez éliminer la cause du dysfonctionnement afin d'arrêter le signal sonore. Le cas échéant, le signal sonore continue à retentir et la plaque s'éteint.
Précautions et conseils FR ! Cet appareil a été conçu et fabriqué conformément aux normes internationales de sécurité. Ces consignes de sécurité sont très importantes et doivent être lues attentivement. Cet appareil est conforme aux Directives Communautaires suivantes : - 2006/95/CEE du 12/12/06 (Basse Tension) et modifications successives - 2004/108/CEE du 15/12/04 (Compatibilité électromagnétique) et modifications successives - 93/68/CEE du 22/07/93 et modifications successives.
Nettoyage et entretien Mise hors tension Avant toute opération de nettoyage ou d’entretien couper l’alimentation électrique de l’appareil. Nettoyage de l’appareil ! Ne jamais utiliser de détergents abrasifs ou corrosifs, tels que des bombes aérosols pour grilloirs et fours, des détacheurs et des anti-rouille, des poudres à récurer ou des éponges à surface abrasive : ils risquent de rayer irrémédiablement la surface. ! Ne jamais nettoyer l’appareil avec des nettoyeurs vapeur ou haute pression.
TRI 633 C E ES ATENCIÓN ! • ATENCIÓN: Este aparato y sus partes accesibles se calientan mucho durante el uso. • Por lo tanto, es importante evitar tocar los elementos calentadores. • Mantenga alejados a los niños menores de 8 años si no son continuamente vigilados.
ES Instalación Descripción del aparato Panel de control 6 1 5 ES ! Antes de utilizar su aparato nuevo, lea atentamente este manual de instrucciones. Contiene información importante acerca del funcionamiento seguro, instalación y mantenimiento del aparato. ! Guarde estas instrucciones para referencia futura. Páselos a los nuevos dueños de la máquina.
ES Instalación de la arandela de seguridad 1 2 MEDIDAS DEL EQUIPO 60 490 560 3 Min. 30/Max.
Fije la encimera de la siguiente manera: 1. Utilice tornillos de fondo plano corto para fijar los 4 muelles de centrado en los orificios previstos en el punto central de cada lado de la encimera. 2. Coloque la encimera en el hueco, asegúrese de que está en una posición central y empuje hacia abajo en todo el perímetro hasta que la encimera se pegue a la superficie de apoyo. ! Los tornillos de los muelles de centrado deben permanecer accesibles.
ES electromagnéticos (inducción); puede ser más o menos intensa dependiendo del material que constituye el fondo de la olla, y disminuye a medida que aumentan las dimensiones de la olla. • Silbido fuerte: se escucha cuando dos elementos de inducción del mismo grupo de funcionan al mismo tiempo a la máxima potencia y / o cuando la función de refuerzo se encuentra en el elemento más grande mientras que el otro es auto-ajustado.
La secuencia para finalizar la grabación del nuevo límite de potencia de la superficie de cocción es: ·Presione al mismo tiempo las teclas de selección Calentador 1 y Calentador 3 ·Una vez hecho esto, el nuevo límite de potencia de la superficie de cocción se registra y hay un reinicio del sistema. Para terminar sin cambios grabación: ·Si durante 60 segundos no hay acción, los cambios no se registran y hay un reinicio del sistema.
ES ! Para cambiar la hora de un calentador cronometrado, repita el proceso explicado anteriormente. ! No utilice ningún accesorio adaptador o difusor, ni ninguna placa metálica sobre las zonas de cocción, pues podrían afectar negativamente al funcionamiento de la plaza, además de provocar daños estéticos en la misma. !Si se mantienen pulsados los botones + y - aumenta la velocidad de la selección de tiempo Final de la cuenta regresiva del temporizador.
Protección contra sobrecalentamiento Si los elementos electrónicos se sobrecalientan, el número que señaliza el nivel de potencia comienza a parpadear, y la letra “c” aparece en la pantalla. Cuando la temperatura ha alcanzado un nivel adecuado, este mensaje desaparece y la encimera puede ser utilizada de nuevo.
Precauciones y consejos ES ! El aparato ha sido proyectado y fabricado en conformidad con las normas internacionales sobre seguridad. Estas advertencias se suministran por razones de seguridad y deben ser leídas atentamente. Este aparato es conforme con las siguientes Normas Comunitarias: -2006/95/CEE del 12.12.06 (Baja Tensión) y sucesivas modificaciones - 2004/108/CEE del 15/12/04 (Compatibilidad Electromagnética) y sucesivas modificaciones - 93/68/CEE del 22/07/93 y sucesivas modificaciones.
Mantenimiento y cuidados Interrumpir el suministro de corriente eléctrica Antes de realizar cualquier operación, desconecte el aparato de la red de alimentación eléctrica. Limpiar el aparato ! Evite el uso de detergentes abrasivos o corrosivos, como aerosoles para barbacoas y hornos, quitamanchas y productos anticorrosivos, jabones en polvo y esponjas con superficie abrasiva, pueden rayar irremediablemente la superficie. ! No utilice nunca limpiadores a vapor o de alta presión para la limpieza del aparato.
TRI 633 C E PT 32 ATENÇÃO ! • ATENÇÃO: Este aparelho e as suas partes acessíveis aquecem muito durante a utilização. • É preciso ter atenção e evitar tocar os elementos que aquecem. • Manter afastadas as crianças com menos de 8 anos, caso não estejam a ser vigiadas.
Descrição do aparelho Instalação Painel de controlo 6 1 5 PT ! Antes de operar com o novo aparelho deve ler cuidadosamente a brochura de instruções. Contém informação importante relativamente a um funcionamento seguro, instalação e manutenção do aparelho. ! Deve guardar estas instruções para consulta futura. As mesmas devem acompanhar sempre o aparelho mesmo quando muda de proprietário.
PT Instalação da anilha de segurança 1 2 DIMENSÕES DO ARMÁRIO 60 490 560 3 Mín. 30/Máx.
Fixar a placa como se segue: 1. Usar parafusos pequenos de fundo plano para fixar as 4 molas de alinhamento nos orifícios para o efeito no meio de cada um dos lados da placa. 2. Colocar a placa na cavidade, assegurar que está na posição central e empurrar para baixo em toda a volta até que a placa fique encaixada na superfície de suporte. ! Os parafusos para as molas de alinhamento devem estar acessíveis.
do mesmo grupo funcionam simultaneamente com a alimentação máxima e/ou a função de propulsor está definida no elemento maior enquanto ou outro é automaticamente ajustado. O ruído é reduzido diminuindo o nível de alimentação do elemento de indução de ajustamento automático; as camadas da base da panela dos vários tipo de materiais estão entre as causas principais deste ruído.
. Activar as zonas de cozedura mesmo tempo nas teclas [-] e [+]. É ouvido um bip e o visor correspondente exibe "0". PT Cada zona de cozedura é controlada usando o botão selector Usando o Temporizador e um dispositivo de ajustamento da potência consiste num botão duplo de(-) e (+). • Para iniciar o funcionamento de uma zona de cozedura , premir o botão de controlo correspondente e definir o nível de potência pretendido (entre 0 e 9) usando os botões (-) ou (+).
PT -o ícone ficará iluminado e será emitido um som de bip. Para usar qualquer dos controlos (por ex. para a cozedura), deve desligar esta função. Premir o botão durante alguns momentos, o ícone deixará de estar iluminado e será removida a função do bloqueio. Todas as teclas na selecção da zona de cozedura serão bloqueadas Se a placa de cozedura estiver desligada Se o Bloqueio do Painel de Controlo estiver activado ou Se ocorrer um erro na placa de cozedura.
Quando são activadas uma ou mais teclas durante mais de 10 segundos, o controlo táctil, desliga-se. Será emitido um bip de aviso em cada 10 segundos, enquanto a tecla/s está/ão activada/s. Com todos os queimadores com potência zero durante 10 segundos, a placa de cozedura é desligada. Se o desligamento for devido a uma activação acidental das teclas, o controlo táctil actua tal como acima.
Precauções e conselhos PT ! Este aparelho foi projectado e fabricado em conformidade com as normas internacionais de segurança. Estas advertências são fornecidas por razões de segurança e devem ser lidas com atenção. Este aparelho é em conformidade com as seguintes Directivas da Comunidade Europeia: -2006/95/CEE de 12.12.06 (Baixa Tensão) e posteriores modificações - 2004/108/CEE de 15/12/04 (Compatibilidade Electromagnética) e posteriores modificações - 93/68/CEE de 22/07/93 e posteriores modificações.
Manutenção e cuidados Desligar a corrente eléctrica a superfície se algo for derramado durante a cozedura. É recomendável realizar estas operações com o aparelho morno ou frio. • Lembre-se sempre de enxaguar com água limpa e enxugar o plano com cuidado: para não acontecer de resíduos de produtos grudarem-se na sucessiva cozedura. Antes de realizar qualquer operação, desligue o aparelho da alimentação eléctrica.
NL TRI 633 C E 42 PAS OP ! • PAS OP: Dit apparaat en zijn bereikbare onderdelen worden tijdens gebruik zeer heet. • Zorg ervoor de verwarmende elementen niet aan te raken. • Zorg ervoor dat kinderen die kleiner dan 8 jaar oud zijn niet dichtbij het apparaat kunnen komen, tenzij onder constant toezicht.
Installeren Beschrijving van het apparaat NL Bedieningspaneel 6 1 NL 5 ! Voor u uw nieuwe apparaat in gebruik neemt, moet u deze instructies zorgvuldig lezen. Ze bevatten belangrijke informatie met betrekking tot de veilige bediening, installatie en het onder van het apparaat. ! Bewaar deze instructies voor een eventuele raadpleging in de toekomst. Geef ze door aan eventuele nieuwe eigenaars van het apparaat.
NL Installatie van de veiligheid afstandsring 1 2 KASTAFMETINGEN 60 490 560 3 Min. 30/Max.
Bevestig de kookplaat alsvolgt: 1. Gebruik vlakke schroeven om de 4 uitlijningsschroeven in de openingen te schroeven in het centrale punt van iedere zijde van de kookplaat. 2. Plaats de kookplaat in de opening. Zorg ervoor dat ze centraal gepositioneerd is en druk neer op de volledige perimter tot de kookplaat vast zit op de ondergrond. ! De schroeven van de uitlijningsveren moeten toegankelijk blijven.
NL stroom veroorzaakt door elektromagnetische velden (inductie); kan meer of minder intensief zijn afhankelijk van het materiaal van de onderzijde van de pot, en vermindert naarmate grotere potten worden gebruikt. • Luid fluitsignaal: weerklinkt wanneer twee inductieelementen van dezelfde groep gelijktijdig aan maximum vermogen werken en/of wanneer de booster-functie wordt ingesteld op het grotere element terwijl het andere automatisch wordt aangepast.
·Druk gelijktijdig op de Brander 1 en Brander 3 selectieknoppen ·Hierna is de nieuwe kookplaat vermogenslimiet geregistreerd en er wordt een systeem reset uitgevoerd. Beëindigen zonder de wijzigen te registreren: ·Als er gedurende 60 seconden geen actie wordt uitgevoerd, worden de wijzigingen niet geregistreerd en het systeem wordt gereset. .
Einde van de timer aftelling. NL Als de resterende tijd verstreken is, wordt de timer uitgeschakeld en het scherm geeft een knipperende ‘0’ weer. Het alarm wordt geannuleerd door een van de toetsen in te drukken. Bedieningspaneel vergrendeling Als de brander ingeschakeld is, kunnen de oven bedieningstoetsen worden vergrendeld om ongewenste wijzigingen aan de instellingen te vermijden (door kinderen, tijdens het schoonmaken, etc.). .
Als een of meerdere knoppen worden ingedrukt gedurende meer dan 10 sec. schakelt de bedieningsknop uit. sMet alle kookplaten op nul gedurende 10 sec. De kookplaat wordt uitgeschakeld. Als de uitschakeling te wijten is aan een ongewenste activering van de knoppen, werkt de aanraakbediening zoals hierboven.
Voorzorgsmaatregelen en advies NL ! Dit apparaat is ontwikkeld en gefabriceerd volgens de geldende internationale veiligheidsvoorschriften. Deze aanwijzingen zijn geschreven voor uw veiligheid en u dient ze derhalve goed door te nemen.
Onderhoud en verzorging De elektrische stroom afsluiten • Als de plaat is schoongemaakt, kan hij worden behandeld met een speciaal product voor onderhoud en bescherming: het onzichtbare laagje dat dit product achterlaat beschermt de plaat in het geval er iets overkookt. Dit soort handelingen moeten worden uitgevoerd als de plaat lauw of koud is. • Vergeet niet de kookplaat altijd met schoon water af te spoelen en goed af te drogen: restjes schoonmaakmiddel kunnen de volgende keer dat u kookt aankoeken.
TRI 633 C E DE 52 ZUR BEACHTUNG ! • ZUR BEACHTUNG: Bei Gebrauch wird dieses Gerät und alle zugänglichen Teile sehr heiß. • Es ist darauf zu achten, dass die Heizelemente nicht berührt werden. • Kinder unter 8 Jahren, die nicht ständig beaufsichtigt sind, von dem Gerät fernhalten.
Beschreibung des Gerätes Installation Bedienfeld 6 1 5 DE ! Bitte lesen Sie dieses Handbuch aufmerksam durch, bevor Sie mit Ihrem neuen Gerät arbeiten. Es enthält wichtige Informationen über den sicheren Betrieb, Installation und Wartung des Gerätes. ! Für zukünftigen Zugriff, bitte dieses Handbuch an einem zugänglichen Ort aufbewahren. Geben Sie es weiter jedem neuen Besitzer des Gerätes.
DE Installation der Sicherungsscheibe 1 2 KASTAFMETINGEN 60 490 560 3 Min. 30/Max.
Befestigen Sie den Herd wie folgt: 1. Verwenden Sie kurze Schrauben mit flachem Ende, um die 4 Zentrierungsfedern in die Löcher an den zentralen Punkt von jeder Seite des Herdes zu fixieren. 2. Legen Sie den Herd in den Hohlraum, vergewissern Sie sich, dass er sich in einer zentralen Position befindet und drücken Sie den gesamten Umfang, bis der Herd an der Auflagefläche festgeklebt bleibt. ! Die Schrauben für die Zentrierungsfedern müssen zugänglich bleiben.
DE • Geknister: hergestellt durch die Vibration des Materials auf dem Boden des Topfes durch die Strömung von parasitären Strömen generiert von den elektromagnetischen Feldern (Induktion), kann mehr oder weniger stark sein, abhängig vom Material des Bodens vom Topf, und nimmt ab wenn der Topf grösser ist.
des Kochfeldes aufzunehmen ist: · Gleichzeitig Heizkörper 1 und Heizkörper 3 Auswahltasten drücken .Sobald dies geschehen ist, wird die neue Leistungsgrenze aufgenommen und ein System-Reset folgt. Um die Änderungen ohne Aufnahme zu beenden: ·Wird während 60 Sekunden keine Aktion untergenommen, werden die Änderungen nicht aufgenommen und ein System-Reset folgt. .
DE Display zeigt eine blinkende '0 und die Timer-Alarm ertönt für eine Minute. Der Alarm wird durch Drücken einer beliebigen Taste des Touch-Controls abgebrochen werden. !Keine Adapter, Diffusoren, oder Metallplatten auf den Kochzonen benutzen.
Nach 10 sek. ohne Pfanne auf der Heizstelle, eine Warnungertönt. Nach 60 sek. ohne Pfanne auf der Heizstelle, der Heizkörper schaltet sich aus. Überhitzungsschutz Wenn elektronische Elemente überhitzen, die Zahl dass die Leistungsstufe signalisiert fängt zu blinken an, und der Buchstabe "c" erscheint auf dem Display. Wenn die Temperatur ein geeignetes Niveau erreicht hat, verschwindet diese Meldung und der Herd kann wieder verwendet werden.
Sehr sanft Garen Sanftgaren Stark garen Sehr stark garen Praktische Back-/Brathinweise Extrem sanft Garen DE 60 ª • • ¶ ¶ § § S S ¢ ¢ £ ™ ™ ¡ Schnellgaren Schnellkochtopf Fritieren Grillen Kochen Crêpes Stark garen und bräunen (Braten, Koteletts, Schnitzel, Fischfilets, Spiegeleier) Schnell eindicken (flüssige Soßen) Kochendes Wasser (Nudeln, Reis, Gemüse) Milch Langsam eindicken (dickflüssige Soßen) Wasserbad Garen im Schnellkochtopf nach dem Dampfaustritt Sehr sanft Garen Aufwärmen von
Vorsichtsmaßregeln und Hinweise ! Das Gerät wurde entsprechend den strengsten internationalen Sicherheitsvorschriften entworfen und gebaut. Nachstehende Hinweise werden aus Sicherheitsgründen geliefert und sollten aufmerksam gelesen werden. Dieses Gerät entspricht den folgenden EGRichtlinien: - 2006/95/EWG vom 12.12.06 (Niederspannung) und nachfolgenden Änderungen - 89/336/EWG vom 03.05.89 (elektromagnetische Verträglichkeit) und nachfolgenden Änderungen -93/68/EWG vom 22.07.
Reinigung und Pflege DE Abschalten Ihres Gerätes vom Stromnetz Vor jeder Reinigung und Pflege ist das Gerät vom Stromnetz zu trennen. Reinigung des Gerätes ! Der Einsatz von Scheuermitteln oder scharfen oder chemischen Reinigungsmitteln wie Backofensprays, Fleckenentferner, Rostentfernungsmittel, Reiniger in Pulverform und Scheuerschwämme ist zu vermeiden: diese können die Oberfläche des Kochfeldes dauerhaft beschädigen.
TRI 633 C E ATTENZIONE! • ATTENZIONE: Questo apparecchio e le sue parti accessibili diventano molto caldi durante l’uso. • Bisogna fare attenzione ed evitare di toccare gli elementi riscaldanti. • Tenere lontani i bambini inferiori agli 8 anni se non continuamente sorvegliati.
IT Installazione Descrizione dell'apparecchio Manopole del piano di cottura 6 1 5 ! Prima di usare il nuovo dispositivo leggere con attenzione questo libretto di istruzioni. Contiene informazioni importanti relativamente al corretto funzionamento, alla giusta installazione e alla buona manutenzione del dispositivo. ! Conservi le presenti istruzioni per una futura consultazione. In caso di trasferimento dell'apparecchiatura, consegnarle ai futuri proprietari.
Installazione della rondella di sicurezza 1 2 DIMENSIONI ARMADIETTO IT 60 490 560 3 Min. 30/Max.
IT Installare il piano cottura come segue: 1. Usare delle viti a testa piatta per fissare le 4 molle di allineamento nei fori al centro di ogni lato del piano cottura. 2. Mettere il piano cottura nella cavità, verificare che sia centrato, quindi premerlo verso il basso lungo tutto il perimetro, fino a che il piano cottura non sarà bloccato alla superficie di supporto. ! Le viti delle molle di allineamento devono restare accessibili.
(induzione); può essere più o meno intenso a seconda del materiale di cui è composta la parte inferiore della pentola, e diminuisce con l'aumentare delle dimensioni della pentola. • Fischio forte: si sente quando due elementi di induzione dello stesso gruppo funzionano insieme a potenza massima e/o quando la funzione booster è impostata sull'elemento più grande mentre l'altro viene regolato automaticamente.
IT Accensione delle zone di cottura Ogni zona di cottura viene controllata servendosi di un e con un dispositivo di pulsante selettore regolazione della potenza che consiste in un pulsante (-) e in un pulsante (+).
IT per alcuni secondi; l'icona si Premere il pulsante spegnerà e verrà rimossa la funzione di blocco. Tutti i tasti sulla selezione della zona di cottura saranno bloccati se il piano cottura è spento, se il blocco del pannello di controllo è attivato o se si verifica un errore sul piano cottura Spegnere il piano cottura Premere il pulsante per spegnere il dispositivo, non fare affidamento unicamente sul sensore pentole.
mentre la piastra anteriore sinistra è impostata su 2 e si spegnerà dopo 8 ore. Livello di potenza Tempo limite di funzionamento in ore 1 9 2 8 3 7 4 6 5 5 6 4 7 3 8 2 9 1 Quando uno o più tasti vengono attivati per più di 10 secondi, il controllo touch si spegne Viene emesso un bip ogni sec., mentre il tasto / i tasti viene / vengono attivato / attivati. Con tutti i riscaldatori a zero per 10 secondi il piano cottura viene spento.
Precauzioni e consigli ! L’apparecchio è stato progettato e costruito in conformità alle norme internazionali di sicurezza. Queste avvertenze sono fornite per ragioni di sicurezza e devono essere lette attentamente. Questa apparecchiatura è conforme alle seguenti Direttive Comunitarie: - 2006/95/CEE del 12/12/06 (Bassa Tensione) e successive modificazioni - 2004/108/CEE del 15/12/04 (Compatibilità Elettromagnetica) e successive modificazioni - 93/68/CEE del 22/07/93 e successive modificazioni.
Manutenzione e cura IT Escludere la corrente elettrica Prima di ogni operazione isolare l’apparecchio dalla rete di alimentazione elettrica. Pulire l’apparecchio ! Evitare l’uso di detergenti abrasivi o corrosivi, quali i prodotti in bombolette spray per barbecue e forni, smacchiatori e prodotti antiruggine, i detersivi in polvere e le spugne con superficie abrasiva: possono graffiare irrimediabilmente la superficie.