i i
Warning: Limitation of Liability The ultimate responsibility of the consequences of use of toxic compounds rests with the user. INFICON’s role is as a supplier of instrumentation to assist in the early detection of hazardous conditions involving such compounds. It is vitally important to ensure that the 2020ComboPRO is maintained in accordance with INFICON’s instructions and that proper calibration is regularly performed.
Contents Contents ...................................................................................... iii Figures ....................................................................................... vii Tables ....................................................................................... viii Notices and Warnings ............................................................................... 2 FCC Warning...............................................................................
Using the 2020ComboPRO..................................................................... 38 Battery Charging........................................................................ 39 Removing and Replacing the Battery Pack ............. 39 Charging the Battery Pack ............................................ 39 Display ....................................................................................... 41 Graphic Display................................................................ 41 Keys .......
Calibration Using the Flow-Match Regulator ........................... 65 Connecting the Flow-Match Regulator to the Cylinder Calibrating the 2020ComboPRO with the Flow-Match Regulator ........................................................................... 66 Calibration Using Accessory Gas Bags ..................................... 67 Preparing the Calibration Gas Bag and the Zero Air Bag Using the Gas Bag .....................................................................
Contacting INFICON .............................................................. 100 Installing an Alternate AC Plug on the Battery Charger ......... 101 Calibration Gas Supplier ......................................................... 101 Presets and Response Factors .................................................. 101 References ............................................................................... 104 Index .....................................................................................
Figures Figure 1. The 2020ComboPRO Instrument ............................................ 33 Figure 2. The 2020ComboPRO Block Diagram .................................... 34 Figure 3. Photoionization Detector ........................................................ 36 Figure 4. Battery Pack Removal and Replacement ............................... 40 Figure 5. The 2020ComboPRO Display ................................................ 41 Figure 6. TVOC Mode User Menu – Unit Setup ..............................
Tables Table 1. System Alerts ............................................................................ 49 Table 2. Averaging Intervals and Period STEL, TWA, and PEAK Operation ..................................................................... 54 Table 3. Check List for Field Operation ................................................ 71 Table 4. Additional Field Items ............................................................. 71 Table 5. Contact Information .........................................
Notices and Warnings 2 1 ISP-074-575-P1D 2
FCC Warning This equipment has been tested and found to comply with the limits for a Class B Digital Device, pursuant to Subpart B, Class B of Part 15 of the FCC rules. These limits are designed to provide reasonable protection against harmful interference when the equipment is operated in a commercial environment.
Do not use any other accessories with the 2020ComboPRO in a hazardous location. Substitution of components may affect safety rating. WARNING To reduce the risk of fire or injury to persons, read and follow these instructions: 1. All calibration, maintenance and servicing of this device, including battery charging, must be performed in a safe area away from hazardous locations. Disconnect all power before servicing. 2.
CAUTION 1. For replacement battery pack use only Part No. MX700010 or NIMH battery MX700011 2. Do not dispose of the battery pack in a fire. The cells may explode. The battery pack must be disposed of properly. Check with local codes for possible special disposal instructions. 3. Do not open or mutilate the battery pack. If the 2020ComboPRO is used in a manner not specified, the protection provided by the 2020ComboPRO may be impaired. 4.
ATTENTION 2020ComboPRO EST CLASSIFIÉ POUR USAGE DANS LES EMPLACEMENTS DANGEREUX DE CLASSE I, DIVISION 1, GROUPES A, B, C, D. ÉVALUATION T4 (135ºC). 2020ComboPRO est conforme à la norme des Underwriters Laboratories Inc. UL 913 Standard for Intrinsically Safe Apparatus and Associated Apparatus for use in Class I, Division 1, Groups A, B, C, D Hazardous (Classified) Locations. Quatrième édition. 2020ComboPRO est conforme à la norme de CSA E79-0:1995 & CAS E79-11:1995: Intrinsically Safe Equipment.
ATTENTION Pour réduire le risque de feu ou blessures, lisez attentivement ces directive: 1. Tout étalonnage et entretien, incluant le chargement de la batterie, doit être fait dans un endroit sécuritaire et non-explosif. L’alimentation électrique doit être mis horsservice. 2. Aucune pièce ne peut être changée par l’utilisateur à part la batterie. 3. Aucun entretien ne peut être fait par l’utilisateur. ATTENTION 1.
ATEX Directive and EMC Directive EC Declaration of Conformity We INFICON, Inc.
CAUTION 1. All calibration, maintenance and servicing of this device, including battery charging, must be performed in a safe area away from hazardous locations. 2. Disconnect all power before servicing. 3. Do not open UV Lamp Cap when unit is energized. 4. Only use the AC Adapter in a safe area away from hazardous locations 5. Only use the Serial Port in a safe area away from hazardous locations. WARNING To reduce the risk of fire or injury to persons, read and follow these instructions: 1.
7. Do not defeat proper polarity orientation between the battery pack and battery charger. 8. Charge the battery pack using the AC adapter provided with or identified for use with this product only in accordance with the instructions and limitations specified in this manual. For AC adapter use only Part No. MX350002 (115 Volts AC), MX396013 (220 Volts AC). When using the AC adapter do not block access to AC outlet in use with adapter. AC adapter is not to be used in a hazardous area.
Hinweis zur Eigensicherheit (I/S) des 2020ComboPRO Das 2020ComboPRO IST KLASSIFIZIERT ZUR VERWENDUNG IN ARBEITSBEREICHEN MIT EXPLOSIBLER ATMOSPHÄRE (=EX-ZONEN) DER KLASSE I, ABSCHNITT 1, GRUPPEN A, B, C, D KlasseT4 (Zündtemperatur bis 135°C).
VORSICHT Um das Brandrisiko oder das Verletzungsrisiko für Personen zu verringern, sind die folgenden Anweisungen aufmerksam zu lesen und zu befolgen: 1. Jede Kalibrierung, Wartung und Instandhaltung dieses Geräts, sowie das Laden des Akkus muss an einem sicheren Ort außerhalb von explosionsgefährdeten Bereichen (Ex-Zonen) ausgeführt werden. Vor und während einer Wartung ist die Verbindung des Gerätes zur Stromversorgung zu unterbrechen. 2.
WARNUNG 1. Jede Kalibrierung, Wartung und Instandhaltung dieses Geräts, sowie das Laden des Akkus muss an einem sicheren Ort außerhalb von explosionsgefährdeten Bereichen (Ex-Zonen) ausgeführt werden. Vor der Wartung sind alle elektrischen Verbindungen zu trennen. Keinesfalls den Zugang zur UV Lampe öffnen, während das Gerät aufgeladen wird. Das Netzgerät nur außerhalb von explosionsgefährdeten Bereichen (ExZonen) einsetzen. 2.
MX350006 MX350007 MX700260 MX700260 M1260147 MX395001 MX395001 Kalibriergasdruckminderer (Kalibriergasregler) Handgelenksschlaufe Gürtelholster Gerätekoffer Karte mit Kurzbedienungsanleitung Probenahmesonde Probenahmeschlauch Verwenden Sie für das 2020ComboPRO kein anderes Zubehör in explosionsgefährdeten Bereichen.
The 2020ComboPRO Intrinsic Safety (I/S) Notice THE 2020ComboPRO IS CLASSIFIED FOR USE IN CLASS I, DIVISION 1, GROUPS A, B, C, D HAZARDOUS LOCATIONS. T4 (135°C) RATING. It has been listed by MET® to comply with Underwriters Laboratories® Inc. UL® 913 Standard for Intrinsically Safe Apparatus and Associated Apparatus for use in Class I, Division 1, Groups A, B, C, D Hazardous (Classified) Locations, Sixth Edition when powered by MX700010 / MX700011 Battery Pack.
1. For erstatnings batteripakke anvend kun Part Nr. ADVARSEL MX700010 eller MX700011 2. Følge den lokale ordning for afskaffelse af batterier. Batterier kan eksplodere ved brand. 3. Åben eller beskadig ikke batteripakken. Hvis 2020ComboPRO ikke anvendes som specificeret bliver sikkerheden forringet. 4. Udøv forsigtighed med batteripakken. Pas på med ringe, armbånd, nøgler m.m. disse ting kan kortslutte batteripakken og overophede denne, således den bryder i brand. 5.
3. Der er indvendig i 2020ComboPRO s ikke udskiftelige servicedele for bruger. 4. Følge den lokale ordning for afskaffelse af batterier. Batterier kan eksplodere ved brand. 5. Åben eller beskadig ikke batteripakken. Hvis 2020ComboPRO ikke anvendes som specificeret bliver sikkerheden forringet. 6. Udøv forsigtighed med batteripakken. Pas på med ringe, armbånd, nøgler m.m. disse ting kan kortslutte batteripakken og overophede denne, således den bryder i brand. 7.
FCC Waarschuwing Deze apparatuur is getest en er is geconcludeerd dat deze voldoet aan de grenswaarden voor een Class B Digital Device, conform Subpart B, Class B van Part 15 van de FCC regels. Deze grenswaarden zijn bedoeld om een redelijke bescherming te bieden tegen schadelijke interferentie wanneer deze apparatuur wordt gebruikt in een commerciële omgeving. Deze apparatuur, genereert, gebruikt en kan radiofrequentie-energie uitstralen.
WAAR-SCHUWING Gebruik als vervangend batterij-pack uitsluitend artikelnr.Part No. MX700010 of MX700011 1. 2. Gooi het batterij-pack niet in een vuur. De cellen kunnen exploderen. Het batterij-pack moet correct worden afgevoerd. Verifieer de lokale regelgeving voor instructies voor de afvoer van dergelijk afval. 3. Open of beschadig het batterij-pack niet.
Voorzichtig Lees en volg deze instructies op om het risico op brand of verwonding van personen te reduceren: 1. Er zijn geen onderdelen in de 2020ComboPRO die door de operator vervangen kunnen worden, behalve het batterij-pack, de UV lamp en monsterinlaatfilter. Gebruik als vervangend batterij-pack uitsluitend artikelnr. MX700010 of MX700011 2. Er zijn geen onderdelen binnenin de 2020ComboPRO s die door de operator kunnen worden onderhouden. 3. Gooi het batterij-pack niet in een vuur.
Avertissement Compatibilité électromagnétique Cet équipement a été testé et reconnu conforme aux limitations de la Classe B des équipements numériques, conformément au sous-paragraphe B, Classe B du paragraphe 15 des règles FCC. Ces limites sont conçues pour fournir une protection raisonnable à l’encontre des interférences nuisibles lorsque l’équipement est utilisé dans un environnement industriel.
AVERTISSEMENT Pour réduire le risque d’incendie ou de blessure aux personnes, lisez et suivez les instructions ci-dessous. 1. Tout étalonnage, maintenance ou entretien de cet équipement, y compris la recharge des batteries, doit être réalisé dans une zone de sécurité et éloignée de toutes zones dangereuses. Déconnecter toute source d’alimentation avant toute intervention de maintenance. 2.
ATTENTION 2020ComboPRO EST CLASSIFIÉ POUR USAGE DANS LES EMPLACEMENTS DANGEREUX DE CLASSE I, DIVISION 1, GROUPES A, B, C, D. ÉVALUATION T4 (135ºC). 2020ComboPRO est conforme à la norme des Underwriters Laboratories Inc. UL 913 Standard for Intrinsically Safe Apparatus and Associated Apparatus for use in Class I, Division 1, Groups A, B, C, D Hazardous (Classified) Locations. Quatrième édition. 2020ComboPRO est conforme à la norme de CSA E79-0:1995 & CAS E79-11:1995: Intrinsically Safe Equipment.
ATTENTION 1. Utilisez seulement des batteries rechargeables de type nickel cadmium avec un chargeur 12 Volts DC (Pièce # MX700010 ou MX700011). 2. Ne jetez pas les batteries dans le feu. Elles pourraient exploser Vérifiez avec la réglementation locale avant d’en disposer. 3. Ne pas ouvrir ou briser la batterie. La protection offerte par le 2020ComboPRO sera alors inutile. 4.
Advertencia FCC Este equipo ha sido probado y se ha comprobado que cumple con los límites para la clase B de los equipos digitales, en conformidad con la sub-parte B, clase B de la parte 15 de las reglas FCC. Estos límites han sido determinados para proveer una protección razonable contra interferencias cuando el equipo es operado en una zona comercial.
2. El 2020ComboPRO no cuenta con partes que deben ser reemplazadas por el operador a excepción del paquete de baterías, la lámpara UV y el filtro de entrada de la muestra. 3. El 2020ComboPRO 2 no cuenta con partes que deben ser mantenidas directamente por el operador. ADVERTENCIA 1. Para reemplazar el paquete de baterías usar sólo la pieza nº. MX700010 o MX700011 2. No tirar el paquete de baterías en el fuego. Estas pueden explotar. El paquete de baterías debe ser desechado adecuadamente.
12. El 2020ComboPRO no cuenta con partes que puedan ser reemplazadas por el operador a excepción del paquete de baterías, la lámpara UV y el filtro de entrada de muestras. 13. Para reemplazar el paquete de baterías usar sólo la pieza original nº. MX700010 o MX700011. 14. El 2020ComboPRO no cuenta con partes que deben ser reparadas directamente por el operador. 15. No colocar el paquete de baterías en el fuego. Estas pueden explotar. El paquete de baterías debe ser desechado adecuadamente.
FCC Avvertenze FCC avverte che questa apparecchiatura è stata esaminata ed è idonea per aderire ai limiti per un dispositivo del codice categoria B Digital, conforme a Subpart B, codice categoria B della parte 15 delle regole del FCC. Questi limiti sono destinati ad assicurare la protezione minima contro interferenza nociva quando l'apparecchiatura è utilizzata in un ambiente commerciale.
Avvertenze 1. Per cambiare il pacco batteria usare solo il part number MX700010 o MX700011 2. Non mettere il pacco batteria sul fuoco. Le celle possono esplodere. Le batterie devono essere rottamate . Controllare I codici locali di rottamazione per possible speciali istruzioni. 3. Non aprire o mutilare il pacco batteria . Un uso non corretto può alterare la sicurezza dello strumento. 4. Prestare attenzione nel maneggiare la batteria al fine di non mettere in corto i contatti .
Introduction 30 2 ISP-074-575-P1D 30
About this Manual This manual provides detailed instructions for setup, operation and maintenance of the 2020ComboPRO Portable Photoionization Monitor. Before unpacking the instrument, please read the Warnings and Safety Practices section in Chapter 1of this manual. This section describes possible hazards that might injure the user, damage the instrument or compromise its operation. Some general safety information is also provided.
Warnings and Safety Practices Please read the Notices and Warnings section of this user’s manual before operating the 2020ComboPRO. Approved Models of the 2020ComboPRO This manual provides operational information for all models of the 2020ComboPRO. The 2020ComboPRO is intrinsically safe and approved for use in hazardous locations. Refer to the Notices and Warnings section in Chapter 1 of this manual for details of each approval.
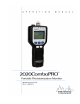
2020ComboPRO Overview Figure 1. The 2020ComboPRO Instrument The 2020ComboPRO measures the concentration of airborne gases and vapors that can be ionized by a photoionization detector. The 2020ComboPRO automatically displays and can record, these concentrations. In TVOC mode, the 2020ComboPRO does not distinguish between individual compounds. The reading displayed represents the total concentration of all photoionizable chemicals present in the sample.
Recorded data can be reviewed on the display or downloaded to a computer. Data are recorded by date and time. The 2020ComboPRO has 5 keys for instrument operation. The keys are used to set up and calibrate the 2020ComboPRO. All information entered with the keys and stored in the 2020ComboPRO’s memory is retained when the instrument is switched off. The clock and calendar continue to operate and do not need to be reset when the 2020ComboPRO is turned on.
In TVOC mode, the 2020ComboPRO does not distinguish one type of compound from another, but displays a number indicating the total concentration of all photoionizable compounds in the sample. In TVOC mode, a standard of isobutylene at a known concentration may be used for setting the sensitivity. If the 2020ComboPRO is calibrated with isobutylene, it displays concentrations in units equivalent to ppm of isobutylene.
Lamp Power Supply Sample Out Lamp Driver Circuit Lampholder UV Lamp Microprocessor High Voltage Plates Light Sensor Electrometer +125 Volts Detector Cell Sample In UV Lamp UV Light Collector Electrode + Repeller Electrode M + h M + e- Ionized Molecule M M Sample M M Figure 3. Photoionization Detector The ionized molecules in the detector cell are subjected to a continuous electric field between the repeller electrode and the collector electrode.
Ensure that all of these accessories have been included with the instrument. If any items are missing or damaged, contact INFICON immediately. Support Equipment and Consumables Calibration For normal operation these items are required: 1. Calibration Gas Regulator (Part No. MX350006). 2. Calibration gas containing 100 ppm isobutylene (Part No. MX350012). Other concentrations of the calibration gas may be required. This will depend on your application. 3.
Using the 2020ComboPRO 38 3 ISP-074-575-P1D 38
Battery Charging Before beginning operation of the 2020ComboPRO, the battery pack must be charged. You can also remove the battery pack and replace it with a fully charged spare battery pack (Part No. MX700010 or MX700011). NOTE: You must use the 220 V battery charger (Part No. MX396013) in order to comply with the requirements of the applicable Council Directives. Removing and Replacing the Battery Pack NOTE: Do not remove or recharge the battery pack in a hazardous location.
To charge the battery pack: 1. Plug the AC adapter into the jack located on the bottom of the 2020ComboPRO. 2. Plug the AC adapter into an AC outlet. If you are using the European AC adapter, ensure the correct plug is installed on the line cord . If it is not correct for the wall outlet in your area, then it must be replaced. 3. The Charge LED above the front display on the 2020ComboPRO indicates the charge state. Red indicates the battery is being charged.
If you are charging the battery pack in the instrument you can use all the features of the 2020ComboPRO while the battery pack is being charged. Leaving the AC adapter connected to the 2020ComboPRO will not harm the battery or the AC adapter in any way. If the 2020ComboPRO is to be left unused for an extended period of time, leave it connected to the AC adapter so that the battery will be fully charged and ready for operation.
The 2020ComboPRO has three soft keys under the graphic LCD display, which always show the available functions of the soft keys in any screen. The 2020ComboPRO User Menus are shown in Figures 6, 7, and 8. TVOC mode Unit Setup Switch to GAS Mode Memory Slots Data Log Options Humidity Tube Pump Backlight User Mode Clock Date format Language Units Sample Collection Off On On Off Logging Off Tag Interval Enter current time – Enter current date MM/DD/YYYY DD/MM/YYYY 1. : : 15.
YES Clear data log Are you sure you want to clear all data? NO MENU Edit interval Edit new interval (0-900 seconds) Data Log Options Download to PC Download to PC Downloading Data Preset Edit Select Slots Name Response Factor STEL Alarm TWA Alarm REAL Alarm Formula wt Edit Name Edit RF Edit STEL Edit TWA Edit REAL Edit Formula wt Edit Slot Edit Slots Edit Slot MENU Memory Slots Slot No. 1 2 … … … 15 Slots Options Figure 7.
GAS mode Unit Setup Switch to TVOC Mode Data Log Options Clear Values Edit Alarms Sample Collection User Mode Units Clock Date Format Backlight Language Logging Off Sample PPM PPB Enter current time Enter current date MM/DD/YYYY DD/MM/YYYY On Off English/Spanish (standard) OR English/other language Clear data log Download to PC SMAX STEL ALL Enter new STEL STEL alarm: REAL alarm: Enter new REAL Enter sample liters Figure 10.
Keys Fixed Keys The 2020ComboPRO has two fixed keys. The first fixed key is the ON/OFF key. The second fixed key is the dedicated calibration key. Pressing the CAL key will start calibration in almost any mode. The ON/OFF key is used to both turn on power to the 2020ComboPRO as well as the turn off the power. To turn on the 2020ComboPRO, press the ON/OFF key. To turn off the power, press the ON/OFF key and hold it down for 5 seconds, and then release it. This is done to prevent accidental power off.
TVOC Mode The 2020ComboPRO can power up in Logging Off, Tag, or Interval mode depending on the mode that was set by the previous user. The current mode is shown in the upper right-hand corner of the display. Figure 12. Logging Off Mode Display Figure 13.
Figure 14. Interval Mode Display GAS Mode In GAS mode, the benzene pre-filter tube (Part No. F1760161) is used to measure benzene. The GAS mode is a filter tube mode, so all benzene measurements require the installation of the pre-filter tube holder (Part No. A1790500) and one of the benzene pre-filter tubes. The benzene pre-filter tube, which is mounted at the head of the tube holder, adsorbs all substances with the exception of benzene in order to selectively measure benzene.
measurements already carried out (SAMP) – corresponds with the amount of benzene pre-filter tubes already used, and the sampling interval period of 45 seconds (SECS). Pressing the VIEW key shows the datalogger measurement values. Pressing the MENU key takes you back to the selection menu. Pressing the SAMPLE key starts the measurement: the pump is activated and measured air is drawn through the benzene pre-filter tube for 45 seconds. The measurement status is indicated by the flashing word SAMPLING.
Instrument Status The instrument status is shown on the left of the first line of the status display. Each status has a priority assigned to it. If more than one status is in effect, then the status with the highest priority is displayed until the condition is corrected or until the option is turned off. Table 1 is a list of the possible system alerts. Table 1.
During calibration, all alarms are disabled. Once the calibration is complete, the alarms are re-enabled. User Interface – Basic Menu The 2020ComboPRO is designed for ease of use with a logically organized internal menu structure/user interface. The 2020ComboPRO User Menus as shown in Figures 6-11. The 2020ComboPRO has three soft keys under the graphic LCD display which always show the available functions of the soft keys in any screen.
these readings in the 2020ComboPRO’s memory at a preset interval selected by the user. In Interval mode, the soft keys are VIEW, CLEAR and MENU. VIEW selects datalogger review. CLEAR selects clearing the values for “TWA”, “PEAK”, “ALL”. MENU selects the2020ComboPRO’s internal menu for the 2020ComboPRO setup by the user. Short-Term Exposure Limit (STEL) Mode The Short-Term Exposure Limit (STEL) mode displays the concentration as a 15minute moving average.
GAS Monitoring Mode for Benzene Measurement In GAS mode, the benzene pre-filter tube (Part No. F1760161) should be used to measure benzene. The GAS mode is a filter tube mode, so all benzene measurements require the installation of the pre-filter tube holder (Part No. A1790500) and one of the benzene pre-filter tubes. The benzene pre-filter tube, which is mounted at the head of the tube holder, adsorbs all substances with the exception of benzene in order to selectively measure benzene.
down to 0. So, the displayed number shows the remaining measuring time. SAMPLE DONE signaled in the display indicates that the measurement is finished. The benzene pre-filter tube (Part Number F1760160) is a one-use device and cannot be used for a second measurement. Repeatedly pressing the SAMPLE key will call up the information that the benzene pre-filter tube in use is no good and that a new benzene pre-filter tube must be put into the pre-filter tube holder.
This sum will only be complete after 8 hours, so the meter displays the current sum divided by 8 hours. While you are in TWA mode, the time on the status display will show the number of minutes and hours of data that TWA has accumulated. When this reaches 8 hours, the 2020ComboPRO stops accumulating data and the TWA is complete. Interval mode logs readings at user-selected intervals of 1 second to 999 seconds. Figure 17.
Erasing or Downloading Data There are two options for data manipulation under the “Erase/Download” Data selection. “Clear Data Log” deletes all readings in the 2020ComboPRO memory. NOTE: Deleted information cannot be recovered. You should play back or download the contents of the datalogger before deleting any information. To empty the data logger in the 2020ComboPRO: 1. Press the MENU key. 2. Use the DOWN ARROW key to choose “Data Logger Options”, and then press the SELECT key. 3.
TVOC mode Unit Setup Switch to GAS Mode Memory Slots Data Log Options Humidity Tube Pump Backlight User Mode Clock Date format Language Units Sample Collection Off On On Off Logging Off Tag Interval Enter current time – Enter current date MM/DD/YYYY DD/MM/YYYY English/Spanish (standard) OR English/other language 1. : : 15. PPM PPB Mg/M3 Clear date log Edit interval Download to PC Enter sample liters Attach Tube holder and insert new tube Figure 18.
To turn on the pump: 1. Press the MENU soft key, “Unit Setup”, press SELECT, “Pump”, press SELECT, “On”, then press SELECT. To turn off the pump: 2. Press the MENU soft key, “Unit Setup”, press SELECT, “Pump”, press SELECT, “Off”, then press SELECT. Backlight The backlight function is used to switch the backlighting on and off when there is insufficient light to read the display. To switch the backlighting on and off: 1. Press the MENU soft key and select “Unit Setup”. 2.
Entering Numbers with the Soft Keys to Set the Clock For all information that you must enter, the left, center and right soft keys correspond to the up, down, and right arrow. See Figure 18. The up and down arrows are used to change the character highlighted by the cursor. The right arrow is used to advance the cursor to the next character on the right. When the cursor is advanced past the right most character or symbol , it wraps around to the first character again.
4. Use the “arrow keys” to enter the correct time. The time is formatted as Hour:Minute. 5. Use the RIGHT ARROW soft key until the “Checkmark” on the display is highlighted. Press the DONE soft key to confirm the time and move to the date option. 6. When setting the date, the 2020ComboPRO prompts you for the current date formatted as Month/Day/Year. Use the ARROW KEYS to enter the correct date. 7. Press the DONE soft key to confirm the date and the display will return to the main screen.
collection is conducted utilizing the optional INFICON Tube Holder (A1790500) and sample collection tubes. On selection of SAMPLE MODE from the UNIT SET UP menu, the pump will shut off and the user will be instructed to ATTACH TUBE HOLDER and INSERT NEW TUBE. Next, set the sample volume in The SAMPLE soft key will activate the pump for a short period of time drawing ambient air into the SAMPLE TUBE.
The 2020ComboPRO is a total VOC instrument and will ALWAYS respond to all ionizable compounds present in a sample. It is the responsibility of the user to be aware of the limitations of PID instruments. CAUTION Preset Edit Select Slots Name Response Factor STEL Alarm TWA Alarm REAL Alarm Formula wt Edit Name Edit RF Edit STEL Edit TWA Edit REAL Edit Formula wt Edit Slot Edit Slots Edit Slot MENU Memory Slots Slot No.
3. Press the EDIT key to change the value for the Response Factor (RF) or the PEAK, STEL and TWA alarms. 4. Press the EDIT soft key, highlight Name, RF, STEL, TWA, or PEAK using the DOWN ARROW key, then press the SELECT soft key. 5. Use the up, down and right arrows soft keys to enter the desired number. 6. Highlight the and press the DONE soft key. 7. Press the DONE soft key to return to the main display or press the SELECT soft key to edit another value. 8.
The initial prompt asks if the user wishes to calibrate the 2020ComboPRO. The user can choose to calibrate the unit or simply start the monitoring activity. The display will next alert the user that tube life is used up, and to then continue. The user is then directed to insert a pre-filter tube and to then continue. For analysis of benzene concentrations, press the sample key. An air sample is drawn into the benzene pre-filter tube and 2020ComboPRO for 45 seconds.
To determine the TLV of the compounds contained in the calibration gas, refer to the Material Safety Data Sheet (MSDS) supplied with your calibration gas cylinder. If you will be using a gas bag for span gas calibration, see Calibration Using Accessory Gas Bag on page 67 for instructions. Compressed Gases Cylinders of compressed gas, such as calibration gas, must be handled with extreme care. For safety, the calibration gas cylinders must be secured before use.
Calibration Gas Adequate ventilation must be provided when the 2020ComboPRO is being calibrated. To determine the TLV of the compounds contained in the calibration gas, refer to the Material Safety Data Sheet (MSDS) supplied with your calibration gas cylinder. See Calibration Using Accessory Gas Bag on page 67 for more details.
Calibrating the 2020ComboPRO with the Flow-Match Regulator 1. Ensure that the short sample probe is connected to the 2020ComboPRO inlet. If you are using the long probe for sampling, then ensure the long probe is connected to the 2020ComboPRO. NOTE: Ensure the sample probe is free of any contamination, as this will affect the calibration. 2. Press the CAL key. 3.
2020ComboPRO has drifted below zero. To readjust the display to zero, press the TARE key, and the display will be re-set at 0.0. Calibration Using Accessory Gas Bags Preparing the Calibration Gas Bag and the Zero Air Bag Observe proper handling techniques for all gases! WARNING 1. Connect the regulator to the calibration gas cylinder. If you are using a portable tank of calibration gas, connect the regulator directly to the tank.
Front Back 1/8" Nut ToRegulator Regulator To the oror2020 1/8" Adapter Tubing 1/8" to 3/16" Union Figure 23. Gas Bag Adapter Teflon Ferrules Insert Gas Bag Tube Stub 2020PRO 3. Loosen the knurled nut on the reducing union of the gas bag adapter. NOTE: Do not remove the nut from the union, as the Teflon ferrules contained inside the nut may be lost. 4. Insert the tube stub from the gas bag into the knurled nut. Tighten the knurled nut and ensure the tube stub is secure.
5. To close the gas bag valve, turn the knurled plastic knob counterclockwise to unlock it. Gently pull the valve tube up to close the valve. Turn the knurled plastic knob clockwise to tighten it against the valve tube. Once the bag has been filled, use the bag and sample as soon as possible. NOTE: Do not use gas bags to sample unstable or highly reactive compounds. Do not use Tedlar® bags for storage of hazardous materials.
4. The 2020ComboPRO display will show “Zero air calibrated. Continue calibration?” If span is required, press the “Next” key. 5. Enter the span gas concentration if the concentration displayed on the 2020ComboPRO is different than the concentration of the span gas cylinder. Press the “New” key and follow the display prompts. For further information, see page 47 for numeric value, duration, time, and date entry. If the span concentration matches the span gas cylinder concentration, press the “Next” key. 6.
Preparing for Field Operation Field Check List When using the 2020ComboPRO for field operation, the following items should be carried into the field to reduce or eliminate down time of the instrument. If you are going to be in the field for a single 8-10 hour day, then you should include the following accessories: Table 3. Check List for Field Operation Spare battery pack (Part No. MX700010 or MX700011) Spare 10.6eV lamp (Part No. MX350023) 2020ComboPRO multi-tool (Part No.
Operational Check List Before beginning field work, set up and calibrate the 2020ComboPRO for your particular application. To ensure the instrument is in working order before heading into the field: 1. Ensure the battery pack is fully charged. If you are unsure about the status of the battery, replace the battery pack with one that is fully charged. See battery charging on page 39. 2.
Connecting Accessories 73 ISP-074-575-P1D 4 73
Computer The 2020ComboPRO will download information stored in its datalogger to a Windows based computer. This option may be used if you need to prepare reports based on the 2020ComboPRO’s recorded data. This feature may also be used if you need the recorded data in a format that can be imported into a spreadsheet or database for further calculations. NOTE: The 2020ComboPRO is not classified for use in hazardous locations when connected to any computer.
NOTE: A DB-25, female connector is sometimes a parallel port. Do not connect the serial port of the converter to a parallel port. Pre-filter Tube Holder INFICON’s optional Pre-Filter Tube Holder (A1790500) is shown in figure 24 below. The holder will accept the optional benzene pre-filter tube (F1760161), the optional activated charcoal pre-filter tube (F1760160) for clean air calibration, the optional humidity reduction tube (F1760162), and the optional charcoal sample collection tube (F1760163).
Pre-filters and Sample Collection Tubes INFICON provides a variety of pre-filter tubes for the2020ComboPRO. The tubes are custom developed for INFICON by Dräger Safety AG & Co., and address benzene sampling, clean air calibration and humidity reduction to facilitate more accurate sampling. The optional sample collection tubes are standard Dräger tubes used for collecting VOC samples for analysis later in a lab or other analytic facility. Figure 26.
DC Power Cord The 2020ComboPRO can be connected to a car battery through the cigarette lighter with the DC power cord. While the 2020ComboPRO is connected to the car battery, the 2020ComboPRO battery is being charged. NOTE: The 2020ComboPRO is not classified for use in hazardous locations with a DC power cord. To connect the 2020ComboPRO to a DC power supply: 1. Turn off the instrument by pressing the ON/OFF key for five seconds. 2. Connect the DC power cord (Part No.
11.7 eV UV Lamp General Information The 2020ComboPRO is equipped with a standard 10.6 eV UV lamp. An 11.7 eV UV lamp (Part No. MX390024) is available for special applications. Install this lamp as outlined in Removing and Replacing the UV Lamp on page 84. When you install a UV lamp other than the standard 10.6 eV lamp, all the response factors become invalid. You must set the response factor for the current cal memory to 1. Contact INFICON’s Applications Department for further information.
3. Calibrate the 2020ComboPRO. See Calibration Using the Flow-Match Regulator on page 65. 4. All response factors are invalid when an 11.7 eV lamp is installed. The response factor must be set to 1. 5. Recalibrate the instrument every 15 minutes of operation. 6. After every hour of operation, switch off the instrument, remove the lamp and examine the window for yellowing. If the window is yellow, then regenerate the window according to the procedure in Cleaning the Lithium Fluoride Window on page 87. 7.
4. Plug the AC adapter into an AC outlet. If you are using the European AC adapter, ensure the correct plug is installed on the line cord. If it is not correct for the wall outlet in your area, then it must be replaced. 5. The LED on the upper face of the off-line charger indicates the charge state of the battery pack. Red indicates the battery is being charged. Green indicates the battery is fully charged. 6. Charging a fully discharged battery pack will take approximately four hours. 7.
7. It is normal for a fully charged battery pack to indicate it is charging (red light) when first plugged in. The LED will turn green within a few minutes to indicate the battery is fully charged. 8. When the battery pack is fully charged, remove the DC power cord, first from the vehicle auxiliary 12 VDC or cigarette lighter socket, then from the off-line charger. 9. Remove the battery pack connector from the socket on the off-line charger. 10.
Routine Maintenance 82 5 ISP-074-575-P1D 82
Battery Charging A fully charged battery pack powers the 2020ComboPRO for approximately 6 hours. If the instrument is to be used for more than 6 hours, carry a spare battery pack (Part No. MX700010 or MX700011). When the first one has been discharged, replace it with the spare. NOTE: If you do not turn off the 2020ComboPRO before removing the battery pack, you will reset the instrument and you will lose all logged data and setup parameters.
Battery Pack Care Leaving the 2020ComboPRO for more than 3 months without charging the batteries may result in the loss of recorded data and setup parameters. If the 2020ComboPRO will not be used for long periods of time, recharge the battery for a few hours every 30 days to avoid loss of data. See Battery Charging on page 39 for instructions on charging the battery. Please observe the following: For replacement battery pack use only Part No. MX700010 or MX700011.
2. Remove the lamp housing cover using the multi-tool. 3. Tilt the 2020ComboPRO slightly and remove the UV lamp. Do not touch the wire grid inside the detector cell. Any dust or dirt in the detector cell can be blown out with a gentle jet of compressed air. Do not insert any object, other than the UV lamp, into the lamp holder. CAUTION 4. Without touching the lamp window, place the new lamp into the 2020ComboPRO lamp holder, window first. See Figure 26. Figure 27.
eventually evaporate off the window, but it will usually leave a residue that must be removed by cleaning the lamp window. Since some UV inhibiting deposits are invisible to the eye, regular cleaning of the lamp window is strongly recommended. Clean the lamp frequently to prevent a heavy buildup of deposits that may be difficult to remove. Do not remove the UV lamp in a hazardous location. WARNING The UV lamp cleaning kit (Part No. MX380336) includes aluminum oxide powder (3.
5. Continue cleaning for approximately one minute. 6. Dampen a new cotton swab with methanol and remove any trace amounts of the cleaning compound from the lamp window. 7. Wipe the window and the lamp with a dry, lint free tissue to remove any trace amounts of the cleaning compound and methanol. All traces of cleaning compound must be removed. 8. If you removed an O-ring from the lamp, replace it now. Ensure your hands are clean and dry. 9.
To replace the inlet filter: 1. Turn off the instrument. Unscrew the filter housing from the detector housing. Be careful not to lose the O-ring seal. 2. Remove the Teflon®/Polypropylene filter and install the new filter (Part No. MX750100). Place the filter so that the Teflon side is facing down in the filter housing and the mesh side is facing the 2020ComboPRO. Figure 28. Replacing the Inlet Filter Handle the filter disk only by the edges. The mesh may be damaged or contaminated by excessive handling.
Troubleshooting 89 ISP-074-575-P1D 6 89
General Information If you have a service-related question about the 2020ComboPRO, consult this manual first. If you cannot find the answer in this documentation, contact INFICON’s Technical Support Department. When you call, please have the following information ready: 1. A description of what happened and what you were doing when the problem occurred. 2. Any corrective action that you have tried. 3. The exact wording of any messages that appeared on the display.
UV Lamp Error UV lamp window is dirty. Clean the lamp window. See page 80. UV lamp is failing. Install a new lamp. See Removing and Replacing the UV Lamp on page 84. The concentration and sample gas are not compatible with the 2020ComboPRO. Contact INFICON. UV lamp has not started immediately. This fault may occur momentarily when the 2020ComboPRO is first turned on. Allow 60 seconds for UV lamp to start and fault to clear. Turn the 2020ComboPROoff then on again.
Instrument over range 92 High concentrations of gases will saturate the detector and electronics. Wait until the display returns to normal. PIDs are designed to detect relatively low levels of gases. The detector has become saturated. Move the 2020ComboPRO to a location where it can sample clean air. Sample clean air until the readings stabilize at a low level. Detector has been shortcircuited by foreign matter in the cell. Contact INFICON.
General Questions Very low or no instrument response detected, yet compounds are known to be present The 2020ComboPRO has not been properly calibrated. Verify the concentration of the span gas. Calibrate the 2020ComboPRO. See page 60. Memory slots are not set up correctly. Program the memory slots. See page 61. Response Factor has been set to zero. Set Response Factor to 1.0 or refer to Table 6 for correct response factor. Detector is leaking. Ensure the UV lamp is correctly installed.
Erroneous high readings Date and time setting are not retained Display is blank Sample flow is less than 300 ml/min 94 Sampling environment is very humid. Water vapor may contain mineral salts which carry a charge. The water vapor becomes an electrolytic solution which becomes ionized when it enters the detector. The 2020ComboPRO is not properly calibrated. Ensure that the calibration gas is the correct concentration and calibrate the 2020ComboPRO as described on page 63.
Liquid has been aspirated. The 2020ComboPRO has been exposed to a solvent that can pass through the inlet filter. Contact INFICON. Very corrosive gases have been sampled. Cannot download data or communicate with PC. Contact INFICON. Cable is not connected. Connect the 2020ComboPRO to the PC. See page 37. . .
Appendices 96 7 ISP-074-575-P1D 96
Specifications Size: 9” (228.6 mm) long x 3” (76.2 mm) deep x 4.25” (107.9 mm) wide at display tapering to 2.6” (66.6 mm) at handle Weight: 1.9 pounds (0.86 kg) Detector: Instant on photoionization detector with standard 10.6eV UV lamp, optional 10.0 eV or 11.7 eV lamps available Keypad: 5 keys with tactile feedback.
Inlet filter: Replaceable Teflon/Polypropylene, 1 m Inlet flow rate: Greater than 300 mL/min Operating temperature range: 0 to 50°C (32 to 122°F) I/S Certified Temperature Range: 0 to 400C (32 to 1050F) Operating humidity range: 0 to 95% relative humidity (non-condensing) Operating humidity range with optional humidity prefilter tube 0 to 100% relative humidity (non-condensing) Operating altitude range: Up to 10,000 ft (3000 m) Storage temperature range: -10 to 65°C (14 to 149°F) Storage hu
Warranty The 2020ComboPRO has a one year Warranty against defects in materials and workmanship. INFICON warranties that its manufactured product will be free from defects in materials and workmanship for a period of one (1) year from the date of receipt by the Customer. This may be voided if, in the opinion of INFICON, the product has been abused or treated in a negligent manner so as to cause damage or failure.
Contacting INFICON To place an order, check the status of an order, obtain current pricing and availability 315-434-1100 Service and repair of your instrument 315-434-1100 Technical Support Department 315-434-1100 Customer Service 315-434-1100 INFICON 2 Technology Place East Syracuse NY 13057-9714 USA Worldwide: Tel.: 315-434-1100 Fax: 315-437-3803 www.inficon.com reachus@inficon.com Table 5.
Installing an Alternate AC Plug on the Battery Charger In most cases the 2020ComboPRO will be shipped with an AC line cord that will fit the AC wall outlet in your area. If this cannot be done, you may need to obtain an AC line cord suitable for the AC receptacle in your area. The AC line cord, attached plug and receptacle must be marked with your country’s certification mark and the cord must have a Harmonization (HAR) mark.
NOTE: It does not matter which response factor is entered. The 2020ComboPRO’s response is not specific to any one compound. The displayed reading represents the total concentration of all ionizable compounds in the sample. NOTE: INFICON’s compound list is subject to change as market requirements evolve. Table 6.
n-Hexane Hydrogen Sulfide Isoamyl Acetate Isobutyl Acetate Isobutyraldehyde 2 Isopentane Isoprene (2-Methyl-1,3-Butadiene) 4 Isopropanol Isopropyl Acetate Isopropyl Ether Methyl Bromide (Bromomethane) Methyl Ethyl Ketone Methyl Isobutyl Ketone Methyl Mercaptan (Methanethiol) 2 Methyl Methacrylate Methyl tert-Butyl Ether (MTBE) Monomethylamine n-Nonane iso-Octane (2,2,4-Trimethylpentane) n-Pentane n-Propanol Propionaldehyde (Propanal) 1 n-Propyl Acetate Propylene 3 Propylene Oxide Styrene Tetrachloroethylene
NOTES: 1. In cases where recommended exposure limits are below the detection limit for the compound in question, the estimated lower limit of detection has been substituted for those values. 2. The 2020ComboPRO is not suitable for monitoring these compounds at ACGIH recommended levels. 3. A 1000-ppm TWA has been established for those compounds which are “Simple Asphyxiants” and for which no exposure value exists. 4.
Index 105 ISP-074-575-P1D 105
135 °C ...................................................21 2020 Approved Models .............................32 Function Map ...................................45 Intrinsic Safety..................................32 Overview ..........................................33 Response ......................................... 102 Specifications ...................................97 Warranty ...........................................99 AC Adapter .................................
Safety Practices ................................64 Data Bits ...................................................76 Reviewed ..........................................34 Data Bits ...............................................74 Datalogger Averaging Interval ............................54 Interval Mode ...................................53 Memory ............................................97 Options .............................................33 Technical Description .......................
Microprocessor .....................................34 Mode Interval..............................................53 Peak ..................................................53 STEL ................................................51 TWA ........................................... 51, 53 Model 2020 ...........................................32 Function Map ...................................45 Overview ..........................................33 Response .........................................
Mode.................................................51 Stop Bits................................................74 Support Equipment ...............................37 T4 ..........................................................21 Technical Description Calibration ........................................63 Datalogger ........................................53 Operation ..........................................34 Photoionization Detector ..................35 Teflon Ferrules ................................
110 110