Projector IN5132/IN5132c/IN5142/IN5142c/IN5134/ IN5134a/IN5134c/IN5144/IN5144a/IN5144c/ IN5135/IN5135c/IN5145/IN5145c ENGLISH FRANÇAIS DEUTSCH User’s Manual (concise) Please read this user’s manual thoroughly to ensure the proper use of this product. ESPAÑOL Manuel d’utilisation (résumé) Nous vous recommandons de lire attentivement ce manuel pour bien assimiler le fonctionnement de l'appareil.
NOTE 7KH LQIRUPDWLRQ LQ WKLV PDQXDO LV VXEMHFW WR FKDQJH ZLWKRXW QRWLFH 7KH PDQXIDFWXUHU DVVXPHV QR UHVSRQVLELOLW\ IRU DQ\ HUURUV WKDW PD\ DSSHDU LQ WKLV PDQXDO 7KH UHSURGXFWLRQ WUDQVIHU RU FRS\ RI DOO RU DQ\ SDUW RI this document is not permitted without express written consent.
Projector ENGLISH IN5132/IN5142/IN5134/IN5134a/ IN5144/IN5144a/IN5135/IN5145 User's Manual (concise) Thank you for purchasing this projector. Before using this projector, please read through this manual in order to use it safely. WARNING Ź%HIRUH XVLQJ WKLV SURGXFW UHDG DOO PDQXDOV IRU WKLV SURGXFW Afterwards, store the manuals in a safe place for future reference.
Safety Information Symbol and headings explanation The following symbols and headings are used for the manuals and the product as follows, for safety purposes. Please review and head this important information. WARNING This warns of a serious risk of personal injury or even death. CAUTION This warns of a risk of personal injury or physical damage. NOTICE This warns of a potential for causing problems.
Regulatory notices About Electro-Magnetic Interference ENGLISH This is a Class A product. In a domestic environment this product may cause radio interference in which case the user may be required to take adequate measures. This product may cause interference if used in residential areas. Such use must be avoided unless the user takes special measures to reduce electromagnetic emissions to prevent interference to the reception of radio and television broadcasts.
Regulatory notices (continued) About Waste Electrical and Electronic Equipment The following information is only for EU-member states: The mark shown to the right is in compliance with the Waste Electrical and Electronic Equipment Directive 2002/96/EC (WEEE). The mark indicates the requirement NOT to dispose the equipment as unsorted municipal waste, but use the return and collection systems according to local laws. Contents of package Your projector should come with the items shown below.
Please insert batteries (batteries not included) into the remote control before using LW ,I WKH UHPRWH FRQWURO DSSHDUV WR PDOIXQFWLRQ UHSODFH WKH EDWWHULHV ¿UVW 5HPRYH the batteries from the remote control and store them in a safe place when the remote will not be used for a length of time. 1 3 Holding the hook part of the battery cover, remove it. Align and insert two AA batteries (HITACHI MAXELL or HITACHI MAXELL ENERGY, Part No.
Arrangement Refer to the following table and to tables T-1 to T-5 at the back of this manual to determine screen size and projection distance. The values shown in the table are calculated for a full size screen. Screen size Projection distance Projector top (from the front of the projector unit) , : Screen height Projector bottom WARNING ŹInstall the projector where you can access the power outlet easily. ŹInstall the projector in a stable horizontal position.
Before connecting the projector to a device, review the device manual to ensure projector compatibility and to understand what accessories are needed for connection. Consult your dealer when the required accessory did not come with the product or the accessory is damaged. After verifying that the projector and the devices are turned off, connect the HTXLSPHQW DFFRUGLQJ WR WKH IROORZLQJ LQVWUXFWLRQV 5HIHU WR ¿gures F-1 to F-4 at the back of this manual. )RU GHWDLOV VHH User’s Manual - Operating Guide.
Fastening the adapter cover 1 When using the USB wireless adapter, be sure to connect the adapter to the USB TYPE A port furthest away from the LAN port and use the supplied adapter cover. Loosen the screw (marked with triangle) on the bottom left of the USB TYPE A ports. Insert the cover tab into the hole at the upper right of the USB TYPE A ports in the direction of the arrow. Align the screw holes on the projector and the cover.
Turning on the power cover. Press the STANDBY/ON button on the projector or the ON button on the remote control. The projection lamp will light up and the POWER indicator will begin blinking green. When the power is completely on, the indicator will stop blinking and become steady green. ENGLISH 1. 0DNH VXUH WKDW WKH SRZHU FRUG LV ¿UPO\ DQG FRUUHFWO\ FRQQHFWHG WR WKH projector and the outlet. POWER indicator Make sure that the POWER indicator is 2. steady orange. Then remove the lens ON button 3.
Adjusting the projector’s elevator When the projector is placed on a slightly uneven surface, use the elevator feet to place the projector horizontally. Using the feet can also tilt the projector in order to project at a suitable angle (up to 9 degrees) to the screen. This projector has 2 elevator feet and 2 elevator buttons. An elevator foot is adjustable when you push the elevator button which is on the same side. 1. 2. 3. 4. 5.
Displaying the picture 3. 4. 5. 6. Activate your signal source. Turn the signal source on, and send the signal to the projector. Press the INPUT button on the projector. Each time you press the button, the projector switches its input port in turn. You can also use the remote control to select an input signal. Press any of the buttons from COMPUTER 1 / 2, LAN, USB TYPE A / B, HDMI 1 / 2, COMPONENT, S-VIDEO or VIDEO to select the input signal from each port. Use the VOL + / - buttons to adjust the volume.
Turning off the power POWER indicator Press the STANDBY/ON button on the STANDBY projector or the STANDBY button on button the remote control. 7KH PHVVDJH ³3RZHU RII"´ ZLOO DSSHDU on the screen for about 5 seconds. Press the STANDBY/ON or STANDBY button again while the message appears. The projector lamp will turn off, and the POWER indicator will begin blinking STANDBY/ON button orange.
$ ODPS KDV D ¿QLWH SURGXFW OLIH 8VLQJ WKH ODPS IRU ORQJ SHULRGV RI WLPH FRXOG cause the pictures to appear darker or the color tone to be poor. Note that each lamp has a different lifetime, and some may rupture or burn out soon after you start using them. It is recommended that you keep a spare lamp on hand. To order a new lamp, contact your dealer and tell them the lamp part number.
Replacing the lamp (continued) HIGH VOLTAGE HIGH TEMPERATURE HIGH PRESSURE WARNING ŹThe projector uses a high-pressure mercury glass lamp. The lamp may burn out or rupture with a loud bang if the lamp is jolted or scratched, handled while hot, or worn over time. Note that each lamp has a different lifetime, and some may rupture or burn out soon after you start using them.
Please check and cleDQ WKH DLU ¿OWHU SHULRGLFDOO\ :KHQ WKH LQGLFDWRUV RU D PHVVDJH SURPSWV \RX WR FOHDQ WKH DLU ¿OWHU FRPSO\ ZLWK LW DV VRRQ DV SRVVLEOH 7KH ¿OWHU XQLW ZLWK VKHHWV RI ¿OWHUV LV LQVLGH RI WKH ¿OWHU FRYHU ,Q DGGLWLRQ WKH H[WUD DLU ¿OWHU LV DWWDFKHG WR LQQHU VLGH RI WKH ¿OWHU FRYHU RI IN5142, IN5144, IN5144a and IN5145.
&OHDQLQJ DQG UHSODFLQJ WKH DLU ¿OWHU FRQWLQXHG 10. 3XW WKH ¿OWHU FRYHU EDFN LQWR WKH SODFH 11. 7XUQ WKH SURMHFWRU RQ DQG UHVHW WKH ¿OWHU WLPH XVLQJ WKH ),/7(5 7,0( LWHP in the EASY MENU. (1) Press the MENU button to display the menu. +LJKOLJKW ),/7(5 7,0( XVLQJ WKH Ÿ/ź cursor buttons, then press the Ź cursor (or the ENTER / the RESET) button. A dialog will appear. 3UHVV WKH Ź FXUVRU EXWWRQ WR VHOHFW WKH ³2.
6SHFLÀFDWLRQV Product name Liquid Crystal Panel Lamp Speaker Power supply, Rated current Power consumption Temperature range Size Weight (mass) Liquid crystal projector IN5132, IN5142: 786,432 pixels (1024 horizontal x 768 vertical) IN5134, IN5134a, IN5144, IN5144a: 1,024,000 pixels (1280 horizontal x 800 vertical) IN5135, IN5145: 2,304,000 pixels (1920 horizontal x 1200 vertical) IN5132, IN5134, IN5134a, IN5135: 245W UHP IN5142, IN5144, IN5144a, IN5145: 330W UHP 8 W x2 IN5132, IN5134, IN5134a, IN513
6SHFL¿FDWLRQV FRQWLQXHG Item Ports Optional parts 18 6SHFL¿FDWLRQ COMPUTER IN1 .......................... D-sub 15 pin mini jack x1 COMPUTER IN2 (H, V, G/Y, B/Cb/Pb, R/Cr/Pr) ... BNC jack x5 HDMI 1 ................................................... HDMI connector x1 HDMI 2 ................................................... HDMI connector x1 MONITOR OUT ............................. D-sub 15 pin mini jack x1 COMPONENT (Y, Cb/Pb, Cr/Pr) ....................... RCA jack x3 S-VIDEO ......................
Never use the product during or after an abnormal situation (for example, when the projector is smoking, smells strange, had a liquid spilled on it, had an object put inside it, is broken, etc.). If an abnormality should occur, unplug the projector immediately. 2WKHUZLVH LI D SUREOHP RFFXUV ZLWK WKH SURMHFWRU UHIHU WR WKH ³7URXEOHVKRRWLQJ´ sections of User’s Manual - Operating Guide, Instant Stack Guide and Network Guide, and run through the suggested checks.
End User License Agreement for the Projector Software Software in the projector consists of the plural number of independent software modules and there exist our copyright or/and third party copyrights for each of such software modules. The projector also uses software modules that we have developed or/and produced. And there exist our copyright and intellectual property for each of such software and related items including but not limited to the software related documents.
[ Screen size Projection distance Projector top (from the front of the projector unit) , : Screen height Projector bottom Screen type T-1 (inch) 30 40 50 60 70 80 90 100 150 200 250 300 600 Screen type T-2 (inch) 30 40 50 60 70 80 90 100 150 200 250 300 600 IN5132/IN5132c with LENS-070 4:3 Projection distance Screen size H m 0.6 0.8 1.0 1.2 1.4 1.6 1.8 2.0 3.0 4.1 5.1 6.1 12.2 V m 0.5 0.6 0.8 0.9 1.1 1.2 1.4 1.5 2.3 3.0 3.8 4.6 9.
[ Screen size Projection distance Projector top (from the front of the projector unit) , : Screen height Projector bottom Screen type T-3 (inch) 30 40 50 60 70 80 90 100 150 200 250 300 600 Screen type T-4 (inch) 30 40 50 60 70 80 90 100 150 200 250 300 600 2 IN5134/IN5134a/IN5134c with LENS-070 16 : 10 Projection distance Screen size H m 0.6 0.9 1.1 1.3 1.5 1.7 1.9 2.2 3.2 4.3 5.4 6.5 12.9 V m 0.4 0.5 0.7 0.8 0.9 1.1 1.2 1.3 2.0 2.7 3.4 4.0 8.1 Screen height a min. a max.
[ Screen size Projection distance Projector top (from the front of the projector unit) , : Screen height Projector bottom Screen type T-5 (inch) 30 40 50 60 70 80 90 100 150 200 250 300 600 IN5135/IN5135c/IN5145/IN5145c with LENS-071 16 : 10 Projection distance Screen size H m 0.6 0.9 1.1 1.3 1.5 1.7 1.9 2.2 3.2 4.3 5.4 6.5 12.9 V m 0.4 0.5 0.7 0.8 0.9 1.1 1.2 1.3 2.0 2.7 3.4 4.0 8.1 Screen height a min. a max. c b m inch m inch cm inch cm inch 1.0 1.3 1.6 1.9 2.3 2.6 2.9 3.2 4.8 6.
F-1 Computer F-2 Computer Access point USB wireless adapter (optional) USB storage device 4 External device
F-3 VCR/DVD/Blu-ray DiscTM player F-4 Speakers ZLWK DQ DPSOL¿HU Monitor Another projector (Wired) Remote control 5
F-5 3.15" (80mm) 15.59" (396mm) 19.61" (498mm) 5.79" (147mm) 6 5.
GNU GENERAL PUBLIC LICENSE Version 2, June 1991 Copyright © 1989, 1991 Free Software Foundation, Inc. 51 Franklin St, Fifth Floor, Boston, MA 02110-1301 USA Everyone is permitted to copy and distribute verbatim copies of this license document, but changing it is not allowed. Preamble The licenses for most software are designed to take away your freedom to share and change it.
the copyright holder saying it may be distributed under the terms of this General Public License.
collective works based on the Program. In addition, mere aggregation of another work not based on the Program with the Program (or with a work based on the Program) on a volume of a storage or distribution medium does not bring theother work under the scope of this License. 3.
restrictions on the recipients' exercise of the rights granted herein. You are not responsible for enforcing compliance by third parties to this License. 7. If, as a consequence of a court judgment or allegation of patent infringement or for any other reason (not limited to patent issues), conditions are imposed on you (whether by court order, agreement or otherwise) that contradict the conditions of this License, they do not excuse you from the conditions of this License.
goals of preserving the free status of all derivatives of our free software and of promoting the sharing and reuse of software generally. NO WARRANTY %(&$86( 7+( 352*5$0 ,6 /,&(16(' )5(( 2) &+$5*( 7+(5( ,6 12 :$55$17< )25 7+( 352*5$0 72 7+( (;7(17 3(50,77(' %< $33/,&$%/( /$: (;&(37 :+(1 27+(5:,6( 67$7(' ,1 :5,7,1* 7+( &23<5,*+7 +2/'(56 $1' 25 27+(5 3$57,(6 3529,'( 7+( 352*5$0 $6 ,6 :,7+287 :$55$17< 2) $1< .
ZDUUDQW\ RI 0(5&+$17$%,/,7< RU ),71(66 )25 $ 3$57,&8/$5 385326( 6HH WKH GNU General Public License for more details. You should have received a copy of the GNU General Public License along with this program; if not, write to the Free Software Foundation, Inc., 51 Franklin St, Fifth Floor, Boston, MA 02110-1301 USA Also add information on how to contact you by electronic and paper mail.
GNU LESSER GENERAL PUBLIC LICENSE Version 2.1, February 1999 Copyright © 1991, 1999 Free Software Foundation, Inc. 51 Franklin St, Fifth Floor, Boston, MA 02110-1301 USA Everyone is permitted to copy and distribute verbatim copies of this license document, EXW FKDQJLQJ LW LV QRW DOORZHG >7KLV LV WKH ¿UVW UHOHDVHG YHUVLRQ RI WKH /HVVHU *3/ ,W DOVR counts as the successor of the GNU Library Public License, version 2, hence the version number 2.1.
software patents pose a constant threat to the existence of any free program. We wish to make sure that a company cannot effectively restrict the users of a free program by obtaining a restrictive license from a patent holder. Therefore, we insist that any patent license obtained for a version of the library must be consistent with the full freedom of use VSHFL¿HG LQ WKLV OLFHQVH 0RVW *18 VRIWZDUH LQFOXGLQJ VRPH OLEUDULHV LV FRYHUHG E\ WKH ordinary GNU General Public License.
GNU LESSER GENERAL PUBLIC LICENSE TERMS AND CONDITIONS FOR COPYING, DISTRIBUTION AND MODIFICATION 0. This License Agreement applies to any software library or other program which contains a notice placed by the copyright holder or other authorized party saying it may be distributed under the terms of this Lesser General Public License (also called "this License"). Each licensee is addressed as "you".
still operates, and performs whatever part of its purpose remains meaningful. (For example, D IXQFWLRQ LQ D OLEUDU\ WR FRPSXWH VTXDUH URRWV KDV D SXUSRVH WKDW LV HQWLUHO\ ZHOO GH¿QHG independent of the application. Therefore, Subsection 2d requires that any applicationsupplied function or table used by this function must be optional: if the application does not supply it, the square root function must still compute square roots.
D ZRUN WKDW XVHV WKH /LEUDU\ XVHV PDWHULDO IURP D KHDGHU ¿OH WKDW LV SDUW RI WKH /LEUDU\ WKH object code for the work may be a derivative work of the Library even though the source FRGH LV QRW :KHWKHU WKLV LV WUXH LV HVSHFLDOO\ VLJQL¿FDQW LI WKH ZRUN FDQ EH OLQNHG ZLWKRXW the Library, or if the work is itself a library.
either source or binary form) with the major components (compiler, kernel, and so on) of the operating system on which the executable runs, unless that component itself accompanies the executable. It may happen that this requirement contradicts the license restrictions of other proprietary libraries that do not normally accompany the operating system. Such a contradiction means you cannot use both them and the Library together in an executable that you distribute. 7.
section is held invalid or unenforceable under any particular circumstance, the balance of the section is intended to apply, and the section as a whole is intended to apply in other circumstances. It is not the purpose of this section to induce you to infringe any patents or other property right claims or to contest validity of any such claims; this section has the sole purpose of protecting the integrity of the free software distribution system which is implemented by public license practices.
,1 12 (9(17 81/(66 5(48,5(' %< $33/,&$%/( /$: 25 $*5((' 72 ,1 :5,7,1* :,// $1< &23<5,*+7 +2/'(5 25 $1< 27+(5 3$57< :+2 0$< 02',)< $1' 25 5(',675,%87( 7+( /,%5$5< $6 3(50,77(' $%29( %( /,$%/( TO YOU FOR DAMAGES, INCLUDING ANY GENERAL, SPECIAL, INCIDENTAL OR &216(48(17,$/ '$0$*(6 $5,6,1* 287 2) 7+( 86( 25 ,1$%,/,7< 72 86( 7+( /,%5$5< ,1&/8',1* %87 127 /,0,7(' 72 /266 2) '$7$ 25 '$7$ %(,1* 5(1'(5(' ,1$&&85$7( 25 /266(6 6867$,1(' %< <28 25 7+,5' 3$57,(6 25 $ )$,/85( 2) 7+( /,%5$5< 72 23(5$7( :,7+ $
, 1 April 1990 Ty Coon, President of Vice That's all there is to it! GNU ABOUT THE OpenSSL TOOLKIT This product includes software developed by the OpenSSL Project for use in the OpenSSL Toolkit (http://www.openssl.org/). Copyright© 1998-2008 The OpenSSL Project. All rights reserved.
Printed in China
Projector IN5132/IN5142/IN5134/IN5134a/ IN5144/IN5144a/IN5135/IN5145 User's Manual (detailed) Operating Guide Thank you for purchasing this projector. WARNING ►Before using this product, read all manuals for this product. Be sure to read Safety Guide first. After reading them, store them in a safe place for future reference. About this manual Various symbols are used in this manual. The meanings of these symbols are described below.
Contents Menu Items Introduction . . . . . . . . . . . . . . . 3 Features . . . . . . . . . . . . . . . . . . . . . . . 3 EASY MENU. . . . . . . . . . . . . . . 42 Checking package contents . . . . . . . . . 3 PICTURE menu . . . . . . . . . . . . 44 Part names . . . . . . . . . . . . . . . . . . . . . 4 IMAGE menu. . . . . . . . . . . . . . 47 Projector, Control panel and Indicators, Ports, Remote control INPUT menu . . . . . . . . . . . . . .
Introduction Introduction Features The projector provides you with the following features: ü T he HDMI ports can support a variety of digital image equipment providing you with clearer pictures. ü The extremely bright lamp and high quality optical system fulfills the demands of professional applications. ü O ptional lenses and a wide lens shift range provides you with the opportunity to install the product wherever you want.
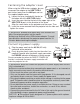
Introduction Part names Projector (1) Lamp cover (&108) The lamp unit is inside. (2) (10) (2) Speakers (x2) (&25, 57) (4) (3) Filter cover (&110) (3) The air filter and intake vent are inside.
Introduction Part names (continued) Control panel and Indicators (9) (10) (11) (12) (13) (14) (1) STANDBY/ON button (&24) (2) INPUT button (&26, 39) (3) MENU button (&39) (4) LENS SHIFT button (&29) (5) ZOOM button (&29) (6) FOCUS - / + buttons (&29) (7) SHUTTER button (&36) (3) (8) FUNCTION button (&22, 29) (4) (9) FILTER indicator (&117) (10) SHUTTER indicator (&36) (6) (11) SECURITY indicator (&93) (2) (12) LAMP indicator (&115, 116) (13) TEMP indicator (&115, 116) (14) POWER indicator (&24, 115, 116)
Introduction Part names (continued) Remote control (1) STANDBY button (&24) (1) (3) (2) ON button (&24) (3) ID - 1 / 2 / 3 / 4 buttons (&17) (4) (7) (4) COMPUTER 1 button (&26) (8) (5) COMPUTER 2 button (&26) (10) (6) COMPUTER 3 button * (13) (7) LAN button (&26) (14) (8) USB TYPE A button (&26) (16) (9) USB TYPE B button (&26) (10) COMPONENT button (&26) (26) (17) (11) S-VIDEO button (&26) (18) (12) VIDEO button (&26) (13) HDMI 1 button (&26) (19) (14) HDMI 2 button (&26) (27) (15) DIGITAL button * (20) (
Setting up Setting up Install the projector appropriately for your environment and mounting situation. When installing in a special application such as for ceiling mount application, additional mounting accessories (&Specifications in the User’s Manual (concise)) and service may be required. Before installing the projector, contact your dealer about your application.
Setting up Arrangement (continued) WARNING ►Install the projector where you can access the power outlet easily. If something unusual occurs, unplug the projector immediately. Otherwise a fire or electric shock may occur. ►Do not subject the projector to unstable conditions. If the projector falls or topples over, it could result in injury or damage the projector and other nearby items. Using a damaged projector could result in a fire and an electric shock.
Setting up Arrangement (continued) CAUTION ►Place the projector in a cool place with sufficient ventilation. The projector may shutdown automatically or may malfunction if its internal temperature is too high. • Using a damaged projector could result in a fire and an electric shock. • Do not place the projector in direct sunlight or near hot objects such as heaters. • Do not place the projector where the air from an air conditioner or similar unit will blow on it directly.
Setting up Connecting your devices Before connecting the projector to a device, consult the device manual to confirm that the device is compatible with this projector and prepare the required accessories, such as appropriate cables. Contact your dealer when the required accessory did not come with the product or an accessory is damaged. After verifying that the projector and the devices are turned off, make all connections per the following instructions. Refer to the illustrations on the subsequent pages.
Setting up Connecting your devices (continued) (&26, 104) (&26) (&57) (&26) Computer NOTE • Before connecting the projector to a computer, consult the computer’s manual and check the signal compatibility, synchronization methods and the display resolution output to the projector. - Some signals may need an adapter to input to this projector. - Some computers have multiple screen display modes which may include some signals which are not compatible with this projector.
Setting up Connecting your devices (continued) (&76) (&19) Computer External device Access point (&76) USB wireless adapter (optional) (&76) USB storage device (&94, 104) WARNING ►Heat may build up in the USB wireless adapter. To avoid possible burns, disconnect the projector power cord for 10 minutes before touching the adapter. ►When using the USB wireless adapter, be sure to connect the adapter to the USB TYPE A port furthest from the LAN port and use the supplied adapter cover (&15).
Setting up Connecting your devices (continued) (&57) (&26) (&26) (&26, 52) VCR/DVD/ Blu-ray DiscTM player NOTE • The HDMI ports of this model are compatible with HDCP (High-bandwidth Digital Content Protection) and therefore capable of displaying video signals from HDCP compatible DVD players and the like.
Setting up Connecting your devices (continued) Speakers (with an amplifier) (&56) Monitor Another projector (Wired) Remote control NOTE • To use a wired remote control, connect a wired remote control to the REMOTE CONTROL IN port. You can also connect another projector to the REMOTE CONTROL OUT port to control it from the wired remote control. You can use this projector as a remote control-relay with the REMOTE CONTROL IN and OUT ports.
Setting up Fastening the adapter cover When using the USB wireless adapter, be sure to connect the adapter to the USB TYPE A port furthest from the LAN port and use the supplied adapter cover. 1. 2. 3. Tab 1 Loosen the screw (marked with a triangle) on the bottom left of the USB TYPE A ports. Insert the cover tab into the hole at the upper right of the USB TYPE A ports in the direction of the arrow. Align the screw holes on the projector and the cover.
Setting up Connecting a power supply the power cord into the projector's AC 1. Plug IN (AC inlet). plug the power cord’s plug into a 2. Firmly power outlet. After a few seconds, the AC IN Power cord POWER indicator will light steady orange. Remember that when the DIRECT POWER ON function activated (&66), the power supply connection will make the projector turn on. WARNING ►Do not connect the projector to a power supply when no lens unit is attached to it.
Remote control Remote control Installing the batteries Insert batteries into the remote control before using it (batteries not included). If the remote control starts to malfunction, try replacing the batteries. If the remote control will not be used for a long period, remove the batteries from the remote control and store them in a safe place. 1 2 Holding the hook part of the battery cover, remove it. Align and insert two AA batteries (HITACHI MAXELL or HITACHI MAXELL ENERGY, 3 Part No.
Remote control Changing the remote control signal frequency There are two choices to control the signal frequency mode of the remote control, Mode 1:NORMAL and Mode 2:HIGH. If the remote control does not function properly, try changing its mode. In order to set the Mode, press and hold the two button combination listed below for about 3 seconds. (1) To s et Mode 1:NORMAL AV MUTE and ZOOM buttons (2) To set Mode 2:HIGH .
Remote control Simple PC mouse & keyboard control When the projector’s USB TYPE B port and the computer’s type A USB port are connected and MOUSE is selected for the USB TYPE B item in the OPTION menu (67), the remote control will work like a simple PC mouse and keyboard. (1) PAGE UP key: Press the PAGE UP button. (2) PAGE DOWN key: Press the PAGE DOWN button. (3) Mouse left button: Press the ENTER button. (1) (4) Move pointer: Use the cursor buttons ▲, ▼, ◄ and ►. (2) (5) ESC key: Press the ESC button.
Status Monitor Status Monitor The Status Monitor is the LCD window on the rear panel of the IN5142, IN5144, IN5144a and IN5145. The Status Monitor displays the projector's present condition, including errors, setup information and error history. Status Monitor Displaying the projector condition If no buttons are being operated, the Status Monitor will display the projector's condition as per below.
Status Monitor Displaying the projector condition (continued) : When the lamp is on, it displays the supplied voltage and 3rd line peripheral Celsius temperature. NOTE • Nothing is displayed on the 2nd line of the monitor, when the projector is searching for an input signal and when the USB TYPE A ports are set to normal condition. • "NO SIGNAL" is displayed on the 2nd line of the monitor (67) when the USB TYPE B port is selected.
Status Monitor Displaying the log You can use the buttons to review the present setup information and the error history on the Status Monitor. NOTE • While the projector is warming up, button presses are ignored. • When the USB TYPE A port is selected, use the buttons on the control panel to display the logs. The Status Monitor button on the remote control may be unavailable.
Status Monitor Displaying the log (continued) NOTE • The Status Monitor and its backlight will return to its previous state when any button (except the cursor buttons) is pressed and when no buttons are pressed for 30 seconds. • The projector usage time is the amount of time the projector lamp has been on since the projector was manufactured. LAMP TIME in the OPTION menu (67) does not reset this timer.
Power on/off Power on/off Turning on the power 1. Make sure the power cord is firmly and correctly connected to the projector and the outlet. POWER indicator STANDBY button ON button sure the POWER indicator is 2. Make steady orange (115). Then remove the lens cover. STANDBY/ON button Press the STANDBY/ON button on the projector or the ON button on the remote control.The projection lamp will light up and POWER indicator will begin blinking green.
Operating Operating Adjusting the volume the VOL + / - buttons to adjust the volume. 1. Use A dialog will appear on the screen to aid you in adjusting the volume. If you do not do anything, the dialog will automatically disappear after a few seconds. VOL + / buttons NOTE • When is selected for current source, the volume adjustment is disabled. See the AUDIO SOURCE item of AUDIO menu (57).
Operating Selecting an input signal the INPUT button on the projector. 1. Press Each time you press the button, the projector switches its input port from the current port as per below. COMPUTER IN1 COMPUTER IN2 LAN INPUT button VIDEO USB TYPE A S-VIDEO USB TYPE B COMPONENT HDMI 2 HDMI 1 NOTE • If some ports have been skipped in SOURCE SKIP of the OPTION menu, those input ports cannot be selected (65).
Operating Selecting an aspect ratio the ASPECT button on the remote control. 1. Press Each time you press the button, the projector switches the aspect ratio as follows.
Operating Adjusting the projector’s elevator When the projector surface is slightly uneven to the left or right, use the elevator feet to place the projector horizontally. You can also tilt the projector using the feet to project at an appropriate angle to the screen, elevating the front side of the projector up to 9 degrees. This projector has 2 elevator feet and 2 elevator buttons. To adjust an elevator foot, you must push the elevator button which is on the same side as it.
Operating Adjusting the lens Adjusting the zoom and focus The ZOOM or FOCUS dialog will appear when you press any of the buttons from ZOOM, ZOOM -, ZOOM +, FOCUS + and FOCUS -. Use the ZOOM + / - buttons on the remote control or ZOOM button and ◄/► cursor buttons on the projector to adjust the screen size. Use the FOCUS + / - buttons to focus the picture. 1. LENS SHIFT button ZOOM + / - buttons FOCUS + / - buttons 2. NOTE • The projector may ignore button operations when the lens is moving.
Operating Adjusting the lens (continued) Lens memory This projector is equipped with memory functions for lens adjustments (LENS SHIFT and LENS TYPE). Up to 3 sets of adjustments can be saved. To use the lens memory feature, press the POSITION or FUNCTION button while the LENS SHIFT dialog is displayed. Then the LENS MEMORY dialog will appear. The current lens adjustments are displayed on the “CURRENT” line.
Operating Using the automatic adjustment feature the AUTO button on the remote control. 1. Press Pressing this button performs the following. F or a computer signal AUTO The vertical position, the horizontal position and the button horizontal phase will be automatically adjusted. Make sure the application window is set to its maximum size before to attempting to use this feature. A dark picture may still be inadjusted correctly. Use a bright picture when adjusting.
Operating Correcting the distortion To correct the distortion of a projected image, you can select one of three options, AUTO, MANUAL and PERFECT FIT. First press the KEYSTONE button to display the KEYSTONE menu, and point at one of items with the ▲/▼ buttons. KEYSTONE AUTO: performs an automatic vertical keystone button correction. (&54) MANUAL: a llows you to adjust the vertical and horizontal keystone manually.
Operating Correcting the distortion (continued) MANUAL: When MANUAL is highlighted, pressing the ► or ENTER button displays the KEYSTONE_MANUAL dialog. 1. 2. Select vertical or horizontal keystone ( / ) with the ▲/▼ buttons. Use the ◄/► buttons to adjust the keystone distortion. NOTE • When the zoom adjustment is set to the TELE (telephoto focus), this function may be excessive. This function should be used when the zoom adjustment is set to the full WIDE (wide-angle focus) whenever possible.
Operating Correcting the distortion (continued) 3. Adjust the selected part as per below. ● To adjust a corner, use the ▲/▼/◄/► buttons to adjust the position of the corner. ● To adjust the upper or lower side, use the ◄/► buttons to select any one point on the side, and use the ▲/▼ buttons to adjust the distortion of the side.
Operating Using the magnify feature the MAGNIFY ON button on the remote 1. Press control. The picture will be magnified, and the MAGNIFY dialog will appear on the screen. When the MAGNIFY ON button is pressed for the first time after the projector is turned on, the picture will be zoomed 1.5 times. On the dialog, triangle marks to show each direction will be displayed. MAGNIFY ON / OFF buttons projector's display magnification switches with every press 2. The of the MAGNIFY ON button.
Operating Temporarily freezing the screen the FREEZE button on the remote control. 1. Press The “FREEZE” indicator will appear on the screen (however, the indicator will not appear when OFF is selected for the MESSAGE item in the SCREEN menu (61)). FREEZE button To exit the FREEZE mode and restore the screen to normal, press the FREEZE button again. NOTE • The projector automatically exits from the FREEZE mode when some control buttons are pressed.
Operating PbyP (Picture by Picture) PbyP is a function for displaying two different picture signals on a screen that is split into main and sub areas for each signal. PbyP button main area Normal mode sub area PbyP mode Press the PbyP button on the remote control. This activates the PbyP mode. The displayed image before the PbyP button was pressed will be displayed as the main area. Most operations are effective for the main area only.
Operating PbyP (Picture by Picture) (continued) COMPUTER IN1 COMPUTER IN2 LAN USB TYPE A USB TYPE B HDMI 1 HDMI 2 COMPONENT S-VIDEO VIDEO C hanging the picture input signal Press any button to select an input port on the remote control or press the INPUT button on the control panel. A dialog box to select the input signal for the main area will be displayed. Choose a signal using the ▲/▼ buttons.
Operating Using the menu function This projector has the following menus: PICTURE, IMAGE, INPUT, SETUP, AUDIO, SCREEN, OPTION, NETWORK, SECURITY and EASY MENU. EASY MENU consists of functions often used, and the other menus are classified into each purpose and brought together as the ADVANCED MENU. Each of these menus is operated using the same methods. When the projector is displaying the menu system, the projector's MENU button acts as a cursor button. Basic menu operations are described below.
Operating Using the menu function (continued) close the MENU, press the MENU button again or select EXIT and press 3. To the ◄ cursor button or the ENTER button. Even if you do not do anything, the dialog will automatically disappear after about 30 seconds. NOTE • If you want to move the menu position, press the POSITION button and then use the cursor buttons. • Some functions cannot be performed when a certain POSITION button input port is selected, or when a certain input signal is displayed.
Operating Using the menu function (continued) Containing items of each menu The items contained in the menus are as per below; Menu Items ASPECT, AUTO KEYSTONE, KEYSTONE, KEYSTONE, EASY MENU (42) PERFECT FIT, PICTURE MODE, ECO MODE, INSTALLATION, RESET, FILTER TIME, LANGUAGE, ADVANCED MENU, EXIT PICTURE (44) BRIGHTNESS, CONTRAST, GAMMA, COLOR TEMP, COLOR, TINT, SHARPNESS, ACTIVE IRIS, MY MEMORY IMAGE (47) ASPECT, OVER SCAN, V POSITION, H POSITION, H PHASE, H SIZE, AUTO ADJUST EXECUTE INPUT (50)
EASY MENU EASY MENU From the EASY MENU, you can perform the items shown in the table below. Select an item using the ▲/▼ cursor buttons. Then follow the instructions below. Item Description ASPECT Using the ◄/► buttons switches the aspect ratio mode. See the ASPECT item in IMAGE menu (47). AUTO KEYSTONE Using the ► button performs the auto keystone function. See the AUTO KEYSTONE item in SETUP menu (54). KEYSTONE Using the ◄/► buttons corrects the vertical keystone distortion.
EASY MENU Item Description NORMAL CINEMA DYNAMIC BOARD(BLACK) BOARD(GREEN) WHITEBOARD DAYTIME DICOM SIM. PICTURE MODE (continued) ECO MODE INSTALLATION GAMMA 1 DEFAULT 2 DEFAULT 3 DEFAULT 4 DEFAULT 4 DEFAULT 5 DEFAULT 6 DEFAULT 7 DEFAULT COLOR TEMP 2 MID 3 LOW 1 HIGH 4 Hi-BRIGHT-1 5 Hi-BRIGHT-2 2 MID 6 Hi-BRIGHT-3 2 MID • When the combination of GAMMA and COLOR TEMP differs from the pre-assigned modes above, the display on the menu for the PICTURE MODE is “CUSTOM”.
PICTURE menu PICTURE menu From the PICTURE menu, you can perform the items shown in the table below. Select an item using the ▲/▼ cursor buttons, and press the ► cursor button or the ENTER button to perform this item. Then follow the instructions below. Item BRIGHTNESS CONTRAST Description Using the ◄/► buttons adjusts brightness. Dark ó Light Using the ◄/► buttons adjusts contrast. Weak ó Strong Using the ▲/▼ buttons switches the gamma mode.
PICTURE menu Item Description Using the ▲/▼ buttons switches the color temperature mode. 1 HIGH 1 CUSTOM 2 MID 2 CUSTOM 3 LOW 3 CUSTOM 4 Hi-BRIGHT-1 6 CUSTOM 6 Hi-BRIGHT-3 5 CUSTOM 5 Hi-BRIGHT-2 4 CUSTOM To adjust CUSTOM COLOR TEMP Selecting a CUSTOM mode and then pressing the ► button or the ENTER button displays a dialog to aid you in adjusting the OFFSET and GAIN of the selected mode. OFFSET adjustments change the color intensity on the whole tones of the test pattern.
PICTURE menu Item SHARPNESS Description Using the ◄/► buttons adjusts the sharpness. Weak ó Strong • There may be some noise and/or the screen may flicker for a moment when an adjustment is made. This is not a malfunction. Using the ▲/▼ cursor buttons changes the active iris control mode. PRESENTATION ó THEATER ó OFF ACTIVE IRIS MY MEMORY 46 PRESENTATION : The active iris displays the best presentation image for both bright and dark scenes.
IMAGE menu IMAGE menu From the IMAGE menu, you can perform the items shown in the table below. Select an item using the ▲/▼ cursor buttons, and press the ► cursor button or the ENTER button to perform this item. Then follow the instructions below. Item Description Using the ▲/▼ buttons switches the aspect ratio mode.
IMAGE menu Item Description OVER SCAN Using the ◄/► buttons adjusts the over-scan ratio. Small (magnifies picture) ó Large (reduces picture) • This item can only be selected for a video, s-video and component video signal. • For an HDMITM signal, this item can also be selected if either (1) or (2) applies. (1) HDMI FORMAT item in the INPUT menu for selected port is set to VIDEO.
IMAGE menu Item Description H PHASE Using the ◄/► buttons adjusts the horizontal phase to eliminate flicker. Right ó Left • This item can only be selected for a computer signal or a component video signal. This function is unavailable with LAN, USB TYPE A / B or HDMI 1 / 2 port signals. H SIZE Using the ◄/► buttons adjusts the horizontal size. Small ó Large • This item can only be selected for a computer signal. This function is unavailable with LAN, USB TYPE A / B or HDMI 1 / 2 port signals.
INPUT menu INPUT menu From the INPUT menu, you can perform the items shown in the table below. Select an item using the ▲/▼ cursor buttons, and press the ► cursor button or the ENTER button to perform this item. Then follow the instructions below. Item Description Using the ▲/▼ buttons switches the progress mode. TV ó FILM ó OFF PROGRESSIVE VIDEO NR • This function only works for composite, s-video, component and HDMITM signals (of 480i@60 or 576i@50 or 1080i@50/60).
INPUT menu Item Description VIDEO FORMAT You can choose the video format for the S-VIDEO and VIDEO ports. (1) U se the ▲/▼ buttons to select the input port. (2) U sing the ◄/► buttons switches the video format mode. AUTO ó NTSC ó PAL ó SECAM N-PAL ó M-PAL ó NTSC4.43 • This item only affects video signals from the VIDEO and S-VIDEO ports. • The AUTO mode automatically selects the optimum mode. • The AUTO operation may not work well with some signals. If the picture becomes unstable (e.g.
INPUT menu Item Description COMPUTER IN The computer input signal type for COMPUTER IN1 and IN2 ports can be chosen. (1) Use the ▲/▼ buttons to select the COMPUTER IN port to be set. (2) U se the ◄/► buttons to select the computer input signal type. AUTO ó SYNC ON G OFF • Selecting the AUTO mode allows you to input a sync on G signal or component video signal from the port. • In the AUTO mode, the picture may be distorted with certain input signals.
INPUT menu Item Description RESOLUTION The resolution for the COMPUTER IN1 and COMPUTER IN2 input signals can be chosen on this projector. (1) In the INPUT menu select the RESOLUTION using the ▲/▼ buttons and press the ► button. The RESOLUTION menu will be displayed. (2) In the RESOLUTION menu select the resolution you wish to display using the ▲/▼ buttons. Selecting AUTO will set a resolution appropriate to the input signal.
SETUP menu SETUP menu From the SETUP menu, you can perform the items shown in the table below. Select an item using the ▲/▼ cursor buttons, and press the ► cursor button or the ENTER button to perform this item. Then follow the instructions below. Item Description Selecting this item performs the Automatic Keystone distortion correction. The projector automatically corrects vertical keystone distortion due to the (forward/backward) setup angle.
SETUP menu Item KEYSTONE PERFECT FIT Description Using the ◄/► buttons corrects the horizontal keystone distortion. Shrink the right of the image ó Shrink the left of the image • The adjustable range of this function will vary among inputs. For some inputs, this function may not work well. • When the horizontal lens shift is not set to the center, this function may not work well. • This function is unavailable when the TRANSITION DETECTOR (90) is ON or the screen is adjusted by PERFECT FIT (33, 34).
SETUP menu Item Description STANDBY MODE Using the▲/▼ buttons switches the standby mode setting between NORMAL and SAVING. NORMAL ó SAVING When SAVING is selected, the power consumption in standby mode is lowered with some functional restrictions as per below: • When SAVING is selected and the projector is in standby mode, all RS-232 communication and network controls are disabled except the power on command.
AUDIO menu AUDIO menu From the AUDIO menu, you can perform the items shown in the table below. Select an item using the ▲/▼ cursor buttons, and press the ► cursor button or the ENTER button to perform this item. Then follow the instructions below. Item Description VOLUME Using the ◄/► buttons adjusts the volume. Low ó High SPEAKER Using the ▲/▼ buttons turns on/off the built-in speaker. ON ó OFF When OFF is selected, the built-in speaker does not work.
AUDIO menu Item Description HDMI AUDIO The HDMI audio mode for the HDMI 1 and 2 ports can be chosen. (1) U se the ▲/▼ buttons to select the HDMI port to be set. (2) U se the ◄/►buttons to select the mode of HDMITM audio. Check each of the modes provided and select the suitable one for your HDMITM audio device.
SCREEN menu SCREEN menu From the SCREEN menu, you can perform the items shown in the table below. Select an item using the ▲/▼ cursor buttons, and press the ► cursor button or the ENTER button to perform this item. Then follow the instructions below. Item LANGUAGE Description Using the ▲/▼/◄/► buttons switches the OSD (On Screen Display) language. ENGLISH ó FRANÇAIS ó DEUTSCH ó ESPAÑOL (shown in the LANGUAGE dialog) Press the ENTER or INPUT button to save the language setting.
SCREEN menu Item Description MyScreen This item allows you to capture a personal MyScreen image which can be used as the BLANK or START UP screen. Display the image you want to capture before accomplishing the following steps. (1) S electing this item displays a dialog titled “MyScreen”. It will ask you if you want to capture the current screen for your MyScreen image. Please wait until the target image is displayed, and press the ENTER or INPUT button.
SCREEN menu Item MyScreen Lock MESSAGE Description Using the ▲/▼ buttons turns on/off the MyScreen lock function. ON ó OFF When ON is selected, the item MyScreen is locked. Use this function for protecting the current MyScreen. • This function cannot be selected when ON is selected to the MyScreen PASSWORD item in SECURITY menu (88). Using the ▲/▼ buttons turns on/off the message function.
SCREEN menu Item Description SOURCE NAME Each input port for this projector can have a name applied to it. (1) U se the ▲/▼ buttons on the SCREEN menu to select SOURCE NAME and press the ► or ENTER button. The SOURCE NAME menu will be displayed. (2) U se the ▲/▼ buttons on the SOURCE NAME menu to select the port to be named and press the ► button. The SOURCE NAME dialog will be displayed. The right side of the menu will remain blank until a name is specified.
SCREEN menu Item Description SOURCE NAME (continued) (6) The current name will be displayed on the first line. Use the ▲/▼/◄/► buttons and the ENTER or INPUT button to select and enter characters. To erase 1 character at a time, press the RESET button or press the ◄ and INPUT button simultaneously. Also if you highlight DELETE or ALL CLEAR on screen and press the ENTER or INPUT button, you can erase one character or all characters at a time. The name can be up to 16 characters.
SCREEN menu Item Description C.C. displays a transcript or dialog of the audio portion of videos, files and other presentations, including relevant sounds. An NTSC format video or a 480i@60 format component video source supporting closed captioning is required to use this function. Depending on the signal source and the equipment being used, this function may not work properly. In this case, turn off Closed Captioning. DISPLAY Select the Closed Captioning DISPLAY option using ▲/▼ buttons.
OPTION menu OPTION menu From the OPTION menu, you can perform the items shown in the table below. Select an item using the ▲/▼ cursor buttons, and press the ► cursor button or the ENTER button to perform this item, except items LAMP TIME and FILTER TIME. Then follow the instructions below. Item Description SOURCE SKIP Ports can be ignored by the AUTO SEARCH function (below) and when using buttons on the control panel. (1) C hoose a picture input port using the ▲/▼ buttons.
OPTION menu Item Description DIRECT POWER ON Using the ▲/▼ buttons turns the DIRECT POWER ON function on/ off, ON OFF When this function is ON, the lamp inside the projector will automatically turn on when the projector is supplied with power instead of following the usual procedure (24).
OPTION menu Item Description USB TYPE B Using the ▲/▼ buttons selects the function of USB TYPE B port. To use this function, you need to connect the projector's USB TYPE B port to the computer's Type A USB port. MOUSE USB DISPLAY MOUSE: The remote control works like a simple mouse and keyboard for the computer. USB DISPLAY: The port will receive image input signals from the computer (104). • It may take several seconds to project the images from the USB TYPE B port.
OPTION menu Item Description MY BUTTON This item assigns one of the following functions to MY BUTTON (1 to 4) on the remote control (6). (1) Use the ▲/▼ buttons on the MY BUTTON menu to select a button from MY BUTTON - 1 to 4 and press the ► or ENTER button to display the MY BUTTON setup dialog. (2) Then using the ▲/▼/◄/► buttons highlight one of the following functions for the chosen button. Press the ENTER or INPUT button to save the setting.
OPTION menu Item Description Select this to display the SERVICE menu. Select an item using the ▲/▼ buttons, and press the ► button or the ENTER button on the remote control to perform this item. ALTITUDE Using the ▲/▼ buttons switches the rotation speed of the cooling fans. We recommend leaving it set to AUTO under most circumstances HIGH-2 ó HIGH-1 ó NORMAL ó AUTO SERVICE AUTO: The projector changes the rotation speed automatically to accomodate for altitude and other environmental factors.
OPTION menu Item SERVICE (continued) Description FILTER MESSAGE Use the ▲/▼ button to set the notification timer for displaying a message to replace the filter unit IN5132, IN5134, IN5134a, IN5135: 1000h ó 2000h ó 5000h ó 10000h ó 15000h ó OFF IN5142, IN5144, IN5144a, IN5145: 1000h ó 2000h ó 5000h ó 10000h ó 15000h ó 20000h ó OFF After choosing any item except OFF, the message “REMINDER *** HRS PASSED....” will appear after the timer reaches the time intervals set by this feature (114).
OPTION menu Item Description KEY LOCK (1) Use the ▲/▼ buttons to choose the control option. CONTROL PANEL ó REMOTE CONTROL (2) Use the ◄/► buttons to select ON or OFF. ON ó OFF Selecting ON in Step 2 locks all the buttons except STANDBY, ON and STANDBY/ON for the control option selected in Step 1. Selecting OFF releases the locked buttons on the control option selected in Step 1. • Use this function to prevent tampering and accidental operation. • It is not possible to disable both options simultaneously.
OPTION menu Item Description Selecting this item displays COMMUNICATION menu. In this menu, you can configure the projector's serial communication settings using the CONTROL port. SERVICE (continued) • Select an item using the cursor buttons ▲/▼. Then press the ► button to open the submenu for setting the item you selected. Or, press the ◄ button instead of the ► button to go back to the previous menui without changing the setup. Each submenu can be operated as described above.
OPTION menu Item Description SERIAL SETTINGS Select the CONTROL port serial communication settings. BAUD RATE 4800bps ó 9600bps ó 19200bps ó 38400bps PARITY NONE ó ODD ó EVEN • When the COMMUNICATION TYPE is OFF (72), the BAUD RATE is set to 19200bps and PARITY is set NONE. SERVICE (continued) COMMUNICATION TRANSMISSION METHOD (continued) Select the NETWORK BRIDGE communication transmission method for the CONTROL port.
OPTION menu Item Description RESPONSE LIMIT TIME Select the time period which the projector should wait to receive response data from a device communicating using the NETWORK BRIDGE and HALF-DUPLEX methods via the CONTROL port. OFF ó 1s ó 2s ó 3s SERVICE (continued) OFF: Select this mode if the responses from the device do not need to be monitored. In this mode, the projector can send data out to the computer continuously.
OPTION menu Item Description INFORMATION Selecting this item displays a dialog titled “INPUT_INFORMATION”. It shows information about the current input. SERVICE (continued) • The “FRAME LOCK” message on the dialog means the frame lock function is working. • The “SCART RGB” message means the COMPONENT ports are working as a SCART RGB input port. Refer to the COMPONENT item in the INPUT menu (50). • This item cannot be selected when there is no signal or sync out.
NETWORK menu NETWORK menu Remember that incorrect network settings on this projector may cause network problems. Contact your network administrator before connecting to an existing access point on the network. Select “NETWORK” from the main menu to access the following functions. Select an item using the ▲/▼ cursor buttons on the projector or remote control, and press the ► cursor button on the projector or remote control, or the ENTER button on the remote control to perform this item.
NETWORK menu Item Description Use the ▲/▼ buttons to turn DHCP on/off. ON OFF Select OFF when the network does not have DHCP DHCP (Dynamic Host enabled. To save the setting, press the ► button. Configuration • When DHCP changes to ON, it takes a little time Protocol) to obtain the IP address from DHCP server. • Auto IP function will assign an IP address if the projector cannot obtain an IP address from the server even if DHCP is ON.
NETWORK menu Item Description DATE AND TIME Use the ▲/▼/◄/► buttons to enter the Year (last two digits), Month, Date, Hours and Minutes. • When this item is set, TIME DIFFERENCE in the WIRED SETUP menu will be overwritten with the same setting (82). • When SNTP is enabled, the projector will override this setting and retrieve DATE AND TIME information from the Time server. (3.1.
NETWORK menu Item Description Use the ▲/▼ buttons to select the SSID to display the SSID menu. #1 DEFAULT #2 DEFAULT #3 DEFAULT #5 CUSTOM #4 DEFAULT Select DEFAULT (#1~#4) and press ► or the ENTER button. WIRELESS SETUP (continued) SSID To adjust CUSTOM Press the ► or ENTER button when #5 CUSTOM is selected. The SSID #5 CUSTOM menu will appear. (1) The current SSID will be displayed on the first line. If nothing has been entered yet, the line will be blank.
NETWORK menu Item Description Select this to display the WIRELESS INFORMATION dialog to view the wireless LAN settings. Use the ▲/▼ buttons to switch the page. The first page shows the wireless LAN settings. The second and subsequent pages display the wireless LAN connection devices signal information WIRELESS INFORMATION • For PASSCODE details, refer to the LiveViewer manual. • Nothing (blank) is shown in the PROJECTOR NAME (83) and SSID (79) field until you setup those items.
NETWORK menu Item Description Select this to display the WIRED SETUP menu for the wired LAN. Use the ▲/▼ buttons to select an item, and the ► or ENTER button on the remote control to perform the item. Use the ▲/▼ buttons to turn DHCP on/off. ON OFF Select OFF when the network does not have DHCP enabled. To save the setting, press the ► DHCP (Dynamic Host button. Configuration • When the DHCP setting changes to ON, it will take some time to obtain IP address from DHCP Protocol) server.
NETWORK menu Item Description TIME DIFFERENCE Use the ▲/▼ buttons to enter the TIME DIFFERENCE. Set the TIME DIFFERENCE to match your computer. If you are unsure what to enter, contact your IT manager. Use the ► button to return to the menu after setting TIME DIFFERENCE. • When this item is set, TIME DIFFERENCE in the WIRED SETUP menu will be overwritten with the same setting (77). DATE AND TIME Use the ▲/▼/◄/► buttons to enter the Year (last two digits), Month, Date, Hours and Minutes.
NETWORK menu Item Description PROJECTOR NAME (1) Use the ▲/▼ buttons on the NETWORK menu to select the PROJECTOR NAME and press the ► button. The PROJECTOR NAME dialog will be displayed. (2) The current PROJECTOR NAME will be displayed on the first 3 lines. A projector name will be pre-assigned by default. Use the ▲/▼/◄/► buttons and the ENTER or INPUT button to select and enter characters. To erase 1 character at one time, press the RESET button or press the ◄ and INPUT button simultaneously.
NETWORK menu Item MY IMAGE Description Select this to display the MY IMAGE menu. Use the application to transfer the image data. It can be downloaded from the InFocus website. (www.infocus.com/support). Use the ▲/▼ buttons to select a still MY IMAGE image (4. My Image Function in the Network Guide) and the ► or ENTER button to display the image. • If no images have been saved, you cannot select an image. • Only 16 characters of the image names can be displayed.
NETWORK menu Item Description Select this to display the PRESENTATION menu. Use ▲/▼ buttons to select one of the following items, then press ► or the ENTER button to use the function. • To use Network Presentation, an exclusive application, LiveViewer is required. It can be installed from the bundled application CD. You can also download the latest version and relevant information from the InFocus website (www.infocus.com/support).
SECURITY menu Item Description MULTI PC MODE (continued) PRESENTATION (continued) • To change from Single PC mode to Multi PC mode, press ► button to choose OK in the dialog and press the ENTER or INPUT button. The display mode will change. • For details on how to switch the display mode to Multi PC mode on your computer, refer to the LiveViewer manual. • The Presenter mode setting of the selected computer becomes valid when the display mode is changed to Single PC mode.
SECURITY menu SECURITY menu This projector is equipped with security functions. From the SECURITY menu, you can perform the items shown in the table below. To use the SECURITY menu: User registration is required before using the security functions. Enter to the SECURITY menu 1. P ress the ► button. The ENTER PASSWORD box will be displayed. 2. U se the ▲/▼/◄/► buttons to enter the password. The factory default password is as follows.
SECURITY menu Item Description The MyScreen PASSWORD function can be used to prohibit access to the MyScreen function and prevent the current MyScreen image from being overwritten. 1 Turning on the MyScreen PASSWORD MyScreen PASSWORD 1-1 Use the ▲/▼ buttons on the SECURITY menu to select MyScreen PASSWORD and press the ► button to display the MyScreen PASSWORD on/ off menu. 1-2 Use the ▲/▼ buttons on the MyScreen PASSWORD on/off menu to select ON. The ENTER NEW PASSWORD box (small) will be displayed.
SECURITY menu Item Description PIN LOCK is a function which prevents the projector from being used unless a registered Code is entered. 1 Turning on the PIN LOCK PIN LOCK 1-1 Use the ▲/▼ buttons on the SECURITY menu to select PIN LOCK and press the ► button or the ENTER button to display the PIN LOCK on/off menu. 1-2 Use the ▲/▼ buttons on the PIN LOCK on/ off menu to select ON and the Enter PIN Code box will be displayed. 1-3 Input a 4 digit PIN code using the ▲/▼/◄/►, COMPUTER 1 and INPUT buttons.
SECURITY menu Item Description If this function is ON and the projector's vertical angle or INSTALLATION setting is different from the previous recorded setting, the TRANSITION DETECTOR ON alarm will be displayed instead of an input signal. • To display the input signal again, turn this function OFF. • The projector will display the TRANSITION DETECTOR ON alarm for approximately 5 minutes and then the lamp will turn off.
SECURITY menu Item Description The MY TEXT PASSWORD function can prevent the MY TEXT from being overwritten. When the password is set for the MY TEXT; • The MY TEXT DISPLAY menu will be unavailable, which can prohibit changing the DISPLAY setting. • The MY TEXT WRITING menu will be unavailable, which can prevent the MY TEXT from being overwritten.
SECURITY menu Item MY TEXT DISPLAY MY TEXT WRITING Description (1) U se the ▲/▼ buttons on the SECURITY menu to select the MY TEXT DISPLAY and press the ► or ENTER button to display the MY TEXT DISPLAY on/off menu. (2) U se the ▲/▼ buttons on the MY TEXT DISPLAY on/off menu to select on or off. ON ó OFF When this is set to ON, the START UP screen will display MY TEXT and when INFORMATION on the SERVICE menu is selected, INPUT_ INFORMATION will display.
SECURITY menu Item SECURITY INDICATOR STACK LOCK Description Select this to display the SECURITY INDICATOR dialog. Use the ▲/▼ buttons to select ON or OFF. ON ó OFF When PIN LOCK or TRANSITION DETECTOR is ON and this is turned ON, the SECURITY indicator blinks yellow in the standby mode (89, 90). Select this to display the STACK LOCK dialog. For more information, see the Instant Stack Guide.
Presentation tools Presentation tools The projector has the following convenient tools that enable on-screen presentations easily and quickly: - PC-LESS Presentation (below) - USB Display (104) - Network Presentation For more details about Network Presentation, refer to the Network Guide and the LiveViewer manual. PC-LESS Presentation PC-LESS Presentation reads image and audio data from a storage media device inserted into the USB TYPE A ports and displays images in the following modes.
Presentation tools PC-LESS Presentation (continued) NOTE • Files with a resolution larger than the following are not supported. IN5132, IN5142: 1024 x 768 (Still), 768 x 576 (Movie) IN5134, IN5134a, IN5144, IN5144a: 1280 x 800 (Still), 768 x 576 (Movie) IN5135, IN5145: 1920 x 1200 (Still), 768 x 576 (Movie) (* Some computers may not support these resolutions.) • Files with a resolution smaller than 36 x 36 are not supported. • Files with a resolution smaller than 100 x 100 may not be displayed.
Presentation tools PC-LESS Presentation (continued) Button Operation You can control the images on the Thumbnail screen with the remote control, control panel or Web Remote Control. The following functions can be supported while the Thumbnail screen is displayed. Button operation Functions Remote control Control panel Web Remote Control ▲/▼/◄/► ▲/▼/◄/► [▲]/[▼]/[◄]/[►] Moves the cursor. PAGE UP PAGE DOWN - [PAGE UP] [PAGE DOWN] Switches pages.
Presentation tools PC-LESS Presentation (continued) Thumbnail Menu Operation You can also control the images by using the Thumbnail screen menu. Item Functions Moves to an upper folder. SORT Allows you to sort files and folders as following. RETURN Press the ► cursor button or ENTER to return to the Thumbnail screen. NAME UP Sorts in ascending order by file name. NAME DOWN Sorts in descending order by file name. DATE UP Sorts in ascending order by file date.
Presentation tools PC-LESS Presentation (continued) NOTE • These operations are not accessible when the projector OSD is displayed. • The Thumbnail mode is able to display up to 20 files in a page. • When a Thumbnail screen, Slideshow, or Full Screen image is displayed, you cannot change the input port using the INPUT button. • When playing back audio data included in a movie, the image quality may deteriorate. If you want the image quality to have priority, turn the sound off by setting ♪ to off.
Presentation tools PC-LESS Presentation (continued) Full Screen Mode The Full Screen mode shows a full display image. To display in Full Screen mode, select an image in the Thumbnail screen. Then press the ENTER button on the remote control, the INPUT button on the control panel or click [ENTER] on the Web Remote Control. Full screen display Operations for still images When a still image is displayed, the following operations will occur in Full Screen mode.
Presentation tools PC-LESS Presentation (continued) Operations for movie When a movie is playing in Full Screen mode, you can press one of the cursor buttons, the ENTER or the INPUT button on the remote control, control panel or Web Remote Control to display a remote control icon and progress bar. The following operations are available when the remote control icon and progress bar are displayed.
Presentation tools PC-LESS Presentation (continued) Slideshow Mode The Slideshow mode displays images in full screen and changes the images based on the timing chosen in INTERVAL on the Thumbnail menu (97). You can start this function from the Slideshow menu. To display the Slideshow menu, select the SLIDESHOW button in the Thumbnail menu and press the ENTER button on the remote control or INPUT button on the control panel, or click [ENTER] on the Web Remote Control.
Presentation tools PC-LESS Presentation (continued) Operating by SLIDESHOW in the Thumbnail menu You can customize your Slideshow. Configure the SLIDESHOW item in the Thumbnail menu (97). Item Functions SLIDESHOW RETURN Returns to the Thumbnail mode. PLAY Play the Slideshow. START Sets the beginning Slideshow slide STOP Sets the ending Slideshow slide. INTERVAL Sets the time intervals for displaying still images during the Slideshow.
Presentation tools PC-LESS Presentation (continued) Playlist The Playlist is a DOS format text file, which decides the order to display still image files in the Thumbnail mode or in Slideshow. The playlist file name is playlist.txt and it can be edited on a computer. When a PC-LESS Presentation is started or a Slideshow is configured, the file is created in a folder that contains the selected image files. [Example of playlist.
Presentation tools USB Display The projector can display images transferred from a computer via a USB cable (&11). NOTE • When the computer resolution is greater than the projector specifications, the projector will shrink the computer image to the size specified below before it displays the image. IN5132, IN5142: 1024 x 768 (XGA) The other models: 1280 x 800 Even if the native projector resolution is higher than above, the transferred image will be displayed in the smaller resolution.
Presentation tools USB Display (continued) Starting USB Display Set the USB TYPE B to USB DISPLAY in the OPTION menu. When you connect your computer to the projector's USB TYPE B port using a USB cable, the projector will be recognized as a CD-ROM drive by your computer. The embedded software, “LiveViewerLiteForUSB.exe”, will run automatically and the application, “LiveViewer Lite for USB”, will be available on your computer for USB Display.
Presentation tools USB Display (continued) Right-Click menu The menu shown on the right is displayed when you right-click the application icon in the Windows notification area. Display : A floating menu is displayed, and the icon disappears from the Windows notification area. Quit : The application is closed, and the icon disappears from the Windows notification area. NOTE • If you wish to restart the application, you need to unplug the USB cable and plug it again.
Presentation tools USB Display (continued) Options window If you select the Option button on the floating menu, the Options window is displayed. Optimize Performance The “LiveViewer Lite for USB” captures screenshots as JPEGs and sends them to the projector. The “LiveViewer Lite for USB” has two compression rates for JPEG data. Transmission speed Speed takes priority over image quality. This makes the JPEG compression rate higher.
Maintenance Maintenance Replacing the lamp A lamp has a finite product life. Using the lamp for long periods of time could cause the pictures to appear darker or the color tone to be poor. Note that each lamp has a different lifetime, and some may rupture or burn out soon after you start using them. We recommended that you keep a spare lamp on hand. Use the part number below when speaking with your dealer.
Maintenance Replacing the lamp (continued) Lamp warning HIGH VOLTAGE HIGH TEMPERATURE HIGH PRESSURE WARNING ►The projector uses a high-pressure mercury glass lamp. The lamp may burn out or rupture with a loud bang if the lamp is jolted or scratched, handled while hot, or worn over time. Note that each lamp has a different lifetime, and some may rupture or burn out soon after you start using them.
Maintenance Cleaning and replacing the air filter Check and clean the air filter periodically. When the indicators or a message prompts you to clean the air filter, please clean the air filter as soon as possible. The filter unit, which contains 2 sheets of filters, is inside the filter cover. In addition, an extra air filter is attached to inside of the IN5142, IN5144, IN5144a and IN5145. filter cover. If one of the filters is damaged or heavily soiled, replace the entire filter unit with a new one.
Maintenance Cleaning and replacing the air filter (continued) 10. Put the filter cover back into the place. 11. Turn the projector on and reset FILTER TIME in the EASY MENU. (1) Press the MENU button to display a menu. (2) Highlight FILTER TIME using the ▲/▼ cursor buttons, then press the ► cursor (or the ENTER / the RESET) button. A dialog will appear. (3) Press the ► cursor button to select OK on the dialog. It resets the filter time.
Maintenance Other care Inside of the projector In order to ensure the safe use of your projector, have it cleaned and inspected by your dealer annually. Caring for the lens If the lens is damaged, soiled or foggy, it could affect the image display quality. Take care of the lens. Handle with care. the projector off, and unplug the power cord. Allow the projector to cool 1. Turn sufficiently. verifying the projector has cooled adequately, lightly wipe the lens with a 2.
Troubleshooting Troubleshooting If something unusual happens, stop using the projector immediately. WARNING ►Never use the projector if something unusual is observed Troubleshooting such as smoke, a strange odor, excessive sound, damage to the projector or its accessories, liquids or foreign matter have gotten into the projector, etc. In such cases, immediately disconnect the power plug from the power outlet. After verifying that the smoke or odor has stopped, contact to your dealer or service company.
Troubleshooting Related messages (continued) Message Description The input signal's horizontal or vertical frequency is not compatible with the projector. Verify the specifications for your projector and the signal source. An improper signal is input. Verify the specifications for your projector and the signal source. The internal temperature is rising. Turn the power off, and allow the projector to cool down at least 20 minutes. After having confirmed the following items, turn the power ON again.
Troubleshooting Regarding the indicator lamps When the LAMP, TEMP and POWER indicators are acting unusual, review the following table. POWER LAMP TEMP Description indicator indicator indicator Solid The projector is in a standby state. OFF OFF Refer to the section “Power on/off”. Orange Blinking Green OFF OFF The projector is warming up. Solid Green OFF OFF The projector is in an ON state. Blinking Orange OFF OFF The projector is cooling down.
Troubleshooting Regarding the indicator lamps (continued) POWER LAMP TEMP indicator indicator indicator Description The cooling fan is not operating. Blinking or Solid Red Blinking Red OFF Turn the power off, and allow the projector to cool down at least 20 minutes. After the projector has cooled down sufficiently, verify that no foreign matter has become caught in the fan, etc., and then turn the power on again. If the same indication is displayed after this, contact your dealer or service company.
Troubleshooting Regarding the indicator lamps (continued) NOTE • When the inside of the projector becomes overheated, the projector will automatically shut down (for safety purposes) and the indicator lamps may also be turned off. In this case, disconnect the power cord, and wait at least 45 minutes. After the projector has cooled down sufficiently, verify the lamp and lamp cover are securely attached, and then turn the power on again.
Troubleshooting Problems that can be easily mistaken for machine defects Before assuming that the projector needs repair, review the following troubleshooting tips: Situation Troubleshooting tips The electrical power cord is unplugged. Connect the power cord correctly. The main power source was interrupted (for example a power outage (blackout), etc.). Disconnect the power plug from the power outlet, and allow the projector to cool down at least 10 minutes, then Power does not turn the power on again.
Troubleshooting Problems that can be easily mistaken for machine defects (continued) Situation Troubleshooting tips Reference page No sounds or pictures are outputted. (continued) The projector does not recognize the USB storage device inserted into USB TYPE A ports. Select REMOVE USB and then remove the USB storage device. Insert it back into the port again.
Troubleshooting Problems that can be easily mistaken for machine defects (continued) Troubleshooting tips Reference page The batteries in the remote control are almost dead. Replace the batteries. 17 Situation The ID numbers set in the projector and the remote The remote control are different. control does not Press the ID button with the same ID number as the work. projector, then perform the desired operation.
Troubleshooting Problems that can be easily mistaken for machine defects (continued) Situation Some kind of image degradation such as flickering or stripes appear on screen. The sound or image is unstable or is output intermittently. The computer connected to the USB TYPE B port of the projector does not start up. RS-232 does not work. Network does not work Troubleshooting tips Reference page When the projector is operating in Eco mode, flickering may appear on screen.
Troubleshooting Problems that can be easily mistaken for machine defects (continued) Situation Troubleshooting tips Reference page NETWORK BRIDGE function does not work The NETWORK BRIDGE function is turned off. Set COMMUNICATION TYPE to NETWORK BRIDGE in the OPTION - SERVICE - COMMUNICATION menu. 72 The SAVING function is working. Set STANDBY MODE to NORMAL in the SETUP menu.
Specifications Specifications See Specifications in the User’s Manual (concise). End User License Agreement for the Projector Software • The projector software contains several independent software modules and there are copyright or/and third party copyrights for each of these software modules. • Be sure to read the “End User License Agreement for the Projector Software”.