
Installation Manual


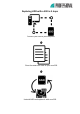


Step3 Replacing your HDD
In this final step, you will change your HDD with your new SSD.
Be sure to shut your computer down and disconnect the power cable.
When you are going to install the SSD in your notebook computer, removing the
battery is necessary.
In the following, we will differ depending on whether you are installing your new
SSD in a desktop or notebook computer.
Notebook Computer SSD Installation
1. Make sure your computer is power off and the power cable is unplugged.
2. Remove base cover and disconnect the battery. (Refer to your computer’s
manual for instructions).
3. Turn the notebook over, press and hold the power button for 5 seconds to
ground the system.
4. Lift the drive along with its cable up away from the motherboard; gently
disconnect the hard drive cable.
5. Remove any adapters attached to the HDD. (In different notebook, this step may
not apply to every install, because of the additional brackets or adapters.)
6. Align the connector pins on your SSD with the pins on the SATA connector in the
drive bay and place the SSD into the drive bay.
7. To reassemble your notebooks just follow the instructions in reverse.