
User Manual


Using the Scan Tool
NETWORK TEST
17
DTCs recorded for each available module.
2. Select the module for which you wish to view DT
Cs, then press
EN
TER
. A “One moment please” message displays while the
requested DT
Cs are retrieved.
If the Scan Tool fails to link to the selected module, a
“Co
mmunication Error” message shows.
- Ensure your vehicle is OBD2 compliant.
- Verify the connection at the DLC, and verify the ignition is ON
.
-
Turn the ignition OFF, wait 5 seconds, then back ON to reset
the computer.
- Press POWER/LINK
to continue, or, press System
Menu
to return to the System Menu.
If the selected module does not support the “Read DTC” function,
an advisory message displays. Press System Menu
to
return to the System Menu, or, press M to access the
Main
Menu.
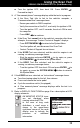
3. R
efer to DISPLAY FUNCTIONS
on
page 3 for a descriptio
n of LCD display
elemen
ts.
If the def
inition for the
currently displayed code is
not available, an advisory
message shows.
I/M MONITOR STATUS
icons are not displayed
when using the Network Test function.
In the case of long code definitions, a small arrow is
shown in the upper/lower right-hand corner of the code
display area to indicate the presence of additional
information.
If no codes are present, the message "No (system name) DTC’s are
presently stored in the vehicle’s computer" shows. Press System
Menu
to return to the System Menu.
4. If more than one code was retrieved press DTC/FF to displa
y
additiona
l code
s one at a time.
Whenever the Scroll function is used, the Scan Tool’s
communication link with the vehicle’s comp
uter disconnects. To
re-establish co
mmunication, press POWER/LINK
again.
5. Wh
en the last retrieved DTC has been displayed and DTC/FF
is
pre
ssed, the Scan Tool returns to the first code.
To exit the enhanced mode, Press System Menu to return
to the System Menu. Select Global OBD, then press ENTER
to return to the Global OBD2 mode.