
User Manual


Using the Scan Tool
NETWORK TEST
18
To scan a selected module:
1. Choose Select Modules from the System Menu, then press ENTER
.
If the Select Group screen displays, select the group (Drive,
Cha
ssis, Body, etc.) containing
the module you wish to scan,
then press EN
TER
. Proceed to step 2.
If the Select Group screen does not display, proceed to step 2.
2. The Availa
ble Systems screen displays.
Select the desired module, then press
ENTER
.
A “One moment please” message
displays while the requested DTCs
are retrieved.
3. Select
the module for which you wish to
view DTCs, then press ENTER
. A
“One
moment please” message
displays
while t
he requested DTCs are retrieved.
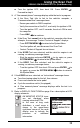
If the Scan Tool fails to link to the selected module, a
“Co
mmunication Error” message shows.
- Ensure your vehicle is OBD2 compliant.
- Verify the connection at the DLC, and verify the ignition is ON
.
-
Turn the ignition OFF, wait 5 seconds, then back ON to reset
the computer.
- Press POWER/LINK
to continue, or, press System
Menu
to return to the System Menu.
If the selected module does not
support the “Re
ad DTC” function
, an
advis
ory message displays. Press
System Menu
to return to the
System Menu,
or, press M to
access the Main
Menu.
4. R
efer to DISPLAY FUNCTIONS
on
page 3 for a descriptio
n of LCD display
elemen
ts.
If the def
inition for the currently displayed code is not available,
an advisory message shows.
I/M MONITOR STATUS icons are not displayed when
using the Network Test function.
In the case of long code definitions, a small arrow is shown
in the upper/lower right-hand corner of the code display
area to indicate the presence of additional information.
If no codes are present, the message "No (system name) DTC’s
are presently s
tored in the vehicle’s computer" shows. Press
System Menu
to return to the
System Menu.