Insteon Wall Switch Owner’s Manual
Contents Getting Started Insteon Wall Switch Dimmer Switch & On/Off Switch 4 High-Wattage Dimmer Switch Tools Needed for Installation Disconnect Power Installation Installation Diagrams Standard Switch Three-Way Switch Four-Way Switch Insteon Links Understanding Linking Linking to the Insteon Hub Linking with a Single-Button Controller Linking with a Multi-Button Controller Multi-Linking or Making a Scene Unlinking from a Single-Button Controller Unlinking from a Multi-Button Contr
Getting Started Everything you need to quickly get up and running.
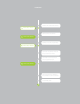
Insteon Wall Switch Dimmer Switch & On/Off Switch Brightness LEDs On Hold to Brighten Status LED High-Wattage Dimmer Switch Brightness LEDs On Hold to Brighten Status LED Off Hold to Dim Set Button Tools Needed for Installation Off Hold to Dim Heat Sink Tab (1000W Only) Set Button Disconnect Power Phillips Screwdriver Flathead Screwdriver Voltage Detector Wire Cutter / Stripper Always disconnect power before installation. Contact Insteon Support when uncertain about installation.
Installation Unbox and read instructions Disconnect Power Remove the old switch Reconnect Power Identify Line and Load wires Disconnect Power Connect the switch wires to the junction box wires Carefully install the switch into the junction box Reconnect Power Test the switch by tapping the paddle to turn on and off Install wall plate 5
Installation Disconnect Power 1 Turn off power to your switch at the electrical service panel. ON Remove the Old Switch 2 ! ON 1 or Circuit Breakers Remove the old switch and disconnect the wires. If your box lacks neutral wires, stop and contact support. 2 Neutral Wire Fuse Panel ½” 12mm Reconnect Power 3 Turn on power at the circuit breaker. ON ON Identify Line and Load 4 Use a voltage detector or multi-meter to identify line and load. Line will be energized.
Installation Wire-In The Switch 5 Turn off power at the circuit breaker. Connect the Wall Switch wires to the identified wires in the junction box. Verify that the wire nuts are secure and that no exposed copper wire is visible except for the bare ground wire. Additional wiring diagrams can be found in the Installation Diagrams section. Load Neutral Line Ground Install the Switch 6 Mount the Wall Switch into the junction box with the LED bar on the left.
Installation Test the Switch 8 Test your Wall Switch by tapping the paddle to turn On and Off. Press and hold to dim or brighten. Install Wall Plate 9 Complete installation by reattaching your wall plate. For the best look, us an Insteon Screwless Wall Plate. Installation of your Wall Switch is now complete.
Installation Diagrams Use the installation diagrams in this section to help you wire your Wall Switch, everything from straight forward, single-switch to multi-way and beyond.
Standard Switch Load Neutral Line Ground 10
Three-Way Switch Load Traveler Not Used Neutral Ground Line Load Not Used Neutral Line Ground 11
Four-Way Switch Load Traveler 2 Not Used Neutral Ground Line Load Not Used Netural Line Ground Traveler 1 Not Used Load Not Used Neutral Ground Line 12
Insteon Links Insteon devices can stand alone and function as a local switch or dimmer, but their real power comes when they are connected together to form a control system. Most Insteon devices can control one another and be the recipient of control. The process of associating multiple Insteon devices to one another is called Linking.
Understanding Linking Links are One-Way When linking Insteon devices, the links that are created are one-way. Links Remember a Device’s State The current state of the controlled device is stored in the link: On, off or dimmed. NEW NEW 75% A B Switch A will turn Switch B on and off but Switch B cannot turn Switch A on or off. X Controllers Insteon devices that can turn other devices on or off are called controllers. NEW Sensors, Switches, Keypads and the Hub are common controllers.
Understanding Linking Controller-Only Some devices, like sensors, can only control other devices. Responder-Only Some devices cannot control other devices; these devices only receive Insteon commands. NEW NEW X X Motion Sensor Dimmer Switch The Motion Sensor will turn on the Switch but the switches cannot control the Motion X Sensor. Grouping Devices You may want to group together two devices, for example, in a virtual-three way configuration. For Insteon, this is called Cross Linking.
Linking to the Insteon Hub 1 From Rooms, navigate to All Devices. 2 Tap the Add button. All Devices Rooms All Devices Check-In Favorites Back Door Bathroom Bedroom Bathroom Bedroom Hallway Font Door Garage Door Garage Light Kitchen Living Room Outside Motion Sensor Outside Lights 72º 72º 3 Add Select Wire-In Device from the list of devices. 4 When prompted, press and hold the set button on your Wall Switch until the device beeps.
Linking with a Single-Button Controller 1 On your Insteon Wall Switch, press and hold the set button until the device beeps. 2 Adjust your responder to the desired state: On, off, or brightness level if dimming, and then press and hold the set button until the device double-beeps. ® ® Your Insteon Wall Switch will now control your Insteon device.
Linking with a Multi-Button Controller 1 Press and hold the set button on your Wall Switch. 2 On your multi-button Insteon device, tap the desired button and then press and hold the set button until the device beeps. A B Your Wall Switch will now control a button on your multi-button Insteon device.
Multi-Linking or Making a Scene 1 On your Insteon Wall Switch, press and hold the set button until the device beeps, then tap the set button. 2 A Adjust the devices in your scene to their desired state: on, off, or brightness level if dimming. 50% 72% Lamp 1 Lamp 2 30% ON Lamp 3 Appliance B 3 One at a time, press and hold the set button on each device in the scene until it double-beeps. 4 Tap the set button on your Wall Switch to finish building your scene.
Unlinking from a Single-Button Controller 1 3 On your Insteon Wall Switch, press and hold the set button until the device beeps. 2 Press and hold the set button again until the device beeps. Press and hold the controlled device’s set button until the device double-beeps. X ® ® Your Wall Switch will no longer control your Insteon device.
Unlinking from a Multi-Button Controller 1 3 On your Insteon Wall Switch, press and hold the set button until the device beeps. 2 Press and hold the set button again until the device beeps. On your multi-button Insteon device, tap the desired button and then press and hold the set button until the device double-beeps. X A B Your Wall Switch will no longer control your multi-button Insteon device.
Multi-Unlinking or Removing a Scene 1 On your Insteon Wall Switch, press and hold the set button until the device beeps. Press and hold the set button again, then tap the set button. 2 One at a time, press and hold the set button on each device in your scene until it double-beeps. A B ® C 3 Tap the set button on your Wall Switch to exit Multi-Unlinking mode. ® X ® ® Your Wall Switch will no longer control your scene.
Local Programming Encompassing all on-device programming options, use the local programming to set local properties. properties and For factory the bestreset. experience, For the use best experience, software for use managing software device for managing properties. device properties.
Navigating the Chart To move right, press and hold the set button Status LED blinks green Status LED doubleblinks green To move down, tap the set button Status LED blinks red Status LED double-blinks red Features Linking Mode Readies the module for linking to another Insteon module. As linking is directional, the first device placed into linking mode will become the controller in the controller/ responder relationship. The second device will become the responder.
Linking Mode Tap Select Tap Tap Exit Exit Exit Press Tap Select Multi-Unlinking Mode Press Tap RF Beacon Select LED Brightness Tap Exit Press Unlinking Mode Tap Uses the current brightness On Level Tap Cancel Save Press Press Tap Uses the current brightness Resume Dim Select Ramp Rate Save Press Cancel Reset Press Save Tap Cancel Press Save Tap Cancel Press Tap Select Toggle RF Beacon Adjust LED Brightness Tap Factory Reset Press Press Press Tap Multi-L
Factory Reset A factory reset will erase all links stored in the device’s database as well as any customized properties.
Factory Reset 1 Pull the set button out from the switch until the status LEDs turn off. 2 Wait about ten seconds. 10 Seconds 3 Push in and hold the set button until the long beep subsides. 4 Release the set button. The switch will double beep. LONG ? Press and hold for 10 seconds on older switches that don’t long beep. Your Wall Switch has been restored to factory settings.
Software-Only Features Most Insteon devices contain features that can only be enabled, disabled or modified using Insteon control software such as HouseLinc and an Insteon PowerLine Modem.
Software-Only Features Beep on Button Press The Wall Switch will beep every time one of its buttons are tapped. By default, this feature is disabled. Disable Local Programming Prevents changing any settings using the set button or tap-and-hold programming. Blink on Traffic The Wall Switch LED will blink if it detects Insteon communication. By default, this feature is disabled.
Software-Only Features LED Brightness Adjust the brightness of the status LEDs from full bright to off.
Appendix Everything else you might need to know about your Insteon product.
Insteon Glossary Controller Responder Blinking The Insteon transmitter The Insteon receiver LED turning on and off repeatedly Dual-Band An Insteon device that can send and receive both Insteon powerline signals and Insteon radio frequency signals Ramp Rate The speed at which the load fades on or off On-Level Insteon Link Linking The preset brightness level a device will return to when turned on A dual-band, mesh networking technology developed by Smarthome/Insteon.
Specifications General Available Colors Brand FCC ID White Insteon SPB2477 Industry Canada 5202A-24772 Product Number. 2477S On/Off Switch 2477D Dimmer Switch 2477DH Dimmer Switch (High Wattage) Patent UPC Warranty Protected under US and Freign Patents (see www.insteon.
Specifications Maximum Controlled Scenes 1 Maximum Scene Memberships 1 Multi-Link Support Yes Multi-Unlink Support Yes Phase Detect Beacon Yes Radio Frequency Radio Frequency Range Scene Commands Supported as Controller Scene Commands Supported as Responder Software Configurable 915.
Specifications Set Button Storage Temperature Range Weight 1, recessed. Requires removal of sensor to access -40º to 104º F -40º to 40º C 3.6 oz 102g Electrical Supply Voltage Neutral Wire Power Wire Leads Maximum Amperage Ground Lead Power Consumption Certification 100-277 Volts AC ± 10%, 50/60Hz, Single Phase Required 6” 16 AWG stranded 600V Line Load Neutral 5 amps 6” 18 AWG stranded bare copper 0.
Troubleshooting The LED lights on the Wall Switch are not illuminated It is possible that your switch is not getting power or that the status LEDs have been disabled. Try this: • Check to make sure power is flowing to your Insteon Wall Switch. If your switch was just installed, make sure the circuit breaker controlling the switch has been turned on. It is also advisable to verify the wire connections in the junction box are secure and not showing any bare wire.
Troubleshooting The connected light turned on by itself There must be a device in your Insteon network that is unexpectedly linked to the Wall Switch. If you have given your device an X10 address, powerline noise may be triggering the Insteon device. Try this: • Use software to examine the Wall Switch’s links. If you can identify the stray controller, remove the link. • If you are unable to identify the unexpected controller, perform a factory reset on the Wall Switch.
Certifications and Warnings This device complies with FCC Rules and Industry Canada license-exempt RSS standard(s). Operation is subject to the following two conditions: (1) this device may not cause harmful interference, and (2) this device must accept any interference, including interference that may cause undesired operation of the device. Le present appareil est conforme aux CNR d’Industrie Canada applicables aux appareils radio exempts de licence.
Product Warranty Limited Warranty Seller warrants to the original consumer purchaser of this product that, for a period of two years from the date of purchase, this product will be free from defects in material and workmanship and will perform in substantial conformity to the description of the product in this Owner’s Manual. This warranty shall not apply to defects or errors caused by misuse or neglect.