
Quick-Start Guide

Page 1 of 1
Rev. 05-08-2009
Use Temp Sensor to Control an INSTEON Device
1) Using the screws and template included in Temp Sensor box, mount Temp Sensor in desired location. Hint: Choose a location near an unused outlet.
2) To set upper and/or lower limit arms, first loosen the appropriate lock nut with a 11/32” (9mm) or adjustable wrench. Use a screw driver to set the limit arms and then
retighten the locknut(s).
3) Verify Current Temp Arm indicates the current temperature. If needed, use an 11/32” or 9mm wrench to adjust the Temp Calibration Dial to the correct temperature.
4) Remove the pre-stripped plastic insulation from Sensor Wire and connect red lead to I/O Linc’s “S” (Sensor Input) terminal
5) Connect both Sensor Wire’s remaining leads (black for low limit and green for high limit) to I/O Linc’s “GND” (Ground) terminal (see Figure 1)
6) Plug I/O Linc into an indoor, un-switched outlet
I/O Linc’s Status LED will turn on and Sensor Status LED will remain off
7) If you want the I/O Linc to send an On command when a temperature threshold is reached, adjust High Temp Dial so that it touches Current Temp arm. Otherwise, skip
and proceed to Step 8.
I/O Linc’s Sensor Status LED will turn on if either High or Low Temp arm touches Current Temp arm
8) Press & Hold I/O Linc’s Set button until it beeps (about 3 seconds)
I/O Linc’s Status LED will begin blinking
9) Press & Hold the Set button on your INSTEON responder (the device you wish to control with I/O Linc) for at least 3 seconds
I/O Linc will beep and its Status LED will return to steady On to confirm linking
10) Test by repeatedly moving High Temp arm away from Current Temp arm and back again so that they are touching
Remote INSTEON device should turn On or Off (as arms change between touching and separated)
11) Using a standard screwdriver, adjust High and Low Temp Dials to desired temperature thresholds. If either high or low temperature thresholds are not needed, adjust
corresponding dial to an unreachable temperature
12) Using an 11/32” or 9mm wrench tighten (but not over tighten) locknuts holding the High and Low Temp Dials in place.
Introduction
Increase the versatility of your INSTEON home automation network using I/O Linc -
INSTEON High and Low Temperature Threshold Kit. This kit was designed to monitor
temperatures and alert you via your INSTEON network when an upper or lower temperature
limit has been reached. The temperature sensor is user definable, allowing high and low
temperature thresholds to be set between -30° F to 130° F. The sensor is also flexible
enough to be used to monitor low temperature only, high temperature only, or low and high
temperatures at the same time. Once a threshold has been reached an INSTEON command
can be sent, turning INSTEON controlled lights and appliances on or off. Ideally, you can
link this kit with an I/O Linc - INSTEON Telephone Alert Kit so that you will receive a phone
call if high or low temperature thresholds are reached, allowing you to take immediate action
and possibly save your property and equipment from costly damage.
Quick-Start Guide
I/O Linc
TM
– INSTEON
TM
High and Low Temperature
Threshold Kit
Model: 24950A7
High/Low Temperature Notification via INSTEON
SmartLabs Limited Warranty – SmartLabs warrants to original consumer of this product for a
period of 2 years from date of purchase, this product will be free from defects in material &
workmanship & will perform in substantial conformity with its owner's manual. Warranty shall
not apply to defects caused by misuse or neglect.
U.S. Patent No. 7,345,998, International patents pending ©Copyright 2009
SmartLabs, 16542 Millikan Ave., Irvine, CA 92606, 1-800-SMARTHOME (800-762-7846)
Sensor Wire
Status LED
Temp
Sensor
Temp
Calibration
Dial
Current
Temp Arm
Questions?
Click: For Advanced Features and X10 compatibility, refer to I/O Linc’s Owner’s Manual:
http://wiki.smarthome.com/index.php?title=I/O_Linc_-_INSTEON_Low_Voltage_/_Contact_Closure_Interface_Owner%27s_Manual
Call: Friendly tech support @ 1-800-SMARTHOME (800-762-7846)
I/O Linc’s Screw Terminals
5V GND S N/C N/O COM
5
Volts
Ground
Sensor
Input
Normally
Closed
Normally
Open
Switches
between N/O
and N/C
Items you will Need (not included)
1) Standard screwdriver (for the High/Low Temp Dials)
Note - The I/O Linc comes with a small screwdriver for the I/O
Linc Screw Terminals
2) 11/32” (9mm) wrench for tightening locknuts securing dials
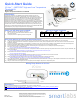
Figure 1
Wiring Temp Sensor to I/O Linc
Black / Green Leads
Red Lead
Low Temp
Dial
GND / Sense
Terminals
Set Button
Sensor Status
LED
High Temp
Dial
Low
Temp Arm
High
Temp Arm
I/O Linc Screw
Terminals