
Quick Start Owner's manual

Page 1 of 1
Rev. 07-16-2012
Limited Warranty – INSTEON warrants to original consumer of this product for a period of 2
years from date of purchase, this product will be free from defects in material and
workmanship and will perform in substantial conformity with its Owner's Manual. Warranty
shall not apply to defects caused by misuse or neglect.
Protected under U.S. and foreign patents (see www.insteon.com) © Copyright 2012
INSTEON, 16542 Millikan Ave., Irvine, CA 92606, 800-762-7845
Installing Two Access Points (Phase Detection)
Installing two Access Points will wirelessly couple the 120V electrical phases in your home. This allows INSTEON devices on one
phase to communicate reliably with the INSTEON devices on the other phase. Follow these instructions to ensure an Access Point is
installed into an outlet on each phase.
If each of your Access Points is a different revision (i.e., 2.1 and below 2.0), see the Access Point Owner’s Manual to see how
different Access Point models will interact with one another.
1) Plug the first Access Point into a convenient wall outlet
The Access Point LED will turn on dim solid green
2) Start Phase Detection Mode by tapping the Set button of the first Access Point four times rapidly
Access Point will beep continuously, once per second, and its LED will turn on bright solid green
3) Plug the second Access Point into a different outlet. (For the best performance when using a remote control, place both Access
Points in the same room.)
4) Look at the LED on the second Access Point:
• If it is blinking green, your Access Points are on opposite phases. Leave the Access Point where it is.
• If it is solid red or solid green or blinking red/green, your Access Points are on the same electrical phase. Repeat Step 3
and try moving your second Access Point to another outlet, to find an outlet that is on the opposite phase.
You may need to try several outlets. If you have tried five different outlets, start again from Step 1, trying a different outlet for
the first Access Point. If you are still unable to locate an outlet, contact the INSTEON Support Line at the number below.
5) Tap the Set button on the first Access Point to exit Phase Detection Mode
The first Access Point will beep continuously (once per second) and its LED will turn on bright solid green
The second Access Point’s LED will turn on dim solid green
The first Access Point will stop beeping and its LED will return to dim solid green
Introduction
Access Point modules allow RF-only INSTEON devices (like RemoteLinc) to
send commands to powerline-only INSTEON devices (like SwitchLinc). If you
need more coverage for your INSTEON RF devices, you only need to add
another Access Point. Also, when used in pairs, Access Points can couple the
120-volt phases in your electrical wiring, allowing commands to freely travel to
all locations in your home.
Quick Start Guide
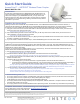
Access Point™ – INSTEON
®
Wireless Phase Coupler
Model: 2443 Rev 2.4+
Set button
Status LED
Troubleshooting and Tips
• Do not plug Access Point into a switch-controlled outlet. If the switch is inadvertently turned off, Access Point will not have power.
• Do not plug Access Point into a power strip or UPS (uninterruptible power supply)
• Install additional Access Points around the home to eliminate RF dead spots
• Do not plug Access Points near large metal objects, like refrigerators, cabinets, televisions or computer monitors. Access Points
work best when placed out in the open.
• Do not plug Access Point into another INSTEON module’s pass-through outlet. The modules may overheat and stop functioning.
Complete Instructions, Troubleshooting and Tech Support
Owner’s Manual and current Quick Start Guide: http://www.insteon.com/support
Call: INSTEON Support Line at 800-762-7845
Installing One Access Point
Installing an Access Point will allow RF-only INSTEON devices, such as INSTEON wireless remotes and motion sensors, to
communicate with powerline-only INSTEON devices, like INSTEON wall dimmers and keypads. (To ensure maximum reliability
throughout your home, installing two Access Points is highly recommended. See Installing Two Access Points below.)
1) Plug your Access Point into a convenient wall outlet. For the best performance when using a remote control, place the Access
Point in the same room as the remote control
The Access Point LED will turn on dim solid green
2) With a friend watching the LED on the Access Point, take your RF-only device to the location where you intend to mount it.
Tap its Set button or press and hold a scene button
The RF device’s LED will start flashing
3) If you don’t see the results mentioned in step 2, try tapping the RF-only INSTEON device’s Set button a few more times, replacing
its battery or relocating your Access Point
4) If you are unable to confirm the results in step 2, call the INSTEON Support Line at the number below
This device complies with FCC Rules and Industry Canada license-exempt RSS standard(s). Operation is subject to the following two conditions: (1) this device may not cause harmful interference, and (2) this device must accept any
interference, including interference that may cause undesired operation of the device.
Le present appareil est conforme aux CNR d'Industrie Canada applicables aux appareils radio exempts de licence. L'exploitation est autorise aux deux conditions suivantes: (1) l'appareil ne doit pas produire de brouillage, et (2) l'utilisateur
de l'appareil doit accepter tout brouillage radiolectrique subi, mme si le brouillage est susceptible d'en compromettre le fonctionnement.