($ $6$ 0LAYER $(3 )NSTRUCTION -ANUAL DHS-8.8_En.
WARNING: TO REDUCE THE RISK OF FIRE OR ELECTRIC SHOCK, DO NOT EXPOSE THIS APPARATUS TO RAIN OR MOISTURE. CAUTION: TO REDUCE THE RISK OF ELECTRIC SHOCK, DO NOT REMOVE COVER (OR BACK). NO USER-SERVICEABLE PARTS INSIDE. REFER SERVICING TO QUALIFIED SERVICE PERSONNEL.
Precautions 1. Recording Copyright—Unless it’s for personal use only, recording copyrighted material is illegal without the permission of the copyright holder. 2. AC Fuse—The AC fuse inside the unit is not userserviceable. If you cannot turn on the unit, contact the dealer from whom you purchased this unit. 3. Care—Occasionally you should dust the unit all over with a soft cloth. For stubborn stains, use a soft cloth dampened with a weak solution of mild detergent and water.
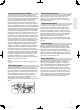
Precautions (Continued) 10. Region Numbers—The DVD standard uses region numbers to control how discs can be played around the world, the world being divided into six regions. This unit will only play DVD discs that match its region number, which can be found on its rear panel (e.g., , ). 11. About this Manual—This manual explains how to use all of this unit’s functions.
Table of contents Thank you for purchasing an Integra HD DVD Player. Please read this manual thoroughly before making connections and plugging in the unit. Following the instructions in this manual will enable you to obtain optimum performance and listening enjoyment from your new HD DVD Player. Please retain this manual for future reference. Introduction Important Safety Instructions ............................ 2 Precautions .......................................................... 3 Features ........
Features Disc compatibility Discs which can be played on this player are as follows. The icons ( ) are used in this manual to indicate features and/or functions that are applicable to various types of discs. Disc Prerecorded discs HD DVD video disc ( HD DVD ) Specification 12cm (43/4 in.) HD DVD video discs are high-density, high-capacity discs. • The HD DVD disc standard has been approved by the DVD forum.
Important notes about HD DVD About the volume level HD DVD with high-definition content required for HD viewing. Viewing high-definition content and up-converting DVD content may require an HDCP capable DVI or HDMI input on your 50/60 Hz display device. Up-conversion of DVD content will result in near HD picture quality. Firmware update may be required for some interactive features depending on content, which may also require an always-on broadband internet connection.
Features (Continued) Notes on web-enabled network content Certain HD DVD discs may contain or have the capability of downloading studio-provided, web-enabled network content. To minimize any potential compatibility and/or connectivity issues, before viewing such content, it is recommended that you perform the firmware update process to ensure that your HD DVD player is using the latest firmware version.
Index to parts and controls Front panel * The above illustration displays the front panel with the cover open. No. 1 2 3 4 5 6 7 Control On/Standby button Standby indicator Disc tray Remote sensor Front panel display Open/Close button Mode switch 8 9 10 11 12 / Function Turns the power on or restores the unit to the standby mode. Blue: power on / Red: standby mode Loads a disc into the disc drive. Receives infrared signals from the remote control.
Index to parts and controls (Continued) Display No. 7 8 No. 1 2 Function : Playing : Pausing : Fast forward playback : Fast reverse playback HD DVD: An HD DVD is loaded. DVD: A DVD is loaded. 3 Shows a title number. 4 A disc which contains advanced content is loaded. 5 Shows a chapter number. 6 A CD is loaded. Function Shows a track number. : Dolby Digital sound is played. : DTS sound is played.
Accessories Supplied accessories Check that the following accessories are supplied. Remote control Loading batteries 1 Remote control Batteries (AAA)×2 Composite audio/video cable Open the cover and load batteries (AAA size). Make sure to match the + and – on the batteries to the marks inside the battery compartment. 2 Close the cover. Operating range Power cord Remote sensor Within about 23 ft (7 m) Caution • Do not use this power cord with any device other than this player.
Remote control (Continued) TV control The remote control of this player is compatible with TV controls. Once you program the remote control (see the next paragraph), the following controls are available. Operate the remote control toward your TV.
Preparation Proceed the following steps to set the player ready. Step 1: Connecting to a TV Page 14 Step 2: Connecting to audio system Page 15 Step 3: LAN connection Page 17 Step 4: Power connection Page 18 Step 5: Powering on Page 18 Step 6: Setting up the player Page 19 Resolution and connections Check the type of video input on your TV. To view high definition content, use the HDMI OUT jack or the COMPONENT VIDEO OUTPUT jacks to connect to a TV.
Preparation (Continued) Step 1: Connecting to a TV • Connect the player directly to your TV. If you connect the player to a VCR, TV/VCR combination, video selector or AV amplifier, the playback picture may be distorted due to copy protection. • Be sure to turn off the power and unplug both units from the wall outlet before making any connections. Via HDMI input To view 1080p output, make this connection. HDMI transfers digital audio and uncompressed digital video on a single cable.
Via S VIDEO or VIDEO (yellow) input 3 6)$%/ CABLE NOT SUPPLIED 480i output only regardless of the resolution settings ( page 21) or the connections of other output jack. OR !UDIO VIDEO CABLE SUPPLIED 4O 3 6)$%/ 4O 6)$%/ This connection only sends video signals. Be sure to make audio connection on page 15. 46 Step 2: Connecting to audio system Sound can output from connected audio system. If you made the HDMI connection between the player and a TV, this step is unnecessary. Skip to Step 3.
Preparation (Continued) Via 5.1ch analog audio output This connection requires selection of “Speaker Setting” (Step 16, !UDIO CABLE NOT SUPPLIED page 24). #%.4%2 , 2 3522/5.$ , 2 &2/.4 !6 AMPLIFIER 35"7//&%2 4O !.!,/' !5$)/ /54054 CH 3522/5.$ Via analog audio output Sound is output only in 2ch format. !UDIO VIDEO CABLE SUPPLIED This connection only sends audio signals. Be page 14. sure to make video connection on 46 4O !.!,/' !5$)/ /54054 CH !.!,/' !5$)/ ).
Step 3: LAN connection You may use the internet connection feature to update the player’s firmware. See page 39. Some HD DVD discs may enable you to access special HD DVD sites, if you connect the player to the Internet via an always-on broadband connection. For example, if an HD DVD site includes content such as links to future movie trailers, you can watch the content on the player via the Internet. You do not need to connect to a PC to use this function. Read the notes on page 31 as well.
Preparation (Continued) Step 4: Power connection After completing all connections, connect the supplied power cord to the AC INLET socket and a wall outlet. Standby indicator on the player illuminates in red. 3TANDBY INDICATOR 4O A WALL OUTLET Caution • Do not power this player using any power cord other than the one supplied with this player. • Do not use the supplied power cord with any device other than this player.
Step 6: Setting up the player Make the settings which are necessary to operate the player. 1 Make sure that the following menu is displayed. (If not, press Setup to display it.) SETUP MENU 4O MOVE A CURSOR Picture Audio 4O ENTER THE SELECTED ITEM Language Ethernet General A: Language 2 4O RETURN TO THE PREVIOUS MENU Press / to select “Language”, then press OK. 3%450 -%.
Preparation (Continued) B: Time 6 Press OK. / 10 Press RETURN or to select “General”, then press to return to the menu of step 1. Parental Lock SETUP MENU Off Clock Set Picture OSD On/Off On Audio Remote Controller Sound Off Language Screen Saver Off Ethernet Maintenance General Twin Format Disc HD DVD 7 Press OK. 8 9 Confirm the time is correct.
C: Resolution 11 Press / to select “Picture”, then press OK. 3%450 -%.5 0ICTURE 46 3HAPE !UDIO %NHANCED "LACK ,EVEL %THERNET 2'" /UTPUT 2ANGE 'ENERAL 0ICTURE -ODE 2ESOLUTION 3ETTING 12 Press / ,ANGUAGE /FF 3TANDARD !UTO UP TO I to select “Resolution Setting”, then press OK. 13 Press / to select the resolution according to the performance of your TV as shown in the table below, then press OK.
Preparation (Continued) Settings and actual output resolution -/$% SWITCH PAGE /UTPUT JACKS ON THE PLAYER h2ESOLUTION 3ETTINGv PAGE UP TO P UP TO P UP TO P UP TO I P P MAXIMUM I MAXIMUM P MAXIMUM P I .O VIDEO OUTPUT P -ODE UP TO P (Z .O VIDEO OUTPUT .O VIDEO OUTPUT I -ODE I Maximum of the player’s actual resolution according to a connected HDMI TV.
D: Audio output 15 Press / to select “Audio”, then press OK. SETUP MENU Picture Digital Out SPDIF 0#- Language Digital Out HDMI Auto Ethernet Digital Direct Audio Mode Audio General $YNAMIC 2ANGE #ONTROL $IALOG %NHANCEMENT 3PEAKER 3ETTING /FF !UTO /FF CH 16 When you connected an audio system to the DIGITAL AUDIO OUTPUT OPTICAL/COAXIAL jack ( page 16): Press / to select “Digital Out SPDIF”, then press OK.
Preparation (Continued) When you connected an audio system to the ANALOG AUDIO OUTPUT jacks ( Press / page 16): to select “Speaker Setting”, then press OK. Select one of the followings according to your connection, and press OK. 5.1ch When a 5.1 channel surround system is connected to this player. 1 Set the speaker sizes, distance to each speaker and the crossover frequency. 3PEAKER 3ETTING CH CH Front Left / Front Right Small: Select if the speaker cannot output low frequency.
E: Ethernet Perform this setting if you connect the player to your LAN ( page 17). After performing this setting, you need to turn off this player and turn it on again to activate this setting. If you do not connect, skip to Step 20. 18 Press 19 Press / to select “Ethernet”, then press OK. / to select each of the followings, then press OK. DHCP Off 0ROXY 3ETTING Off -!# !DDRESS .40 3ERVER .ETWORK 3PEED Cookie Setting 1 To set your network information.
Preparation (Continued) 4 Network Speed Select the speed and press OK button. For other speeds: 1 Select “Other” and press OK button. 5 Cookie Setting Cookie Setting Network Speed 28.8kbps Modem 33.6kbps Modem 56kbps Modem 64kbps ISDN 128kbps ISDN 256kbps DSL/Cable “Accept” Accept Not Accept Cookies are accepted. 384kbps DSL/Cable 512kbps DSL/Cable 768kbps DSL/Cable 1Mbps Cable Network Speed (Other) 1.5Mbps T1 Over 10Mbps 1 Other OK Select “Accept” or “Not Accept” and press OK button.
Playing Preparation • Turn on the TV or audio system and select the corresponding input source that the player is connected to. • Turn the power on. ( page 18) Playing a disc HD DVD DVD-Video 1 DVD-RW DVD-R CD Press Open/Close to open the disc tray. Place a disc in the hollow of the disc tray with 2 the playback side down. When using a double-sided disc, turn the label of the playing side up. -ENU 3 After placing a disc, press Open/Close. Playback starts.
Playing (Continued) To pause playback HD DVD DVD-Video Press DVD-RW 0LAY 2ESUME 0LAY 0AUSE 3LOW 3TOP CD (Pause). To resume press 4OP -ENU DVD-R (Play). To stop playback HD DVD DVD-Video Press DVD-RW DVD-R CD (Stop). To resume playback from the location last stopped HD DVD DVD-Video DVD-RW DVD-R After stopping playback, press Resume Play ( HD DVD ) or DVD-RW DVD-R CD ). If you want to return to the beginning, press (Stop), then press (Play) ( DVD-Video (Play).
To select subtitles HD DVD DVD-Video You can display subtitles on the TV and select a subtitle language from those included on the disc. 1 !UDIO The current subtitle setting appears. (except for some HD DVD discs) e.g. 3UBTITLE !NGLE Each time you press / , “On” and “Off” alternates. Select “On” to view subtitles. $ISPLAY 2 #LEAR 2EPEAT 4 3EARCH DVD-RW DVD-R The current audio setting appears. (except for some HD DVD discs) e.g.
Playing (Continued) 3 To locate a position HD DVD 1 DVD-Video DVD-RW CD Press T.Search repeatedly to select the category. Category Title Chapter Time Track 2 DVD-R To search by specifying: Title number Chapter number Elapsed time of the current title (track) Track number Repeat playback starts. To check the current status HD DVD 1 e.g. To enter 25: “2” e.g. To enter 1 hour, 25 minutes, and 30 seconds: “1” Pressing Clear resets the numbers.
HD DVD playing options in the future A/B/C/D buttons HD DVD DVD-Video DVD-RW DVD-R CD Use these buttons as indicated by the video display during HD DVD disc playback. Depending on the disc contents, the functions of each button may differ. Cursor controls HD DVD DVD-Video DVD-RW DVD-R CD Future HD DVD discs may include game software and drawing software. If they do you can use the cursor function for some software.
Output sound conversion table Disc HD DVD Video Advanced content ADV indicator ADV HD DVD Video Standard content (off) DVD-Video (off) CD (off) DVD-VR (off) Disc HD DVD Video Advanced content ADV indicator ADV HD DVD Video Standard content (off) DVD-Video (off) CD (off) DVD-VR (off) Audio format “Digital Out SPDIF” “Digital Out HDMI” DD Plus/Dolby TrueHD dts-HD/L-PCM Bitstream Dolby Bitstream DTS Bitstream PCM 2ch PCM 2ch PCM Auto Depend on HDMI receiver PCM2 up to 5.
Customizing the function settings You can change the default settings to customize performance to your preference. 1 4O RETURN TO THE PREVIOUS MENU During stop, press Setup. “SETUP MENU” appears. Press / to select the group that contains a desired item, then press OK. Press Refer to the explanations on pages beginning from 33, to change the selection by / or other buttons, then press OK. Repeat step 3 and 4 to set other items if necessary.
Customizing the function settings (Continued) Group Ethernet Setting General Disc HD DVD DVD-Video DVD-RW DVD-R Parental Lock HD DVD DVD-Video DVD-RW DVD-R Clock Set HD DVD DVD-Video DVD-RW DVD-R CD OSD On/Off HD DVD DVD-Video DVD-RW DVD-R CD HD DVD DVD-Video DVD-RW DVD-R CD Screen Saver HD DVD DVD-Video DVD-RW DVD-R CD Maintenance HD DVD DVD-Video DVD-RW DVD-R CD Twin Format Disc HD DVD DVD-Video DVD-RW DVD-R CD Remote Controller Sound CD Details To set up
RGB Output Range Standard For a monitor of RGB range 16-235. Enhanced For a monitor of RGB range 0-255. Note • If “Standard” pales black of “Enhanced” blackens too much, change the setting. Picture Mode There are two types of source content in pictures recorded in DVD video discs: film content (pictures recorded from films at 24 frames per second) and video content (video signals recorded at 30 frames in NTSC per second). Make this selection according to the type of content being viewed.
Customizing the function settings (Continued) Dialog Enhancement To turn on or off a function that increases dialog volume of a disc playback. On This function is activated. Off This function is disabled. Notes • This function is effective only in playback of Dolby Digital recorded HD DVD or DVD video discs. • The effect level of this function vary depending on the disc. Speaker Setting See page 24. Language Disc Menu Language To select a preferred language for disc menus.
. How to select a language: 1) Obtain the code from the list below. 2) Enter the code as below. 3) Select “OK” and press OK button. e.g.
Customizing the function settings (Continued) Ethernet See page 25. General Parental Lock HD DVD and DVD video discs equipped with the Parental Lock function have a predetermined limitation level. The limitation level or limitation method may differ depending on the disc. For example the whole contents of a disc may not be played back, or an extreme violent scene may be cut or replaced automatically by another scene.
Clock Set page 20. See OSD On/Off To activate or deactivate the operational status display on the TV screen. On Activates the operational status display (e.g., ) on the TV screen. Off Deactivates the operational status display (e.g., ) on the TV screen. Remote Controller Sound To turn on or off the confirmation beeper announcing when each remote command is received. On Turns on the beep sound. Off Turns off the beep sound.
Before calling service personnel Before accessing, try updating this player’s firmware. For details on how to update, see “Update (Firmware update)” ( page 39). If you experience any of the following difficulties while using this unit, check the list below before consulting the dealer from whom you purchased this unit. Symptom Remedy Page No power. No picture. • Is the power plug disconnected? Check the power connection.
License information on the software used in the Integra HD DVD player This document is statement purpose only. Not concerned with operation of this product. The software pre-installed in the Integra HD DVD player consists of multiple, independent software components. Each software component is copyrighted by Onkyo or a third party.
License information on the software used in the Integra HD DVD player (Continued) GNU GENERAL PUBLIC LICENSE TERMS AND CONDITIONS FOR COPYING, DISTRIBUTION AND MODIFICATION 0. This License applies to any program or other work which contains a notice placed by the copyright holder saying it may be distributed under the terms of this General Public License.
For example, if a patent license would not permit royalty-free redistribution of the Program by all those who receive copies directly or indirectly through you, then the only way you could satisfy both it and this License would be to refrain entirely from distribution of the Program. If any portion of this section is held invalid or unenforceable under any particular circumstance, the balance of the section is intended to apply and the section as a whole is intended to apply in other circumstances.
License information on the software used in the Integra HD DVD player (Continued) ExhibitB GNU LESSER GENERAL PUBLIC LICENSE Version 2.1, February 1999 Copyright © 1991, 1999 Free Software Foundation, Inc. 59 Temple Place, Suite 330, Boston, MA 02111-1307 USA Everyone is permitted to copy and distribute verbatim copies of this license document, but changing it is not allowed. [This is the first released version of the Lesser GPL.
2.You may modify your copy or copies of the Library or any portion of it, thus forming a work based on the Library, and copy and distribute such modifications or work under the terms of Section 1 above, provided that you also meet all of these conditions: a) The modified work must itself be a software library. b) You must cause the files modified to carry prominent notices stating that you changed the files and the date of any change.
License information on the software used in the Integra HD DVD player (Continued) a) Accompany the combined library with a copy of the same work based on the Library, uncombined with any other library facilities. This must be distributed under the terms of the Sections above. b) Give prominent notice with the combined library of the fact that part of it is a work based on the Library, and explaining where to find the accompanying uncombined form of the same work. 8.
ExhibitC LICENSE ISSUES The OpenSSL toolkit stays under a dual license, i.e. both the conditions of the OpenSSL License and the original SSLeay license apply to the toolkit. See below for the actual license texts. Actually both licenses are BSD-style Open Source licenses. In case of any license issues related to OpenSSL please contact openssl-core@openssl.org. OpenSSL License Copyright © 1998-2002 The OpenSSL Project. All rights reserved.
Specification ower requirement P 47.0W ower supply P 120V AC 60Hz ass M 4.3kg xternal dimension E Width 435 x Height 73 x Depth 346mm (17-1/8˝ × 2-7/8˝ × 13-5/8˝) Analog audio output 2.0V (rms), 2.2kW or below, pin jack (L, R) x 1 system 2.0V (rms), 2.2kW or below, pin jack x 6 Digital audio output (OPTICAL/COAXIAL jack) Optical connector x 1 system Coaxial pin jack x 1 system, 0.
Memo 49 DHS-8.8_En.
Memo 50 DHS-8.8_En.
DHS-8.8_En.
)NTEGRA $IVISION OF /.+9/ 5 3 ! #/20/2!4)/. PARK 7AY 5PPER 3ADDLE 2IVER . * 5 3 ! 4EL &AX HTTP WWW INTEGRAHOMETHEATER COM )NTEGRA $IVISION OF /.+9/ #/20/2!4)/. 3ALES 0RODUCT 0LANNING $IV .ISSHIN CHO .EYAGAWA SHI /3!+! *!0!. 4EL &AX %N 9 0RINTED ON 2ECYCLED 0APER 3. # #OPYRIGHT /.+9/ #/20/2!4)/. *APAN !LL RIGHTS RESERVED DHS-8.8_En.