DVD Receiver DSR-4.
WARNING: TO REDUCE THE RISK OF FIRE OR ELECTRIC SHOCK, DO NOT EXPOSE THIS APPARATUS TO RAIN OR MOISTURE. CAUTION: TO REDUCE THE RISK OF ELECTRIC SHOCK, DO NOT REMOVE COVER (OR BACK). NO USER-SERVICEABLE PARTS INSIDE. REFER SERVICING TO QUALIFIED SERVICE PERSONNEL.
Precautions 1. Recording Copyright—Unless it’s for personal use only, recording copyrighted material is illegal without the permission of the copyright holder. 2. AC Fuse—The AC fuse inside the unit is not userserviceable. If you cannot turn on the unit, contact the dealer from whom you purchased this unit. 3. Care—Occasionally you should dust the unit all over with a soft cloth. For stubborn stains, use a soft cloth dampened with a weak solution of mild detergent and water.
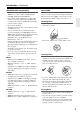
Precautions—Continued 10. Region Numbers—The DVD standard uses region numbers to control how discs can be played around the world, the world being divided into six regions. This unit will only play DVD discs that match its region number, which can be found on its rear panel (e.g., 1 , ). 11. About this Manual—This manual explains how to use all of this unit’s functions.
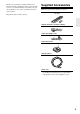
Thank you for purchasing an Integra DVD receiver. Read this manual carefully before using your new DVD receiver. A good understanding of its features and operation will allow you to achieve optimum performance and enjoyment. Supplied Accessories Make sure you have the following accessories: RC-705S Keep this manual for future reference. Remote controller & 2 batteries (AA/R6) Video cable (RCA) (1.
Introduction Features Highlights *1 • • • • • *1 *2 Dolby Digital, DTS DVD-Video, Video CD, audio CD MP3, WMA*3, JPEG DVD-Audio and Super Audio CD CD-R/RW, DVD-R/RW, and DVD+R/RW compatible • HDMI*4 digital interface Manufactured under license from Dolby Laboratories. Dolby, Pro Logic, and the double-D symbol are trademarks of Dolby Laboratories. *2 “DTS” is a registered trademark of DTS, Inc. and “96/24” is a trademark of DTS, Inc.
Contents Overview Playback Techniques Important Safety Instructions .................................... 2 Precautions ............................................................... 3 Supplied Accessories................................................ 5 Introduction ............................................................... 6 Features ................................................................ 6 Disc Notes .............................................................
Introduction—Continued Disc Notes Supported Discs The DVD receiver supports the following discs. Disc Logo Format or file type DVD-Video *1 DVD-Audio DVD-Audio Super Audio CD Super Audio CD (single layer, dual layer, hybrid) DVD-R*2 DVD-Video, MP3, WMA, JPEG DVD-RW*2 DVD-Video, MP3, WMA, JPEG Video CD Including PBC • The DVD receiver does not support disc types not listed. • The DVD receiver supports 8 cm and 12 cm discs.
Introduction—Continued MP3/WMA/JPEG Compatibility About WMA • The DVD receiver can play/display MP3, WMA, and JPEG files recorded on CD-R, CD-RW, DVD-R, DVD-RW, DVD+R and DVD+RW discs. • Discs must be in ISO 9660 Level 2 or Joliet format (folders can be up to eight levels deep). Music files recorded on discs that use the HFS (hierarchical file system) cannot be played. • Discs must be finalized. • The DVD receiver can only recognize the first session on multisession discs.
Introduction—Continued Copyright It is forbidden by law to copy, broadcast, show, broadcast on cable, play in public, or rent copyrighted material without permission. DVD-Video discs are copy-protected, and any recordings made from these discs will be distorted. This product incorporates copyright protection technology that is protected by method claims of certain U.S. patents and other intellectual property rights owned by Macrovision Corporation and other rights owners.
Before Using the DVD receiver Installing the Batteries 1 To open the battery compartment, press the small hollow and slide off the cover. Using the Remote Controller To use the remote controller, point it at the DVD receiver’s remote control sensor, as shown below. Remote control sensor DVD receiver Approx. 16 ft. (5 m) 2 Insert the two supplied batteries (AA/R6) in accordance with the polarity diagram inside the battery compartment. 3 Put the cover onto the remote controller and slide it shut.
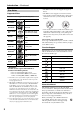
Front & Rear Panels For detailed information, refer to the pages in brackets. Front Panel Standby/On button [28] (1(2 This button is used to set the DVD receiver to On or Standby. Standby indicator [28] This indicator lights up when the DVD receiver is in Standby. Input selector [31] and indicator This selector is used to select from the following input sources: DVD, VIDEO 1, VIDEO 2/DOCK, FM, AM. Disc tray [33] Discs are loaded here.
Front & Rear Panels—Continued Display (1 (2 MUTING indicator (3 (4 (5 (6 (7 This indicator flashes while the DVD receiver is muted. Tuning indicators AUTO: This indicator lights up when the Auto Tuning mode is selected, and disappears when the Manual Tuning mode is selected. : This indicator lights up when the DVD receiver is tuned into a radio station. FM ST: This indicator lights up when the DVD receiver is tuned to a stereo FM station.
Front & Rear Panels—Continued Rear Panel (1 (2(3 (4 (5 (6 SPEAKERS [18] COAXIAL DIGITAL AUDIO IN [25] This coaxial digital audio input can be connected to a coaxial digital audio output on a DVD recorder or game console. This input is assigned for VIDEO 2/DOCK INPUT in default. If you output audio from this input during VIDEO 1 INPUT is selected, you must change the “Video1 Input” setting to “Coax” from “OPT” (page 54). These terminal posts are for connecting your front speakers.
Front & Rear Panels—Continued Remote Controller Standby/On button* [28] (2 (3 (4 (5 (6 (7 (8 This button is used to set the DVD receiver to Standby or turn on. Don’t turn on the DVD receiver until you’ve completed, and double checked all connections (pages 23–27). Number buttons* [43, 44, 64] These buttons are used to enter title, chapter, and track numbers and to enter times for locating specific points in time.
Front & Rear Panels—Continued Basic Playback buttons* Pause button [33, 35] This button is used to pause playback. While playback is paused, pressing this button moves the video forward one frame at a time. Play button [33] This button is used to start playback. Stop button [34] This button is used to stop playback. This button is used to search for titles, chapters, groups, folders, tracks, and specific points in time.
Connecting the DVD receiver Placing the Speakers Connecting Your Speakers Front Left and Right Speakers Speaker Connection Precautions • Place the front left and right speakers symmetrically and so that the distance from the listening position is the same. • When placing speakers, direct the speakers toward the position of the listener’s ears where the listener sits to enjoy music or movies. • Place the two speakers so that the heights of the two speakers are aligned.
Connecting the DVD receiver—Continued Connecting the Speaker Cables 1 Strip about 5/8" (15 mm) of insulation from the ends of the speaker cables, and twist the bare wires tightly, as shown. 2 Unscrew the terminal. Connecting Antenna 5/8" (15 mm) This section explains how to connect the supplied indoor FM antenna and AM loop antenna, and how to connect commercially available outdoor FM and AM antennas.
Connecting the DVD receiver—Continued Connecting the AM Loop Antenna Connecting an Outdoor FM Antenna The supplied indoor AM loop antenna is for indoor use only. If you cannot achieve good reception with the supplied indoor FM antenna, try a commercially available outdoor FM antenna instead. 1 Assemble the AM loop antenna, inserting the tabs into the base, as shown. 2 Connect both wires of the AM loop antenna to the AM antenna push terminals, as shown. The antenna connection is polarity sensitive.
Connecting the DVD receiver—Continued Connecting an Outdoor AM Antenna If good reception cannot be achieved using the supplied AM loop antenna, an outdoor AM antenna can be used in addition to the loop antenna, as shown. Outdoor antenna Insulated antenna cable AM loop antenna Black White Outdoor AM antennas work best when installed outside horizontally, but good results can sometimes be obtained indoors by mounting horizontally above a window. Note that the AM loop antenna should be left connected.
Connecting the DVD receiver—Continued AV Cables & Connectors Video Cable Jack HDMI connections can carry uncompressed, standard or high definition digital video and digital audio, for the best picture and sound quality. HDMI Y Component video Description Component video separates the luminance (Y) and color difference signals (PR, PB), providing the best picture quality. Some TV manufacturers label their component video inputs differently.
Connecting the DVD receiver—Continued Video Output/Video Setting Matrix The following matrix shows how the video outputs work in relation to the various video settings.
Connecting the DVD receiver—Continued Before Making Any Connections • Read the manuals supplied with your AV components. • Don’t connect the power cord until you’ve completed all audio and video connections. RCA AV Connection Color Coding RCA AV connections are usually color coded: red, white, and yellow. Use red plugs to connect right-channel audio inputs and outputs (typically labeled “R”). Use white plugs to connect left-channel audio inputs and outputs (typically labeled “L”).
Connecting the DVD receiver—Continued Connecting Your TV (video connection) Connecting Other AV Component • Connect the DVD receiver directly to your TV. If you connect the DVD receiver through a VCR, TV/VCR combination, or video selector, the picture may be distorted because DVD-Video discs are usually copy protected. You can use an AV cable to connect VIDEO 1 INPUT L/ R or V jack to your AV component such as a set top box, VCR, and DVD recorder.
Connecting the DVD receiver—Continued Connecting an RI Dock ■ iPod with video or RI Dock with the OSD mode Connect your RI Dock’s analog audio output jacks and Video output jack to the DVD receiver’s VIDEO 2/DOCK INPUT L/R jacks and V jack. Connect the RI Dock with an cable. (Onkyo DS-A1X/A2/A2X hookup shown below.) ■ iPod without video Connect your RI Dock’s analog audio output jacks to the DVD receiver’s VIDEO 2/DOCK INPUT jacks. Connect the RI Dock with an cable. (Onkyo DS-A1 hookup shown below.
Connecting the DVD receiver—Continued Connecting your HDTV or AV component with an HDMI connection This section shows how to connect the DVD receiver to an HDTV, projector, or game console that has an HDMI input/output socket. Notes: • The DVD receiver supports HDCP (High-bandwidth Digital Content Protection), a protection system for digital video. HDMI components that you connect to the DVD receiver must also support HDCP.
Connecting the DVD receiver—Continued Using the Multiroom Control Kits To control the DVD receiver with the remote controller when DVD receiver is located in a cabinet, you’ll need a commercially available multiroom remote control kit. • Multiroom kits are made by Niles and Xantech. These kits can also be used when control other components.
Connecting the Power/Turning on the DVD receiver Before connecting • Make sure that all the connections on pages 17–27 are complete (the connection to a TV is required). • Before unplugging the receiver from the power outlet, make sure you first switch it into standby. • For the above reasons, do not plug this receiver into a switched power supply found on some amplifiers and AV receivers.
Initial Setup This chapter explains the settings you need to make the very first time the DVD receiver is turned on. Basically this manual contains procedures using the remote controller. Here you need to make a few settings to get the DVD receiver up and running. You can change these settings later (see page 57). 1 Enter Use the Up and Down [ ]/[ ] buttons to select “TV Shape”, and then press [Enter]. Select “4:3 Letter box” or “4:3 Pan Scan” if you have a 4:3 TV.
HDMI and Progressive Settings HDMI Resolution Note: Stop playback before perform these settings. Setting the HDMI This section explains how to turn on the HDMI OUT and change the video resolution when your TV or projector is connected to the HDMI OUT. 1 DVD receiver 2 Remote controller Press the DVD receiver’s [HDMI] button to turn on HDMI. Press the [Resolution] button repeatedly to change the HDMI resolution. The first button press displays the current resolution onscreen.
Understanding Common Operations Sleep Input selector Input Master Volume control Muting VOL / Phones When reproducing the audio and video signals from HDMI IN, select “VIDEO 1”. Adjusting the Volume Remote controller DVD receiver Using Headphones You can connect a pair of stereo headphones (1/4-inch phone plug) to the DVD receiver’s Phones jack for private listening, as shown. or Use the Master Volume control, or the remote controller’s VOL [ ]/[ ] button.
Understanding Common Operations—Continued Muting the DVD receiver You can temporarily mute the output of the DVD receiver. Remote controller Press the [Muting] button. The output is muted and the MUTING indicator flashes on the display, as shown. MUTING To unmute the DVD receiver, press the [Muting] button again, or adjust the volume. The Mute function is cancelled when the DVD receiver is set to Standby.
Playing Discs This chapter covers basic playback. Advanced playback functions are covered in the “Advanced Playback” on page 43. Stop Open/Close Play Starting, Pausing & Stopping Playback This section explains how to start, pause, and stop playback. ■ Start DVD receiver Pause Remote controller ■ Pause DVD receiver 1 DVD receiver Press [Open/Close] to open the disc tray. The input source is automatically set to DVD. 2 Load a disc.
Playing Discs—Continued ■ Stop DVD receiver Remote controller To stop playback, press the Stop [ ] button. Playback stops and the Play indicator disappears. • When you stop playback of a DVD-Video disc, the DVD receiver remembers the point at which playback was stopped and “Resume” appears onscreen. To resume playback from that point, press the Play [ ] button. To cancel the “Resume” function, press the Stop [ ] button again. The Resume function is reset when the disc is removed from the DVD receiver.
Playing Discs—Continued Forward Frame-by-Frame Playback DVD-V VCD With frame-by-frame playback you can view individual picture frames one at a time forward. ■ Forward Press the Pause [ ] button. frame-by- Press it repeatedly to view subframe sequent frames. To resume normal playback, press the Play [ ] button. Fast Forward & Reverse DVD-V DVD-A SACD VCD CD MP3 This section explains how to fast forward and reverse. ■ Fast forward During playback, press the [ ] button to start fast forward.
Playing Discs—Continued • On some DVDs, to display the disc menu, press the [Menu] button. • Since the multichannel input source of DVD-Audio is down mixed, the output will be a processed audio. To output an original audio, select the 2-channel source. Some DVD-Audio discs may not be down mixed; in this case select the 2-channel source. Number buttons Top Menu Enter Menu To set VCD’s PBC on and off PBC menus can turned on or off by pressing the [Top Menu] button.
Playing Discs—Continued Enter / / 3 Use the Up and Down [ ]/[ ] buttons to select tracks and subfolders in the open folder. To open a folder in the list, press the [Enter] button. To close a folder (i.e., move back up the directory tree), press the [Return] button. Alternatively, select the item at the top of the list and press the [Enter] button. Use the Left and Right [ ]/[ ] buttons to display the other folders that contain playable tracks.
Playing Discs—Continued Viewing a Slideshow of JPEG Images To open a folder in the list, press the [Enter] button. To close a folder (i.e., move back up the directory tree), press the [Return] button. Alternatively, select the item at the top of the list and press the [Enter] button. Use the Left and Right [ ]/[ ] buttons to display other folders that contain JPEG images. JPEG This section explains how to display a slideshow of JPEG images on your TV. 1 Load a JPEG disc. The “Disc Navigator” appears.
Listening to the Radio Tuning into Radio Stations Input Search Number buttons Memory ■ Auto Tuning Mode 1 Press the [Mode] button so that the AUTO indicator appears on the display. 2 Press the Tuning [ ]/[ ] button. Searching stops when a station is found. To stop searching, press Stop [ ] button. CLR Preset Tuning Mode When tuned into a station, the indicator appears. When tuned into a stereo FM station, the FM ST indicator appears on the display, as shown.
Listening to the Radio—Continued ■ Tuning into Stations by Frequency You can tune into AM and FM stations directly by entering the appropriate frequency. 1 2 Selecting Presets To select a preset, use the Preset [ ]/[ ] buttons. Press the [Search] button. Within 8 seconds, use the number buttons to enter the frequency of the radio station. For example, to tune to 87.5 (FM), press 8, 7, 5. Notes: • This procedure can also be performed by using the number buttons.
Using the Listening Modes Selecting Listening Modes About the Listening Modes See “About the Listening Modes” in the right column for detailed information about the listening modes. Direct In this mode, audio from the input source is output directly with minimal processing, providing high-fidelity reproduction. Stereo The selected input source is processed as a stereo signal and output by the front left and right speakers and the subwoofer if connected.
Using the Listening Modes—Continued T-D (Theater-Dimensional) Listening Angle Setting 2 Use the Up and Down [ ]/[ ] buttons to select “Angle”, and use the Left and Right [ ]/ [ ] buttons to select: “Narrow”, “Middle”, or “Wide”. Narrow: Select if the listening angle is 20 degrees. Middle: Select if the listening angle is 30 degrees (default). Wide: Select if the listening angle is 40 degrees. 3 When you’ve finished, press the [Setup] button again. The setup menu closes.
Advanced Playback 2 Use the number buttons to specify a title, chapter, or track number. To enter, for example, “12”, press the [1] button followed by the [2] button. Search Number buttons Search Title Disc DVD-VIDEO Chapter Current/Total 12/ 19 Current/Total 5/ 7 Entered title number appears here Enter Entered chapter number appears here If you’re playing a DVD, MP3, or WMA disc, use the Left and Right [ ]/ [ ] buttons to select the Title/Group/ Folder and Chapter/Track fields.
Advanced Playback—Continued Search Number buttons Enter Searching by Time DVD-A DVD-V SACD VCD CD With the “Search” function you can search by time. 1 During playback, press the [Search] button twice. The “Search” window appears onscreen. Search Disc DVD-VIDEO 2 Time -:- -:- - Use the number buttons to enter a time. Time search only works within the current title or track. To enter, for example, 5 minutes, 30 seconds, press [5] [3] [0] buttons.
Advanced Playback—Continued A-B Repeat Playback DVD-V SACD VCD CD MP3 With the “Repeat A-B” function you can play a specified section over-and-over again. Repeat 1 During playback, press the [A-B] button to set the A point (i.e., the start of the section you want to repeat). “Repeat A-” appears onscreen and “-R_A” appears on the display. 2 Press the [A-B] button again to set the B point (i.e., the end of the section you want to repeat).
Advanced Playback—Continued • To use the “Random” function with a VCD that supports PBC, you must first turn off PBC (see page 36). • If the “Memory Playback” function is on (page 47), random playback is unavailable. • You can’t use the [Search] button during random playback. • During random playback, the remote controller’s arrow [ ], [ ], [ ], [ ] buttons and number buttons don’t work with the “Disc Navigator”. • The “Random” function cannot be used with JPEG files.
Advanced Playback—Continued Number buttons Memory Last Memory CLR Enter Memory Playback DVD-V DVD-A SACD VCD CD Repeat step 2 to add more items to the memory list. You can add up to 32 items to the memory list. 4 To play the memory list, press the Play [ ] button. The “Memory List” window must be open when you press the Play [ ] button. 5 To stop playback, press the Stop [ ] button. While playback is stopped, you can delete the memory list by pressing the [CLR] button.
Advanced Playback—Continued Deleting Items from the List Last Memory Use the Up/Down [ ]/[ ] buttons to select it, and then press the [CLR] button. The item is deleted and subsequent items move up the list. DVD-V With the “Last Memory” function you can resume playback from where you left off even if the disc has been removed and the DVD receiver has been set to Standby. “Last Memory” also remembers the soundtrack and subtitle settings you were using.
Advanced Playback—Continued Selecting Camera Angles DVD-V / / / Angle Zoom Zooming DVD-V VCD JPEG With the Zoom function you can enlarge any part of the picture. 1 Some DVDs feature multiple camera angles that allow you to view scenes from different angles. When a DVD features multiple camera angles, the camera indicator appears on the display. Such discs usually have the camera angle logo ( ) printed on the sleeve. Press the [Angle] button repeatedly to cycle through the available camera angles.
Advanced Playback—Continued Selecting Subtitles DVD-V Some DVD-Video discs feature subtitles in several languages. See the disc’s sleeve notes for details. Subtitle Audio Selecting Soundtracks DVD-V DVD-A SACD Some DVD-Video discs feature soundtracks in several languages or audio formats (e.g., Dolby Digital or DTS). Music DVD-Video discs and DVD-Audio discs sometimes feature audio in several formats, such as PCM, Dolby Digital, or DTS. See the disc’s sleeve notes for details.
Disc and Input Information Displaying Information You can display various information about the current disc, or input source as follows. Remote controller Press the [Display] button repeatedly to cycle though the available information. During playback of a disc, various information appears onscreen. The operating status (e.g., Stop, Play, Resume) and disc type information is displayed along the top of the screen.
Controlling Other Components Controlling a TV connected to the DVD receiver 4 Point the remote controller at the TV, and check the operation. If the remote controller doesn’t work as expected, and several remote codes are listed, try each one in turn and use the one that works best. You can control a TV. You must enter the appropriate remote control code first. Number buttons Note: The remote control codes provided are correct at the time of printing, but are subject to change.
Controlling Other Components—Continued Controlling an Apple iPod in RI Dock connected to the DVD receiver When operating an Apple iPod in RI Dock with an connection, you can control it by DVD receiver’s remote controller. When Using an RI Dock: • Connect the RI Dock to the VIDEO 2/DOCK INPUT jacks (see page 25). • Set the RI Dock’s RI MODE switch to HDD or HDD/ DOCK. • See to the RI Dock’s instruction manual for more information. Press the Input [ DOCK”.
Configuring the DVD receiver Setup Menu Here you can configure the DVD receiver in this menu on display. The configurations are common for the all input settings excluding “AVSync”, “Video1 Input” and “Video2 Input”. 1 Remote controller Press and hold the [Setup] button for 3 seconds. When selecting the input other than DVD, just press the [Setup] button. “Balance” appears on the display.
Configuring the DVD receiver—Continued Speakers Output Balance Lock Setup Here you can adjust the output balance of speakers. The balance can be adjusted from “L + 12” to “R + 12” in 1 steps. With this preference, you can protect your settings by locking the setup menus. When the setup menus are locked, you cannot change any setting. Note: When the listening mode is set to “Direct”, no effect will be produced. Locked: Setup menus locked. Unlocked: Setup menus not locked.
Configuring the DVD receiver—Continued Crossover Frequency Audio Input Setup This setting only applies to the speakers that you specified as “Small” in the “Front Speakers Size” on page 55. To get the best bass performance from your speaker system, you need to set the crossover frequency according to the size and frequency response of your speakers. Use the diameter of the smallest speaker in your system when choosing the crossover frequency.
DVD Onscreen Setup Menus This chapter explains the various functions and settings of the onscreen setup menus. Functions and settings are arranged into six menus: Picture, Audio, Language, Display, Operation Setting, and Initial Setup. The following table lists all the functions and settings, with a brief description and page number where you can find full details.
DVD Onscreen Setup Menus—Continued Using the Onscreen Setup Menus This section explains how to navigate the onscreen setup menus. 3 Use the Up/Down [ ]/[ ] buttons to select the options, and press the [Enter] button to confirm your selection. 4 When you’ve finished, press the [Setup] button again. The onscreen setup menu closes. Input Enter Setup 1 Press the Input [ ]/[ ] buttons to select “DVD”, and then press the [Setup] button. The onscreen setup menu appears, as shown.
DVD Onscreen Setup Menus—Continued Picture Menu TV Shape With this setting you can select a picture format to match the aspect ratio of your TV. 4:3 Letter box (default): Choose this option if you have a standard TV (4:3 aspect ratio). When you watch widescreen DVD-Video movies, the entire picture will be visible and there will be black bars at the top and bottom of the screen, as shown.
DVD Onscreen Setup Menus—Continued Progressive Setting HD JPEG Mode With this setting you can set the component video output to progressive or interlaced. While the “HDMI Output Setting” is set to “On”, this setting is fixed at “Progressive” and cannot be changed. See page 30 for more information. If your TV is connected to the HDMI OUT and the HDMI resolution is set to 720p or 1080i, this setting allows you to display your JPEG pictures in high definition.
DVD Onscreen Setup Menus—Continued Audio Menu Digital/HDMI Audio Out With this setting you can configure the HDMI digital output. All (default): Dolby Digital and DTS signals are output as they are. If your TV or amp doesn’t support higher sampling rates, set the “Linear PCM Out” setting to “Down Sample On” (below). Select “Others” if the language you want is not displayed. See “Selecting Other Languages” on page 62. Notes: • Not all DVD-Video discs have menus in multiple languages.
DVD Onscreen Setup Menus—Continued ■ Selecting Other Languages This section explains how to select other languages for disc menus, audio, and subtitles. 1 Remote controller Select “Others” from the “Disc Menu Language”, “Audio Language”, or “Subtitle Language” menu, and then press [Enter]. 2 Use the Left/Right [ ]/[ ] buttons to select the code. Use the Up/Down [ ]/[ ] buttons to enter a language code. See adjacent table for language codes. 3 When you’ve finished, press the [Enter] button.
DVD Onscreen Setup Menus—Continued Display Menu On-Screen Display With this setting you can turn on or off onscreen messages, such as “Play”, “Stop”, and “Resume”. Off: Onscreen messages are not displayed. On (default): Onscreen messages are displayed. On-Screen Display Color With this setting you can set the color and theme of the Disc navigation window.
DVD Onscreen Setup Menus—Continued Operation Setting Menu Setting the Parental Lock With the Parental Lock function you can block access to certain scenes that the authors have flagged as being unsuitable for children. 1 Select “Operation Setting” menu in the setup. 2 Use the Up/Down [ ]/[ ] buttons to select “Parental Lock”, and then press the [Enter] button. The password (security code) input screen appears.
DVD Onscreen Setup Menus—Continued DVD Priority Contents This setting determines what is played when a DVD-Audio disc also contains DVD-Video material. DVD-AUDIO (default): The DVD-Audio material is played. DVD-VIDEO: The DVD-Video material is played. SACD Priority Contents SACDs have two separate areas for storing audio tracks—one for multichannel audio, the other for 2channel stereo audio. In addition, hybrid SACDs have an extra layer for playback in standard CD players.
Additional information Resetting the receiver Disc Content Organization Use this procedure to reset all the receiver’s settings to the factory default. Note that resetting the DVD receiver will delete your radio presets and custom settings. ■ DVD-Video Format DVD-Video discs contain titles, which are usually subdivided into chapters. 1 Turn on the DVD receiver. 2 Using the front panel buttons, hold down the [Stop] button and press [Standby/On] button. “DVD Clear” appears on the display.
Additional information—Continued ■ MP3, WMA & JPEG Files MP3, WMA and JPEG files are typically organized into folders. The DVD receiver handles MP3, WMA and JPEG files as tracks. ROOT 001 MP3/WMA/JPEG (CD-R/RW, DVD-R/RW, DVD+R/RW) Folder 1 001 Track 001.mp3 (001.wma) 010.mp3 (010.wma) 011.mp3 (011.wma) Folder 2 002 012.mp3 (012.wma) 020.mp3 (020.wma) 004 Glossary Analog audio Dolby Digital An electrical signal that directly represents sound.
Glossary—Continued Dynamic range NTSC (National Television Standards Committee) The difference between the quietest and loudest sounds possible in an audio signal (without distorting or getting lost in noise). Dolby Digital and DTS soundtracks are capable of a very wide dynamic range, delivering dramatic cinema-like effects. This is one broadcasting system for color televisions, and is used in the U.S., Korea, Central and South America, Japan, and other countries.
Troubleshooting If you have any trouble using the DVD receiver, look for a solution in this section. If you can’t resolve the issue yourself, contact the dealer from whom you purchased this unit. Audio The sound is not heard or very quiet • If the SLEEP indicator is lit on the display, the Sleep timer is functioning. Cancel the Sleep timer (page 32). • If the Standby indicator is blinking on and off, the built-in protection circuit is activated. Be careful not to short the positive and negative wires.
Troubleshooting—Continued The subwoofer produces no sound • When you play source material that contains no information in the LFE channel, the subwoofer produces no sound. • Make sure the subwoofer is configured correctly (page 54). Headphones makes noise or no sound • There may be a bad contact. Clean up the headphones terminal. For information on how to clean up, see the instruction manual attached to the headphones. Otherwise, verify the cord of the headphones which may be broken.
Troubleshooting—Continued Tuner Disc Playback Reception is noisy, FM stereo reception is noisy, or the FM ST indicator doesn’t appear The disc won’t play or is automatically ejected after loading • Relocate your antenna. • Move the DVD receiver away from your TV or computer. • When listening to an AM station, operating the remote controller may cause noise. • Passing cars and airplanes can cause interference. • Concrete walls weaken radio signals.
Troubleshooting—Continued No sound, or sound is distorted • No sound is output when scanning discs other than audio CDs and SACDs. • Check that the disc is free from dust and dirt, and that it is not damaged (page 9). • Check that the plugs and terminals are free of dirt, oxide, etc. and clean if necessary. Also check the cable for damage. Connection with External Devices No sound is heard from the connected device • Make sure that the optical digital cable is not bent over or damaged.
Troubleshooting—Continued HDMI Status Mode If you’re using an HDMI connection and there’s no picture or sound, you can check the status of the HDMI connection by pressing and holding down the DVD receiver’s [Display] button for 10 seconds until a message ID appears on the display. Look up the message ID in the following tables and check the HDMI connections and settings on both the DVD receiver and the connected component.
Specifications Amplifier Section Rated output Power (FTC) 50 watts minimum continuous power per channel, 6 ohm loads, 2 channels driven at 40 Hz - 20 kHz with a maximum total harmonic distortion of 0.9 % THD (Total Harmonic Distortion) 0.9% (Power Rated) 0.08% (1 kHz, 1 W) Input Sensitivity and Impedance 200 mV/47 k: (LINE) Frequency Response 20 Hz - 100 kHz/+0 dB - 1.
Remote Control Codes List TV TV TV 888 0264 Beko 0714 Clarion 0180 Acura 0009 Bell & Howell 0154 Clarivox 0037 Addison 0092, 0108, 0653, 1150 BenQ 1032 0037 Commercial Solutions 0047, 1447 Beon Admiral 0093, 0463 Blaupunkt 0195 Concerto 0056 Advent 0761, 0783, 0815, 0817, 0842 0556, 1037, 1254, 1314 Conrac 0808 Blue Sky Aiko 0092 BPL 0208, 0896 Conrowa Aiwa 1916 Bradford 0180 0009, 0145, 0156, 0264, 0698, 0753, 1156 Brandt 0109, 0335 Contec 0009, 0180 Akai 00
Remote Control Codes List—Continued TV TV 0037 Gintai 0474, 1150 Huanghaimei 0009 Electroband 0000 Go Video 0886 Huanghe 0009, 0817 0001, 0030, 0037, 0056, 0109, 0154, 0178, 1150, 1378 Huanglong 0009 GoldStar Huangshan 0009, 0264, 0817 Goodmans 0037, 0343, 0360, 0371, 0634 Gradiente 0053, 0056, 0170 Electrograph 1755 Electrohome 0463 Elektra 0017, 1661 Elin 0037 Elta 0009 Emerson 0154, 0171, 0178, 0180, 0236, 0361, 0463, 0623 Graetz 0361, 0714 Granada 0037, 0208 Grandin
Remote Control Codes List—Continued TV TV TV M&S 0054 M Electronic 0009, 0037, 0109, 0346, 0480 Magnavox 0030, 0054, 0186, 0706, 0780, 0802, 1254, 1454 Manesth 0264 0556 Marantz 0030, 0037, 0054, 0556, 0704, 0855 KEC 0180 Mark 0037 Kendo 0037 Kenwood 0030 Mastro 0053, 0698, 0706, 0780 NEI 0037 0009, 0035, 0037, 0208, 0371, 0443 Neovia 0865 Netsat 0037 1755 Kaige 0009, 0264, 0817 Kaisui 0009 Kanghua 0896 Kangli 0001, 0009, 0264, 0661, 0817 Kangyi 0009, 0264 Karcher 0
Remote Control Codes List—Continued TV TV 0037 RadioShack 0030, 0047, 0056, 0154, 0178, 0180 0037, 0051, 0054, 0161, 0208, 0226, 0250, 0508, 0650, 0896, 1168, 1175, 1177 RCA 0009, 0051, 0208, 0226, 0264, 0508, 0698, 0706, 0780, 0817 0000, 0030, 0047, 0060, 0090, 0092, 0178, 0618, 0679, 1047, 1147, 1247, 1347, 1447, 1454, 1547 Realistic 0030, 0056, 0154, 0178, 0180 Rediffusion 0361 Pausa 0009 Relisys 0865 Reoc 0714 Penney 0030, 0047, 0051, 0060, 0156, 0178, 1347, 1378 Revox 0037 Rex 0
Remote Control Codes List—Continued TV TV Squareview 0171 SSS 0180 Standard 0009 TV 0030, 0054, 0056, 0178, 0866, 1156 Telefunken 0056, 0074, 0109, 0335, 0343, 0625, 0702, 0896 Warumaia 0661 Teletech 0009 Watson 0037 0156 Wards Starlite 0180 Studio Experience Teleton 0186 Waycon 0843 Tera 0030, 0092, 0474 Weipai 0009 Sunkai 0865 Tevion 0767 Westinghouse 0885, 0889, 1282 Superscan 0093, 0864 Texla 0780 Supra 0056 Thomson White Westing- 0037, 0186, 0463, house 0623 Su
* Memo Integra Division of ONKYO U.S.A. CORPORATION 18 park Way, Upper Saddle River, N.J. 07458, U.S.A. Tel: 201-785-2600 Fax: 201-785-2650 http://www.integrahometheater.com Integra Division of ONKYO CORPORATION Sales & Product Planning Div.: 2-1, Nisshin-cho, Neyagawa-shi, OSAKA 572-8540, JAPAN Tel: 072-831-8023 Fax: 072-831-8124 En Y0710-1 SN 29344561 (C) Copyright 2007 ONKYO CORPORATION Japan. All rights reserved.