Intel® IQ80332 I/O Processor Evaluation Platform Board Manual September 2005 Document Number: 274069003US
Intel® IQ80332 I/O Processor Evaluation Platform Board Manual INFORMATION IN THIS DOCUMENT IS PROVIDED IN CONNECTION WITH INTEL® PRODUCTS. NO LICENSE, EXPRESS OR IMPLIED, BY ESTOPPEL OR OTHERWISE, TO ANY INTELLECTUAL PROPERTY RIGHTS IS GRANTED BY THIS DOCUMENT.
Intel® IQ80332 I/O Processor Evaluation Platform Board Manual Contents Contents 1 Introduction....................................................................................................................................9 1.1 1.2 1.3 1.4 1.5 1.6 1.7 2 Getting Started............................................................................................................................. 15 2.1 2.2 2.3 2.4 2.5 2.6 3 Document Purpose and Scope .................................................
Intel® IQ80332 I/O Processor Evaluation Platform Board Manual Contents 3.7.1 3.7.2 3.8 3.9 4 Software Reference ..................................................................................................................... 45 4.1 4.2 4.3 A 4 Console Serial Port................................................................................................ 35 JTAG Debug .......................................................................................................... 36 3.7.2.
Intel® IQ80332 I/O Processor Evaluation Platform Board Manual Contents B Getting Started and Debugger ................................................................................................... 53 B.1 B.2 B.3 B.4 B.5 B.6 B.7 B.8 B.9 Introduction ......................................................................................................................... 53 B.1.1 Purpose ..............................................................................................................
Intel® IQ80332 I/O Processor Evaluation Platform Board Manual Contents Figures 1 2 3 4 5 6 7 8 9 10 11 12 13 14 15 6 Intel® 80332 I/O Processor Block Diagram ................................................................................ 13 Serial-UART Communication ..................................................................................................... 19 JTAG Debug Communication .....................................................................................................
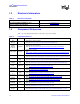
Intel® IQ80332 I/O Processor Evaluation Platform Board Manual Contents Examples 1 2 3 4 5 6 7 8 9 10 11 12 13 14 15 16 17 18 19 20 21 22 23 24 25 26 27 28 29 30 31 32 33 34 35 36 37 38 39 40 41 42 43 Intel® 80332 I/O Processor Related Documentation List.............................................................. 9 Electronic Information ................................................................................................................. 10 Component Reference.................................
Intel® IQ80332 I/O Processor Evaluation Platform Board Manual Contents Revision History 8 Date Revision Description 08 September 2005 003 In Section 3.6.6, “Rotary Switch” on page 33 and Table 12, “Rotary Switch Requirements” on page 33, changed Rotary Switch settings 1 and 0. Factory Default is now 1. 19 July 2005 002 in Table 20, “Rotary Switch Settings” on page 40, reverswd Rotary Switch settings 0 and 1. Factory Default is now 1 27 September 2004 001 Initial Release.
1 Introduction 1.1 Document Purpose and Scope This document describes the Intel® IQ80332 I/O processor evaluation platform board (IQ80332) using DDR-II 400 MHz SDRAM. The Intel® 80332 I/O processor (80332) is intended for rapid, intelligent I/O development. The 80332 is a multi-function device that integrates the Intel XScale® core (ARM* architecture compliant) with intelligent peripherals including a PCI Express bus application bridge. 1.2 Other Related Documents Table 1.
Intel® IQ80332 I/O Processor Introduction 1.3 Electronic Information Table 2. Electronic Information Support Type Location/Contact The Intel World-Wide Web (WWW) Location: http://www.intel.com Customer Support (US and Canada): 1.4 1-916-377-7000 Component References Table 3 provides additional information on the major components of 80332. Table 3.
Intel® IQ80332 I/O Processor Introduction 1.5 Terms and Definitions Table 4. Terms and Definitions Acronym/Term Definition ARM Refers to both the microprocessor architecture and the company that licenses it. CRB Customer Reference Board ICE In-Circuit Emulator – A piece of hardware used to mimic all the functions of a microprocessor.
Intel® IQ80332 I/O Processor Introduction 1.6 Intel® 80332 I/O Processor About the 80332. The 80332 is a multi-function device that combines the Intel XScale® core with intelligent peripherals, and integrates two PCI Express-to-PCI Bridges. The 80332 consolidates into a single system: • • • • • Intel XScale® core. • • • • • • • • • High-Performance Memory Controller. x8 PCI Express Upstream Link. Two PCI Express-to-PCI Bridges supporting PCI-X interface on both segments.
Intel® IQ80332 I/O Processor Introduction Figure 1. Intel® 80332 I/O Processor Block Diagram ! " # $ (!/ 0 (%% ( - & ) "*+, % & ' .
Intel® IQ80332 I/O Processor Introduction 1.7 Intel® IQ80332 I/O Processor Evaluation Platform Board Features Table 5. Summary of Features Feature Definition Battery Backup Unit: Battery back up circuit for SDRAM. Ethernet Intel(R) 82545EM Gigabit Ethernet Controller Flash ROM: 8 MB Flash ROM 3.3 V – 16-bit Flash I/F.
Getting Started 2 The 80332 is a software development environment for IQ80332. Software updates and additional offerings from vendors can change frequently. To keep up-to-date, please visit http://www.intel-ioprocessortools.com/kshowcase/view for the latest updates. 2.1 Kit Content The 80332 Kit contains the following items: • • • • 2.
Intel® IQ80332 I/O Processor Getting Started 2.2.2 Power Requirements The 80332 requires a 3.3 V supply coming through the PCI Express primary connector. Plug the board into a desktop with a PCI Express slot. The 80332 has an auxiliary power receptacle (J1A1, see Section 3.9.4, “Connector Summary”) that is used to power the secondary PCI-X slot. This connector is compatible with a standard ATX hard drive power connector.
Intel® IQ80332 I/O Processor Getting Started 2.3 Factory Settings Make sure that the switch/jumper settings are set to proper positions as explained in Section 3.9, “Switches and Jumpers” on page 38. 2.4 Development Strategy 2.4.1 Supported Tool Buckets For developing and debugging software application, the production version of the 80332 kit includes the Code|Lab Development Environment. Support for the Code|Lab development environment is available from ATI*. Please refer to the enclosed package.
Intel® IQ80332 I/O Processor Getting Started 2.5 Target Monitors 2.5.1 RedHat RedBoot RedBoot* is an acronym for “RedHat Embedded Debug and Bootstrap”, and is the standard embedded system debug/bootstrap environment from RedHat, replacing the previous generation of debug firmware: CygMon and GDB stubs. It provides a bootstrap environment for a range of embedded operating systems, such as embedded Linux and eCos*, and includes facilities such as network downloading and debugging.
Intel® IQ80332 I/O Processor Getting Started 2.6 Host Communications Examples How to communicate to the host. 2.6.1 Serial-UART Communication Using a serial connection to communicate with the board (Figure 2). Please note that the evlaution board is plugged into a host machine, as in the figure below. You can use an additional laptop computer, but it is not necessary. The host computer, when loaded with the proper software can communicate with the board. Figure 2.
Intel® IQ80332 I/O Processor Getting Started 2.6.3 Network Communication Using a standard network connection, the user can communicate with the board via the ethernet port. Redboot also allows the user to remotely boot the platform using a BOOTP server through the network Connection. Figure 4.
Intel® IQ80332 I/O Processor Getting Started 2.6.4 GNUPro GDB/Insight 2.6.4.1 Communicating with RedBoot Hardware Setup: • Host with UNIX/Linux or Win32 installed • IQ80332 with serial cable • RedHat RedBoot monitor Flashed to the platform board Recommended Mapping of UART Ports to Host Com Ports • Host port connected to the platform board UART.
Intel® IQ80332 I/O Processor Getting Started To bring up a HyperTerminal session on a Win32 platform: Go to Start, Programs, Accessories, Communications, HyperTerminal • HyperTerminal setup screens: — “Connection Description” Panel: • Enter name. — “Connect To” Panel: • Select host com2 port (or whichever port you are using). — Port Settings: • Bits per second: 115200 • Data Bits: 8 • Parity: none • Stop Bits: 1 • Flow Control: none — Start HyperTerminal: • Select Call from HyperTerminal panel.
Intel® IQ80332 I/O Processor Getting Started 2.6.4.2 Connecting with GDB Below are the GDB commands entered from the command prompt. Be sure system path is set to access “xscale-elf-gdb.exe”. File name in example “hello”. Bold type represents input by user: >xscale-elf-gdb -nw hello1 • Start GDB executable, loads debug information and symbols. (GDB) set remotebaud 115200 • Set baud rate for the 80332.
Intel® IQ80332 I/O Processor Getting Started This Page Left Intentionally Blank 24 Evaluation Platform Board Manual
Intel® IQ80332 I/O Processor Hardware Reference Section 3 Hardware Reference Section 3.1 Functional Diagram Figure 5 shows the functional block for the 80332. Figure 5. Functional Block Diagram Target Market ROMB PCI Express RAID card DDR II 400 HEX LED DDR SDRAM Battery Backup Buzzer Local Bus I2C GPIOs JTAG PCI Express 8 MB StrataFLASH RS-232 RS-232 Intel® 80332 I/O Processor PCI-X 2.
Intel® IQ80332 I/O Processor Hardware Reference Section 3.2 Board Form-Factor/Connectivity Table 6 summarizes the form-factor and connectivity features for the 80332. Table 6. Form-Factor/Connectivity Features Description The IQ80332 is a x8 PCI Express card with form factor depicted by Figure 6. The 80332 connects to the Primary PCI-Express bus of the host machine. The 80332 has two PCI-X expansion slot. The 80332 has two serial ports and one RJ-45 Ethernet port.
3.3 Power The 80332 draws power from the PCI Express bus. The power requirements for the 80332 are shown in Table 7 below. The numbers do not include the power required by a PCI-X card mounted on the expansion slot. Table 7. Power Features Voltage Rail Note: Typical Current Maximum Current +3.3 V TBD mA 6971 mA +5 V TBD mA 7 mA +12 V TBD mA 105 mA The maximum current was calculated, but not measured.
Intel® IQ80332 I/O Processor Hardware Reference Section 3.4 Memory Subsystem The Memory Controller of 80332 controls the DDR SDRAM memory subsystem. It features programmable chip selects and support for error correction codes (ECC). The memory controller can be configured for DDR SDRAM at 333 MHz and DDR-II at 400 MHz. The memory controller supports pipelined access and arbitration control to maximize performance.
Intel® IQ80332 I/O Processor Hardware Reference Section 3.4.2 Flash Memory Requirements Total Flash memory size is 8 MB. Table 8.
Intel® IQ80332 I/O Processor Hardware Reference Section 3.5 Interrupt Routing The 80332 Interrupt routing. Table 9.
Intel® IQ80332 I/O Processor Hardware Reference Section 3.6 Intel® IQ80332 I/O Processor Evaluation Platform Board Peripheral Bus The 80332 populates the peripheral bus as depicted by Figure 7. Figure 7.
Intel® IQ80332 I/O Processor Hardware Reference Section 3.6.1 Flash ROM Table 11. Flash ROM Features Description Flash is an Intel StrataFlash® technology – Part number: 28F640J3C Flash size is 8 MB The connection to the peripheral bus is depicted by Figure 8 Figure 8.
Intel® IQ80332 I/O Processor Hardware Reference Section 3.6.2 UART The 80332 has two integrated UARTs. Each asynchronous serial ports supports all the functions of a 16550 UART. The UART signals are connected to a dual RS-232 buffer and then to a RJ-11 serial port connector mounted on the bracket of the evaluation board. The serial port and GPIO signals are muxed on the same pins. Jumper J1D2, located next to the serial port buffer can disable the buffer to allow the signals to be used as GPIO signals.
Intel® IQ80332 I/O Processor Hardware Reference Section 3.6.7 Battery Status A CPLD on the IQ80332 provides the following status for the battery. Please see Section 4.2.2, “Peripheral Bus Memory Map” on page 47 for more details on addressing the CPLD. Table 13.
Intel® IQ80332 I/O Processor Hardware Reference Section 3.7 Debug Interface 3.7.1 Console Serial Port The platform has two serial ports for debug purposes as described in Section 3.6, “Intel® IQ80332 I/O Processor Evaluation Platform Board Peripheral Bus” on page 31.
Intel® IQ80332 I/O Processor Hardware Reference Section 3.7.2 JTAG Debug The 80332 has a 20-pin JTAG connector (J7D2) that is in compliant with ARM Multi-ICE guidelines. 3.7.2.1 JTAG Port Figure 9.
Intel® IQ80332 I/O Processor Hardware Reference Section 3.8 Board Reset Scheme Figure 10 depicts the reset scheme for the 80332. Table 14 list the reset schemes for the 80332. Table 14. Reset Requirements/Schemes Description Primary PCI reset, resets all devices on the board. It occurs during the power-up. The SRST signal from the JTAG connector is a bi-directional signal that can force a reset similar to the power-up reset on the board. Figure 10.
Intel® IQ80332 I/O Processor Hardware Reference Section 3.9 Switches and Jumpers 3.9.1 Switch Summary Please note that the term ‘open’ refers to the individual pin of switch S7A1 being pushed in at bottom (small dot on pin away from the ‘open’ label on the switch). The term ‘closed’ refers to the pin being pushed in at the top. Please see Figure 11, “Default Switch Setting Switch S7A1” on page 38, for more details. Table 15.
Intel® IQ80332 I/O Processor Hardware Reference Section 3.9.3 Jumper Summary Table 17. Jumper Summary Jumper Description J1C1 JTAG Chain Enable J1D2 Disables UART J7B4 SM_SCLK to EEPROM, SM_SDTA to EEPROM 1-2 Open 1-2, 3-4 J7D1 16-bit Flash Enable Open J9D3 Buzzer Volume Open 3.9.4 Connector Summary Table 18. Connector Summary Connector Description J1D1 RJ45 Network Connector for GbE NIC. J1E1 RJ11 Dual Serial Port Connector.
Intel® IQ80332 I/O Processor Hardware Reference Section 3.9.6 Detail Descriptions of Switches/Jumpers 3.9.6.1 Switch S1C2: 80332 Reset This switch resets 80332. 3.9.6.2 Switch S6A1: BPCI-X Reset This switch resets the PCI-X B segment bus. 3.9.6.3 Switch S8A1: Rotary Table 20. Rotary Switch Settings Position Description 1 Enables private devices on the secondary PCI-X slot.
Intel® IQ80332 I/O Processor Hardware Reference Section 3.9.6.4.3 S7A1-3: Configration Cycle Enable corresponding to signal name PBI_AD6 Configuration Cycle Enable or RETRY is latched at the de-asserting edge of P_RST# and it determines when the Primary PCI interface disable PCI configuration cycles by signaling a Retry until the Configuration Cycle Retry bit is cleared in the PCI Configuration and Status Register. Table 23. Switch S7A1-3: RETRY: Settings and Operation Mode S7A1-3 Open Closed 3.9.6.4.
Intel® IQ80332 I/O Processor Hardware Reference Section 3.9.6.4.7 Switch S7A1 - 7: SMBUS Manageability Address Bit 0 corresponding to signal name PBI_AD17 This allows 80332 to address SMBus Slave Address bit 0 (PBI_A17). Table 27. Switch S7A1 - 7: SMBUS Manageability Address Bit 0: Settings and Operation Mode S7A1-6 Open Closed 3.9.6.4.
Intel® IQ80332 I/O Processor Hardware Reference Section 3.9.6.5 Jumper J7D1: Flash bit-width Table 31. The Intel® IQ80332 I/O processor evaluation platform board expects an 8-bit Flash enable. Jumper J7D1: Descriptions Jumper J7D1 Table 32. Description 8-bit Flash Enable Open Jumper J7D1: Settings and Operation Mode Pins Operation Mode 1-2 Enables 16-bit Flash NC 8-bit Flash (default mode) 3.9.6.6 Jumper J1C1: JTAG Chain Table 33. Jumper J1C1: Descriptions Jumper J1C1 Table 34.
Intel® IQ80332 I/O Processor Hardware Reference Section 3.9.6.8 Jumper J7B4: SMBus Header Table 37. Jumper J7B4: Descriptions Jumper J7B4 Table 38. Description Factory Default SMBus Header 1-2, 3-4 Jumper J7B4: Settings and Operation Mode J7B4 Pins 1, 2 Operation Mode Connects SM_SCLK to EEPROM U7B2 (Default Mode). Pins 3, 4 Connects SM_SDTA to EEPROM U7B2 (Default Mode).
Intel® IQ80332 I/O Processor Software Reference Software Reference 4.1 4 DRAM For DDR SDRAM Sizes and Configurations, see theIntel® 80332 I/O Processor Developer’s Manual. This section also contains multiple examples of Address Register Programming. See the Intel® 80332 I/O Processor Design Guide, section 8, table 34 for supported DDR333 and DDR-II configurations. For all registers relating to DRAM and other MCU related registers, see the Intel® 80332 I/O Processor Developer’s Manual. 4.
Intel® IQ80332 I/O Processor Software Reference 4.2.1 Flash ROM The Flash ROM is an 8 MB Intel StrataFlash® (part# 28F640) that sits on the Peripheral Bus and is accessed using PCE0. Figure 12. Flash Connection to Peripheral Bus CS PCE0 FLASH 28F640J3A 16-bit 8 Mb Intel® 80332 I/O Processor Intel® 80332 I/O Processor Bus B3236-02 Under normal operation, the very first instruction access by the Intel XScale® core begins at location 0x0 on the 80332 Internal Bus.
Intel® IQ80332 I/O Processor Software Reference 4.2.2 Peripheral Bus Memory Map The Table 41 is the physical memory map of the devices on the 80332 Peripheral Bus: Table 41.
Intel® IQ80332 I/O Processor Software Reference 4.3 Board Support Package (BSP) Examples Examples provided in this section are based on the RedHat* RedBoot software running on the IQ80332. 4.3.1 Intel® 80332 I/O Processor Memory Map Figure 13 depicts the memory space for the 80332 (before RedBoot boots): Figure 13.
Intel® IQ80332 I/O Processor Software Reference 4.3.2 RedBoot* Intel® 80332 I/O Processor Memory Map Virtual Address 4.3.3 Physical Address Size (MB) Description 0x0000 0000 0x0000 0000 2048 SDRAM - 64-bit ECC 0x8000 0000 0x8000 0000 128 ATU Outbound Memory Translation Windows 0x8800 0000 * 128 Unused 0x9000 0000 0x9000 0000 1 ATU OUtbound I/O Translation Window.
Intel® IQ80332 I/O Processor Software Reference 4.3.4 RedBoot 80332 DDR Memory Initialization Sequence In order to set the correct ECC bits, a DDR memory system (DIMM or discrete components) must be written to with a known value. This process requires 64-bit writes to the entire DDR memory intended for use. The following explains the sequence for memory initialization by RedBoot on an 80332 board with an ECC DIMM. It also includes an example for the scrub (ECC initialization) code.
Intel® IQ80332 I/O Processor IQ80321 and IQ80332 Comparisons IQ80321 and IQ80332 Comparisons A This appendix provides a brief description for differences between IQ80332 and IQ80321. Please also refer to application note: Intel® 80321 Software Conversion to the Intel® 80332 I/O Processor Application Note. Table 42.
Intel® IQ80332 I/O Processor IQ80321 and IQ80332 Comparisons This Page Left Intentionally Blank 52 Evaluation Platform Board Manual
Intel® IQ80332 I/O Processor Getting Started and Debugger Getting Started and Debugger B.1 B Introduction This appendix pertains to Code|Lab version 2.3 and later which uses Microsoft's Visual Studio .NET. For Code|Lab version 2.2 and earlier, refer to appendix B. For more detailed information on JTAG and the 80332, please see the Intel® 80332 I/O Processor JTAG Support White Paper. B.1.
Intel® IQ80332 I/O Processor Getting Started and Debugger B.1.4 Related Web Sites • • • • 54 Macraigor: http://www.ocdemon.net/ http://developer.intel.com/design/intelxscale/dev_tools/021022/index.htm http://developer.intel.com/design/iio/ http://developer.intel.com/design/iio/papers/273961.
Intel® IQ80332 I/O Processor Getting Started and Debugger B.2 Setup B.2.1 Hardware Setup Use Figure 14 and the rest of the Intel® 80332 I/O Processor Evaluation Platform Board Manual, to set up the hardware. • Connect the Raven to the host via the parallel port and to the evaluation board via the 20-pin JTAG connector. Note: The parallel port must be configured to EPP mode for the Macraigor Raven to work properly. The parallel port setting can be changed in the BIOS setup program or in Control Panel.
Intel® IQ80332 I/O Processor Getting Started and Debugger B.2.2 Software Setup ATI Code|Lab is a plug-in to Microsoft Visual Studio .NET, therefore Microsoft Visual Studio .NET must already be loaded on the system. To load ATI Code|Lab, run setup.exe under the program directory. Note: Do not install over an old version of ATI Code|Lab. When necessary, uninstall Code|Lab with Add/Remove programs under the Control Panel before reinstalling.
Intel® IQ80332 I/O Processor Getting Started and Debugger B.3 New Project Setup B.3.1 Creating a New Project 1. Launch Code|Lab EDE for .NET. 2. On the Start Page, select “New Project”. a. The “New Projects” window appears. b. Select “Code|Lab Projects” under Project Types and name the project “Project80332” in the name field. Note: The directory “Project80332” is created under the path specified in the Location box. c. Click OK. 3. In the Code|Lab EDE Project Wizard Window: a.
Intel® IQ80332 I/O Processor Getting Started and Debugger B.3.2 Configuration Examine the main menu of Code|Lab EDE for .NET. • File • Edit • Project • View • code|lab EDE • Build, Debug • Tools • Window • Help Since Code|Lab is a plug-in to Visual Studio, some of these menu items are Visual Studio and some are specific to Code|Lab. Click on any of these menu items and the drop-down menu displays the subordinate menu items.
Intel® IQ80332 I/O Processor Getting Started and Debugger B.4 Flashing with JTAG B.4.1 Overview Code|Lab and Raven are capable of reading from, writing to, and erasing the contents of the Flash on the evaluation board. The board comes with RedBoot loaded in the Flash. RedBoot is the RedHat debug monitor which initializes the board and has some debug and diagnostic functions.
Intel® IQ80332 I/O Processor Getting Started and Debugger B.4.2 Note: Using Flash Programmer The parallel port must be set to EPP mode or the Macraigor Raven does not work properly. Download the RedBoot executable files from the following location: http://developer.intel.com/design/intelxscale/dev_tools/021022/index.htm RedBoot Debug Monitor for the IQ80332. 1. Double click on the “Code|Lab Debug” icon on the desktop. The Connection Window appears. 2. Select Macraigor JTAG Connect a. Click Setup. 3.
Intel® IQ80332 I/O Processor Getting Started and Debugger B.5 Debugging Out of Flash JTAG debuggers can be used on two levels; with or without the source code. When the Flash is programmed, the debugger can monitor the executable code, halt it, step through it, and monitor the memory and registers. The executable code is disassembled so that the assembly code can be examined. Debugging with source code allows the user to examine the C code that is being executed.
Intel® IQ80332 I/O Processor Getting Started and Debugger B.7 Running the Code|Lab Debugger This section is provided to get the system up and running in the Code|Lab Debug environment, but it is not intended as a full-functional tutorial. Please refer to the ATI Code|Lab Debug Reference Manual for more detailed information. B.7.1 Launching and Configuring Debugger 1. In EDE, click on the icon that looks like a red bug. The “Connect” window appears. 2. When not configured from Section B.4.
Intel® IQ80332 I/O Processor Getting Started and Debugger B.7.3 Displaying Source Code 1. Launch the Code|Lab EDE Debugger and open the “Tester1LED” ELF program. Note: Use the File/Recent Programs menu for quick access. 2. Select the “Files” view in the lower tab of the WorkSpace window. 3. Bring up “blink.c” and “led.c” source code by double-clicking each filename. 4. Use the “Windows” Menu to arrange the windows, or maximize, minimize, and resize manually as desired. 5.
Intel® IQ80332 I/O Processor Getting Started and Debugger B.7.5 Stepping Through the Code The “led.c” file contains a function that is called from code in “blink.c”. This exercise steps through the code and utilizes a few of the most common step tools. 1. Launch the debugger, open Tester1LED, and open the “blink.c” and “led.c” files. 2. Set a breakpoint on the following line in “blink.c”: displayLED(leds[8],leds[0]); /* LED display '80'*/ 3. Press Go. Program execution sit on the first breakpoint. 4.
B.8 Exploring the Code|Lab Debug Windows This section discusses some basics of the debug environment. Some of these windows and concepts have been dealt with during previous exercises in this manual. However, many new windows are also discussed and basic interaction exercises are given. Begin this section by launching the Code|Lab Debugger environment and connection via the JTAG port. B.8.1 Toolbar Icons Placing the mouse arrow on any icon displays the text function of that icon.
Intel® IQ80332 I/O Processor Getting Started and Debugger B.8.6 Registers Window Close all the active windows, then bring up the Registers window. Resize the this window and its columns to get a good view of all the registers. Notice that there is a Flags tab at the bottom of this window. This is useful for seeing the system flags defined by the CPSR.
B.9 Debugging Basics B.9.1 Overview Debuggers allow developers to interrogate application code by allowing program flow control, data observation, and data manipulation. The flow control functions include the ability to single-step through the code, step into functions, step over functions, and run to breakpoint (hardware or software). The data observation and manipulation functions include access to memory, registers, and variables.
Intel® IQ80332 I/O Processor Getting Started and Debugger B.9.3 C.9.3 Exceptions/Trapping A debug exception causes the processor to re-direct execution to a debug event handling routine.