
Platform Confidence Test User Guide


9
Troubleshooting
This section is not intended to be a tutorial on repair and system troubleshooting. It is intended to provide
hints for the technician. If the system experiencing problems has just been assembled, a first step should be
to check the system against the assembly procedures in the printed “Quick Start User’s Guide,” and the
electronic Product Guide that is provided on the CD provided with the system. In addition, a troubleshooting
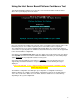
guide is available on the CD and on the support website http://support.intel.com/support/motherboards/server
Troubleshooting Information
Problem Possible Solution
System fails to boot Make sure the system is plugged into an AC power supply. Power off the system and make sure the
cabling, connectors, and components are properly seated. Remove all components except form the
minimum required memory and minimum required processors and reboot. If possible check
individual components (especially processors and memory) in a known good system.
1. Check for approved memory DIMM modules. See the tested memory list at:
http://support.intel.com/support/motherboards/server
2. Make sure the power supply connector is correctly attached to the 24-pin (ATX 20pin +4) power
connector. Intel Server Chassis use a 24-pin SSI compliant power connector, but most third party
chassis use 20 pin ATX power connectors. Refer to the printed “Quick Start Guide” or the electronic
product guide also available on the CD that ships with the product. For further information, both of
these documents are also available on the Intel Customer Support Website (see URL below).
3. If applicable, verify the 3.3v sense (2x5pin) power connector is attached to the power supply
signal connector located next to the server board power connector.
4. Ensure the power supply being used is at least 800mA of +5V standby current to support WOL
and is required for proper operation.
System will not boot from the server board
Deployment Assistant CDROM/Resource
CDROM
An incorrect BIOS Boot priority order is set. Press <F2> during POST and configure the boot order
in BIOS setup.
“motherboard is not supported” message at
test start
Each server board has a unique diagnostic package. Ensure you have downloaded and are using
the proper version of the diagnostic tests for the board you are installing or testing. Ensure you have
updated the board with the latest version of BIOS and firmware. The latest versions of the software
are located at http://support.intel.com/support/motherboards/server
Probe did not identify all expected devices Make sure the system is plugged into an AC power supply. Power off the system and make sure the
cabling, connectors, and components are properly seated. If possible, install individual components,
especially processors, disks, and memory, into a known good system to determine if the device is
recognized in a different system.
Platform Confidence Test hangs during probe
process
If the test software hangs during the probe for processors, memories, or disks, check the BIOS,
Firmware revisions, and update if necessary or remove/replace the device. Otherwise, replace
server board.
Platform Confidence Test hangs during test
execution
Note the most recent test message to determine which FRU (Field Replaceable Unit) is failing.
Unless the test is specifically for processors, memory or disk, the probable cause is baseboard
failure. Replace the failing component as necessary.
Other For further support information, check http://support.intel.com/support/motherboards/server