
Users guide


Intel® RAID Software User Guide 40
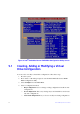
3. Select Modify and press <Enter>.
4. On the Storage Driver Support screen select S
torage Adapters and press <Enter>.
5. Delete any existing Intel
®
RAID adapter listings.
6. Press <Insert> to add unlisted drivers.
7. Press <Insert> again.
A path is displayed.
8. Press <F3>.
9. Insert the driver disk into the floppy drive, and press <Enter>.
The system will locate the .HAM driver.
10. Press the <Tab> key.
11. Select the Driver Summary screen, and press <Enter>.
12. Continue the Novell NetWare
installation procedure.
4.4.2 Installation in an Existing Novell Netware* System
Perform the following steps to add the Novell NetWare* driver to an existing Installation.
Note: Drivers for Novell Netwar
e* are not available on the CD-ROM. The latest drivers are
available at http://www.intel.com/support/motherboards/server/ or from your CDI
account.
1. Type nwconfig at the root prompt and press <Enter>. The Configuration Options
scree
n loads.
2. Select Drive Options and press <Enter>.
3. Select Configure Disk and Storage Device Options, and pre
ss <Enter>.
4. Select one of the following options displayed in the window:
a. Discover and Load an Additional Driver - If you sel
ect this option, the system
discovers the extra unit and prompts you to select a driver from the list. Press
<Insert> to insert the driver. This completes the procedure.
b. Select an Additional Driver - If you select
this option the Select a Driver screen
displays. Press <Insert>. Follow the instructions that display. Insert a disk into
the floppy drive, and press <Enter>. The system will find and install the driver.
This completes the procedure.
4.5 RAID Driver Installation for Solaris* 10
4.5.1 Installation in a New Solaris* System
This updated driver can be applied using the normal operating system installation options.